Table of Contents
Advertisement
Quick Links
Advertisement
Table of Contents

Related Manuals for Jeanneau Sun Odyssey 349


Summary of Contents for Jeanneau Sun Odyssey 349
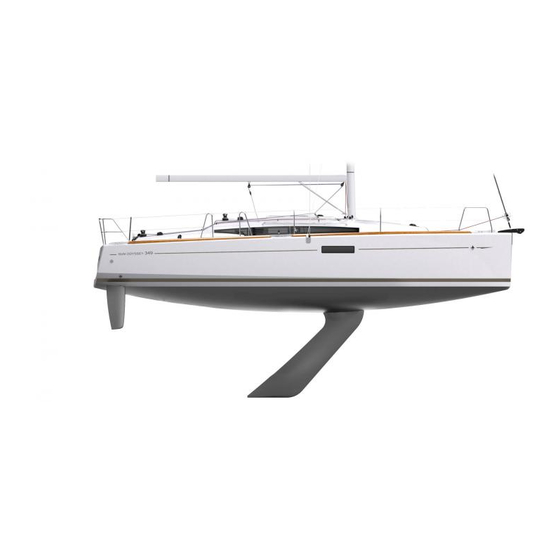
- Page 1 SUN ODYSSEY 349 OWNER'S MANUAL 158918 Index C...
-
Page 3: Table Of Contents
CONTENTS INTRODUCTION ........................7 Welcome ......................... 7 Notes on reading this manual..................9 TECHNICAL SPECIFICATIONS ................... 11 1.1 CONSTRUCTION ......................11 1.2 GENERAL DIMENSIONS....................11 1.3 ENGINE ......................... 11 1.4 ELECTRICITY........................ 11 1.5 CAPACITIES ......................... 12 1.6 SAILS..........................12 DESIGN CATEGORIES AND DISPLACEMENT ............13 2.1 VERSION - DEEP DRAUGHT KEEL ................ - Page 4 SAFETY ........................43 6.1 PREVENTING MAN OVERBOARD SITUATIONS AND THE MEANS OF GETTING SOMEONE BACK ONBOARD ..................43 6.1.1 Prevention of man overboard................43 6.1.2 Getting back onboard ..................45 6.2 STORING THE LIFE-RAFT ..................46 6.3 SECURING MOVEABLE ITEMS .................. 46 6.4 DECK LAYOUT......................
- Page 5 11 ONBOARD COMFORT ....................93 11.1 ELECTRONIC EQUIPMENT ..................93 11.2 EQUIPMENT OTHER THAN FOR PROPULSION, WHICH BURNS FUEL (HEATING) ..97 11.2.1 General points ....................97 11.2.2 Warm air heating system.................. 98 12 WATER SYSTEMS...................... 103 12.1 GENERAL POINTS..................... 103 12.2 USING A VALVE......................
- Page 6 15 DECK FITTINGS ......................149 15.1 GENERAL POINTS ..................... 149 15.1.1 Polyester ......................149 15.1.2 Plexiglas ......................149 15.1.3 STAINLESS STEEL..................149 15.1.4 Solid wood on exterior wooden panelling ............ 150 15.1.5 Exterior cushions .................... 150 15.1.6 Synthetic wood composite decking .............. 151 15.2 EQUIPMENT........................
-
Page 7: Introduction
A JEANNEAU is made to last, in order to bring you all the pleasure you expect from a vessel over a period of many years. Each boat is subject to the utmost attention to detail from the design stage right through to launching. - Page 8 This manual has been produced to help you enjoy using your boat in all safety. It contains the details of the boat and of all the equipment provided and installed on your boat, as well as the instructions for their use. Read it carefully and really get to know your boat before using it. This owner's manual is not in any way a navigation or mariner's training manual.
-
Page 9: Notes On Reading This Manual
Notes on reading this manual The various symbols used throughout the manual for crucial safety information are as follows: DANGER Indicates the existence of a serious inherent danger with a high risk of death or serious injury if the appropriate precautions are not taken. WARNING Indicates the existence of a danger which could lead to injury or death if the appropriate precautions are not taken. -
Page 11: Technical Specifications
1 TECHNICAL SPECIFICATIONS CONSTRUCTION Model ....................... SUN ODYSSEY 349 Architect / Interior design..........Marc LOMBARD / Jeanneau Design Builder ........................SPBI S.A Principal means of propulsion .................... Sail Deck construction material ..... Laminated sandwich glass / Polyester / Balsa wood Hull construction material .......... -
Page 12: Capacities
CAPACITIES Total mass of the liquid content of fixed tanks when they are full........396 kg Fuel capacity:........................130 l Fresh water capacity:......................206 l Black water capacity (WC):....................80 l It may not be possible to use these capacities fully depending on the trim and load of the boat. It is recommended to keep a reserve of 20% in the fuel tanks. -
Page 13: Design Categories And Displacement
2 DESIGN CATEGORIES AND DISPLACEMENT - Some of the data is shown on the manufacturer's plate fixed to the boat. The explanation of the data is given in the appropriate chapters of this manual. - The recommended maximum load includes the weight of all the people onboard, of provisions, personal belongings, of all equipment not included in the weight of the boat in ballast, of the cargo (if relevant) and of all liquids contained in fixed tanks when full (fuel, water, grey water, black water). -
Page 14: Version - Retractable Keel
VERSION - RETRACTABLE KEEL Design category Maximum number of people to be allowed onboard Light displacement 5 374 kg Recommended maximum load 1 624 kg 1 724 kg 1 7444 kg 1 864 kg Displacement with maximum 6 998 kg 7 098 kg 7 118 kg 7 238 kg... -
Page 15: Design Categories
DESIGN CATEGORIES Category A: At high sea The boat is designed to sail in winds that may exceed Beaufort force 8 and in waves of a significant height of 4 metres and more. This craft is largely self-sufficient. Abnormal conditions such as hurricanes are excluded. Such conditions may be encountered on extended voyages, for example across oceans, or inshore when unsheltered from the wind and waves for several hundred nautical miles. -
Page 17: Stability And Buoyancy
3 STABILITY AND BUOYANCY STABILITY DATA - Fully laden displacement was used to evaluate the stability and buoyancy of the boat. The value of this displacement can be found in paragraph ’ Technical specifications ’ at the beginning of this manual. - Any changes in the distribution of loads onboard (for example by adding a raised structure for fishing, fitting a radar or in-mast furling, changing the engine etc.) can significantly affect the boat's stability, trim and its performance ;... -
Page 18: Access To The Boat
ACCESS TO THE BOAT Access to the cockpit NOTE: It is essential that the guardrail is closed when sailing. Access to the engine compartment Side hatches Companionway Holding - 18 - 158918 Index C... - Page 19 Access to companionway - It is imperative that both the cockpit and the engine compartment are kept closed when at sea. - When at sea close the guardrail side-opening or openings. - Slamming an access hatch may cause injury : always close the hatch gently and carefully.
-
Page 21: Manoeuvrability
4 MANOEUVRABILITY - This boat was tested using the stability rating STIX, which is a worldwide safety measurement of stability and which takes account of the length of the vessel, its displacement, hull dimensions, stability characteristics and flooding proofness. This test produced the following results:: Shallow draught version (Shallow draught keel) Boat with minimal load... - Page 22 - This boat was found to be capable of carrying its crew, even when flooded. - This boat is liable to capsize or to become flooded if carrying too much sail. In these circumstances it could sink. It is important to reduce the sail area if the wind exceeds force 3 on the scale of Beaufort.
-
Page 23: Rigging And Sails
5 RIGGING AND SAILS RIGGING DIAGRAM Classical mast - 23 - 158918 Index C... - Page 24 Reference Designation Genoa furler line Genoa sheet (Classic) Cable adjustment - Performance version genoa Spinnaker sheet Kicker tackle - Spinnaker Self-tacking jib sheet Single line furler - Code 0 Assembly - Classic (Mast foot) Genoa halyard stowed on the mast Furling mainsail halyard stowed on the mast Boom topping lift with cleat on mast Adjustable kicking strap at mast foot...
- Page 26 BACKSTAY Note: Measurements are expressed in mm. - 26 - 158918 Index C...
- Page 27 SAILS DIMENSIONS Performance Classic Cruising square top mainsail - To hoist a crew member up to the top of the mast, make a bowline with the halyard directly on the bosun's chair ring (never use the halyard snap shackle or shackle). - Never hoist a crew member when sailing in heavy weather.
-
Page 28: Running Rigging
RUNNING RIGGING - Inspect the halyards for wear and condition. - Regularly check the condition of the jam cleat jaws. - Regularly clean the backstay blocks with fresh water. - Avoid aggressive gybing in order to reduce premature wear on the sheets, attachment points and the gooseneck. - Page 29 CLASSICAL MAST - SYSTEM AT MAST FOOT Port side 1. Main halyard 2. Kicking strap 3. Reef 1 Assembly B: Winch on the coachroof Assembly A: Mast foot - 10 1. Genoa furler line 5. Genoa furler line 2. Main halyard 6.
- Page 30 Starboard 1. Reef 2 2. Self-tacking jib sheet 3. Fore stay sail halyard / Boom lift 4. Spinnaker halyard Assembly B: Winch on the coachroof Assembly A: Winch - aft - 10 - 11 - 12 - 13 - 14 5.
- Page 31 ROLLER FURLING MAST - SYSTEM AT MAST FOOT Port side Assembly B: Winch on the coachroof Assembly A: Winch - aft - 10 1. Genoa furler 5. Genoa furler line 2. Mainsail safety block stopper 6. Genoa sheet 3. Mainsail safety block stopper 7.
- Page 32 Starboard Assembly B: Winch on the coachroof Assembly A: Winch - aft - 10 1. Mainsail foot 5. Mainsail sheet 2. Spinnaker halyard 6. Mainsail foot 3. Fore stay sail halyard 7. Genoa sheet 4. Kicker tackle - Spinnaker 8. Spinnaker halyard 9.
-
Page 33: Sails
SAILS General points - The working life of a sail mainly depends on its being regularly maintained. - When sailing, trim the sails properly in accordance with the stresses in order to reduce the harmful strains on the fabric. - Avoid wear and tear: Protect against chafing on gear with rough/sharp surfaces (spreaders, stanchions, etc). -
Page 34: Setting The Sails
SETTING THE SAILS 5.5.1 Mainsail (classic) Reference Designation Swivel single pulley Double swivel pulley Mainsail sheet Bridle - Mainsail sheet Loop - 34 - 158918 Index C... -
Page 35: Standard Genoa
5.5.2 Standard genoa Reference Designation Genoa sheet Loop Stanchion block Genoa furler line - 35 - 158918 Index C... -
Page 36: Performance Version Genoa
5.5.3 Performance version genoa Reference Designation Genoa sheet Loop Single pulley Single block carbon Two-way switch - Genoa sheet - 36 - 158918 Index C... -
Page 37: Tacking Jib
5.5.4 Tacking jib Reference Designation Shackle Single block carbon SHEET - Jib Pulley - 37 - 158918 Index C... -
Page 38: Symmetric Spi
5.5.5 Symmetric spi Reference Designation Single block carbon Pulley Spinnaker boom downhaul Swivel single pulley Spinnaker sheet Spinnaker halyard Boom lift - 38 - 158918 Index C... -
Page 39: Code 0
5.5.6 Code 0 Reference Designation Swivel single pulley Single line furler Spinnaker sheet Spinnaker halyard Bobstay Pig tail - 39 - 158918 Index C... -
Page 40: Asymmetrical Spinnaker
5.5.7 Asymmetrical spinnaker Reference Designation Swivel single pulley Spinnaker sheet Spinnaker halyard Bobstay - 40 - 158918 Index C... -
Page 41: Deck Fitting
DECK FITTING General points - Inspect each piece of deck gear regularly (blocks, shackles, swivels, jam cleats, etc): Check that there are no cracks, corrosion or deformation. - When replacing a piece of deck gear, make sure that you use a type with the same strength specifications. -
Page 42: Genoa Furler
GENOA FURLER Operation - Leave several turns of the furling line around the drum. - Furl/unfurl the genoa slowly so that the furling line is always under light tension thus avoiding any riding turns in the drum. - Never slacken the genoa halyard when furling/unfurling the sail. - When furling in light winds, it is recommended to keep the sheet under slight tension so that the genoa furls correctly. -
Page 43: Safety
6 SAFETY PREVENTING MAN OVERBOARD SITUATIONS AND THE MEANS OF GETTING SOMEONE BACK ONBOARD 6.1.1 Prevention of man overboard - The zones outside the working deck area are the hatched areas below - The ’ working deck ’ means those areas outside where people stand or walk during normal use of the boat. - Page 44 Ref 1 & 1’: Fitting a means of climbing back onboard. Ref 2: Mooring cleats which correspond to the anchor points for the lifelines. - Use the seats provided. Regularly check the guard-rails: - With metal guard-rails, watch for corrosion particularly at connecting points. - With synthetic guard-rails, change them as soon as they show signs of wear due to chafing or UV.
-
Page 45: Getting Back Onboard
6.1.2 Getting back onboard The means for getting back onboard must be able to be deployed by one person alone in the water, with no other help. Fitting a means of climbing back onboard: Ref 1’ Location / Mechanism Ref 1 - Some types of equipment for getting back onboard have a locking device when folded up: It is important to keep the means for getting back onboard deployed and ready to use once the boat is in use (at anchor, moored or at... -
Page 46: Storing The Life-Raft
STORING THE LIFE-RAFT The life-raft(not supplied) must be stored in the space provided for it (Ref 1). A pictogram helps to locate it easily. - Before putting to sea, carefully read the launching instructions shown on the liferaft. - When at sea, never padlock or lock the stowage locker for the life-raft. SECURING MOVEABLE ITEMS - Ensure that movable items are firmly secured when the boat is under way. -
Page 47: Deck Layout
DECK LAYOUT 1. Lifebuoy support bracket (the ring lifebuoy is not supplied). The maximum weight of the outboard engine on the pushpits must not exceed 20 kg (the outboard engine is not supplied). - 47 - 158918 Index C... -
Page 48: Information About The Risks Of Flooding And About The Boat's Stability
INFORMATION ABOUT THE RISKS OF FLOODING AND ABOUT THE BOAT'S STABILITY 6.5.1 Openings in hull Reference Designation Valve WC evacuation to sea Heads water intake Sea water inlet valve for engine Galley sink drain - 48 - 158918 Index C... - Page 49 Reference Designation Valve Chain locker scupper Water tank vent Shower draining Black water tank (WC) Heating exhaust Draining of manual bilge pump Electric bilge pump draining Vent hole - Fuel tank Engine exhaust - 49 - 158918 Index C...
-
Page 50: Bilge Pumps And Drainage
6.5.2 Bilge pumps and drainage General points - The inner moulding of the hull has channelling: the drainage channels. The drainage channels allow the water to drain down to the lowest point in the boat, where it can be discharged. So it is important to allow the water to flow freely down to this lowest point of the boat, which includes. - Page 51 Manual bilge pump The manual bilge pump is in the cockpit (Ref 1). The bilge pump lever is located close to it (Ref 2). (See the setting up diagram on the following page). Operation: I- Put the lever on the manual bilge pump. II- Repeatedly work the lever up and down to its fullest extent.
-
Page 52: Safety Precautions
Electric bilge pumps - The bilge pumps are powered by DC. - Location of the electric bilge pumps: Ref 3. The switch for the electric bilge pump is located on the switch panel (Ref 4). - The electric bilge pump must only be used to discharge stagnant water at the bottom of the bilge. - Page 53 Diagram of the layout - Drying out the bilge Pipe - Bilge pump system - Ø 25mm Reference Designation Manual bilge pump Stuffing box Draining of manual bilge pump Electric bilge pump Non-return valve Electric bilge pump draining - 53 - 158918 Index C...
-
Page 54: Emergency Systems In Case Of Steering Gear Failure
EMERGENCY SYSTEMS IN CASE OF STEERING GEAR FAILURE MERGENCY TILLER Emergency tiller The emergency tiller is designed only to be able to continue underway at a reduced speed in case of steering gear failure. location of components Sector access port Emergency tiller - in position Instructions in the event of steering gear failure I. -
Page 55: Information Relating To Fire Risks And Risks Of Explosion
7 INFORMATION RELATING TO FIRE RISKS AND RISKS OF EXPLOSION PROPULSION ENGINES AND OTHER FUEL-BURNING EQUIPMENT The risks associated with motorisation are described in the MOTORISATION chapter. The risks associated with other fuel-burning equipment are described in the OTHER FUEL-BURNING EQUIPMENT chapter. ELECTRICAL SYSTEM The risks associated with the electrical systems are described in the ELECTRICITY chapter. -
Page 56: Fire-Prevention And Fire-Fighting Equipment
FIRE-PREVENTION AND FIRE-FIGHTING EQUIPMENT 7.4.1 Fire-fighting equipment Portable fire-extinguishers and fire blanket (not supplied) - When in use, this boat must be equipped with portable fire extinguishers of the following extinguishing capacity and located in the following places: The location of the portable fire extinguishers is shown by the pictogram below: Minimum Reference Designation... - Page 57 Maintenance of the fire-fighting equipment The owner/person operating the boat must: - Get the fire-fighting equipment checked at the frequency shown on the equipment ; - Replace portable fire extinguishers, if outdated or discharged, by extinguishing apparatus of equal capacity ; - Provide at least one fire bucket with a lanyard, in a readily accessible place, for protection on deck ;...
-
Page 58: Extinguisher Access Hole
7.4.2 Extinguisher access hole A hole extinguisher is provided in the engine compartment to extinguish a fire without opening the usual access panels. - 58 - 158918 Index C... -
Page 59: Emergency Exits In Case Of Fire
EMERGENCY EXITS IN CASE OF FIRE NEVER: - Obstruct the passages leading to the emergency exits and the hatches ; - Obstruct or block safety controls, for instance fuel shut off valves, gas taps, electrical system circuit-breakers ; - Obstruct the access to the portable extinguishers stored in lockers ; - Leave the boat unsupervised when cooking equipment and/or heating equipment is in use ;... -
Page 61: Electrical System
8 ELECTRICAL SYSTEM GENERAL INFORMATION ABOUT THE ELECTRICAL SYSTEM Reference Designation Service batteries & Engine battery, General fuse, Power distributor, Battery charger, Fuses Battery switch & Circuit breakers Electrical panel & Fuses - The risks of fire or explosion may result from careless use of the DC and AC systems. -
Page 62: Dc Installation (12 V Or 24 V)
DC INSTALLATION (12 V OR 24 V) 8.2.1 Battery use and distribution General points The electricity onboard is direct current. The boat's electrical system comprises service batteries and the engine battery or batteries. The service batteries serve as the power supply for all the boat's electrical components. The engine battery is used solely to power the engine's starter motor. - Page 63 Maintenance - Avoid charging batteries to a voltage greater than 14,6 V. - Keep the batteries clean and dry. - Regularly check that the terminals and connection cables are clean. If necessary, apply a thin coating of paraffin on the terminals, to prevent corrosion. - Regularly recharge all of the batteries onboard.
-
Page 64: Battery Switch
8.2.2 Battery switch - Manual battery switches: to make the system live, manually turn the positive and negative battery isolator switches. Positive battery isolator switch Battery switch of negative terminal Location: Port aft cabin 1. Battery breaker - "positive terminal - engine" 2. -
Page 65: Power Distributor
8.2.3 Power distributor - The electronic charge dividers isolate the battery banks from each other and allow the charge to be directed automatically to the battery with the lowest charge. They give the advantage of preventing a drop in voltage. - The charge divider is electronic. -
Page 66: Battery Charger
8.2.4 Battery charger General points - The battery charger runs on AC power. - A breaker protects the electrical circuit. - The battery charger charges all of the batteries onboard, while keeping the service battery bank isolated from the engine's battery bank. - Within its power limits, the DC equipment can be supplied directly. - Page 67 Layout diagram - Battery cables REPB REPM - 67 - 158918 Index C...
-
Page 68: Layout Of The Wiring Looms In The Hull - Dc Circuit
8.2.5 Layout of the wiring looms in the hull - DC circuit Version 2 cabins Version 3 cabins - 68 - 158918 Index C... -
Page 69: Electrical Panel
8.2.6 Electrical panel Location: Saloon SAILING ENGINE FEUX DE NAVIGATION FEU DE PONT NAVIGATION LIGHTS DECK LIGHT FEU DE MOUILLAGE NAVIGATION MOORING LIGHT ECL.INTERIEUR GROUPE FROID CABINS LIGHTS FRIDGE UNIT 11,5V 12,5V 13,5V AUXILIAIRE SPARE BORD ENGINE 12 VOLTS DC EN FONCTION GROUPE EAU OPERATING... -
Page 70: Circuit Breakers
8.2.7 Circuit breakers A circuit-breaker can be re-set (manually press the black button to restart it). Location: Port aft cabin 1. Electric windlass 2. Retractable keel - 70 - 158918 Index C... -
Page 71: Fuses
8.2.8 Fuses - A fuse protects an electrical circuit from a power surge. If it blows, you must replace it with another fuse of the same rating. Location: Port aft cabin Reference Designation Rating Service battery voltage Fuel gauge Plus after contact (Authorization windlass & Retractable 7,5A keel) General fuse for 12 V circuit... - Page 72 Location:Chart table Retractable keel (10A) Designation Rating Shower pump Hifi Ventilator - Cabins When replacing fuses/circuit-breakers, always ensure replacements are of the right capacity (see the colour-codes) - 72 - 158918 Index C...
-
Page 73: Relay Box
8.2.9 Relay box Location:Chart table from left to right - time delay - Shower pump - Plus after contact (Retractable keel) - Hydraulic steering (Retractable keel) - Hydraulic pump (Retractable keel) - Auto pilot - 73 - 158918 Index C... -
Page 74: Ac System (110 V Or 220 V)
AC SYSTEM (110 V OR 220 V) - Never let the end of the boat/shore supply cable hang in the water: The result may be an electric field liable to hurt or kill the swimmers nearby. - There may be danger of electrocution if alternating current systems are incorrectly used. -
Page 75: Ac Shore Socket
8.3.1 AC shore socket location of components AC shore socket Switch - AC (Ref 1) (Ref 2) Operation First plug the extension cable into the AC socket on the boat, then into the socket onshore. First unplug the extension cable from the socket onshore, then from the AC socket on the boat. - 75 - 158918 Index C... -
Page 76: Layout Diagram
diff 30mA A2 m 6² PQ1 j/v 10² PQ11 j/v 6² A2 m 6² PQ1 m 10² PQ11 m 6² A2 b 6² PQ1 b 10² PQ11 b 6² m 2,5² A6 m 6² CE.. 1,5² CE ... 1,5² b 2,5² A6 b 6²... - Page 77 Reference Designation Shore power socket Differential circuit breaker AC electrical panel Circuit breaker - water heater Circuit breaker of battery charger Shore power supply circuit breaker "Shore supply live" indicator light "Polarity inversion" warning light PAC10 Port connector PAC11 Socket - chart table PAC12 Fore cabin socket PAC14...
- Page 78 AC electrical panel SAILING ENGINE FEUX DE NAVIGATION FEU DE PONT NAVIGATION LIGHTS DECK LIGHT CHARGEUR BATTERIES BATTERY CHARGER FEU DE MOUILLAGE NAVIGATION MOORING LIGHT CHAUFFE EAU WATER HEATER ECL.INTERIEUR GROUPE FROID CABINS LIGHTS FRIDGE UNIT 11,5V 12,5V 13,5V AUXILIAIRE SPARE PRISES AC 1 AC OUTLETS 1...
- Page 79 Layout of AC hull bundles Version 2 cabins Version 3 cabins - 79 - 158918 Index C...
-
Page 80: Anodes
8.3.3 Anodes General points - The sacrificial anodes protect the boat's metal components from electrolysis. - A sacrificial anode is an expendable part, that by eroding (oxydisation), allows the current to flow. The anodes used are made of a metal that is more readily reductive than the metal they are protecting. - Page 81 Replacing the anodes - The anodes are fastened with screws and nuts. First, remove the screws and nuts that hold the anode, then clean the contact surface. Press the new anode to obtain a good electrical contact. Propeller anode - Never cover the anodes in antifoul. - During the first few weeks that the boat is in the water, check the anodes and if necessary replace them: they erode very rapidly during this period.
-
Page 83: Liquefied Petroleum Gas(Lpg)System (Gpl)
9 LIQUEFIED PETROLEUM GAS(LPG)SYSTEM (LPG) THE ONBOARD GAS SYSTEM location of components Reference Designation Gas cylinder locker Thru-hull fitting Drain Gas system Gas supply valve - 83 - 158918 Index C... - Page 84 - Systematically store the gas bottles only in the lockers or storage places provided for these. - It is recommended that you ensure good ventilation when using gas powered equipment, to prevent asphyxiation. Use and maintenance of the installation - Please refer to the manufacturer's notes for the use and maintenance of the LPG cooker. - When the equipment is not in use close the taps on the LPG hose and on the gas bottles.
- Page 85 To change an LPG bottle 1. Close the tap on the LPG bottle 2. Detach the LPG bottle 3. Replace the LPG bottle 4. Attach the new LPG bottle 5. Open the tap on the LPG bottle When the cooker is on, ventilate well to prevent any risk of asphyxiation. Do not use the cooker as a means of heating.
-
Page 86: Layout Diagram
LAYOUT DIAGRAM Version: Europe Reference Designation Regulator valve Gas cylinder Drain Connection kit - gas bottle Rubber washers Pictogram Connection kit - gas copper PVC girdled sleeve Gas appliance connection kit - 86 - 158918 Index C... - Page 87 Version: US Reference Designation Regulator valve - 12 V Gas cylinder Drain Stuffing box PVC girdled sleeve Electromagnetic valve - 12 V Plastic propane pipe - 87 - 158918 Index C...
- Page 88 Gas cylinder locker Electromagnetic valve Location: Galley - 88 - 158918 Index C...
-
Page 89: Domestic Appliances
10 DOMESTIC APPLIANCES 10.1 FRIDGE General points - The fridge is composed of 3 components: the compressor, the evaporator and the condenser. These components are connected by a closed circuit refrigerant gas circuit. The fridge is air-cooled. - The fridge is DC powered. It is designed to chill food and drink. Any other use is dangerous and forbidden. - Page 90 Location: Galley - 90 - 158918 Index C...
-
Page 91: Microwave
10.2 MICROWAVE General points - The microwave is AC powered. - A breaker protects the electrical circuit. - The microwave is designed to reheat food and drink or to cook food. Any other use is dangerous and forbidden. - The microwave must never be started when empty. - Remove all foil or metallic elements of the packaging before putting food in the microwave. -
Page 93: Onboard Comfort
11 ONBOARD COMFORT 11.1 ELECTRONIC EQUIPMENT The onboard electronics are powered by direct current. Control: Electrical panel LEAD LINES Transducer location: Outside view / Inside view - Do not store material on top of the sensors. - Do not cover the sensors in antifoul when antifouling the hull. - Regularly clean the sensors. - Page 94 Auto pilot Layout of components Hydraulic pump (Ref 1) Gyrocompass (Ref 2) Vessel Management Unit (Ref 3) - 94 - 158918 Index C...
- Page 95 - To ensure optimum perfomance, keep all metallic objects away from the gyrocompass. - Do not store material close to the calculator and electrical connections. Control: Starboard cockpit Fuses & Relay box Location: Chart table - 95 - 158918 Index C...
- Page 96 Layout of components: Chart table ADVICE-RECOMMENDATION - Place the protective covers on the repeaters when unused for long periods. - When sailing store the protective covers inside the boat to avoid losing them. - The various repeater displays are back-lit. - Regularly clean the fascias of the repeaters with fresh water.
-
Page 97: Equipment Other Than For Propulsion, Which Burns Fuel (Heating)
11.2 EQUIPMENT OTHER THAN FOR PROPULSION, WHICH BURNS FUEL (HEATING) 11.2.1 General points - Make sure that the ventilation openings in the engine (and generator, if installed) compartment are well cleared. - Stop the engine and refrain from smoking during fuel tank filling. - Get your fuel circuit checked regularly by a professional engineer. -
Page 98: Warm Air Heating System
11.2.2 Warm air heating system General points - The heating is powered by DC supply. The electrical supply is provided by the onboard battery bank. - A fuse potects the circuit. - The fluid used for the heating is a mixture of water and coolant. - You are advised to run the heating system for about 15 minutes every month (to prevent the operating components from becoming blocked/to refresh the fuel in the pipeline). - Page 99 Layout of components Manual control Location: Chart table Reference Designation Function selector (economy, normal, fast, ventilation) ON/OFF Temperature selector Tell-tale - 99 - 158918 Index C...
- Page 100 Heater 1. Pump - Fuel Access: Cockpit locker 2. Supply - Fuel (Diesel connection) - Please refer to the manufacturer's instructions for the use and maintenance of the heating system. - A sudden cut in the electrical supply risks damaging the heater: REMEMBER TO SWITCH OFF THE HEATER BEFORE ISOLATING THE BATTERIES.
Need help?
Do you have a question about the Sun Odyssey 349 and is the answer not in the manual?
Questions and answers