Roksan Audio K3 User Manual
Integrated
Hide thumbs
Also See for K3:
- Manual (22 pages) ,
- Set up manual and product manual (20 pages) ,
- User manual (14 pages)
Advertisement
Table of Contents
Advertisement
Table of Contents

Subscribe to Our Youtube Channel
Related Manuals for Roksan Audio K3


Summary of Contents for Roksan Audio K3
- Page 1 Page 1...
- Page 2 • Safety Instructions (accompanying card) • Safety Certification • Introduction • Cautions • Installation • Setup • Operation • Troubleshooting • Guarantee • Specifications • Notes Roksan Audio Ltd CLASSIFICATION: General Use All specifications are liable to change without notice. E&OE Page 2...
-
Page 3: Maintenance
This CD Player is designed and manufactured to the highest specification and rigorously tested to reward you with many years of listening pleasure. Your K3 CD Player is an integral part of your system. Its correct installation, set-up and operation will have a significant influence on the performance of the entire hi-fi... -
Page 4: Ac Mains Supply
Cautions AC Mains Supply Your K3 Integrated Amplifier is set to operate from a fixed supply voltage which is marked on a label next to the mains input plug. Before connecting the mains lead please check that your mains supply corresponds to the label as below: 230V Products: Voltage Range 220V –... - Page 5 Location Your K3 Integrated Amplifier should be located in a well ventilated area and kept away from sources of heat, dust and humidity and from direct sunlight. The integrated Amplifier may be positioned either as a free standing unit or along side another audio/video product.
-
Page 6: Installation
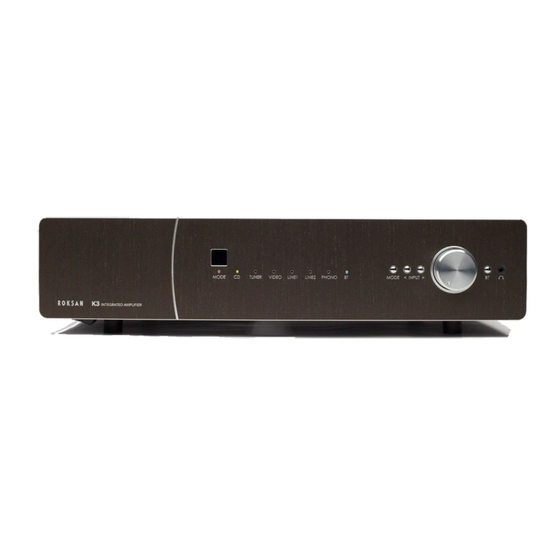
Installation K3 Integrated Amplifier- Front Panel View 1. Mode Button 2. Input Button (back) 3. Input Button (forward) 4. Mode Indicator 5. CD Input Indicator 6. Tuner/Aux. Line 3 Input Indicator 7. AV Input Indicator 8. Aux Line 1 Input Indicator 9. - Page 7 K3 Integrated Amplifier- Rear Panel View 17. Pre amp Output 1 (Multi-Amping or Subwoofer) 18. Bypass Input (When Bypass switch 31 is set to BYPASS) 19. Phono Input (Moving Magnet) 20. Tuner / Aux line 3 Input 21. Aux line 2 Input 22.
-
Page 8: Connecting Mains Power
The BYPASS input is directly connected to the power amp section and bypasses the preamp. The volume is then controlled via the surround sound processor and not the K3 Integrated. You could also use the integrated as a power amp in this mode. -
Page 9: Loudspeaker Connections
BLACK (-) speaker terminal to the BLACK (-) amplifier terminal. When both left and right channels are connected to the irrespective speaker’s the amplifier is ready for use. Roksan Audio Ltd CLASSIFICATION: General Use All specifications are liable to change without notice. E&OE... - Page 10 If the system loudspeakers utilise more than one drive unit with individual input terminals, for example a Tweeter and Woofer, then the loudspeakers performance should benefit from bi-amping by use of the addition of a K3 Power Amplifier. Dedicating one amplifier to the Tweeter and another to the Woofer isolates them from each other, hence reducing distortion and increasing reserved power.
-
Page 11: Operation
(going on a short break, holidays etc.) the mains power should be switched OFF and the power cord disconnected from the mains power input. When switched ON, your K3 integrated amplifier will be on STANDBY with the MODE indicator (4) illuminated in GREEN. The amplifier is now ready for use. -
Page 12: Volume Control
When paired or connected the blue light will stop flashing and remain on. You are now ready to stream music to the K3 from the paired device. If your device is aptX compatible and contains high resolution audio files, then these will be streamed in the original high... - Page 13 If the amplifier output current exceeds its safe operating range (very low loudspeaker impedance and/or very high volume level) the protective circuitry of the K3 will take the amp into Standby mode. If subsequently lowered or the loudspeakers changed, the amplifier can be brought out of Standby to resume as normal.
-
Page 14: Troubleshooting
Troubleshooting If you suspect that your ROKSAN K3 Integrated Amplifier is not operating properly, you should check all the connections carefully. Pay particular attention to speaker phasing and channel connections. Phono plugs should be fully inserted - a frequent cause of problems is due to the phono plug surrounds not making proper contact. - Page 15 All the warranty issues will be dealt through the selling retailer. Warranty registration can be done online at: http://www.roksan.co.uk/rw.php Roksan Audio Ltd CLASSIFICATION: General Use All specifications are liable to change without notice. E&OE Page 15...
-
Page 16: Specifications
Full Power 2-CH: 8Ω <330W, 4Ω <550W 432 x 380 x 90mm (W x D x H) Dimensions: 432 x 380 x 102mm (Incl. Feet Weight: 14kg Roksan Audio Ltd CLASSIFICATION: General Use All specifications are liable to change without notice. E&OE Page 16... -
Page 17: Serial Number
Notes: Please keep a record for future reference: Serial Number Date of Purchase Name of Roksan Retailer Location Roksan Audio Ltd CLASSIFICATION: General Use All specifications are liable to change without notice. E&OE Page 17... -
Page 18: Additional Notes
Additional Notes: Roksan Audio Ltd CLASSIFICATION: General Use All specifications are liable to change without notice. E&OE Page 18... - Page 19 Additional Notes: Roksan Audio Ltd CLASSIFICATION: General Use All specifications are liable to change without notice. E&O Page 19...
- Page 20 Page 20...
Need help?
Do you have a question about the K3 and is the answer not in the manual?
Questions and answers