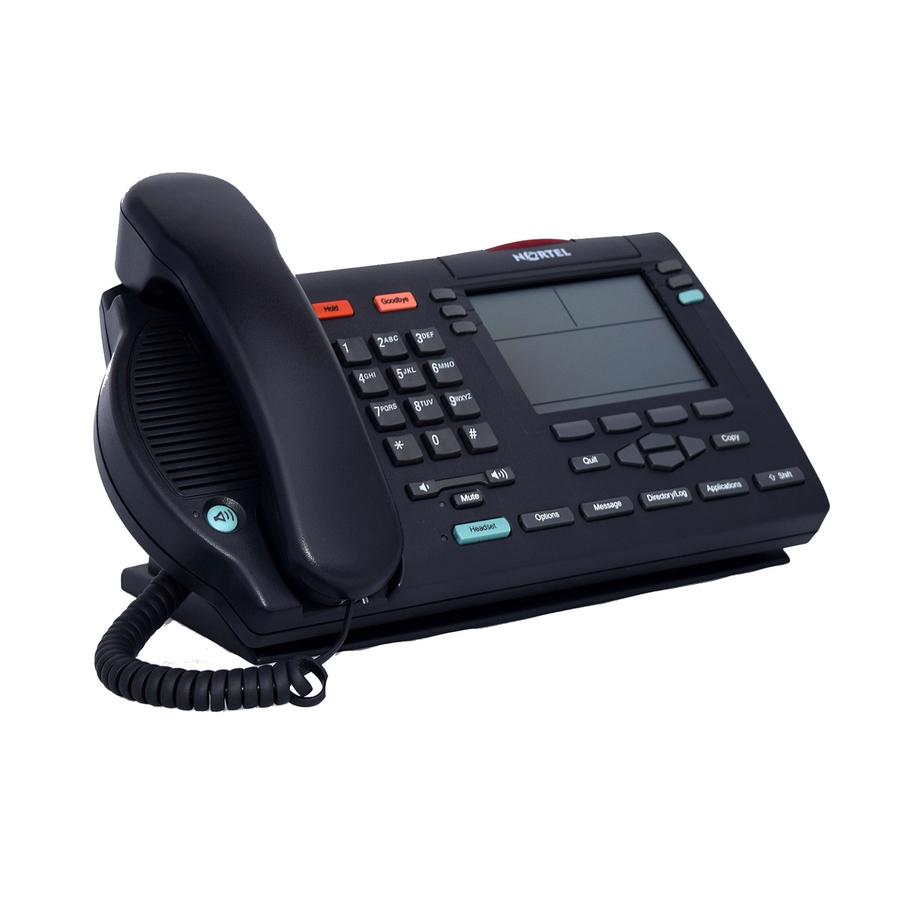
Nortel M3902 Quick Reference Manual
Meridian digital
telephones
Hide thumbs
Also See for M3902:
- Quick reference manual (66 pages) ,
- Install manual (3 pages) ,
- Installation manual (2 pages)

Related Manuals for Nortel M3902


Summary of Contents for Nortel M3902
- Page 1 Meridian Digital Telephones M3902 M3903 M3904 Quick Reference Guide Enterprise Voice Solutions Customer Documentation...
- Page 2 While you are away from your desk: Call Forward...
-
Page 3: Table Of Contents
Forward calls (M3903 and M3904) ............15 Additional call features Use Call Pickup ..................17 Set up a Conference call (M3902) ............18 Set up a Conference call (M3903 and M3904) ........18 Join a call ................... 19 Engage Group Listening ............... 20 Use the Voice Messaging control screens (M3903 and M3904) .... - Page 4 Contents Choose Ring type ................. 26 Select Call Log options ................26 Use Live dial pad ................. 27 Select Preferred name match ..............27 Set up area code ................. 27 Enable Call timer ................. 28 Select Date/time format ................ 28 Enable Key click ...................
- Page 5 Contents Corporate Directory Virtual Office Secure your telephone...
- Page 6 Contents...
-
Page 7: M3902, M3903, And M3904 Meridian Digital Telephones
Telephones There are five models in the M3900 Series Meridian Digital Telephone portfolio. This document describes the M3902, M3903, and M3904 features and how to use them. For user information on the M3901, refer to the M3900 Series Meridian Digital Telephone User Guide. For information on the M3905, refer to the M3905 Call Center Meridian Digital Telephone User Guide. - Page 8 M3902, M3903, and M3904 Meridian Digital Telephones The M3903 has two Programmable Line (DN)/Feature Keys (self-labeled) with two features or lines (DNs) configured on each key. The M3903 also has four Context Sensitive Soft Keys (self-labeled). M3903 telephone LCD Display...
-
Page 9: Your Telephone Call Features
Your Telephone Call Features Your Telephone Call Features Your M3900 Series Meridian Digital Telephone provides easy access to a wide range of business features. Your system administrator assigns features to your telephone and provides you with passwords and other codes as required. This section describes the features available for your telephone and how to use them. -
Page 10: Make A Call
Your Telephone Call Features Make a Call To make a call from your telephone, use the following procedure: 1. Lift the handset. Press the Line (DN) Key. 2498 Press the Key. Handsfree Note: The Handsfree Key must be enabled by the network administrator Press the Key if you have a Headset... -
Page 11: Make A Call While On-Hook
Your Telephone Call Features Make a call while on-hook Leave the handset in the cradle while you dial a number. To dial on-hook: 1. Press a (DN) Key. Line 2498 Dial the number when you receive a dial tone. 3. Lift the handset to speak when the called party answers. -
Page 12: Use Ring Again (M3902)
Your Telephone Call Features Use Ring Again (M3902) Use the Ring Again feature when you dial a number and receive a busy tone or no answer. The Ring Again feature lets you know when the person you dialed is available or has used their telephone. The feature notifies you when to redial your party. -
Page 13: Use Ring Again (M3903 And M3904)
Your Telephone Call Features Use Ring Again (M3903 and M3904) Use the Ring Again feature when you dial a number and receive a busy tone or no answer. The Ring Again feature lets you know when the person you dialed is available or has used their telephone. -
Page 14: Use Hot Line
Note 2: On the Meridian SL-100, the Automatic Line (AUL) feature is the same as the Hot Line feature. Use Speed Call (M3902) The Speed Call feature allows you to automatically dial frequently called numbers by entering a one, two, or three digit code. Contact your network administrator to determine the capacity of your Speed Call list. -
Page 15: Use Speed Call (M3903 And M3904)
Your Telephone Call Features To make a Speed Call: 1. Lift the handset. 2. Press the Speed Call Controller Key or SpcCtrl SpcUsr Speed Call User Key. Dial the Speed Call code assigned to the telephone number. Use Speed Call (M3903 and M3904) The Speed Call feature allows you to automatically dial frequently called numbers by entering a one, two, or three digit code. - Page 16 Your Telephone Call Features Press the Key to save the code and number. To make a Speed Call: 1. Lift the handset. 2. Press the Key or Speed Call Controller SpcCtrl SpcUsr Speed Call User Key. The screen displays Enter code. Dial the Speed Call code assigned to the telephone number.
-
Page 17: Receive A Call
Receive a call Receive a call When you receive an incoming call, your telephone rings and the LCD indicator flashes. To answer a call: Lift the handset. Press the Key. Handsfree Press the flashing Line (DN) Key when 2498 using a headset. Place a call on Hold Use the Hold feature when you are talking with one party and a second call comes in on a second line. -
Page 18: Transfer A Call (M3902)
Receive a call Transfer a call (M3902) Use the Transfer feature to direct a call to a third party. 1. Press the Transfer Key. Transfer The other party is on hold and you receive dial tone. The LCD indicator lights steadily. -
Page 19: Transfer A Call (M3903 And M3904)
Receive a call Transfer a call (M3903 and M3904) Use the Transfer feature to direct a call to a third party. 1. Press the Transfer Key. Trans The other party is on hold and you receive dial tone. The screen displays Call on hold, dial number. -
Page 20: Handle Multiple Calls
The Call Waiting status icon appears in the display. 2. Press the Call Wait (CWait CallWait M3902) to answer the call. To return to your first telephone call: 1. Press the Hold Key, if you want to put Hold the second call on hold. -
Page 21: Forward Calls (M3903 And M3904)
Handle multiple calls the number to which you want to Dial forward your calls. 3. Press the Key again. Forward Forward To change a previous Call Forward number: 1. Press the Key. Forward Forward the new forward number. Dial 3. Press the Key. - Page 22 Handle multiple calls 2. If desired, use the Key to delete Delete each digit in the number shown and dial a new number. To edit the number, use the left or right Key to Navigation move the cursor without deleting digits.
-
Page 23: Additional Call Features
Additional call features Additional call features Use Call Pickup The Call Pickup feature allows you to pick up a call from any telephone in the same Pickup Group or another Pickup Group. This feature must be enabled by your network administrator. To answer a call in your own Call Pickup Group: 1. -
Page 24: Set Up A Conference Call (M3902)
Additional call features Set up a Conference call (M3902) You can set up a Conference call for up to six people (including yourself). Contact your network administrator to determine the maximum number of people your system allows on a conference call. -
Page 25: Join A Call
2. Press the that has the caller you 2498 want to connect to your current call. 3. Press the Key again Conference Conf Connect (M3902), or press the Connect (M3903 and M3904). M3903/ M3902 The person on hold joins your M3904 conversation. -
Page 26: Engage Group Listening
Additional call features Engage Group Listening The Group Listening feature allows others to listen to a call through the speaker while you are speaking through the handset. Group Listening must be enabled by your network administrator. Please refer to “Activate Group Listening” on page 31 for instructions on activating the Group listening option in the Options List. - Page 27 Additional call features 6. Press the Key to pause playback Stop Stop of the message. Press Play to resume playback Press the Last Key to go to the previous Last message. Press Play to playback the message or Press Last again to move to previous messages.
-
Page 28: Options List
Options List Options List The Options List allows you to customize certain characteristics of your phone. Screen prompts take you step-by-step through procedures and keep you informed on the status of the following settings: Language, Change feature key label, Screen contrast, Volume adjustment, Ring type, Call log options, Live dial pad, Preferred name match, Area code set-up, Call timer enable, Date/time format, Key click enable, Headset port on call, Headset port external alerter and recorder interface, Call indicator light, On hook default path, and Display diagnostics. -
Page 29: Select A Language
Options List Select a language The display is available in multiple languages. After you select Language. . . from Options List menu, 1. Use the Keys to Navigation highlight the desired language (e.g., German). Deutsch 2. Press the Key. Select Select Press the Done... - Page 30 Options List 5. Press the Key that is printed Dial Pad with the first letter in your new label. Press the key until the correct character appears. 6. Use the Case Key to change the case Case of the letter, as needed. 7.
-
Page 31: Adjust Screen Contrast
Options List Adjust Screen contrast The Screen contrast option allows you to adjust the contrast of the display on your telephone. After you select Screen contrast from the Options List menu; From the screen, press the Contrast Lower Higher Key to decrease the display Lower contrast level, or press the Higher... -
Page 32: Choose Ring Type
Options List Choose Ring type The Ring type option allows you to choose from among the various ringing sounds available for your telephone model. After you select Ring type. . . from menu; Options List 1. Use the Keys to scroll Navigation through the list of ring types. -
Page 33: Use Live Dial Pad
Options List Use Live dial pad The Live dial pad option (available on the M3094) allows you to press any dial pad key to automatically access a dial tone. After you select Live dial pad from menu; Options List From the screen, press Live dialpad Key to turn on Live dial pad, or... -
Page 34: Enable Call Timer
Options List Enable Call timer The Call timer enable option measures how long you are on each call. After you select Call timer enable from the Options List menu; From the screen, press the Call timer Key to turn on the Call timer, or press the Key to turn off the Call timer. -
Page 35: Use Headset Port On Call
Quit Options Note: Additional equipment is required to implement this option. For more information please contact your Nortel Networks distributor. Activate Headset port external alerter When the Headset port external alerter option (available on the M3904) is activated, it supports a visual or audible alerter and/or recorder device. This device plugs into the Headset port, which is located on the bottom of the telephone. -
Page 36: Set On Hook Default Path
Options List Set On hook default path The On hook default path option (available on the M3903 and M3904) automatically opens the voice path on either the Headset or on Handsfree when you press a Line (DN) Key. After you select On hook default path from the menu;... -
Page 37: Activate Group Listening
Options List Activate Group Listening The Group Listening feature allows you to talk on the handset to one party while other people listen to the conversation on your telephone’s speaker. The network administrator must enable this feature. After you select Group listening from the menu;... -
Page 38: Directory Display And Controls
Directory display and controls Directory display and controls The M3904 has a three line display. When you press the Key, the Directory/Log following screen appears: 01 Directories Personal Directory Call Log (Callers List) Call Log (Redial List) Select Quit Copy 553-9080 The M3903 has a one line display. -
Page 39: Use Directory Password Protection
Directory display and controls Use Directory password protection You can password protect your Call Log, Redial list, and Personal Directory. Note: Password protection is only available on the M3904. To enable password protection: 1. Press the Directory/Log Key. Directory/Log 2. From the menu, use the Directories Keys to highlight... - Page 40 Directory display and controls 9. Press the Key. Enter Enter Press the Key to save changes. Press the Key or Key to Done Quit Directory/Log exit. To disable Personal Directory password: 1. Press the Key. Directory/Log Directory/Log Dial the password. 3.
-
Page 41: Manage Call Log
Manage Call Log Manage Call Log The Call Log records the name and number of incoming and outgoing calls and can be password protected on the M3904. You can activate Call Log to record all calls, record only the unanswered calls, or record no incoming calls. The Callers List stores incoming calls, and the Redial List stores outgoing calls in order of date and time received/made. -
Page 42: Access And Use The Callers List (M3904)
Manage Call Log To make a call from the Callers List: 1. Use the Navigation Keys to scroll through the Callers List and highlight the number you want to call. Note: If you are calling an external or 2498 long distance number, you will need to edit the number to add the access codes required by your system to make an external or long distance call. -
Page 43: Use The Redial List
Manage Call Log 4. Press the Key to go to the top of the new calls list, or press the to go to the top of the old calls list. To make a call from the Callers List: 1. Use the Keys to scroll Navigation through the Callers List and highlight... - Page 44 Manage Call Log 4. Use the Keys to scroll Navigation through the Redial List and highlight the number you want to call. 2637 Note: If you are calling an external or long distance number, be sure that the appropriate access codes are included. 5.
-
Page 45: Use The Personal Directory
Use the Personal Directory Use the Personal Directory The Personal Directory (available on the M3904) provides a personalized directory of names and telephone numbers. The Personal Directory allows you to add, delete, search, and edit entries and can be password protected. The Personal Directory holds up to 100 entries (an entry is one name and one telephone number). - Page 46 Use the Personal Directory ¤¤¤ ¤¤¤ ¤¤¤ ¤¤¤ 2. Press the dial pad with the desired ›› ›› ›› ›› letter repeatedly until that letter ‡‡‡ ‡‡‡ ‡‡‡ ‡‡‡ appears on the display. ››› ››› ››› ››› 3. Press the right Navigation key to go to ‡‡‡‡...
-
Page 47: Add An Incoming Call
Use the Personal Directory Add an incoming call 1. Press the Copy Key. The displays Copy shows the message C C C C o o o o p p p p y y y y t t t t o o o o . 2. -
Page 48: Delete Or Edit A Personal Directory Entry
Use the Personal Directory Delete or edit a Personal Directory entry To delete a Personal Directory entry: 1. Use the Keys to highlight Navigation the entry you want to edit or delete. 2. Press the Key to delete the Delete Delete currently highlighted entry in your Personal Directory. -
Page 49: Delete Your Personal Directory
Use the Personal Directory Delete your Personal Directory To delete your Personal Directory: 1. Press the Key. The message Delete List DelList Delete all entries? appears. 2. Press the Key if you want to delete all the entries in your Personal Directory. -
Page 50: Use Card View
Use the Personal Directory Use Card View The Card View feature provides additional information about the Personal Directory entry. To look at the Card View: 1. Highlight the name. 2. Press the right Navigation Key. To dial from Card View: 1. -
Page 51: Copy A Number From The Redial List
Use the Personal Directory 3. Use the to enter the first letter dial pad of the name your are seeking. For ¤ ¤ ¤ ¤ example, press twice to go to the first entry that begins with the letter “B”. Copy a number from the Redial List You can copy a number from the Redial List to the Personal Directory. -
Page 52: Set-To-Set Messaging
Set-to-Set Messaging Set-to-Set Messaging With the Set-to-Set Messaging application activated (available on the M3903 and M3904), an internal caller using an M3903 or M3904 telephone receives a quick visual message, which you have selected, whenever they dial your telephone number. The length of your message is limited to 24 characters. The message is entered through the dial pad keys using a process similar to the one used for entering names in the M3904’s Personal Directory. - Page 53 Set-to-Set Messaging 5. From the screen, use the Edit Mode dial pad to enter a text message. Press Delete Key to delete a character. Press the Case Key to toggle between upper and lower case characters. Press the Key to exit the screen Cancel without saving changes.
-
Page 54: Corporate Directory
Corporate Directory Corporate Directory The Corporate Directory application (available on the M3903 and M3904) allows you to search by entering the characters in the name of the person you are calling, beginning with the last name. Once you have located the name and number of the person, you may use the dial soft key to call the number. - Page 55 Corporate Directory 6. Use the Keys to scroll Navigation through the directory. Note: The entire directory is available. The “find” process determines which directory entry to select as your starting point. 7. If desired, use the right Navigation Key to move from “list” view to “card” view.
-
Page 56: Virtual Office
Virtual Office Virtual Office The Virtual Office feature allows you to log into a specially designated M3903 or M3904 telephone. When you log into the telephone your individual configuration is downloaded to the telephone for line (DN) and feature access. Virtual Office is ideal for use on a telephone which may be assigned to different users depending on the hour-of-the-day or the day-of-the-week. - Page 57 Virtual Office Note 1: If your Virtual Office telephone is configured as an M3903, you may only login to an M3903. If your Virtual Office telephone is configured as an M3904, you may only login to an M3904. Note 2: If two or more users are attempting to login at the same moment, the system processes the login information for the first user.
-
Page 58: Secure Your Telephone
Secure your telephone Secure your telephone You can lock your telephone with a password to prevent unauthorized use of your telephone. Note: The Meridian SL-100 does not support this feature. To lock your telephone: 1. Lift the handset. Dial the Lock Flexible Feature Code (FFC) and your Electronic Lock Password. - Page 59 While you are away from your desk: Call Forward...
- Page 60 Title to and ownership of Meridian SL-1 software shall at all times remain with Nortel Networks. Meridian SL-1 software shall not be sold outright and the use thereof by the customer shall be subject to the parties entering into software agreements as specified by Nortel Networks.
Need help?
Do you have a question about the M3902 and is the answer not in the manual?
Questions and answers