Table of Contents
Advertisement
Advertisement
Table of Contents

Subscribe to Our Youtube Channel
Related Manuals for Abbott FreeStyle Navigator


Summary of Contents for Abbott FreeStyle Navigator
- Page 1 User Guide Continuous Glucose Monitoring System...
-
Page 2: Indications For Use
Indications for Use • The FreeStyle Navigator Continuous Glucose Monitoring System is a glucose monitoring device indicated for continually measuring interstitial fluid glucose levels in people (ages 6 and older) with diabetes mellitus. The indication for children (ages 6-17) is limited to those who are supervised by a caregiver who is at least 18 years of age. The caregiver is responsible for managing or assisting the child to manage the FreeStyle Navigator system and also for interpreting or assisting the child to interpret FreeStyle Navigator output. The FreeStyle Navigator Continuous Glucose Monitoring System is intended to be used: • In the home and clinical settings to aid in the management of diabetes. • To provide real-time glucose readings directly to the user. • To provide glucose trend information. • To provide alarms for the detection and prediction of episodes of low blood glucose (hypoglycaemia) and high blood glucose (hyperglycaemia). • By more than one individual, if used according to instructions. Warnings • During times of rapidly changing glucose levels, continuously reported interstitial glucose levels as measured by the FreeStyle Navigator Sensor may not accurately reflect blood glucose levels. When glucose levels are falling rapidly, continuous glucose results from the FreeStyle Navigator Sensor may be higher than blood glucose levels. Conversely when glucose levels are rising rapidly, continuous glucose results from the FreeStyle Navigator Sensor may be lower than blood glucose levels. Under these circumstances use the built-in FreeStyle Blood Glucose (BG) Meter to conduct finger-stick testing to check the continuous glucose results from the FreeStyle Navigator Sensor. • In order to confirm hypoglycaemia or impending hypoglycaemia as reported by the FreeStyle Navigator Continuous Glucose Sensor, use the built-in FreeStyle Blood Glucose Meter to conduct finger-stick testing to check the FreeStyle Navigator reading. • Do not ignore symptoms that may be due to low blood glucose or high blood glucose. If you have symptoms that do not match the FreeStyle Navigator reading, use the built-in FreeStyle Blood Glucose Meter to conduct finger-stick testing to check the FreeStyle Navigator Continuous Glucose reading. -
Page 4: How To Use This Guide
Appendices contain useful information to which you may need to refer. The Glossary provides a list of terms and their meanings. The Index is a tool you can use to quickly find terms and items that you seek. • FreeStyle Navigator and FreeStyle are registered trademarks of the Abbott Group of Companies in various jurisdictions. • OpSite® IV 3000 and Uni-Solve® are trademarks of Smith and Nephew Inc. - Page 5 Table of Contents Section 1: Getting Acquainted........... . 1 – 12 Parts of the System.
- Page 6 Section 10: Daily Use............69 – 73 Maintain Connection Between the Transmitter and Receiver.
- Page 7 Customer Care: +8000 - 2255 - 232 (+8000 - CALL - ADC)
-
Page 8: Getting Acquainted
Important: Read all of the instructions in this User Guide and the FreeStyle Test Strip package insert before using your FreeStyle Navigator Continuous Glucose Monitoring System. Adjustments to your treatment should be done under the guidance of your healthcare team. - Page 9 Getting Acquainted How is the System Kit packaged? The System Kit • 1 FreeStyle Navigator Receiver in a receiver skin • 2 AAA (LR03) Alkaline Batteries (for the receiver) • 1 FreeStyle Navigator Transmitter • 1 Silver Oxide 357 Coin Cell Battery (for the transmitter) •...
- Page 10 Section 1 Getting Acquainted What are the key parts of my system? Your FreeStyle Navigator system includes the following major parts: Sensor Measures your glucose level. Locking Pin Sensor Tip Prevents accidental discharge; Part of sensor inserted into your skin.
- Page 11 Section 1 Getting Acquainted Key features of the System Glucose CM 03:00 mg/dL Projected Low Glucose Alarms Acknowledge Main 4.7 mmol/L Stats 21 day 08:30 Highest CM: 298 mg/dL Lowest CM: 61 mg/dL Ave. CM: 160 mg/dL Std. Dev: 20 mg/dL Above Target: 19% 4.7 mmol/L Statistics...
- Page 12 Section 1 Getting Acquainted Using your system For Daily Activities You will be wearing a sensor and a transmitter at all times while you are using the system. Keep the following in mind as you go about your normal routine; • Only wear the sensor and transmitter on a flat surface of either your abdomen or the back of your upper arm. • Sleeping – The sensor and transmitter should not interfere with your normal sleeping patterns. As you get ready to go to sleep, place the receiver close by to maintain the transmitter-to-receiver connection. • Bathing – Do NOT wear the receiver while bathing or showering. Do NOT allow the receiver to get wet. However, you can wear the sensor and transmitter while bathing or showering. • Swimming – You may swim while wearing the sensor and transmitter. Do NOT go deeper than 1 metre. Note: The connection between the transmitter and receiver is NOT maintained when the transmitter is underwater; thus, you will NOT receive continuous glucose readings. However, when you take the sensor and transmitter out of the water, the continuous glucose readings will resume. When Travelling by Plane Note: Do NOT perform the upload data feature when you are on a commercial aircraft. Follow the guidelines below when travelling. Always check with local authorities prior to departure as rules and regulations may change without notice. At the airport: Notify the security personnel of the presence of the device when going through the security systems.
- Page 13 FreeStyle Navigator Sensor may not accurately reflect blood glucose levels. When glucose levels are falling rapidly, continuous glucose results from the FreeStyle Navigator Sensor may be higher than blood glucose levels. Conversely when glucose levels are rising rapidly, continuous glucose results from the FreeStyle Navigator Sensor may be lower than blood glucose levels.
- Page 14 FreeStyle Navigator system yourself. Caution: If a FreeStyle Navigator system was previously used by another person, the system log should be cleared using the “Erase History” command and the system settings should be returned to their defaults using the “Reset User Settings”...
- Page 15 Caution: In order to confirm hypoglycaemia or impending hypoglycaemia as reported by the FreeStyle Navigator Sensor, use the built-in FreeStyle Blood Glucose Meter to conduct finger-stick testing to check the FreeStyle Navigator reading. • Performance of the FreeStyle Navigator system has not been evaluated in pregnant women. Caution: Performance of the system under conditions of fluctuating hydration levels such as during renal dialysis has not been evaluated.
- Page 16 • The Low Glucose alarm cannot be set below 60 mg/dL (3.3 mmol/L). Therefore, it is not intended to notify you of severe hypoglycaemia. • The High Glucose alarm cannot be set above 300 mg/dL (16.7 mmol/L). Therefore, it is not intended to notify you of severe hyperglycaemia. • It is important to use the correct type of batteries in the receiver, otherwise the battery life may not be accurately monitored. • Because you must insert a new sensor after each battery replacement, you should replace the batteries just before you insert a new sensor. For example, if you drop your receiver and the batteries fall out, you will have to insert a new sensor. • Do NOT immerse the receiver in water or in any other liquid. Avoid getting water or any other liquid in the test strip port. • If you observe a significant change in your continuous glucose readings that you think is erroneous, or if you feel the blood glucose measurement in the Blood Glucose mode is erroneous and you are close to an electromagnetic interference source, move away from the source of interference and check to see if the condition fades away. • If you have a medical appointment that includes strong magnetic or electromagnetic fields, such as an X-ray, MRI (Magnetic Resonance Imaging), CT (Computed Tomography) scan or another type of exposure to radiation, keep your system and sensor away from the area. Before exposure to such radiation, discard any sensor you are wearing and insert a new sensor after the radiation session. The effect of these types of radiation on the performance of the system has not been evaluated. • Warning: CHOKING HAZARD due to small parts. Adult supervision is recommended. • Warning: The test strip vial and sensor delivery unit packaging may contain a drying agent that could be harmful if inhaled or swallowed and may cause skin and eye irritation. • Warning: NEVER point a pre-cocked sensor inserter toward the eyes, face or any other body part where sensor insertion is not desired. • Changes or modifications not expressly approved by Abbott Diabetes Care Inc. could void the user’s authority to operate the equipment. • The system should not be used in environments that are oxygen-rich or that contain a combustible gas. OVER...
- Page 17 Section 1 Getting Acquainted Helpful health-related information: The following pertain to your health and should always be kept in mind: • The system is intended to assist you in better managing your diabetes by allowing you to know your glucose levels throughout the day. • Test results below 60 mg/dL (3.3 mmol/L) mean your glucose levels are low. • Test results above 240 mg/dL (13.3 mmol/L) mean your glucose levels are high. • Severe dehydration and excessive water loss may cause false low results. If you believe you are experiencing severe dehydration, consult your healthcare team immediately. • If you get results below 60 mg/dL (3.3 mmol/L) or above 240 mg/dL (13.3 mmol/L) and do not have symptoms of hypoglycaemia or hyperglycaemia, test your glucose using the Blood Glucose mode. • If you have symptoms of hypoglycaemia or hyperglycaemia or continue to get results below 60 mg/dL (3.3 mmol/L) or above 240 mg/dL (13.3 mmol/L), consult your healthcare team. • If you are experiencing symptoms that are not consistent with your glucose test results, consult your healthcare team. Physiological differences between the interstitial fluid and capillary blood may result in differences in glucose measurements. Differences in glucose measurement between interstitial fluid and your finger may be observed during times of rapid change in blood glucose, e.g. after eating, dosing insulin or exercising. – Interstitial fluid (ISF) is the fluid between cells in the body. Movement of nutrients, oxygen and glucose from the blood into the cells happens across the ISF. Therefore, if the glucose in the bloodstream rises (e.g. during meals), that rise is not seen in the ISF until later. Similarly, if glucose levels in the ISF drop (for example during exercise, the cells consume glucose rapidly) that drop is not seen in the bloodstream until later. • When testing your glucose levels in the Blood Glucose mode, differences in the blood circulation in your finger and other test sites (forearm, upper arm, hand, thigh or calf) may result in different glucose readings. Differences in blood glucose readings between your finger and other test sites (forearm, upper arm, hand, thigh or calf) may be observed after eating, taking insulin, diabetes medication or exercising.
- Page 18 Section 1 Getting Acquainted What is Hypoglycaemia Unawareness? Hypoglycaemia unawareness is a condition where you have hypoglycaemia but you do not have any of the usual warning symptoms (such as rapid heartbeat, sweating, shakiness, anxiety or a tingling sensation in your fingers or toes). Those warning symptoms are either absent or greatly reduced. Instead, the first sign may be confusion or impaired thinking, which makes it even more difficult to know if you are experiencing low blood glucose. You could find yourself in the midst of a severe hypoglycaemic episode without any warning at all. Symptoms of Hypoglycaemia Unawareness: Because you would have missed the early warning signs of hypoglycaemia, the only signs or symptoms you may have would be due to the effects of low blood glucose on the brain: • Irritability • Tiredness • Confusion • Forgetfulness • Pale skin • Slurred speech • Loss of consciousness This condition is potentially dangerous because hypoglycaemia confusion can occur without warning. If you were driving a car or operating heavy machinery, confusion or delayed reaction could cause an accident. Hypoglycaemia unawareness can develop for several reasons: a. Having frequent hypoglycaemic episodes.
- Page 19 Section 1 Getting Acquainted What are the Continuous Monitoring mode and Blood Glucose mode? Your FreeStyle Navigator system operates in two modes: • Continuous Monitoring mode (Glucose CM). • Blood Glucose mode (Glucose BG). Continuous Monitoring mode (Glucose CM) The Continuous Monitoring mode is the mode you will use most of the time. It continuously displays the glucose level in the fluid in the tiny spaces between your tissues (interstitial fluid). This glucose reading comes from the sensor you will place just beneath your skin and is updated every minute. • “Glucose CM” at the top left of the display. • The glucose reading is typically accompanied by a directional trend arrow that indicates how fast your glucose is changing and in what direction.
- Page 20 Section 2 Install or Replace Transmitter and Receiver Batteries 2 Install or Replace Transmitter and Receiver Batteries Purpose To ensure that your FreeStyle Navigator system has power to operate properly. Start Do this procedure: • The first time you use your FreeStyle Navigator system. • When the receiver displays the Low Battery message and alarm and the battery icon appears on the screen. • When the receiver sounds an alarm and displays the “Replace TX Battery with Next Sensor” message. Materials Gather these materials before you begin: • 2 new AAA alkaline batteries (LR03) for the receiver. We recommend Energizer® Max® and Energizer® Industrial batteries. Other batteries may not provide expected battery life. For more information on batteries, contact Customer Care. • 1 Silver Oxide 357 battery (coin cell) for the transmitter. We recommend RENATA 357 or VARTA V357HC batteries. Other batteries may not provide expected battery life. • A coin.
- Page 21 Section 2 Install or Replace Transmitter and Receiver Batteries Install or Replace the Transmitter Battery a. Turn the circular battery door anticlockwise with either a coin or your fingernail. (Fig. 1) b. Carefully remove the battery door. c. Remove the old battery, if any, and discard it properly. d. Insert a NEW silver oxide 357 battery with the plus sign (+) facing you. (Fig. 2) Fig. 1 Important: When inserting the battery in the transmitter, pay special attention to placing the battery straight in rather than at an angle.
- Page 22 Section 2 Install or Replace Transmitter and Receiver Batteries Match what you see on your Receiver with ONE of the screen shots shown below. If the display is Then • Press the RIGHT Option button to see if the screen turns on. • If screen turns on, compare with the screens below and perform the matching steps. • If screen does NOT turn on, then repeat this procedure ensuring that the batteries are: – New. – Oriented properly in the battery compartment. – If the problem persists see Section 11 on troubleshooting.
- Page 23 Section 2 Install or Replace Transmitter and Receiver Batteries Reconnect the Receiver to the Transmitter. a. Place the receiver close to the transmitter. System Menu 08:30 Reconnect b. Press the RIGHT Option button twice to display the Data Upload Main Menu screen. Status Erase History c. Use the UP or DOWN Arrow button to highlight System. Link Main Select d. Press the RIGHT Option button (Select) to display the System Menu with Reconnect highlighted. e. Press the RIGHT Option button (Select). f. Wait for the receiver to beep. If it beeps: • Twice – The system is connected. • Three times – The system is not connected. Make sure the battery in the transmitter is new and ensure that the receiver and transmitter are linked (see...
- Page 24 Section 3 Set the Time and Date 3 Set the Time and Date Purpose To ensure the correct time and date are associated with your data. Start Do this procedure: • The first time you use your FreeStyle Navigator system. • When you install new batteries. Materials Your FreeStyle Navigator Receiver. Helpful Information Important: Be sure to set the date and time correctly. The correctness of the line graph and statistical reports depend upon the date and time being correct.
- Page 25 Section 3 Set the Time and Date Steps Do This Go to the System screen. a. Press the DOWN Arrow button to highlight System. Main 08:30 Glucose b. Press the RIGHT Option button (Select) to go to the Alarms Reports System Menu screen. System Add Event Select Select Set Date/Time from the System Menu screen. a. Use the UP/DOWN Arrow buttons to highlight Set System Menu 08:30 Date/Time on the System Menu screen.
- Page 26 • If NO, press the LEFT Option button (Next) and repeat this procedure from Step 5a. • If YES, press the RIGHT Option button (Set) to accept your changes. Result: The screen displays the System menu. h. Press the LEFT Option button (Main) to return to the Main screen. Check your work. Result: Your FreeStyle Navigator Receiver is operating with the correct time and date. You have done this procedure correctly when: The time is correct. The date is correct. Note: Set the language after setting the date and time when you are doing this procedure for the first time. (See Section 4) END OF Section 3...
- Page 27 Section 4 Change Country Settings 4 Change Country Settings Purpose To set the date and time formats, the language format and the decimal format. Start Do this procedure when your requirements differ from the country setting currently being used by the system. Materials Gather these materials before you begin: • Your requirements for displaying date, time format and the other items mentioned in the purpose statement. • Your FreeStyle Navigator Receiver. Helpful Information • Check with your healthcare team if you have any questions about your requirements. • If you don’t press any button within 20 seconds the receiver screen will go blank and the last change will be lost if you haven’t pressed the RIGHT Option button (Select). Steps Do This Access the System menu from the Main menu. a. Press the UP or DOWN Arrow button to highlight Main 08:30 System.
- Page 28 Section 4 Change Country Settings Steps Do This Access the Country Settings menu. a. Press the UP or DOWN Arrow button to highlight System Menu 08:30 Country Settings. Status b. Press the RIGHT Option button (Select) to go to the Erase History Link Country Settings screen. Set Date/Time Country Settings c. Decide what you want to do: Main Select If you want to change how Then go this is displayed to Step • Language.
- Page 29 Section 4 Change Country Settings Steps Do This Change the Date Format. a. Use the UP or DOWN Arrow button to highlight Date Country Settings 08:30 Format. Language (English) Date Format (dd-mm-yy) b. Press the RIGHT Option button (Select) to go to the Time Format (24h) Select Date Format screen. Decimal Format (x. y) c. Use the UP or DOWN Arrow button to select either Back Select the mm-dd-yy or the dd-mm-yy format. d. Press the RIGHT Option button (Set) to accept your choice. Result: The Country Settings screen is displayed. e. Go to Step 2c to decide what to do next.
- Page 30 Section 4 Change Country Settings Steps Do This Change the Decimal Format. a. Use the UP or DOWN Arrow button to highlight Country Settings 08:30 Decimal Format. Language (English) Date Format (dd-mm-yy) b. Press the RIGHT Option button (Select) to go to the Time Format (24h) Select Decimal Format screen. Decimal Format (x. y) c. Use the UP or DOWN Arrow button to select either the Back Select x.y or the x,y format. d. Press the RIGHT Option button (Set) to accept your choice. Result: The Country Settings screen is displayed. e. Go to Step 2c to decide what to do next.
-
Page 31: Perform A Control Solution Test
Section 5 Perform a Control Solution Test 5 Perform a Control Solution Test Purpose The purpose of the control solution test is to: • Ensure that your receiver and test strips are working properly prior to calibration or blood glucose testing. • Check that you are following the correct testing procedure. • Practice Blood Glucose mode testing without having to use your own blood. A control solution test is not the same as a calibration. See Section 8 for calibrating the system. Start Do this procedure when you: • Set up your receiver for the first time. • Open and begin using a new vial of test strips. • Suspect that your receiver or test strips are not working properly. • Suspect that your glucose test results are not accurate. • Suspect that your test results are not consistent with how you feel. • Drop, damage or expose the receiver to liquids. • Are advised by your healthcare team to do so. Materials Gather these materials before you begin: • FreeStyle Navigator Receiver. • FreeStyle Control Solution. • FreeStyle Test Strips. Helpful Information Caution: • Do NOT use FreeStyle Control Solution for calibration. - Page 32 Section 5 Perform a Control Solution Test Steps Do This Verify that your FreeStyle Control Solution is current. Note: FreeStyle Control Solution is valid for three months from opening the bottle, or until the expiry date printed on the label, whichever comes first. Count forward three months from the date you open a new bottle of control solution. This is your discard date. Write this date on the side of the control solution bottle. Example: You open the control solution on January 15th. Count forward three months to April 15th. This is the discard date that you record on the bottle.
- Page 33 Section 5 Perform a Control Solution Test Steps Do This Insert test strip into the receiver. a. Turn the test strip so the faces up. b. Grasp the test strip by the end with the two sample areas. c. Insert the other end of the test strip into the receiver at the lower left corner of the receiver. Result: The receiver display screen turns on and displays the Strip Code screen. Note: If the screen does not turn on, refer to Section 11 on troubleshooting. Compare code numbers. Compare the code number on the display with the code number on the vial of test strips.
-
Page 34: Control Solution
Section 5 Perform a Control Solution Test Steps Do This Apply control solution. Important: Do NOT apply control solution to both edges of the test strip. Notes: • Gently touch ONLY ONE EDGE of the test strip to the control solution next to one of the sample areas. • If progress tones are turned on, the receiver will beep to indicate that enough control solution was applied. Result: A stopwatch will appear on the display screen while the receiver measures the control solution. - Page 35 Section 5 Perform a Control Solution Test Steps Do This Evaluate the test results. Compare the test results displayed on the screen to the range printed on the vial of test strips. If the result Then • Falls WITHIN the Go to Step 8. ➜ range. • Falls OUTSIDE of You’ve repeated Call Customer Care. the range. the test. You’ve NOT Repeat the test from Step 1 with a repeated the test. NEW test strip. • Is an error message. Go to Section 11 on ➜ troubleshooting. Glucose BG 08:30 mg/dL Control Solution? 2.9 mmol/L...
- Page 36 Section 6 Insert or Remove Your Sensor 6 Insert or Remove Your Sensor Purpose To insert, remove or replace a small, thin, plastic sensor under your skin so that your FreeStyle Navigator system can continuously monitor your glucose level. Start Do this procedure: • The first time you use your FreeStyle Navigator system. • Every 5 days after that. • Replace your sensor sooner than 5 days when: – There is any redness, pain, tenderness or swelling at the insertion site. – An error code displays on your receiver indicating a sensor problem. • When replacing batteries. Materials Gather these materials before you begin: • Soap and water. • Alcohol prep pads. • A sensor inserter in its UNOPENED package. • A sensor support mount in its UNOPENED package. • Your transmitter. • Your receiver.
- Page 37 Section 6 Insert or Remove Your Sensor Important Things to Know About Getting Reliable Results Warning: Movement of the sensor support mount or excessive perspiration at the sensor insertion site due to activities like vigorous exercise or bumping against objects may lead to poor adhesion of the support mount to the skin and then cause the sensor to dislodge. If the sensor dislodges due to the sensor support adhesive failing to adhere to the skin, you may get unreliable results or no results. The system may not provide a warning in such circumstances. Choose the proper sensor insertion site when inserting the sensor and prepare the site by following the instructions for site preparation. Caution: If your results from the Continuous Monitoring mode seem erroneous, check and make sure that the sensor has not dislodged. If you notice the sensor is dislodged from the skin, or if you see that the adhesive on your over-bandage or the sensor support mount is coming loose, discard the old sensor and insert a new sensor.
- Page 38 Section 6 Insert or Remove Your Sensor Steps Do This Decide what to do. If you want to Then • Change or remove your sensor. Go to Step 2. • Insert your sensor. Go to Step 4. Remove the sensor. a. Wipe a small amount of isopropyl alcohol around the edges of the sensor support mount. Note: You can use a normal alcohol prep pad from your local chemist. b. Grasp the top end of the adhesive (the end nearest the sensor, see Fig. 1) and slowly peel it off your skin in one continuous motion. c. P ull down on the adhesive at the bottom of the support Fig. 1 mount (the end farthest from the sensor, see Fig. 2).
- Page 39 Section 6 Insert or Remove Your Sensor Steps Do This End sensor session. a. Press the RIGHT Option button twice to get to the Main 08:30 Menu. b. Press the UP/DOWN Arrow button to highlight System. c. Press the RIGHT Option button to select System. Did You Remove d. Press the UP/DOWN Arrow button to highlight Status. The Sensor? e. Press the RIGHT Option button to select Status. f. Press the UP/DOWN Arrow button to highlight Removed Sensor. g. Press the RIGHT Option button to select Removed Sensor. h. Press the RIGHT Option button to select Yes. The system now knows you have removed the sensor. If you are going to replace your sensor now, continue to Step 4. Reconnect the receiver to the transmitter.
- Page 40 Section 6 Insert or Remove Your Sensor Steps Do This Prepare the insertion site. a. Wash your hands thoroughly with soap and water. b. Clean the selected insertion site area with soap and water. c. Rinse the area thoroughly and pat dry. d. Wipe the area with an alcohol prep pad. Note 1: The insertion area MUST be clean and dry. Otherwise: • An infection could occur. • The sensor support mount may not stick to the site. Note 2: Do NOT place a bandage on the insertion site before inserting the sensor. The sensor may not penetrate the skin and the system will not work with a bandage under the sensor. Remove the sensor inserter Caution: Do NOT use the sensor inserter if the sterile from its package.
- Page 41 Section 6 Insert or Remove Your Sensor Steps Do This Remove the protective liner from the sensor support mount. a. Bend the two-piece protective liner slightly so you can see the seam between the two pieces. b. Peel away the smaller section. c. Peel away the larger section. Attach the sensor delivery unit to your skin. a. Locate the top of the sensor support mount. b. Follow the instructions below as you place the sensor support mount, adhesive-side down, on the insertion site. Note: To avoid the adhesive sticking to itself, press the sensor support mount until you feel only light to Top of the Sensor moderate pressure on your skin. Support Mount If you are Then...
- Page 42 Section 6 Insert or Remove Your Sensor Steps Do This Ensure that the adhesive pad a. Hold the sensor delivery unit firmly in place. is adhered to your skin. b. Smooth the adhesive pad against your skin. Remove the locking pin. a. Grasp the top of the locking pin with your thumb and index finger. b. Twist the locking pin a 1/4 turn in either direction until the locking pin clicks. c. Pull the locking pin away to remove it. Note: The sensor support mount adhesive will help keep the sensor support mount in place. Insert sensor.
- Page 43 Section 6 Insert or Remove Your Sensor Steps Do This Check the sensor support a. Confirm that the sensor support mount remains mount. tightly adhered to your skin by sliding your finger along the edges of the adhesive pad and examine for any gaps in adhesion. b. Examine the area for a drop of blood. You may see some blood from the insertion site. If there is continuous bleeding that does not stop in a few minutes even after blotting with a clean cloth or swab, repeat the procedure from Step 2 to remove the sensor support mount, select a new site and insert a NEW sensor. c. Use a mirror to check that the sensor is correctly placed. Then Sensor is correctly placed. You will see the tip of the sensor is inserted under the skin and the sensor is flush against the top edge of the sensor support mount. Sensor is missing. 1. Remove sensor support mount. 2.
- Page 44 Section 6 Insert or Remove Your Sensor Steps Do This Discard the sensor inserter We recommend a sharp-objects container or a puncture- safely. proof container with a tight lid. Check your work. Result: An inserted sensor, a removed sensor or a replaced sensor. You have done this procedure correctly when: The system has successfully recognised that you have o removed a sensor (if you have removed a sensor). o The site was selected and prepared according to the guidelines given in this procedure. The receiver and transmitter were reconnected o successfully. The sensor support mount is tightly adhered to either your abdomen or the back of your upper arm.
- Page 45 Section 7 Attach Your Transmitter 7 Attach Your Transmitter Purpose To enable the transmitter to send glucose data to the receiver. Start Do this procedure after inserting a new sensor. Materials Your FreeStyle Navigator Transmitter with battery installed. Helpful Information Important: Do NOT remove or replace the transmitter from the sensor support mount while wearing a sensor. If you notice that the transmitter is not properly attached, replace the sensor with a new sensor and then re-attach the transmitter.
- Page 46 Section 7 Attach Your Transmitter Steps Do This Attach the transmitter to the a. Position the transmitter over the sensor support mount sensor support mount. so that the battery side faces the mount. b. Lower the transmitter onto the mount. Note: It helps to position the transmitter’s connector directly over the round part of the “keyhole” (Fig. 1) as you lower the transmitter. Result: The transmitter fits flush against the mount and slides smoothly back and forth on the guide rails. Fig.
- Page 47 Section 7 Attach Your Transmitter Steps Do This Apply an over-bandage (Optional). Apply an over-bandage to hold down the transmitter and sensor support mount. Use an over-bandage if you find that the sensor support mount is not adhering well during daily activities. Caution: If your results from the Continuous Monitoring mode seem erroneous, check and make sure that the sensor has not dislodged. If you notice the sensor is dislodged from the skin, or if you see that the adhesive on your over-bandage or the sensor support mount is coming loose, replace the sensor with a new one.
- Page 48 Section 7 Attach Your Transmitter Steps Do This Check your work. Result: A transmitter ready to send glucose data. You have done this procedure correctly when: The transmitter is securely attached to the sensor support mount. You have applied an over-bandage as necessary to hold down the transmitter and the sensor support mount. The sensor code has been correctly entered into the receiver. You see an icon on the top right-hand corner of the screen. END OF Section 7...
- Page 49 Section 8 Calibrate Your System/Test Blood Glucose Manually 8 Calibrate Your System/Test Blood Glucose Manually Purpose To ensure the receiver will calculate your glucose readings accurately. Start Do this procedure: • Each time the receiver prompts you with the message, “Do BG Test. ” You will see a blood drop icon on the screen and you will also hear the system beep (or vibrate). • When you need to measure your blood glucose manually using the built-in FreeStyle Meter. Materials • Soap, water and a clean towel. • FreeStyle Test Strips. • A FreeStyle Lancing Device. • Your FreeStyle Navigator Receiver. • Sterile lancets. • A Sharp-objects Container. Helpful Information Important Things to Remember About System Calibration • The system is calibrated using a capillary whole blood glucose measurement (performed in the Blood Glucose mode using the built-in FreeStyle Blood Glucose Meter). In order to calibrate, the receiver...
- Page 50 Section 8 Calibrate Your System/Test Blood Glucose Manually Helpful Information (cont.) • You will calibrate at approximately 1, 2, 10, 24 and 72 hours after sensor insertion. If you do not complete calibration tests successfully in the allotted time periods, your glucose readings will NOT be displayed and alarms will be inactive. The system may ask you to perform additional calibrations during the first 24 hours depending on the sensor signal. In such cases, you will be prompted with a message to do additional BG tests. • The receiver will beep (or vibrate) to prompt you to do a calibration. The receiver will display a blood drop icon and the message “Do BG Test. ” The system will prompt you with alarm messages when your calibrations are unsuccessful. • You will not have continuous monitoring until you have successfully completed the first calibration (at least for the first hour after sensor insertion). • If you get a request for a calibration or expect additional calibration requests during a time when you do not want to be disturbed (e.g. sleep time), you can choose to wait to perform additional BG tests at a later point in time. If you choose to wait and the allotted time window for calibration has expired, please note that you will not get glucose results until you have performed a successful calibration. You can use the Alarm Mute function to prevent requests for calibration and other alarms from occurring. This function is programmable from 1 to 12 hours. When to calibrate the system? You will calibrate the system at approximately 1, 2, 10, 24 and 72 hours after sensor insertion. For example: What happens in the example if you insert the sensor at 22:00 and elect to delay the first calibration until the next morning? For...
- Page 51 Section 8 Calibrate Your System/Test Blood Glucose Manually Helpful Information (cont.) Calibration Timeline Calibrations Sensor End of Insertion Sensor Wear Hour 0 72 80 Additional calibrations may be required during the rst 24 hours or so if the signal is unstable. Examples Calibrations Sensor...
- Page 52 Section 8 Calibrate Your System/Test Blood Glucose Manually Steps Do This Insert a FreeStyle Test Strip into the receiver’s test strip port. a. Turn the test strip so the faces up. b. Grasp the test strip by the end with the two sample areas. c. Insert the other end of the test strip into the receiver at the lower left corner of the receiver. Result: The receiver will display the most recently used test strip code number. Ensure that the code number Caution: The code numbers MUST match to ensure on the screen matches the code...
- Page 53 Section 8 Calibrate Your System/Test Blood Glucose Manually Steps Do This Select a test site. Caution: If you have hypoglycaemia, or hypoglycaemia unawareness, then test ONLY on your fingers. Note 1: Vary the sites from test to test to avoid tenderness and to avoid creating callouses. Note 2: Avoid moles, veins, bones and tendons. Caution: Always calibrate the system using only a finger-stick blood sample.
- Page 54 Section 8 Calibrate Your System/Test Blood Glucose Manually Steps Do This Prepare for lancing. a. Wash your hands and the selected test site with soap and water. Make sure there is no lotion on the test site. b. Thoroughly dry your hands and the test site. c. Snap the cap off the lancing device. Important: Use a new sterile lancet for every test. NEVER use a lancet for more than one person. d. Insert a new lancet firmly into the white lancet cup holder. Important: Do not touch the exposed needle on the lancet. e. Hold the lancet firmly in place with one hand and use your other hand to twist off the rounded top.
- Page 55 Section 8 Calibrate Your System/Test Blood Glucose Manually Steps Do This Prepare for lancing. (cont.) g. Select the lancing device depth setting. If you are lancing Then • A finger. Set the depth setting to its shallowest depth (1). • Your forearm. Start at Level (2) or higher if your experience with setting 2 does not produce a usable sample. • The FreeStyle Lancing Device offers four different depth settings. Move the dial to the desired setting as shown in the depth indicator window. Level 1 is the shallowest depth; Level 4 is the deepest. To lance parts of the body other than the finger, we recommend that you start at Level (2) and use the clear cap. To lance your finger, we recommend that you set the depth setting to its shallowest depth (1) and use the grey cap. h. Pull the dark grey cocking handle out until it clicks. Note: You may have already cocked the device in Step 4d. i. Prepare the site: If you are using Then to stimulate blood flow...
- Page 56 Section 8 Calibrate Your System/Test Blood Glucose Manually Steps Do This Lance the site. To lance your finger (grey cap): a. Lightly touch the lancing device against the side of your fingertip. b. Press the release button. c. Put the lancing device down. d. Gently squeeze your finger, if needed, until a drop of blood the size of a pinhead forms. To lance your forearm (clear cap): a. Hold the lancing device against the test site. b. Press the release button. c. Continue to hold the lancing device against the test site as you: i) Inspect the test site through the clear cap.
- Page 57 Section 8 Calibrate Your System/Test Blood Glucose Manually Steps Do This Test the sample. Do Not: • U se test strips more than once. Discard used test strips. • S crape the blood. • A pply blood to the flat side of the test strip. • A pply blood to the test strip when the test strip is out of the receiver. • A pply blood to both edges of the test strip. • P ut blood or foreign objects into the receiver’s test strip port. a. Holding the receiver at a slight angle to the sample, gently touch the sample area on the test strip to the sample. Important: Your blood glucose level must be between 60 and 400 mg/dL (3.3 and 22.2 mmol/L) to be able to perform calibration tests.
- Page 58 Section 8 Calibrate Your System/Test Blood Glucose Manually Steps Do This Interpret the blood glucose results. Caution: Low or high glucose measurements can indicate a potentially serious medical condition. Then • Lo appears in You do NOT have low blood Repeat the test from Step 3 the display. Lo glucose symptoms. using: appears when • Your finger. the measured • A new test strip.
- Page 59 Section 8 Calibrate Your System/Test Blood Glucose Manually Steps Do This Remove and discard the test strip Important: Test strips may only be used once. Discard used test strips. Discard the lancet. Note: Use a sealed container such as a Sharp-objects Container to avoid biohazards. a. Snap off the cap from the lancing device. b. Hold the lancet over a Sharp-objects Container or another puncture-proof container with a lid. c. Pinch the white clip that holds the lancet until the lancet falls into the container.
- Page 60 Section 9 Set, Review, or Change the Alarm Settings 9 Set, Review or Change the Alarm Settings Purpose To set the receiver to: • Alert you when your glucose conditions change. • Notify you when the receiver needs attention. • Notify you when the receiver begins or completes certain activities. Start Do this task: • Immediately after you finish the first set up of your FreeStyle Navigator system. • When your healthcare team gives you new glucose threshold numbers. • Whenever you get a “Preferences Lost Reconfigure” alarm message on the receiver. • Whenever you replace your receiver. • Whenever you want to change your alarm settings. • Whenever you want to review your alarm settings. • Whenever you want to temporarily mute the audible alarms from the receiver. Materials • Your FreeStyle Navigator Receiver.
- Page 61 Section 9 Set, Review, or Change the Alarm Settings About Glucose Alarms The FreeStyle Navigator system is designed to alert you when your glucose levels reach preset low or high values. These values or ‘threshold values’ can be programmed in the receiver for any individual. These high and low glucose alarms or the threshold alarms are designed to alert you when your glucose levels cross these threshold values. High Threshold (180 mg/dL) Low Threshold (80 mg/dL) 10.0 mmol/L 4.4 mmol/L Example of a Low Glucose Threshold Alarm – Example of a High Glucose Threshold Alarm – The alarm sounds when the glucose level crosses The alarm sounds when the glucose level crosses the preset threshold value. the preset threshold value. In addition to alerting you of a low or high glucose condition, the system can also alert you before you reach such a low or high glucose condition. These alarms are called the projected low and projected high glucose alarms. They can be set at low, medium and high sensitivities to alert you approximately 10, 20 or 30 minutes before your glucose levels reach the low or high threshold values, assuming your glucose keeps changing at the same rate. You can turn all glucose alarms ON or OFF. If the alarms are turned OFF, you will not get any alarms. These alarms are designed to help you take High Threshold action as soon as you are notified. Projected low...
- Page 62 Section 9 Set, Review, or Change the Alarm Settings About Glucose Alarms (cont.) Follow the guidelines below when selecting your alarm settings for detection of high and low glucose conditions. When the detection rate is maximum, you will get the greatest number of alarms. When the detection rate is minimum, you will get the fewest number of alarms. Threshold Projected Detection Alarm Alarm Rate Maximum High Sensitivity (~30 min) Intermediate Low Sensitivity (~10 min) or Medium Sensitivity (~20 min) Minimum None Caution: Do NOT rely solely on the projected glucose alarms for detection of low or high glucose conditions. Always use both the low glucose and high glucose threshold alarms AND the projected low and projected high glucose alarms for maximum notification of low or high glucose conditions.
- Page 63 Section 9 Set, Review, or Change the Alarm Settings Steps Do This Access the Alarms menu from the Main menu. Note: If you don’t press any buttons within 20 seconds, Main 08:30 the receiver screen will go blank and the last change will Glucose be lost if you haven’t pressed the Select button. Alarms Reports a. Press the UP Arrow button or the DOWN Arrow System Add Event button to highlight Alarms. Select b. Press the RIGHT Option button (Select) to go to the Alarms Setting screen. Decide what to do. If you want to Then • Set, review or change the Low glucose alarm.
- Page 64 Section 9 Set, Review, or Change the Alarm Settings Steps Do This Set, review or change the Low Glucose alarm. Caution: The Low Glucose alarm cannot be set below 60 mg/dL (3.3 mmol/L). Therefore, it is not intended to Alarm Settings 08:30 Mute Alarms notify you of severe hypoglycaemia.
- Page 65 Section 9 Set, Review, or Change the Alarm Settings Steps Do This Set, review or change the High Glucose alarm. Caution: The High Glucose alarm cannot be set above 300 mg/dL (16.7 mmol/L). Therefore, it is not Alarm Settings 08:30 intended to notify you of severe hyperglycaemia.
- Page 66 Section 9 Set, Review, or Change the Alarm Settings Steps Do This Set, review or change your Projected Low glucose alarm. a. Select Projected Low from the Alarms menu. • Use the UP/DOWN Arrow buttons to highlight Alarm Settings 08:30 Projected Low. Low Glucose (70) High Glucose (275) • Press the RIGHT Option button to select Projected Low (On) Projected Low.
- Page 67 Section 9 Set, Review, or Change the Alarm Settings Steps Do This Set, review or change your Projected High glucose alarm. a. Select Projected High from the Alarms menu. • Use the UP/DOWN Arrow buttons to highlight Alarm Settings 08:30 Low Glucose (70) Projected High. High Glucose (275) • Press the RIGHT Option button to select Projected Low (On) Projected High.
- Page 68 Section 9 Set, Review, or Change the Alarm Settings Steps Do This Set, review or change the Data Loss alarms. Important: If you turn off your Data Loss alarms, you must also turn off your Low Glucose, High Glucose, Projected Low Alarm Settings 08:30 Low Glucose (70)
- Page 69 Section 9 Set, Review, or Change the Alarm Settings Steps Do This Set System Alarms. Important: If you turn off the System Alarms, the receiver Alarm Settings 08:30 will NOT prompt you to do the calibration tests after you High Glucose (275) insert a new sensor.
- Page 70 Section 9 Set, Review, or Change the Alarm Settings Steps Do This Set Progress Tones. a. Select Progress Tones from the Alarms menu. Alarm Settings 08:30 Projected Low (On) Projected High (O ) Data Loss System Alarms Progress Tones Main Select Decide what settings you want: • Turn progress tones on or off. • Set progress tones volume low or high.
- Page 71 Section 9 Set, Review, or Change the Alarm Settings Steps Do This Mute all audible alarms for 1 to 12 hours. Note 1: You will still get vibration, visual alarms will still be displayed and you will continue to get Low Glucose Alarm Settings 08:30 Mute Alarms alarms. Low Glucose (70) High Glucose (275) Note 2: If you want to turn off all alarms for more than Projected Low (On) 12 hours, you should turn off each alarm individually.
- Page 72 Section 10 Daily Use 10 Daily Use Purpose To read and understand your display screen. Start Do this procedure: • Whenever you are using your system in the Continuous Monitoring mode. Materials Your receiver. Helpful Information • Your receiver and transmitter must be linked, connected and calibrated in order to use the system in the Continuous Monitoring mode. • When you sleep, place the receiver on a high headboard or on a nearby dresser rather than clipping it to your bed-clothing or taking it to bed. Be aware that if the receiver is set to vibrate and if you place it too far from you, you may not hear it vibrate. • You must keep your receiver within 3 metres of the transmitter to maintain a consistent connection. If the connection between the transmitter and receiver is broken you will not receive continuous glucose readings. • The connection can also be affected by objects getting between the transmitter and receiver, like nearby large metal objects, and by some electronic devices that produce radio frequencies. • As a periodic check, turn your receiver on a few times every day to make sure that it is still producing glucose results. • As a periodic check, turn on the low glucose alarm every day to make sure that it sounds an alarm (or vibrates) based on your settings. • If a connection alarm sounds, adjust the placement of the receiver, to restore the connection. Step 2 of this Section describes how to maintain connection between the receiver and transmitter. For general troubleshooting, refer to Section 11 as well. • If the display turns off, press the RIGHT Option button to turn it back on.
- Page 73 Section 10 Daily Use Steps Do This Decide what to do. If you want to Then go to this Step • Connect your receiver and transmitter. • Reconnect your receiver and transmitter. • Interpret the CM screen. • Interpret icons on the CM screen. • Interpret icons on the Main screen. Reconnect the receiver to the transmitter. a. P lace the receiver close to the transmitter. b. D ecide what to do next. If the receiver has Then lost connection...
- Page 74 Section 10 Daily Use Steps Do This Interpret the CM screen. Press the RIGHT Option button to turn the display on. Result: The Glucose CM screen is displayed. Location Description If CM appears here, the receiver is operating Glucose 08:30 in the Continuous Monitoring mode. mg/dL If BG appears here, the receiver is operating in the Blood Glucose mode. Main 6.7 mmol/L The current time of day. Glucose CM 08:30 mg/dL Main 6.7 mmol/L The directional glucose trend arrow tells Glucose CM 08:30 you the direction that your glucose levels are trending and how fast (see Step 4).
- Page 75 Section 10 Daily Use Steps Do This Interpret the icons. Note: The directional trend arrows are different from the projected glucose alarms (Section 9). For example, you can have a projected low glucose alarm and still have a relatively stable trend arrow. This Icon Means Your glucose is changing gradually, at a rate of less than 60 mg/dL/hr (3.3 mmol/L/hr). Your glucose is increasing moderately, at a rate of between 60 mg/dL/hr and 120 mg/dL/hr (3.3 mmol/L/hr and 6.7 mmol/L/hr). Your glucose is decreasing moderately, at a rate of between 60 mg/dL/hr and 120 mg/dL/hr (3.3 mmol/L/hr and 6.7 mmol/L/hr). Your glucose is increasing rapidly, at a rate of greater than 120 mg/dL/hr (6.7 mmol/L/hr). Your glucose is decreasing rapidly, at a rate of greater than 120 mg/dL/hr (6.7 mmol/L/hr). The system is processing a control solution or blood glucose sample in the Blood Glucose mode. It is time to do a calibration. See Section 8. The system is waiting until it is time to do something (for example, waiting to do the 1st calibration after inserting a sensor). You don’t need to do anything. There is a problem with the transmitter-receiver connection. See Step 2. The alarm is muted. It is time to replace the batteries in the receiver. Install the new batteries just before you insert a new sensor. See Section 2. This icon shows up for Blood Glucose mode test results that happened when the operating temperature was beyond the system’s specified operating temperature range and may be...
- Page 76 Section 10 Daily Use Steps Do This Check your work. Result: You are aware of your glucose levels and trends. You have done this procedure correctly when: You correctly interpret the directional glucose trend arrows. You can tell your current glucose level at a glance. You maintain the connection between your transmitter and receiver or can reconnect the transmitter and receiver when the connection is lost. You can correctly interpret the icons that appear on the receiver screen. END OF Section 10...
- Page 77 Section 11 Respond to Alarms, Errors and Problems 11 Respond to Alarms, Errors and Problems Purpose To resolve alarm messages, error codes or problems. Start Do this whenever you: • Receive either an alarm or an error code in the Continuous Monitoring mode or the Blood Glucose mode. • Experience problems with your FreeStyle Navigator system. Materials Your FreeStyle Navigator system. Helpful Information • Press the RIGHT Option button to respond to a vibration or audio alarm. • Press the LEFT Option button to turn off a text display message. • See Section 9, Step 10 to temporarily mute all audible alarms. • Alarms are given a level of urgency based on how soon you must respond. Alarms act differently d epending upon the level of urgency: If the level of Then the alarm urgency is • Must never be ignored.
- Page 78 Section 11 Respond to Alarms, Errors and Problems Status Information The receiver can provide you with a number of different types of Status Information. Available Status Information is listed in the following table. To access the Status Information, press the RIGHT option button twice to get to the Main menu and use the UP or DOWN arrow button to highlight System. Select System by pressing the RIGHT option button. Highlight and select Status from the System menu. Status Information Description System Status Shows information about the System, including Sensor life remaining (in hours) and time since valid data was transmitted (in hours). System Status 08:30 Sensor Life Left 000:000 Time Since Sensor Data - - - Back Main Receiver Status Shows information about the receiver, including serial number and software version (may be useful when calling Customer Care), as well as battery life remaining.
- Page 79 Section 11 Respond to Alarms, Errors and Problems Status Information (cont.) Status Information Description Allows you to indicate that you are removing a Sensor so Removed Sensor the Data Loss Alarm will not set off, and to stop recording glucose results. Results logged after the sensor is removed don’t correspond to your actual glucose level. Use this 08:30 function only if you are removing a sensor. Note: Once you select this option, the system will Did You Remove terminate any active sensor and there will be no more The Sensor? glucose results or alarms available from that sensor. The sensor must be replaced after this option is selected. Calibration BG Allows you to add a new blood glucose reading used for calibration. Use this selection ONLY at the request of a Customer Care representative. 08:30 Note: Once you use this feature to successfully perform an additional calibration, the system discards the parameters from the previous calibrations. It begins to calculate glucose Do You Want To Calibrate? results based on this calibration. When using the Calibration BG feature, always perform an additional Blood Glucose...
- Page 80 Section 11 Respond to Alarms, Errors and Problems...
- Page 81 Section 11 Respond to Alarms, Errors and Problems...
- Page 82 Section 11 Respond to Alarms, Errors and Problems...
- Page 83 Section 11 Respond to Alarms, Errors and Problems...
- Page 84 Section 11 Respond to Alarms, Errors and Problems...
- Page 85 Section 11 Respond to Alarms, Errors and Problems...
- Page 86 Section 11 Respond to Alarms, Errors and Problems...
- Page 87 Section 11 Respond to Alarms, Errors and Problems...
- Page 88 Section 11 Respond to Alarms, Errors and Problems Respond to Blood Glucose Mode error codes. Possible Causes • Sample is too small. • Problem with the meter. • Problem with the test strip. • Very low blood glucose (less than 20 mg/dL [1.1 mmol/L ]). What You Should Do 1. I f you have symptoms such as weakness, sweating, nervousness, headache or confusion, follow your doctor’s recommendation for treating hypoglycaemia. 2. C onduct a control solution test using a new test strip. If the results of the control solution test are within the range printed on the side of your test strip vial, retest using blood and a new test strip. 3. I f the retest using control solution does not work or the error persists, call Customer Care. Possible Causes • Problem with the test strip. • Problem with the meter. • Very high blood glucose (above 500 mg/dL [27.8 mmol/L]).
- Page 89 Section 11 Respond to Alarms, Errors and Problems Respond to Blood Glucose Mode error codes. (cont.) (Note: There is no Error Er5) Possible Causes • Problem with test strip. • Meter malfunction. What You Should Do 1. C onduct a control solution test using a new test strip. If the results of the control solution test are within the range printed on the side of your test strip vial, retest using blood and a new test strip. 2. I f the retest using control solution does not work, or if the error persists, call Customer Care. Possible Causes • Blood sample was applied while code number was being changed. What You Should Do 1. R etest using a new test strip.
- Page 90 Section 11 Respond to Alarms, Errors and Problems The receiver will not turn on. a. Has the test strip been inserted correctly (the should be facing up as you insert the end with the dark rectangle)? If YES, go to Step c. If NO, repeat the test with a new strip taking care that the is up as you insert the end with the dark rectangle until it stops. b. Did this solve your problem? If YES, stop. If NO, continue with Step c. c. Are the batteries installed correctly? If YES, go to Step d. If NO, install the batteries correctly and reset time and date. d. The batteries may be dead. Replace existing batteries and reset time and date. e. Repeat the test with a new test strip. If this did not solve the problem, call Customer Care. Note: Whenever batteries are removed and replaced or re-installed in the receiver, you will have to reconnect the transmitter and receiver and insert a new sensor.
- Page 91 Section 11 Respond to Alarms, Errors and Problems Unexpected characters on the receiver display screen, unusual or unexpected receiver screen appearance. Then The batteries are installed correctly. If you are close to a source of electromagnetic interference (see Appendix C for further details), move away from the interfering source and see if the problem goes away. If there is consistent interference from a source, contact the manufacturer of the source or a certified electrician for help. The batteries may have to be replaced. Replace batteries with fresh ones and reset date and time. The batteries are installed incorrectly. Install batteries correctly and reset date and time. a. Reconnect the transmitter and receiver. b. Insert a new sensor. c. If this did not solve the problem, call Customer Care.
- Page 92 Section 11 Respond to Alarms, Errors and Problems There is no glucose value on the screen. Then You are waiting for the first It has been less than You will see an icon on the calibration. 1 hour after the screen. Wait for the system to insertion of the sensor. prompt you to do a BG test for calibration. It has been more than 1 hour Allow the system up to 2 hours You see an icon after insertion of the sensor. to prompt you to do a BG test on the screen. for calibration. It has been more than 1 hour You receive alarms Acknowledge the alarm, take after insertion of the sensor. (for example, skin appropriate action (for example, temperature-related bring the skin temperature...
- Page 93 Section 11 Respond to Alarms, Errors and Problems Skin irritation at sensor insertion site. a. Ensure that seams, waistbands or other constrictive clothing or accessories do not cover the site causing friction. b. Inspect the site. If the irritation is Then Around the edges of the adhesive Lift the edges slightly all around the or tape. dressing. Wherever the adhesive touches skin. You may be sensitive to the adhesive or material, consult your healthcare team to identify the best solution. c. If none of the above works, consult your healthcare team for other suggestions. The sensor support mount is not sticking to your skin. Note: Do Step a through Step c BEFORE placing the sensor support mount on your skin.
- Page 94 Section 11 Respond to Alarms, Errors and Problems Discomfort when inserting the sensor. a. Rub the insertion site with ice before inserting the sensor. b. If that doesn’t work, call Customer Care. The system does not recognise a new sensor after attaching the transmitter to the sensor support mount. Then Your transmitter and receiver You will see the icon on the screen. Try are not connected. establishing connection between the receiver and transmitter. If the system still does not recognise a new sensor in about 3 minutes, remove the sensor and insert a new sensor (Section 6).
- Page 95 Section 11 Respond to Alarms, Errors and Problems You are not sure whether your receiver and transmitter are connected. Then You do not see the icon Your system is connected. on the screen. There is no connection between the receiver You see the icon. and transmitter. Reconnect the transmitter and receiver, see Section 10. Check and make sure that the transmitter You see the icon and battery is not old or exhausted. the reconnect procedure was unsuccessful. If the battery is old or exhausted, then a. Remove the sensor. b. Change the battery. c. Establish connection between transmitter and receiver.
- Page 96 Section 11 Respond to Alarms, Errors and Problems The system does not prompt you with a message to do a BG test for calibration. Then The system has not prompted Follow the troubleshooting ➜ you with a message recognising guidelines on sensor recognition. a new sensor after you attached the transmitter to the sensor support mount. ➜ It has been less than 1 hour after Wait for the 1 hour time period insertion of the sensor. to end and allow the system to prompt you to do a BG test for calibration. It has been more than 1 hour Reconnect the transmitter and There is a...
- Page 97 Section 12 Add Events 12 Add Events Purpose To create a record of events that may affect your glucose levels. Start Do this procedure whenever you observe anything that may affect your glucose levels, including your state of health and daily activities such as meals, exercise and insulin dosages. Materials • Your FreeStyle Navigator Receiver. • Data and details about the event that you want to record. Helpful Information Important: To edit an event, go to Section 13: Review Your Reports and Edit Events. • P ressing the RIGHT Option button (Set) completes the entry of your event regardless of how much or how little detail you have provided. • Th e current date and time are automatically recorded when you enter an event. If you enter the event at a later time, you must change the date and time of the event to when it actually occurred before you press the RIGHT Option button (Set) to save the event.
- Page 98 Section 12 Add Events Steps Do This Select the type of event you want to record. Use the UP Arrow button or the DOWN Arrow button to Select Event 08:30 highlight the type of event: Insulin Meals Exercise State of Health Generic Main Select If the event deals with Then • Meals or snacks. 1. Highlight Meals. 2. Press the RIGHT Option button (Select). 3. Go to Step 3.
- Page 99 Section 12 Add Events Steps Do This Record insulin events. a. Use the LEFT Option button (Next) to select which History 08:30 Insulin item to enter or change (Type, Units, SAVE/ 09 - 04 - 08 08:30 CANCEL, Date, Time). Type: Rapid Units: 0.25 b. Use the UP Arrow button or the DOWN Arrow button to change the selected item. SAVE SAVE CANCEL Next Note: Your insulin choices are Rapid, Intermediate, Long Acting or Pre-mix. Rapid Pre-Mix c. When you have finished, press the RIGHT Option Intermediate button (Set) to save (or cancel) the event. Long Acting Record exercise events.
- Page 100 Section 12 Add Events Steps Do This Record generic events. a. Use the LEFT Option button (Next) to select which item History 08:30 to enter or change (Event, SAVE/CANCEL, Date, Time). Generic 09 - 04 - 08 08:30 b. Use the UP Arrow button or the DOWN Arrow button Event: to change the selected item. SAVE SAVE Note 1: There are eight generic event numbers that CANCEL Next you or your healthcare team can assign to specific events (for example, #1 can refer to “Dining Out”, #2 to “Shopping”, #3 to “Inactive Day”, #4 to “Party”, etc.) Note 2: Write down the meanings for each number as you assign them so you don’t forget what they represent (you don’t have to assign meanings to all the numbers). c. When you have finished, press the RIGHT Option button (Set) to save (or cancel) the event. Check your work. Result: An electronic record of all the events that may affect your glucose levels.
- Page 101 Section 13 Review Reports and Edit Events 13 Review Reports and Edit Events Purpose • To review your glucose levels. • To help you and your healthcare team to detect patterns in your glucose levels that are relative to your targets. • To review a history of events that are important to your treatment plan. • To edit event history. Start • When you or your healthcare team want to know about your glucose levels or about events that may either explain your glucose levels or influence your treatment plan. • When you need to make changes to your event history. Materials Gather these materials before you begin: • Your glucose targets (your healthcare team can help determine these). • Your receiver. Helpful Information • Your healthcare team will usually give you glucose targets. Compare your actual glucose levels with these targets to see how you are doing. Ask your healthcare team to tell you how your levels should compare to each target.
- Page 102 Section 13 Review Reports and Edit Events Steps Do This Decide what you want to do. Note: Your reports will be more meaningful if you set glucose targets. Glucose targets give you something with which to compare your actual glucose levels. Decide what to do: If you want to Then • Set glucose targets. Go to Step 3. • See a line graph showing a history Go to Step 4. of your glucose levels. • See a statistical summary of your Go to Step 5. glucose levels over a period of time. • Review or edit the events you have Go to Step 7. recorded in your receiver. •...
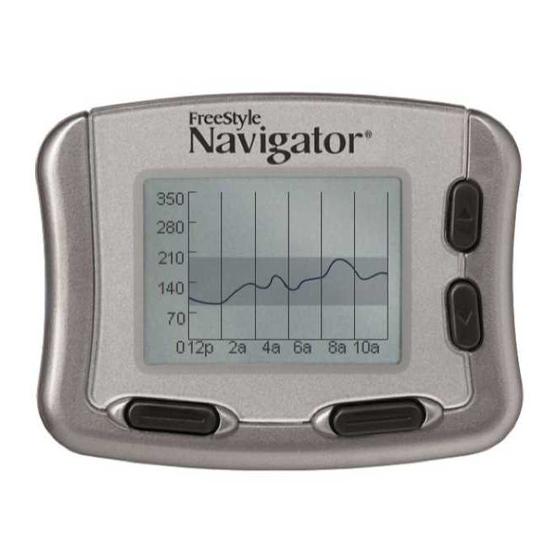
- Page 103 Section 13 Review Reports and Edit Events Steps Do This View a line graph of your glucose level history. a. Select Line Graphs from the Select Report menu. Select Time Period 08:30 i) Use the UP Arrow button or the DOWN Arrow 2 Hour button to highlight Line Graph. 4 Hour ii) Press the RIGHT Option button (Select) to go to 6 Hour 12 Hour the Select Time Period screen. 24 Hour b. Select the time period (2, 4, 6, 12 or 24 hours) using Back Select...
- Page 104 Section 13 Review Reports and Edit Events Steps Do This View a statistical summary of your glucose levels. a. Select Statistics from the Select Reports menu. Stats 3 day 08:30 i) Use the UP Arrow button or the DOWN Arrow Highest CM: 298 mg/dL button to highlight Statistics. Lowest CM: 61 mg/dL Ave. CM: 160 mg/dL ii) Press the RIGHT Option button (Select) to go to the Std.
- Page 105 Section 13 Review Reports and Edit Events Steps Do This Select the desired Note: Statistics include ONLY continuous glucose results. statistical reading. Glucose readings that were taken in the Blood Glucose mode are NOT included in the statistics. a. Use the UP Arrow button or the DOWN Arrow button to highlight the statistic you want to review for the selected period. If you want to know Then highlight • Your highest glucose reading. Highest CM • Your lowest glucose reading. Lowest CM • Your average glucose reading. Ave. CM • How well you are maintaining your Std. Dev. Note: A small number indicates that levels in relation to the average value.
- Page 106 Section 13 Review Reports and Edit Events Steps Do This Review or change your event history. a. Select Event History from the Select Reports menu. Select Filter 08:30 CM 60 b. Use the UP or DOWN Arrow button to highlight the CM 120 CM 10 event you want to review or edit. Insulin Back Select If you want to Then highlight review/edit your 10 minute intervals CM 10 • Continuous glucose...
- Page 107 Section 13 Review Reports and Edit Events Steps Do This Interpret your events. a. Interpret the events using the notes about each type of event in the table below: Event Notes • Each recorded measure is displayed on one screen with its (CM 60, CM 120, date and time. and CM 10) • Displays actual measures at the indicated intervals. • Does NOT display averaged measures. • Use the RIGHT Option button (Next) to move to the next recorded CM reading. • Each BG measure is displayed on one screen with its date and time. • All BG measures are displayed. • A tick indicates that the measure was marked as a control. • Use the RIGHT Option button (Next) to move to the next recorded BG screen. Insulin Each recorded insulin event is displayed with type, dosage in units, date and time. Meals Each recorded meal event is displayed with its carbohydrate value in grams, date and time. Exercise Each recorded exercise event is displayed with its description, duration in hours and minutes, intensity, date and time.
- Page 108 Section 13 Review Reports and Edit Events Steps Do This Edit the event. Note: You CANNOT edit your glucose measurements. a. Press the RIGHT Option button (Edit). b. Use the LEFT Option button (Next) to select the item you want to change. c. Use the UP or DOWN Arrow button to change the selected item. d. R epeat this process from Step 9b until you’ve changed every item that you wanted to change. Note: If you change your mind about saving your edits, change SAVE to CANCEL. e. Press the RIGHT Option button to save or cancel your edits. Check your work. Result: The result will be an increased awareness of your glucose level history, glucose level patterns and events that could affect your treatment plan.
- Page 109 Section 14 Clean and Disinfect Your System 14 Clean and Disinfect Your System Purpose To clean and disinfect the system. Start Clean your system: • Every time you change your sensor. • Any time the system appears to need cleaning. Disinfect your system: • Whenever the system is transferred between people. Materials Make sure you have access to these materials before you begin: • Antibacterial liquid soap. • Clean, running water. • Clean, soft, lint-free paper or cloth towels. • 70% isopropyl alcohol. • Cotton swabs (for disinfecting only). • CaviCide®. Helpful Information For Cleaning: • Your FreeStyle Navigator system needs minimal maintenance aside from cleaning and battery replacement. • A void getting dust, dirt, blood, control solution, water or any other substance in the receiver’s test strip port.
- Page 110 FreeStyle Navigator system yourself. • If a FreeStyle Navigator system was previously used by another person, the system log should be cleared using the “Erase History” command and the system settings should be returned to their defaults using the “Reset User Settings”...
- Page 111 Section 14 Clean and Disinfect Your System Steps Do This Clean your transmitter. a. Wash the transmitter with mild soap and water. b. Rinse the transmitter thoroughly under running water. c. Dry the transmitter thoroughly with a clean, soft, lint- free cloth or paper towel. d. Shake any water out of the transmitter’s contact points and blot on a clean, soft, lint-free cloth or paper towel. e. Make sure that the contact points are clean, dry and not Contact Points excessively worn. Clean your receiver skin. Before cleaning the receiver skin, remove it from the receiver. Wash the receiver skin in mild soap and water. Clean your receiver. Caution: Do NOT immerse the receiver in water or in any other liquid.
- Page 112 Section 14 Clean and Disinfect Your System Steps Do This Disinfect the receiver. a. Make sure that the batteries are removed from the receiver and that the battery door is secured in place. b. Use a clean, soft, lint-free cloth or paper towel dampened with CaviCide® to thoroughly wet the pre-cleaned external surfaces of the receiver. Care should be taken to prevent fluid from entering the test strip port or any of the internal surfaces of the receiver. c. Place the receiver screen-side down and allow all external surfaces to remain moist with CaviCide® for 3 minutes at room temperature. d. Dry the receiver with a clean, soft, lint-free cloth or paper towel, or allow to air dry. Check your work. Result: A clean and disinfected transmitter and receiver. You have done this procedure correctly when: o ...
- Page 113 Section 15 Link and Unlink Your Transmitter and Receiver 15 Link and Unlink Your Transmitter and Receiver Purpose To enable secure communication between your transmitter and your receiver. Start Do this procedure: • W hen you replace either your transmitter or your receiver. Materials Gather these materials before you begin: • Y our receiver. • Y our transmitter. Note: Your system may need fresh batteries if it cannot establish communication. Helpful Information Important: You will NOT receive continuous glucose data while the transmitter and receiver are unlinked and all alarms associated with the Continuous Monitoring mode will be turned off.
- Page 114 Section 15 Link and Unlink Your Transmitter and Receiver Steps Do This Decide what you want to do. Then go If you want to to Step • Unlink your receiver from your transmitter. • Link your receiver to your transmitter. • Check your work. Unlink your receiver from your transmitter. a. Press the RIGHT Option button twice to display the Link 08:30 Main menu. b. Use the UP or DOWN Arrow button to highlight Blood Glucose Mode System.
- Page 115 Section 15 Link and Unlink Your Transmitter and Receiver Steps Do This Link your receiver to your transmitter. a. Place the receiver close to the transmitter. Link 08:30 b. Press the RIGHT Option button twice to display the Main menu. Searching For Transmitter c. Use the UP or DOWN Arrow button to highlight Allow 70 Seconds System. Cancel d. P ress the RIGHT Option button (Select) to display the System menu. Link 08:30 e. Use the UP or DOWN Arrow button to highlight Link. Transmitter ID: f. Wait while the receiver searches for the transmitter.
- Page 116 Section 16 Reset User Settings and Erase History 16 Reset User Settings and Erase History Purpose To reset the user settings to the default values and erase all recorded glucose data and events. Start Do this procedure whenever you need to return your settings to the factory defaults and erase the recorded glucose data and events. Materials Your FreeStyle Navigator Receiver. Helpful Information • If you don’t press any buttons for 20 seconds, the receiver screen will go blank and the last change will be lost if you haven’t pressed the Select button. Caution: You should never reset your user settings when you are wearing a sensor. This will reset parameters that may affect your system performance.
- Page 117 Section 16 Reset User Settings and Erase History Steps Do This Access the System menu from the Main menu. a. Press the UP or DOWN Arrow button to highlight Main 08:30 System. Glucose Alarms b. Press the RIGHT Option button (Select) to go to the Reports System System Menu screen. Add Event Select Access the Reset User Settings screen. a. Press the UP or DOWN Arrow button to highlight System Menu 08:30 Reset User Settings.
- Page 118 Section 16 Reset User Settings and Erase History Steps Do This Access Erase History screen from the System menu. a. Press the UP or DOWN Arrow button to highlight System Menu 08:30 Erase History. Erase History Link b. Press the right Option button (Select) to go to the Set Date/Time Country Settings Erase History Screen. Reset User Settings Main Select Erase History. Confirm what you want to do: If you want to Then...
- Page 119 Section 17 Appendix A: Site Maintenance 17 Appendix A: Site Maintenance Introduction Careful site selection, preparation and maintenance can help to lower the risk of infection and improve sensor adhesion. In addition to site selection, a number of helpful products are available. Site Selection Site rotation helps prevent discomfort, irritation, bruising, skin rashes and sensitivity to adhesives. It is important for you to rotate between several sites and to insert sensors only in the abdomen or in the back of the upper arm. ALWAYS change the insertion site each time a new sensor is used. Rotating the sites in a predictable pattern may help you to remember to rotate them evenly. For example, you may want to start in the upper-right corner of your abdomen, and then move one inch to the left when you insert a new sensor, continuing in a circular direction. Or, you may want to start on the right arm at a high position, move to a low position on the right arm, then repeat on the left arm. Helpful products Choose from the list of products below as needed. • Antiseptics – If you tend to develop infections at the sensor insertion site, consider prepping the skin with an antiseptic. Ask your healthcare team to recommend which antiseptic is best for you. • Dressings – If you are having trouble with the sensor support mount sticking to your skin, consider applying a bandage over the transmitter. A variety of such bandages are available at your local chemist. Ask your healthcare team to recommend which type of bandage is best for you. • Adhesive enhancers – If you’re having trouble getting the sensor support mount to stick to your skin, you may want to try an adhesive enhancer. Adhesive enhancers help the adhesive pad on the sensor support mount to stick to your skin. After applying this type of product, be sure that the sensor insertion site is thoroughly dry before placing the sensor support mount on your skin. Ask your healthcare team to recommend which adhesive enhancer is best for you.
-
Page 120: System Specifications
Section 18 Appendix B: Specifications 18 Appendix B: Specifications System Specifications Your FreeStyle Navigator system specifications are listed in the following table: Operating Temperature 4 °C (40 °F) to 40 °C (104 °F). Storage Temperature Store the transmitter and receiver between -10 °C (14 °F) and 45 °C (113 °F). Store sensor inserters and sensor support mounts between 3 °C (37 °F) and 30 °C (86 °F). Store the test strips between 4 °C (40 °F) and 30 °C (86 °F). Control solution should be stored between 2 °C (36 °F) and 30 °C (86 °F). Operating Humidity (Receiver) 5% to 90% (non-condensing). Operating and Storage Altitude Sea level to 3,048 metres. Operating Pressure 1.0 bar (14.7 psia, sea level) to 0.7 bar (3,048 metres). Sensor Life Up to 5 days. Sensor Operating Skin Surface 25 °C (77 °F) to 40 °C (104 °F). Temperature Glucose Result Range 20 to 500 mg/dL (1.1 to 27.8 mmol/L). Glucose Assay Method Amperometric electrochemical sensor using WIRED (for CM mode) ENZYME technology. Continuous subcutaneous measurement of glucose in interstitial fluid by a sensor inserted approximately 5mm under the skin. Power Source Transmitter: One silver oxide 357 battery (coin cell), replaceable (battery life is ~ 30 days). - Page 121 Section 18 Appendix B: Specifications 18 Appendix B: Specifications (cont.) Receiver Weight 99.2 grams – including batteries. Receiver Battery Life Up to 30 days. Automatic Shutoff Built-in blood glucose meter: 2 minutes after last user action. Receiver: 20 seconds after last user action. Receiver Memory • 60 days of normal use including continuous glucose readings (stored every 10 minutes) and daily blood glucose readings. • Date/time will be remembered for 5 minutes after receiver battery removal. Calibration Plasma equivalent. Calibration Time • 1st calibration: Can be performed at approximately 1 hour after a new sensor has been inserted or can be delayed using the mute alarms function for up to 12 hours. Continuous glucose readings will NOT be reported until the 1st calibration is performed successfully. • 2nd calibration: Can be performed between 1 and 1.5 hours after the 1st calibration or continuous glucose will not be reported. The 2nd calibration can be performed after 1.5 hours; continuous glucose reporting will resume after you have completed the 2nd calibration successfully. • 3rd calibration: Must be performed between 10 and 12 hours after the sensor was inserted or continuous glucose will not be reported. The 3rd calibration can be performed after 12 hours; continuous glucose reporting will resume after you have completed the 3rd calibration successfully.
- Page 122 Section 19 Appendix C: Electromagnetic Interference Information 19 Appendix C: Electromagnetic Interference Information Electromagnetic Interference and Your FreeStyle Navigator Continuous Glucose Monitoring System Important Information about Electromagnetic Interference The FreeStyle Navigator Transmitter and Receiver communicate using radio-frequency waves. The FreeStyle Navigator system has been designed to be reliable and immune to common electromagnetic interference so that it is not influenced by such interference. However, under rare circumstances, if you happen to be in an environment of strong electromagnetic radiation, there may be some interference. Examples of possible sources of interference are: retailer doorways, supermarket checkout counters, metal detectors like those used in airport security systems or electronic surveillance devices, and radio-transmitting devices such as mobile phones, 2-way radio and cordless phones. Interference may occur in the vicinity of equipment marked with the symbol. If such interference happens, it tends to be temporary. This makes it unlikely that you will experience any noticeable difference in the performance of the system. In the event of electromagnetic interference, you may experience loss of communication between the receiver and transmitter, you may see unrecognisable characters on the receiver display screen or you may not see continuous glucose results. The system is designed to alert you of these conditions through audio (beep or vibrate)
- Page 123 Section 19 Appendix C: Electromagnetic Interference Information 19 Appendix C: Electromagnetic Interference Information (cont.)
- Page 124 Section 19 Appendix C: Electromagnetic Interference Information 19 Appendix C: Electromagnetic Interference Information (cont.)
- Page 125 Section 19 Appendix C: Electromagnetic Interference Information 19 Appendix C: Electromagnetic Interference Information (cont.)
- Page 126 Section 19 Appendix C: Electromagnetic Interference Information 19 Appendix C: Electromagnetic Interference Information (cont.)
- Page 127 Section 20 Glossary 20 Glossary Products that can help the adhesive pad on the sensor support mount stick more efficiently to Adhesive your skin. Enhancers Sounds, vibrations or text that are used by the receiver to notify you of certain conditions. Alarms A menu you can access from the Main menu. From the Alarms menu, you can turn an alarm on Alarms Menu or off, set its sensitivity and select alarm type. A setting that you can adjust to trigger the Projected Low/High Glucose alarms (early warning Alarm alarms) sooner or later. The higher the sensitivity, the sooner the alarm will sound. Sensitivity Refers to the sound or vibration of the alarm. Alarm types include low, medium or high beeps Alarm Type and short, medium or long vibrations. Products that you can use at the sensor insertion site if you tend to develop infections. Antiseptics One of two modes in which the system functions (the other is Continuous Monitoring mode). Blood Glucose Mode In the Blood Glucose mode, you can perform traditional blood glucose testing manually using a FreeStyle Test Strip and a drop of blood. Although you can use the Blood Glucose mode whenever you wish, its main use is for calibrating the system. The system must be calibrated at approximately 1, 2, 10, 24 and 72 hours after sensor insertion. Calibration The system is calibrated using a blood glucose measurement (performed in the Blood Glucose mode using the built-in FreeStyle Blood Glucose Meter). The receiver compares the reading it gets from the blood to the reading the sensor takes from the interstitial fluid. Based on the calibration, the receiver calculates real-time glucose readings. Allows you to add a new blood glucose measurement that is used for sensor calibration. Use Calibration BG this feature only under the direction of a Customer Care representative or your healthcare team.
- Page 128 Section 20 Glossary 20 Glossary (cont.) A test done with FreeStyle Control Solution in the Blood Glucose mode using the built-in Control FreeStyle Blood Glucose Meter to ensure that the system is working properly in the Blood Solution Test Glucose mode. An alarm that tells you when you are about to lose data, or when your alarms are about to stop Data Loss working. Data Loss alarms sound when the transmitter-receiver connection is broken or when Alarm the sensor has expired. The act of transferring data from your FreeStyle Navigator system to a computer. Data Upload Products that can be used as over-bandages to cover the transmitter. These can help the sensor Dressings support mount adhesive stick to your skin. Permanently eliminates stored data, such as glucose history, events and alarms, from the Erase receiver’s memory. Once data is erased, it cannot be recovered. The activities and observations that can affect your glucose levels that you record in your Events system. Reviewing events may help you to see patterns in your glucose levels and how you manage your diabetes. Once entered into the system, events may be viewed in several ways, including Event History reports or Line Graph reports. A type of report that incorporates the event information you enter (for example, histories of Event History recent glucose results, insulin doses, carbohydrate content of meals, exercise, state of health, etc.). Reports A record of many popular forms of exercise. You may also specify the intensity and duration of Exercise Event each exercise event.
- Page 129 Section 20 Glossary 20 Glossary (cont.) A measure of the amount of red blood cells in your body. Haematocrit Notifies you when you go above your high glucose threshold (a number you and your High Glucose healthcare team will set). Alarm The level you do not want your glucose level to rise above. You and your healthcare High Glucose team choose the level that is right for you, and you set it in the system. The High Threshold Glucose alarm and the Projected High Glucose alarm use the high glucose threshold. Simple graphic symbols that appear on the receiver display screen to alert you to system Icons conditions or actions required. A record of insulin doses (injection or pump) that you enter in the system to help you evaluate Insulin Event current therapy. The time and date of an Insulin event are always recorded. You may also enter the type of insulin and dose amount (units). The fluid in the tiny spaces between the cells in your body. The system uses this fluid to measure Interstitial Fluid your glucose levels. The measuring of something out of the body. For example, in a test tube. in vitro The measuring of something in the body. in vivo A tiny, sharp-pointed, disposable component used with the lancing device to obtain a drop of Lancet blood for a Blood Glucose mode test. A handheld piece of equipment that is used with a lancet to obtain a drop of blood for a Blood Lancing Device Glucose mode test.
- Page 130 Section 20 Glossary 20 Glossary (cont.) An alarm that tells you when you go below your low glucose threshold (a number you and your Low Glucose healthcare team will set). Alarm The level that you do not want your glucose level to fall below. You and your healthcare team Low Glucose choose the level that is right for you, and you set it in the system. The Low Glucose alarm and the Threshold Projected Low Glucose alarm use the low glucose threshold. Displays a list of options that allow you to perform many functions and view specific Main Menu information. A record of meals and snacks that you enter into the system to help you see patterns in your Meal Event glucose levels. The time and date are always recorded. You may also record carbohydrate grams to help you count carbohydrates or determine insulin/carbohydrate ratios. A type of statistical report that shows a summary of glucose results in relation to your glucose Multi-Day targets over a specified number of days. You can choose 3, 7, 14, 21 or 28-day periods. Statistics A receiver function that allows you to silence most audio alarms and notifications for a period Mute of 1-12 hours. When the mute function is used, all system alarms, projected glucose alarms and high glucose threshold alarms are silenced. Muting does not turn off vibration for alarms that are set to vibrate. Low glucose threshold alarms are not silenced through the mute function. Communicate progress, errors and successful completion of system activities such as Blood Progress Tones Glucose mode testing. Provides an early warning when you are approaching your high glucose threshold. Projected High Alarm Provides an early warning when you are approaching your low glucose threshold.
- Page 131 Section 20 Glossary 20 Glossary (cont.) Information about your glucose levels shown in a way to help you and your healthcare team Reports analyse changes in your glucose levels and your treatment plan (such as changes in insulin doses, carbohydrate intake, etc.) Several types of reports are available. The part of the system that you insert under your skin. Each inserted sensor is intended to Sensor remain in place and provide a continuous glucose reading for up to 5 days. A number that you will find on the sensor inserter packaging. This code number must be Sensor Code entered into the receiver after you insert a new sensor and before you complete the system calibration. The sensor delivery unit is designed and packaged to enable safe insertion of the sensor into Sensor Delivery Unit your skin. The sensor delivery unit has 2 parts that you must assemble: the sensor inserter with pre-installed sensor (which puts the tip of the sensor under your skin) and the sensor support mount (which stays on your skin to hold the sensor in place and which attaches the sensor to the transmitter). The sensor inserter is a cylindrical-shaped, plastic-cased device. A pre-cocked, coiled spring is Sensor Inserter connected to a stainless steel needle, used to guide the sensor for insertion. With a single push of the insertion button, the needle guides the sensor into the skin and is quickly withdrawn from the skin. The Locking Pin is designed to avoid accidental discharge of the sensor inserter. Do not remove the locking pin until the assembled sensor delivery unit is adhered to the skin. With a single push of the insertion button, the needle guides the sensor into the skin and is Sensor Insertion quickly withdrawn from the skin. Button The place on your body where you insert a sensor, on either the abdomen or the back of the Sensor Insertion upper arm. Always change the sensor insertion site each time a new sensor is used. The sensor Site should be inserted at least 1 inch from the previous site.
- Page 132 Section 20 Glossary 20 Glossary (cont.) A record of health-related events, symptoms and other observations that may help you see State of Health patterns in your glucose levels. Event A comprehensive summary of glucose results relative to your glucose targets. You can view Statistical statistical reports for 1, 3, 7, 14, 21 or 28-day periods. Viewing this kind of information can Reports help you see patterns in your glucose levels. Information about the system and how it is working, such as sensor time or battery life Status remaining. Information A short name for the FreeStyle Navigator Continuous Glucose Monitoring System. System System messages (for example, low battery life, time for calibration). System Alarms A menu available from the Main menu that is used to access status information and other System Menu functions. Also called TX. A small electronic device that makes an electrical connection to the portion of Transmitter (TX) the sensor that extends above the skin. The transmitter processes the very low current signals it receives from the sensor and sends the glucose data to the receiver once every minute. The wireless connection needed for the system to function. The transmitter and the receiver Transmitter/ must be within 3 metres of each other for the connection to be valid. Receiver Connection A connector that helps secure the transmitter to the sensor support mount.
- Page 133 Section 21 Index 21 Index Add Events 95 Country Settings 21, 24 Adhesive Daily Use 69 Adhesion To Skin 36, 91 Adhesive Enhancers 119 Data Adhesive Removers 33 Data Loss Alarm 57, 65 Data Upload 5 Alarms Glucose Data And Reports 99 Change The Alarms 57 Mute Alarms 68 Date Respond To Alarms 75, 78 Change The Date 19 Glucose Alarms 57-64 Change The Date Format 23 Arrow...
- Page 134 Section 21 Index 21 Index (cont.) Icons 72 Site Select An Insertion Site 34 Insertion Blood Glucose Test Site 49 Sensor Insertion 37 Maintain Your Site 119 Insertion Site 34 Site Rotation 119 Prepare Insertion Site 35 Insulin 96, 97 Specifications 121 Interference 123 Standard Deviation (Std. Dev.) 103 Interstitial Fluid 1, 10 State Of Health 97, 104 Line Graph 101 Statistics 103...
- Page 135 This product and/or its use are protected by one or more of the following European patents: EP1230248; EP1230249; EP0958495; EP1145000; EP1119637. Additional patents pending. ©2008, 2010 Abbott ART20775-001 Rev. A 04/10 Abbott Diabetes Care Ltd. Abbott Diabetes Care Inc. Range Road 1360 South Loop Road Witney, Oxon...
Need help?
Do you have a question about the FreeStyle Navigator and is the answer not in the manual?
Questions and answers