
Related Manuals for Abbott FreeStyle Precision H


Summary of Contents for Abbott FreeStyle Precision H
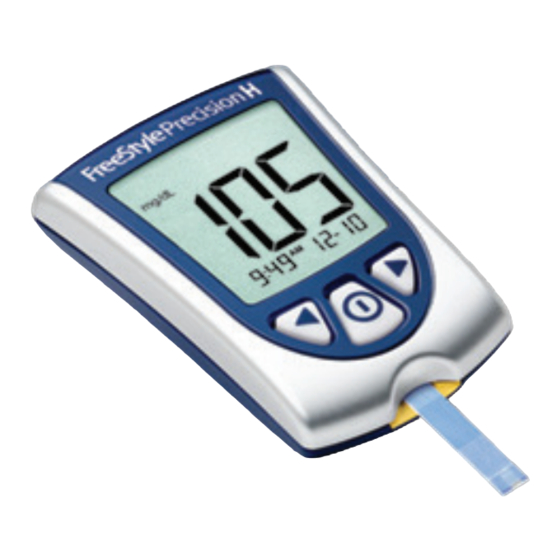
- Page 1 User’s Manual Manual del usuario Blood Glucose and Ketone Monitoring System Sistema de monitoreo de glucosa y cetonas en sangre...
- Page 2 Definition of Symbols These symbols are associated with your meter. The batteries in this product should be removed and Batch code disposed in accordance with local regulations for separate collection of spent batteries. Catalog number Caution Consult instructions for use This packaging is capable of being recycled Date of manufacture Manufacturer...
-
Page 3: Table Of Contents
Table of Contents Intended Use ..............1 Monitoring System Kit Contents . - Page 4 Test Site ..............20 Performing a Blood Ketone Test .
-
Page 5: Intended Use
Intended Use The FreeStyle Precision H monitoring system is intended for in-vitro diagnostic use by healthcare professionals. The system is indicated for the quantitative measurement of glucose (D-glucose) in fresh neonatal, venous, arterial, and fingertip capillary whole blood. The system is also indicated for... -
Page 6: Monitoring System Kit Contents
How FreeStyle Precision H Blood Glucose and Ketone Monitoring System Works When you insert a test strip into the meter, the Apply Sample message shows on the meter’s display window. When a blood sample or control solution sample is applied to the test strip, the glucose or ketone reacts with the chemicals on the test strip. -
Page 7: Setting Up The Meter
Setting Up the Meter Enter Setup Mode Commands • Press to move between setup displays Start with the meter off (no test • strip inserted). Press to move forward • Press to go back • Press to turn display light On and Off Press and hold until appear. -
Page 8: Date
Date The year flashes. Press until the correct year appears. Press to save the year and to move to set month. Year The month flashes. Press until the correct month appears. Press save the month and to move to set day. The day flashes. -
Page 9: Measurement Units
Measurement Units The unit of measurement set by the factory appears. You cannot change this setting. Contact Customer Service for more information. Press to return to set beeper, or press and hold to turn off the meter. Preparing the Meter for Glucose Testing Important Testing Notes This display always appears when the meter is turned on. -
Page 10: Calibrating The Meter For Glucose Testing
Calibrating the Meter for Glucose Testing Remove the glucose calibrator (white) from the new box of test strips. Peel the clear cover away from the corner with three bumps to open the calibrator package. IMPORTANT: Use only the calibrator that is packaged in the box of test strips you are using. - Page 11 Confirm the LOT Number Check to see that the LOT number matches on all the following areas: • Meter display • Test strip calibrator IMPORTANT: Do not discard the calibrator until you • Test strip instructions for use have used all the test strips in the box. •...
- Page 12 Recall the LOT Number Press and continue to hold until all the following items appear on the display: • Display check • Glucose LOT number • Time and date of the most recent glucose calibration LOT Number What It Means What To Do Correct The meter is calibrated for...
-
Page 13: Testing Blood Glucose
Testing Blood Glucose Important Testing Notes • Use the meter within the test strip operating range • Use the test strip immediately after removing it from its foil packet • 13758 Use each test strip only once 2012/ 03 E.g. Expiration Do not use expired test strips;... -
Page 14: Performing A Blood Glucose Test
Performing a Blood Glucose Test Open the foil test strip packet at the notch and tear down to remove the test strip. Insert the Test Strip With the contact bars (3 black lines) facing up, insert the test strip into the meter until it stops. - Page 15 The LOT number of the box of test strips you are using appears next. The Apply Sample symbols also appear, indicating the meter is ready for you to apply a sample to the test strip. Obtain a Blood Sample Make sure that the sampling site is clean and dry before lancing. Use the lancing device to obtain a blood sample.
- Page 16 Hold the blood drop to the white area until the meter beeps (if sound is on) and the status bar appears on the display. This indicates the test strip has obtained enough blood. The countdown appears on the display as the meter checks the glucose level. Note: Do not remove the test strip from the meter or disturb the test strip during the countdown.
-
Page 17: Understanding Blood Glucose Test Results
Understanding Blood Glucose Test Results Low and High Blood Glucose Results The meter displays results in mg/dL. The IMPORTANT: The meter displays results from unit of measurement is preset. You cannot 20–500 mg/dL. Low or high blood glucose change this setting. results can indicate a potentially serious medical condition. - Page 18 Meter: Display What It Means What To Do Blood glucose level is Check blood ketone. high Appears with result which is: ≥ 300 mg/dL Severe high blood Repeat the test with a new test strip. glucose Check blood ketone. Appears when result is: There may be a problem >...
-
Page 19: Preparing The Meter For Ketone Testing
Preparing the Meter for Ketone Testing Calibration Calibrate the meter to: • Match the test strips being used • Obtain accurate results Calibration is required: • When using the meter for the first time • When opening and using a new box of test strips IMPORTANT: This display means the meter is not calibrated for ketone testing. - Page 20 Prepare the Meter Hold the calibrator with the LOT/CODE number facing you. Insert the calibrator into the meter until it stops. This turns the meter on. This display always appears when the meter is turned on. Do not use the meter if the display check screen does not exactly match the example.
- Page 21 Confirm the LOT/CODE Number Check to see that the LOT/CODE number matches on all the following areas: • Meter display • Test strip calibrator IMPORTANT: Do not discard the calibrator until • Test strip instructions for use you have used all the test strips in the box. •...
- Page 22 Recall the LOT/CODE number Press and continue to hold until all the following items appear on the display: • Display check • Glucose LOT number • Time and date of the most recent glucose calibration After the last item appears, press to display: •...
-
Page 23: Testing Blood Ketone
Testing Blood Ketone Important Testing Notes • Use the meter within the test strip operating range • Use the test strip immediately after removing it from the foil packet 12345 • Use each test strip only once 2012/ 03 E.g. Expiration Do not use expired test strips;... -
Page 24: Test Site
Test Site Note: Use fingertip blood samples for blood ketone testing; see test strip instructions for use for additional blood sample types. Fingertips Performing a Blood Ketone Test Open the foil test strip packet at the notch and tear down to remove the test strip. - Page 25 This display always appears when the meter is turned on. Do not use the meter if the display check screen does not exactly match the example. Contact Customer Service. See “Preparing the Meter for Glucose Testing” section for more information. Time and date (if set) appear next.
- Page 26 Apply Blood to the Test Strip Bring the blood drop to the white area at the end of the test strip. The blood is drawn into the test strip. IMPORTANT: If the countdown does not start, you may not have applied enough blood to the test strip.
-
Page 27: Understanding Blood Ketone Test Results
View the Result The meter beeps (if sound is on) when the result and appears on the display. The test is complete (example shown). The result is stored in memory. Turn Off the Meter Use the opened foil packet to remove the used test strip. This turns off the meter. Discard the used test strip properly. - Page 28 Blood ketone is expected to be below 0.6 mmol/L. High blood ketone may be caused by illness, fasting, vigorous exercise, or uncontrolled blood glucose levels. Repeat a blood ketone test using a new blood ketone test strip when: • HI appears on the display •...
-
Page 29: Medisense Glucose And Ketone Control Solutions
Meter: Display What It Means What To Do Very high blood ketone Repeat the test with a new test strip. If the result is HI, contact the prescribing physician Appears when immediately. There may be a problem result is: > 8.0 mmol/L with the test strip MediSense Glucose and Ketone Control Solutions IMPORTANT: When you open a control solution bottle for the first... -
Page 30: Important Control Solution Testing Notes
Important Control Solution Testing Notes • Use only MediSense Glucose and Ketone control solutions with the meter • Replace the cap securely on the bottle immediately after use Do not use control solution past the expiration date. Do not add water or other liquid to control solution. Do not swallow or inject the control solution. -
Page 31: Performing A Control Solution Test
Performing a Control Solution Test Open the foil test strip packet at the notch and tear down to remove the test strip. Insert the Test Strip With the contact bars (3 black lines) facing up, insert the test strip into the meter until it stops. - Page 32 Time and date (if set) appear next. The LOT number of the box of test strips you are using appears next. The Apply Sample symbols also appear. Note: will appear if performing a ketone control solution test. Press to mark the test as a control solution test. appears.
- Page 33 Hold the control solution drop to the white area until the meter beeps (if sound is on) and the status bar appears on the display. This indicates the test strip has obtained enough control solution. The countdown appears on the display as the meter checks the glucose or ketone level.
-
Page 34: Managing Results
Compare the control solution result to the range printed on the blood glucose or blood ketone test strip instructions for use. The result should fall within the range. Causes of out-of-range results include: • The meter and test strips may not be working properly Repeat the test with a new test strip. - Page 35 This display always appears when the meter is turned on. Do not use the meter if the display check screen does not exactly match the example. Contact Customer Service. See “Preparing the Meter for Glucose Testing” section for more information. The most recent result, with time and date (if set) it was obtained, appears next.
- Page 36 Press to review the previous result. Repeat this for each result you wish to review. Note: To exit meter memory at any time, press and hold Appear on the display when there are no previous results to view. Press to return to a previously reviewed result. Repeat this for each result you wish to review.
-
Page 37: Viewing Blood Glucose Averages
Viewing Blood Glucose Averages IMPORTANT: • Set the date and time before testing to be able to review averages • Averages do not include glucose and ketone control solution results, blood ketone results, and results that do not show time and date •... - Page 38 Press to view the 14-day average. Press to view the 30-day average. Press to return to the 7-day average, or Press to return to the memory screen. Press and hold to turn off the meter. The meter turns off after 30 seconds of inactivity.
-
Page 39: Transferring Results To A Computer
Transferring Results to a Computer Transferring test results to a computer requires a compatible data management system. For more information, please go to our website or contact Customer Service. Error Messages Message What It Means What To Do The temperature is too hot 1. - Page 40 Message What It Means What To Do The blood glucose level may 1. Repeat the test using a new test strip. be too high to be read by the 2. If the error reappears, contact the prescribing physician immediately. system There may be a problem with the test strip Blood was applied to the test...
-
Page 41: To E-9, What It Means, What To Do
Message What It Means What To Do Meter error 1. Turn off the meter. 2. Repeat the previous testing steps. 3. If the error reappears, contact Customer Service. Troubleshooting What It Means What To Do The meter Test strip is not inserted 1. - Page 42 What It Means What To Do The test does Blood sample is too small 1. See test strip instructions for use for not start after re-application instructions. applying the 2. If the countdown still does not start, remove blood sample. the used strip and discard it properly.
-
Page 43: Maintaining The Meter
Maintaining the Meter Replacing the Battery The meter comes with a CR 2032 lithium (coin cell) battery installed. It provides power for about 1,000 tests. • Appears on the display when the battery is low. • Causes the display light to fail to turn on. When appears, you may still use the meter and the results will be accurate. - Page 44 2. If the meter includes a plastic tab, pull on the tab to remove the battery. If the meter does not include a plastic tab, push the battery upward to remove 3. Insert a new CR 2032, lithium (coin cell) battery: (+) facing up. 4.
-
Page 45: Cleaning The Meter
Cleaning the Meter Avoid getting dirt, dust, blood, control solution, or liquid in the meter test strip port. Clean the outside of the meter using a damp cloth and mild soap. Other acceptable cleaning solutions include: 10% bleach, 70% isopropyl alcohol or 10% ammonia IMPORTANT: Do not try to clean the test strip port. -
Page 46: Specifications
Specifications Size Length 7.47 cm Width Top 5.33 cm Bottom 4.32 cm Depth 1.63 cm Weight 40 to 46 grams Power Source 1 CR 2032 Lithium (coin cell) battery Battery Life Approximately 1,000 tests Up to 450 events, including control solution, blood glucose and Memory blood ketone results, and other meter information. - Page 47 Control solution See control solution instructions for use. Assay Method Amperometric electrochemistry Assay Range Blood glucose See blood glucose test strip instructions for use. Blood ketone See blood ketone test strip instructions for use. Control Solution Range Blood glucose See blood glucose test strip instructions for use. Blood ketone See blood ketone test strip instructions for use.
- Page 48 Beeper On: When countdown starts and ends. On: Stays on during countdown; turns off 30 seconds after results Display Light appear. Stays on while transferring results to a computer. Data Port Operating Range Meter temperature 50 ° to 122 °F (10 ° to 50 °C) System temperature See operating range of the test strip you are using.
-
Page 49: References
References Schade DS, Eaton RP. Metabolic and clinical significance of ketosis. Special Topics in Endocrinology and Metabolism 1982; 4:1–27. Wiggam MI, O’Kane MJ, Harper R, Atkinson AB, Hadden DR, Trimble ER, Bell PM. Treatment of diabetic ketoacidosis using normalization of blood 3-hydroxybutyrate concentration as the endpoint of emergency management. -
Page 50: Warranty Statement
Meter has not been caused in whole or in part by the use of test strips that are not the test strips manufactured by Abbott. This Limited Warranty covers only the Meter and shall not apply to auxiliary equipment or disposable accessories, extends only to the original purchaser, and is not assignable or transferable. - Page 51 Limitation of Liability TO THE EXTENT POSSIBLE UNDER LAW, ABBOTT WILL NOT BE LIABLE FOR ANY INCIDENTAL OR CONSEQUENTIAL DAMAGES RESULTING DIRECTLY OR INDIRECTLY FROM USE OF THE METER OR FAILURE OF THE METER TO PERFORM IN ACCORDANCE WITH SPECIFICATIONS.
- Page 52 Definición de símbolos Estos símbolos están relacionados con el medidor. Las pilas que se utilicen en este producto deben Código de lote quitarse y desecharse de acuerdo con las normas locales para la recolección separada de pilas agotadas. Número de catálogo Precaución Consulte las instrucciones Este envase puede reciclarse...
- Page 53 Índice Propósito de uso............. 1 Contenido del kit del sistema de monitoreo .
- Page 54 Sitio de prueba ............. . 20 Cómo realizar una prueba de cetona en sangre .
-
Page 55: Propósito De Uso
Propósito de uso El sistema de monitoreo FreeStyle Precision H está diseñado para el uso diagnóstico in vitro por parte de profesionales de la salud. El sistema está indicado para la medición cuantitativa de la glucosa (D-glucosa) en sangre capilar entera fresca neonatal, venosa, arterial y de la yema del dedo. El sistema también está... -
Page 56: Contenido Del Kit Del Sistema De Monitoreo
Cómo funciona el sistema de monitoreo de glucosa y cetonas en sangre FreeStyle Precision H Cuando se introduce una tira de prueba en el medidor, aparece el mensaje de aplicar sangre en la pantalla del medidor. Cuando se aplica una muestra de sangre o una muestra de la solución de control a la tira de prueba, la glucosa o la cetona reacciona con las sustancias químicas de la tira de prueba. -
Page 57: Configuración Del Medidor
Configuración del medidor Ingreso en el modo de configuración Comandos • Oprima para desplazarse entre Comience con el medidor pantallas de configuración • apagado (sin introducir una tira Oprima para avanzar de prueba). • Oprima para retroceder • Oprima para encender y apagar la luz de la pantalla Oprima sin soltar hasta que aparezcan los símbolos y... -
Page 58: Fecha
Fecha El año parpadea. Oprima hasta que aparezca el año correcto. Oprima para guardar el año y pasar a configurar el mes. Año El mes parpadea. Oprima hasta que aparezca el mes correcto. Oprima para guardar el mes y pasar a configurar el día. El día parpadea. -
Page 59: Unidades De Medida
Unidades de medida Aparece la unidad de medida configurada de fábrica y esa configuración no se puede cambiar. Comuníquese con Atención al Cliente para obtener más información. Oprima para volver a la configuración de la señal acústica, u oprima sin soltar para apagar el medidor. -
Page 60: Calibración Del Medidor Para Realizar Pruebas De Glucosa
Calibración del medidor para realizar pruebas de glucosa Extraiga el calibrador de glucosa (blanco) de la caja nueva de tiras de prueba. Desprenda la cubierta transparente desde la esquina con tres bordes para abrir el paquete del calibrador. IMPORTANTE: Utilice solamente el calibrador empacado en la caja de tiras de prueba que esté... - Page 61 Confirme el número de LOT (LOTE) Verifique que el número de LOT (LOTE) coincida con todas las siguientes áreas: • Pantalla del medidor • IMPORTANTE: No deseche el calibrador hasta Calibrador de tiras de prueba • que haya usado todas las tiras de prueba de la Instrucciones de uso de las tiras de prueba caja.
- Page 62 Recuerde el número de LOT (LOTE) Oprima y continúe oprimiendo hasta que todos los siguientes elementos aparezcan en la pantalla: • Verificación de la pantalla • Número de LOT (LOTE) de la glucosa • Fecha y hora de la calibración de glucosa más reciente Número de ¿Qué...
-
Page 63: Pruebas De Glucosa En Sangre
Pruebas de glucosa en sangre Notas importantes sobre la realización de la prueba • Utilice el medidor dentro del rango de funcionamiento de las tiras de prueba • Utilice la tira de prueba inmediatamente después de sacarla de su envoltura de 13758 aluminio 2012/03... -
Page 64: Cómo Realizar Una Prueba De Glucosa En Sangre
Cómo realizar una prueba de glucosa en sangre Rompa la envoltura de aluminio de la tira de prueba para abrirla por el corte de apertura y rasgue hacia abajo para extraer la tira de prueba. Introduzca la tira de prueba Con las barras de contacto (las 3 líneas negras) hacia arriba, introduzca la tira de prueba en el medidor hasta el fondo. - Page 65 Luego, aparece el número de LOT (LOTE) de la caja de tiras de prueba que está usando. Los símbolos de Aplicar muestra también aparecen para indicar que el medidor está listo para que aplique una muestra a la tira de prueba. Obtenga una muestra de sangre Asegúrese de que el sitio donde va a tomar la muestra esté...
- Page 66 Mantenga el área blanca en contacto con la gota de sangre hasta que el medidor emita un sonido (si la señal acústica está encendida) y la barra de estado aparezca en la pantalla. Eso indica que la tira de prueba absorbió suficiente sangre.
-
Page 67: Significado De Los Resultados De Las Pruebas De Glucosa En Sangre
Significado de los resultados de las pruebas de glucosa en sangre Resultados altos y bajos de glucosa en sangre IMPORTANTE: El medidor muestra resultados El medidor muestra los resultados en mg/dL. entre 20 y 500 mg/dL. Los resultados de La unidad de medida está preconfigurada y glucosa en sangre bajos o altos pueden esa configuración no se puede cambiar. - Page 68 Medidor: Pantalla ¿Qué significa? ¿Qué hacer? El nivel de glucosa en Verifique las cetonas en sangre. sangre es alto Aparece cuando el resultado es: ≥ 300 mg/dL Glucosa en sangre Repita la prueba con una tira de prueba nueva. demasiado alta Revise las cetonas en sangre.
-
Page 69: Preparación Del Medidor Para Realizar La Prueba De Cetonas
Preparación del medidor para realizar la prueba de cetonas Calibración Calibre el medidor para: • Coincidir con las tiras de prueba que se están usando • Obtener resultados precisos Será necesario que realice la calibración: • Cuando use el medidor por primera vez •... - Page 70 Prepare el medidor Sostenga el calibrador con el número del LOT/CODE (LOTE/CODIGO) de cara a usted. Introduzca el calibrador en el medidor hasta el tope. Esto encenderá el medidor. Esta pantalla siempre aparece cuando el medidor está encendido. No use el medidor si la pantalla de verificación no coincide exactamente con el ejemplo.
- Page 71 Confirme el número de LOT/CODE (LOTE/CODIGO) Verifique que el número de LOT/CODE (LOTE/CODIGO) coincida con todas las siguientes áreas: • Pantalla del medidor • IMPORTANTE: No deseche el calibrador Calibrador de tiras de prueba • hasta que haya usado todas las tiras de Instrucciones de uso de las tiras de prueba prueba de la caja.
- Page 72 Recuerde el número de LOT/CODE (LOTE/CODIGO) Oprima y continúe oprimiendo hasta que todos los siguientes elementos aparezcan en la pantalla: • Verificación de la pantalla • Número de LOT (LOTE) de la glucosa • Fecha y hora de la calibración de glucosa más reciente Después de que aparezca el último elemento, oprima para mostrar:...
-
Page 73: Pruebas De Cetonas En Sangre
Pruebas de cetonas en sangre Notas importantes sobre la realización de la prueba • Utilice el medidor dentro del rango de funcionamiento de las tiras de prueba • 12345 Utilice la tira de prueba inmediatamente después de sacarla de la envoltura 2012/ 03 de aluminio •... -
Page 74: Sitio De Prueba
Sitio de prueba Nota: Utilice muestras de sangre de las yemas de los dedos para realizar la prueba de cetonas en sangre; consulte las instrucciones de uso de la tira de prueba para obtener información acerca de los tipos adicionales de muestras de sangre. Yemas de los dedos Cómo realizar una prueba de cetona en sangre... - Page 75 Esta pantalla siempre aparece cuando el medidor está encendido. No use el medidor si la pantalla de verificación no coincide exactamente con el ejemplo. Comuníquese con Atención al Cliente. Consulte la sección “Preparación del medidor para realizar pruebas de glucosa” para obtener más información.
- Page 76 Aplique sangre a la tira de prueba Ponga el área blanca del extremo de la tira de prueba en contacto con la gota de sangre. La tira de prueba absorbe la sangre. IMPORTANTE: Si la cuenta regresiva no comienza, es posible que no haya aplicado suficiente sangre a la tira de prueba.
-
Page 77: Significado De Los Resultados De Las Pruebas De Cetona En Sangre
Vea el resultado El medidor emite un sonido (si la señal acústica está encendida) cuando el resultado y aparecen en la pantalla. La prueba ha finalizado (como se muestra en el ejemplo). El resultado se almacena en la memoria. Apague el medidor Use la envoltura de aluminio abierta para extraer la tira de prueba usada. - Page 78 Se espera que las cetonas en sangre estén por debajo de 0.6 mmol/L. Los niveles altos de cetonas en sangre pueden ser causados por enfermedad, ayuno, ejercicio vigoroso o niveles de glucosa en sangre fuera de control. Repita la prueba de cetonas en sangre utilizando una nueva tira de prueba de cetonas en sangre cuando: •...
-
Page 79: Soluciones De Control De Glucosa Y Cetonas Medisense
Medidor: Pantalla ¿Qué significa? ¿Qué hacer? Nivel muy alto de cetonas en Repita la prueba con una tira de prueba nueva. Si el resultado es HI (ALTO), comuníquese de sangre Aparece cuando inmediato con su médico. el resultado es: Es posible que haya algún >... -
Page 80: Notas Importantes Sobre La Realización De La Prueba De La Solución De Control
Notas importantes sobre la realización de la prueba de la solución de control • Utilice solamente soluciones de control para glucosa y cetonas de MediSense con el medidor • Coloque de nuevo la tapa y cierre bien el frasco después de usarla No use la solución de control después de su fecha de vencimiento. -
Page 81: Cómo Realizar Una Prueba De La Solución De Control
Cómo realizar una prueba de la solución de control Rompa la envoltura de aluminio de la tira de prueba para abrirla por el corte de apertura y rasgue hacia abajo para extraer la tira de prueba. Introduzca la tira de prueba Con las barras de contacto (las 3 líneas negras) hacia arriba, introduzca la tira de prueba en el medidor hasta el fondo. - Page 82 A continuación, aparecen la hora y la fecha (si están configuradas). A continuación aparece el número de LOT (LOTE) de la caja de tiras de prueba que está usando. También aparecen los símbolos de aplicar sangre. Nota: aparecerán si realiza una prueba de la solución de control de cetonas.
- Page 83 Mantenga el área blanca en contacto con la gota de solución de control hasta que el medidor emita un sonido (si la señal acústica está encendida) y la barra de estado aparezca en la pantalla. Eso indica que la tira de prueba absorbió suficiente solución de control.
-
Page 84: Manejo De Resultados
Compare el resultado de la solución de control con el rango impreso en las instrucciones de uso de las tiras de prueba para glucosa en sangre o cetonas en sangre. El resultado debe encontrarse dentro del rango. Los resultados fuera del rango pueden deberse, entre otras, a las siguientes causas: •... - Page 85 Esta pantalla siempre aparece cuando el medidor está encendido. No use el medidor si la pantalla de verificación no coincide exactamente con el ejemplo. Comuníquese con el departamento de Atención al Cliente. Consulte la sección “Preparación del medidor para realizar pruebas de glucosa” para obtener más información.
- Page 86 Oprima para revisar el resultado anterior. Repita este paso para cada resultado que desee revisar. Nota: Para salir de la memoria del medidor en cualquier momento, oprima sin soltar Estos símbolos aparecen en la pantalla cuando no hay resultados anteriores para ver.
-
Page 87: Repaso De Los Promedios De Glucosa En Sangre
Repaso de los promedios de glucosa en sangre IMPORTANTE: • Configure la fecha y la hora antes de realizar las pruebas para poder ver los promedios • Los promedios no incluyen los resultados de las pruebas de la solución de control de glucosa y cetonas, los resultados de cetonas en sangre y los resultados que no muestran la hora y la fecha •... - Page 88 Oprima para ver el promedio de 14 días. Oprima para ver el promedio de 30 días. Oprima para volver al promedio de 7 días, u Oprima para volver a la pantalla de memoria. Oprima sin soltar para apagar el medidor. El medidor se apaga después de 30 segundos de inactividad.
-
Page 89: Transferencia De Los Resultados A Una Computadora
Transferencia de los resultados a una computadora Para transferir los resultados de las pruebas a una computadora, se necesita un sistema compatible de administración de datos. Si desea más información, visite nuestro sitio en Internet o llame al departamento de Atención al Cliente. Mensajes de error Mensaje ¿Qué... - Page 90 Mensaje ¿Qué significa? ¿Qué hacer? Es posible que el nivel 1. Repita la prueba con una tira de prueba nueva. de glucosa en sangre sea 2. Si el error aparece de nuevo, comuníquese de inmediato con su médico. demasiado alto para que el sistema lo lea Quizás haya un problema con la tira de prueba...
-
Page 91: Resolución De Problemas
Mensaje ¿Qué significa? ¿Qué hacer? Error del medidor 1. Apague el medidor. 2. Repita los pasos previos para realizar la prueba. 3. Si el error vuelve a aparecer, llame al departamento de Atención al Cliente. Resolución de problemas ¿Qué significa? ¿Qué... - Page 92 ¿Qué significa? ¿Qué hacer? La prueba La muestra de sangre es 1. Consulte las instrucciones de uso de las tiras demasiado pequeña de prueba para saber cómo volver a aplicar la no comienza muestra. después de 2. Si la cuenta regresiva aún no comienza, que se aplica extraiga la tira usada y deséchela la muestra de...
-
Page 93: Mantenimiento Del Medidor
Mantenimiento del medidor Cambio de la pila El medidor viene con una pila (de botón) de litio CR 2032 instalada. Suministra energía para realizar aproximadamente 1,000 pruebas. • Aparece en la pantalla cuando la pila se está agotando. • Hace que la luz de la pantalla no se encienda. Cuando el símbolo aparece, puede seguir usando el medidor y los resultados serán exactos. - Page 94 2. Si el medidor incluye una lengüeta plástica, tire de la lengüeta para sacar la pila. Si el medidor no trae una lengüeta plástica, empuje la pila hacia arriba para sacarla. 3. Introduzca una nueva pila (de botón) de litio CR 2032: con el símbolo (+) hacia arriba.
-
Page 95: Limpieza Del Medidor
Limpieza del medidor Evite que entre la suciedad, el polvo, la sangre, la solución de control o los líquidos en el puerto para las tiras de control del medidor. Limpie la parte exterior del medidor utilizando un paño húmedo y jabón suave. Otras soluciones de limpieza aceptables incluyen: Blanqueador al 10%, alcohol isopropílico al 70% o amoníaco al 10% IMPORTANTE:... -
Page 96: Especificaciones
Especificaciones Dimensiones Longitud 7.47 cm Ancho Parte superior 5.33 cm Parte inferior 4.32 cm Profundidad 1.63 cm Peso 40 a 46 gramos Fuente de energía 1 pila (de botón) de litio CR 2032 Duración de la pila Aproximadamente 1,000 pruebas Hasta 450 eventos, incluidos los resultados de pruebas de la solución Memoria de control, de glucosa en sangre y de cetona en sangre, y otra... - Page 97 Solución de control Consulte las instrucciones de uso de la solución de control. Método de ensayo Electroquímica amperométrica Rango de ensayo Consulte las instrucciones de uso de las tiras de prueba de glucosa en Glucosa en sangre sangre. Consulte las instrucciones de uso de las tiras de prueba de cetonas en Cetona en sangre sangre.
- Page 98 Señal acústica Encendido: Cuando comienza y finaliza la cuenta regresiva. Encendido: Permanece encendida durante la cuenta regresiva y se apaga 30 segundos después de que aparecen Luz de la pantalla los resultados. Permanece encendida mientras se transfieren los resultados a una computadora. Puerto de datos Sí...
-
Page 99: Referencias
Referencias Schade DS, Eaton RP. Metabolic and clinical significance of ketosis. Special Topics in Endocrinology and Metabolism 1982; 4:1–27. Wiggam MI, O’Kane MJ, Harper R, Atkinson AB, Hadden DR, Trimble ER, Bell PM. Treatment of diabetic ketoacidosis using normalization of blood 3-hydroxybutyrate concentration as the endpoint of emergency management. -
Page 100: Declaración De Garantía
única obligación de Abbott es remplazar el Medidor, sin costo alguno, por el mismo Medidor o uno similar, según lo que Abbott decida a su exclusivo criterio. Abbott garantiza el funcionamiento del Medidor de conformidad con sus especificaciones si se utiliza... - Page 101 O SIN ERRORES. Limitación de responsabilidad HASTA DONDE SEA POSIBLE DE CONFORMIDAD CON LAS LEYES, ABBOTT NO SERÁ RESPONSABLE POR NINGÚN DAÑO FORTUITO O CONSECUENTE RESULTANTE DIRECTA O INDIRECTAMENTE DEL USO DEL MEDIDOR O DE LA INCAPACIDAD DEL MEDIDOR PARA FUNCIONAR DE CONFORMIDAD CON LAS ESPECIFICACIONES.
- Page 102 24 horas del día en el 1-800-527-3339 1-800-527-3339 or visit us online at: o visítenos en: AbbottDiabetesCare.com AbbottDiabetesCare.com Manufacturer | Fabricante: FreeStyle and other brand marks are trademarks of Abbott Diabetes Care Inc. in various jurisdictions. ©2010-2019 Abbott ART27387-001 Rev. A 12/19...
Need help?
Do you have a question about the FreeStyle Precision H and is the answer not in the manual?
Questions and answers