Abbott FreeStyle Libre Interactive Tutorial
Hide thumbs
Also See for FreeStyle Libre:
- User manual (124 pages) ,
- Manual (57 pages) ,
- Quick start manual (18 pages)

Related Manuals for Abbott FreeStyle Libre


Summary of Contents for Abbott FreeStyle Libre
- Page 1 Product Overview Reader Sensor Product Use More Information Interactive Tutorial Next DOC39658 Rev. B 09/18...
- Page 2 Indications for Use The FreeStyle Libre Flash Glucose Monitoring System is a continuous glucose monitoring (CGM) device indicated for the management of diabetes in persons age 18 and older. It is designed to replace blood glucose testing for diabetes treatment decisions.
- Page 3 When you see the symbol, you must check your blood glucose with a blood glucose meter before making any treatment decisions. Sensor readings may not accurately reflect blood glucose levels. If you are using the FreeStyle LibreLink app, you must also have access to a blood glucose monitoring system as the App does not provide one.
- Page 4 After the start-up period, the Sensor can be worn for up to the wear duration specified in your Sensor Kit's product insert. Some individuals may be sensitive to the adhesive that keeps the Sensor attached to the skin. If you notice significant skin irritation around or under your Sensor, remove the Sensor and stop using the System.
- Page 5 Select an appropriate Sensor site to help the Sensor stay attached to the body and prevent discomfort or skin irritation. Avoid areas with scars, moles, stretch marks, or lumps. Select an area of skin that generally stays flat during normal daily activities (no bending or folding).
- Page 6 The FreeStyle Libre Reader has a built-in blood glucose meter that is designed to be used only with FreeStyle Precision Neo blood glucose test strips and MediSense Glucose and Ketone Control Solution. Using other test strips with the Reader's built-in meter will produce an error or cause the Reader's built-in meter to not turn on or start a test.
- Page 7 Welcome to Your System! The FreeStyle Libre System is a continuous glucose monitoring (CGM) System designed to replace blood glucose testing for diabetes treatment decisions. This Interactive Tutorial will help you learn how to set up and use your new System. Topics include: Product overview Reader setup &...
-
Page 8: System Overview
Product Overview Reader Sensor Product Use More Information System Overview Product Overview The System has two main parts: a disposable Sensor and System Overview either a handheld Reader or mobile app. The Sensor is Getting to Know the Reader worn on the back of the upper arm and does not need to be calibrated with blood glucose values. - Page 9 Product Overview Reader Sensor Product Use More Information System Overview The System has two main parts: a disposable Sensor and either a handheld Reader or mobile app. The Sensor is worn on the back of the upper arm and does not need to be calibrated with blood glucose values.
- Page 10 Product Overview Reader Sensor Product Use More Information Getting to Know the Reader The Reader scans the Sensor and provides glucose readings. It can store approximately 90-days of glucose history as well as notes about activities, insulin, meals, and exercising. When scanning, the Sensor automatically transmits data to the Reader. The Reader is compact, lightweight, and easy to hold.
- Page 11 Product Overview Reader Sensor Product Use More Information Getting to Know FreeStyle LibreLink App The App performs some similar functions to the Reader. You can use it to start a Sensor, get glucose readings from the Sensor, and store your glucose history and notes you enter. FreeStyle LibreLink app is available for download from the App Store.
-
Page 12: Sensor Kit
Product Overview Reader Sensor Product Use More Information Sensor Kit The Sensor automatically measures and continuously stores glucose readings for 8 hours. The Sensor Kit has two parts: a Sensor Pack and a Sensor Applicator. Once you have assembled the Sensor, you will apply it to the back of your upper arm. -
Page 13: Sensor Glucose Readings
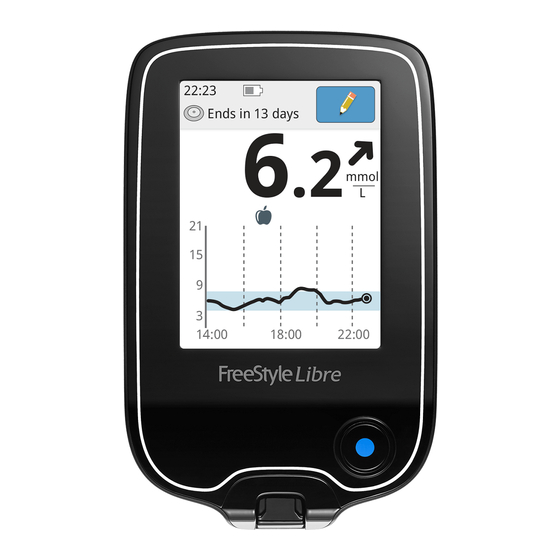
Product Overview Reader Sensor Product Use More Information Sensor Glucose Readings The Sensor Glucose Reading screen appears after you use your device to scan your Sensor. Your Reading includes your Current Glucose, a Glucose Trend Arrow indicating which way your glucose is going, and a graph of your current and stored glucose readings. - Page 14 Product Overview Reader Sensor Product Use More Information Sensor Glucose Readings What you see on the App Previous Next...
- Page 15 Product Overview Reader Sensor Product Use More Information First Time Reader Setup Reader Complete the setup to use the Reader to check your Sensor First Time Reader Setup glucose readings or use the Reader's built-in meter. Reader Home Screen How to do it: Setting Reminders Press the Home Button to tum on the Reader.
- Page 16 Product Overview Reader Sensor Product Use More Information First Time Reader Setup Complete the setup to use the Reader to check your Sensor glucose readings or use the Reader's built-in meter. How to do it: Press the Home Button to tum on the Reader. If prompted, use the touchscreen to select your preferred language for the Reader.
- Page 17 Product Overview Reader Sensor Product Use More Information Note First Time Reader Setup Complete the setup to use the Reader to check your Sensor Use the pad of your finger. Do NOT use your fingernail or any glucose readings or use the Reader's built-in meter. other object on the screen.
- Page 18 Product Overview Reader Sensor Product Use More Information Caution First Time Reader Setup Complete the setup to use the Reader to check your Sensor It is very important to set the time and date correctly. These glucose readings or use the Reader's built-in meter. values affect the Reader data and settings.
- Page 19 Product Overview Reader Sensor Product Use More Information Note First Time Reader Setup Complete the setup to use the Reader to check your Sensor Your Target Glucose Range is displayed on glucose graphs on glucose readings or use the Reader's built-in meter. the Reader and used to calculate your Time In Target.
- Page 20 Product Overview Reader Sensor Product Use More Information Reader Home Screen The Reader Home Screen provides access to information about glucose readings and the System. Press the Home Button to go to the Home Screen from any other screen. Previous Next...
-
Page 21: Setting Reminders
Product Overview Reader Sensor Product Use More Information Setting Reminders Use Reminders to remember when to check glucose, take insulin, or as a general alarm. How to do it: Touch the symbol on the Home Screen. Touch to select which Type of reminder to set: Check Glucose, Take Insulin, or Alarm. - Page 22 Product Overview Reader Sensor Product Use More Information Note Setting Reminders Use Reminders to remember when to check glucose, take You can set reminders for a specific time (e.g. 8:30 am) or as a insulin, or as a general alarm. timer (e.g.
-
Page 23: Changing The Reader Settings
Product Overview Reader Sensor Product Use More Information Changing the Reader Settings Many System features can be customized from the Settings menu. How to do it: Touch the Settings Symbol on the Home Screen. Touch the arrows to scroll up or down. Touch the setting you want to change: Sounds, Target Range, Control Solution Test, Time &... - Page 24 LibreView Data Management Software is developed and distributed by Newyu, Inc. Use of FreeStyle LibreLink requires registration with LibreView, a service provided by Abbott and Newyu, Inc. Confirm your glucose unit of measure and tap NEXT. Set your Target Glucose Range and tap NEXT. Work with your health care professional to determine your Target Glucose Range.
- Page 25 LibreView Data Management Software is developed and distributed by Newyu, Inc. Use of FreeStyle LibreLink requires registration with LibreView, a service provided by Abbott and Newyu, Inc. Confirm your glucose unit of measure and tap NEXT. Set your Target Glucose Range and tap NEXT. Work with your health care professional to determine your Target Glucose Range.
- Page 26 LibreView Data Management Software is developed and distributed by Newyu, Inc. Use of FreeStyle LibreLink requires registration with LibreView, a service provided by Abbott and Newyu, Inc. Confirm your glucose unit of measure and tap NEXT. Set your Target Glucose Range and tap NEXT. Work with your health care professional to determine your Target Glucose Range.
- Page 27 LibreView Data Management Software is developed and distributed by Newyu, Inc. Use of FreeStyle LibreLink requires registration with LibreView, a service provided by Abbott and Newyu, Inc. Confirm your glucose unit of measure and tap NEXT. Set your Target Glucose Range and tap NEXT. Work with your health care professional to determine your Target Glucose Range.
- Page 28 Product Overview Reader Sensor Product Use More Information App Home Screen The App Home Screen provides access to information about glucose readings and the App. To return to the Home Screen from another screen, go to the Main Menu and tap Home. Previous Next...
- Page 29 Product Overview Reader Sensor Product Use More Information Setting Reminders Use Reminders to remember when to check glucose, take insulin, or as a general alarm. How to do it: Go to the Main Menu and tap Reminders. Tap ADD REMINDER. Name your reminder.
- Page 30 Product Overview Reader Sensor Product Use More Information Note Setting Reminders Use Reminders to remember when to check glucose, take If you would like the reminder to repeat, tap the slider to the right. insulin, or as a general alarm. You can also select which days you would like to receive the reminder.
- Page 31 Product Overview Reader Sensor Product Use More Information Note Setting Reminders Use Reminders to remember when to check glucose, take There is one default reminder to help you remember to scan insulin, or as a general alarm. your Sensor. This Scan Sensor reminder can be changed or disabled but cannot be deleted.
-
Page 32: Changing App Settings
Product Overview Reader Sensor Product Use More Information Changing App Settings How to do it: Go to the Main Menu to access the App settings. Unit of Measurement - View the glucose unit of measure used in the App. Target Glucose Range - Set the target range you want to be displayed on the App glucose graph. It is also used to calculate your Time In Target. - Page 33 Product Overview Reader Sensor Product Use More Information Application Site Selection Sensor Apply Sensors only on the back of your upper Application Site Selection arm. If placed in other areas, the Sensor may Preparing the Application Site not function properly and could give inaccurate readings.
- Page 34 Product Overview Reader Sensor Product Use More Information Application Site Selection Apply Sensors only on the back of your upper arm. If placed in other areas, the Sensor may not function properly and could give inaccurate readings. The application of the Sensor is not approved for other sites.
- Page 35 Product Overview Reader Sensor Product Use More Information Caution Application Site Selection Apply Sensors only on the back of your upper Intense exercise may cause your Sensor to loosen due to sweat arm. If placed in other areas, the Sensor may or movement of the Sensor.
- Page 36 Product Overview Reader Sensor Product Use More Information Preparing the Application Site Clean application site with an alcohol wipe and allow site to dry before proceeding. This helps the Sensor stay attached to your body. 0:00 / 0:10 Previous Next...
- Page 37 Product Overview Reader Sensor Product Use More Information Note Preparing the Application Site Clean application site with an alcohol wipe and The area MUST be clean and dry, or the Sensor may not stick to allow site to dry before proceeding. This helps the site.
- Page 38 Product Overview Reader Sensor Product Use More Information Preparing the Sensor Applicator To ensure glucose readings are accurate, make certain the Sensor Pack and Sensor Applicator codes match. How to do it: Open the Sensor Pack by peeling the lid off completely.
- Page 39 Product Overview Reader Sensor Product Use More Information Caution Preparing the Sensor Applicator To ensure glucose readings are accurate, make The Sensor Pack and Sensor Applicator are packaged as a set certain the Sensor Pack and Sensor Applicator codes (separately from the Reader) and have the same Sensor code. match.
- Page 40 Product Overview Reader Sensor Product Use More Information Caution Preparing the Sensor Applicator To ensure glucose readings are accurate, make Do NOT use if the Sensor Pack or the Sensor Applicator seem to certain the Sensor Pack and Sensor Applicator codes be damaged or already opened.
- Page 41 Product Overview Reader Sensor Product Use More Information Caution Preparing the Sensor Applicator To ensure glucose readings are accurate, make The Sensor Applicator now contains a needle. Do NOT touch certain the Sensor Pack and Sensor Applicator codes inside the Sensor Applicator or put it back into the Sensor Pack. match.
-
Page 42: Applying Your Sensor
Product Overview Reader Sensor Product Use More Information Applying Your Sensor How to do it: Place the Sensor Applicator over the prepared site and push down firmly to apply the Sensor to your body. Gently pull the Sensor Applicator away from your body. - Page 43 Product Overview Reader Sensor Product Use More Information Caution Applying Your Sensor Do NOT push down on the Sensor Applicator until placed over How to do it: prepared site to prevent unintended results or injury. Place the Sensor Applicator over the prepared site and push down firmly to apply the Sensor to your body.
- Page 44 Product Overview Reader Sensor Product Use More Information Note Applying Your Sensor Applying the Sensor may cause bruising or bleeding. If there is How to do it: bleeding that does not stop, remove the Sensor, and contact your health care professional. Place the Sensor Applicator over the prepared site and push down firmly to apply the Sensor to your body.
- Page 45 Product Overview Reader Sensor Product Use More Information Starting Your Sensor Start your Sensor with the Reader if you would like to use the Reader to check your glucose. If you want to also use the App with the Sensor, scan the Sensor with the App after starting it with the Reader.
- Page 46 Product Overview Reader Sensor Product Use More Information Note Starting Your Sensor Start your Sensor with the Reader if you would like to If the Sensor is not successfully scanned within 15 use the Reader to check your glucose. If you want to seconds, the Reader displays a prompt to scan the Sensor also use the App with the Sensor, scan the Sensor again.
- Page 47 Product Overview Reader Sensor Product Use More Information Starting Your Sensor Start the Sensor with the App if you would like to only use the App to check your glucose. If you want to use both the Reader and the App to check your glucose, you must start the Sensor with the Reader first.
- Page 48 Product Overview Reader Sensor Product Use More Information Note Starting Your Sensor Start the Sensor with the App if you would like to only use the You can either tap the blue box on the Home Screen or App to check your glucose. If you want to use both the Reader the top right.
- Page 49 Product Overview Reader Sensor Product Use More Information Note Starting Your Sensor Start the Sensor with the App if you would like to only use the If your Sensor is not successfully scanned, you may receive App to check your glucose. If you want to use both the Reader a Scan Error.
-
Page 50: Removing Your Sensor
Product Overview Reader Sensor Product Use More Information Removing Your Sensor The Sensor automatically stops working after the wear duration specified in the Sensor Kit's product insert and must be replaced. Replace the Sensor if you notice any irritation or discomfort at the application site or if your device reports a problem with the Sensor currently in use. - Page 51 Product Overview Reader Sensor Product Use More Information Note Removing Your Sensor The Sensor automatically stops working after the Any remaining adhesive residue on the skin can be removed with wear duration specified in the Sensor Kit's product warm soapy water or isopropyl alcohol. insert and must be replaced.
- Page 52 Product Overview Reader Sensor Product Use More Information Checking Glucose with a Sensor Product Use Checking Glucose with a Sensor How to do it with the Reader: Understanding Sensor Readings - Reader Press the Home Button to turn on the Reader or touch Check Understanding Sensor Readings - App Glucose on the Home Screen.
- Page 53 Product Overview Reader Sensor Product Use More Information Checking Glucose with a Sensor How to do it with the Reader: Press the Home Button to turn on the Reader or touch Check Glucose on the Home Screen. Hold the Reader within 1.5 inches (4 cm) of the Sensor to scan it.
- Page 54 Product Overview Reader Sensor Product Use More Information Note Checking Glucose with a Sensor If the Sensor is not successfully scanned within 15 seconds, the How to do it with the Reader: Reader displays a prompt to scan the Sensor again. Touch OK to return to the Home Screen and touch Check Glucose to scan Press the Home Button to turn on the Reader or touch Check your Sensor.
- Page 55 Product Overview Reader Sensor Product Use More Information Checking Glucose with a Sensor How to do it with the Reader: Press the Home Button to turn on the Reader or touch Check Glucose on the Home Screen. Hold the Reader within 1.5 inches (4 cm) of the Sensor to scan it.
- Page 56 Product Overview Reader Sensor Product Use More Information Checking Glucose with a Sensor How to do it with the App: Tap the scan button Hold the top of your iPhone near the Sensor. Hold still until you hear a tone and/or feel a vibration. This completes the scan.
- Page 57 Product Overview Reader Sensor Product Use More Information Note Checking Glucose with a Sensor If your Sensor is not successfully scanned, you may receive a How to do it with the App: Scan Error. Tap the scan button and scan again. Tap the scan button Hold the top of your iPhone near the Sensor.
- Page 58 Product Overview Reader Sensor Product Use More Information Understanding Sensor Readings - Reader Sensor Glucose Reading Trend Arrows Going High/Low Reading High/Low Reading HI/LO Reading Note: While Sensor glucose readings are gathered in the System range of 40-500 mg/dL, the graph display range is 0-350 mg/dL for ease of review on screen.
- Page 59 Product Overview Reader Sensor Product Use More Information Understanding Sensor Readings - Reader Sensor Glucose Reading Trend Arrows Going High/Low Reading High/Low Reading HI/LO Reading The Glucose Trend Arrow gives an indication of the direction Glucose is rising quickly (more than 2 mg/dL per your glucose is going.
- Page 60 Product Overview Reader Sensor Product Use More Information Understanding Sensor Readings - Reader Sensor Glucose Reading Trend Arrows Going High/Low Reading High/Low Reading HI/LO Reading If your glucose is projected to be higher than 240 mg/dL or lower than 70 mg/dL within 15 minutes, you will see a or a message on the screen.
- Page 61 Product Overview Reader Sensor Product Use More Information Understanding Sensor Readings - Reader Sensor Glucose Reading Trend Arrows Going High/Low Reading High/Low Reading HI/LO Reading If your glucose is higher than 240 mg/dL or lower than 70 mg/dL, you will see a message on the screen.
- Page 62 Product Overview Reader Sensor Product Use More Information Understanding Sensor Readings - Reader Sensor Glucose Reading Trend Arrows Going High/Low Reading High/Low Reading HI/LO Reading If LO appears on the Reader, your reading is lower than 40 mg/dL. If HI appears on the Reader, your reading is higher than 500 mg/dL.
- Page 63 Product Overview Reader Sensor Product Use More Information Understanding Sensor Readings - App Sensor Glucose Reading Trend Arrows Going High/Low Reading High/Low Reading HI/LO Reading Note: The glucose graph in the App will scale to 500 mg/dL to accommodate glucose readings above 350 mg/dL. Note: The symbol may appear, indicating the smartphone's time was changed.
- Page 64 Previous Next...
- Page 65 Product Overview Reader Sensor Product Use More Information Understanding Sensor Readings - App Sensor Glucose Reading Trend Arrows Going High/Low Reading High/Low Reading HI/LO Reading The Glucose Trend Arrow gives an indication of the direction Glucose is rising quickly (more than 2 mg/dL per your glucose is going.
- Page 66 Product Overview Reader Sensor Product Use More Information Understanding Sensor Readings - App Sensor Glucose Reading Trend Arrows Going High/Low Reading High/Low Reading HI/LO Reading If your glucose is projected to be higher than 240 mg/dL or lower than 70 mg/dL within 15 minutes, you will see a or a message on the screen.
- Page 67 Product Overview Reader Sensor Product Use More Information Understanding Sensor Readings - App Sensor Glucose Reading Trend Arrows Going High/Low Reading High/Low Reading HI/LO Reading If your glucose is higher than 240 mg/dL or lower than 70 mg/dL, you will see a message on the screen.
- Page 68 Product Overview Reader Sensor Product Use More Information Understanding Sensor Readings - App Sensor Glucose Reading Trend Arrows Going High/Low Reading High/Low Reading HI/LO Reading If LO appears, your reading is lower than 40 mg/dL. If HI appears, your reading is higher than 500 mg/dL. You can touch the symbol for more information.
- Page 69 Product Overview Reader Sensor Product Use More Information Treatment Decisions Guide Using Sensor Glucose Readings for treatment decisions Reader Previous Next...
- Page 70 Product Overview Reader Sensor Product Use More Information Treatment Decisions Guide WARNING: The System can replace blood glucose testing except in a few situations. These are the times when you need to do a blood glucose test before deciding what to do or what treatment decision to make as Sensor readings may not accurately reflect blood glucose levels.
- Page 71 Product Overview Reader Sensor Product Use More Information Treatment Decisions Guide – Example Scenarios When You Wake-Up Before Breakfast After Breakfast Lunch After Exercising Before Dinner After Dinner What you see: Reader When you wake‐up, your current glucose is 65 mg/dL and the trend arrow shows it is changing slowly There is a (Reader) /...
- Page 72 Product Overview Reader Sensor Product Use More Information Treatment Decisions Guide – Example Scenarios When You Wake-Up Before Breakfast After Breakfast Lunch After Exercising Before Dinner After Dinner What you see: Before breakfast, your Reader current glucose is 115 mg/dL. The graph shows that your glucose is going up and so does the trend arrow What it means:...
- Page 73 Product Overview Reader Sensor Product Use More Information Treatment Decisions Guide – Example Scenarios When You Wake-Up Before Breakfast After Breakfast Lunch After Exercising Before Dinner After Dinner What you see: After breakfast, your Reader current glucose is 108 mg/dL. The trend arrow shows it is going down quickly .
- Page 74 Product Overview Reader Sensor Product Use More Information Treatment Decisions Guide – Example Scenarios When You Wake-Up Before Breakfast After Breakfast Lunch After Exercising Before Dinner After Dinner What you see: What it means: When you checked your glucose before lunch, it was 90 mg/dL and rising. Before Don't take a correction dose within 2 eating lunch, you took enough insulin to cover the meal and a little more since hours of your meal dose.
- Page 75 Product Overview Reader Sensor Product Use More Information Treatment Decisions Guide – Example Scenarios When You Wake-Up Before Breakfast After Breakfast Lunch After Exercising Before Dinner After Dinner What you see: After exercising, you are Reader feeling shaky, sweaty, and dizzy – symptoms you generally get when you have low glucose.
- Page 76 Product Overview Reader Sensor Product Use More Information Treatment Decisions Guide – Example Scenarios When You Wake-Up Before Breakfast After Breakfast Lunch After Exercising Before Dinner After Dinner What you see: Before dinner, your Reader current glucose is 134 mg/dL. The graph shows that your glucose is going down and so does the trend arrow...
- Page 77 Product Overview Reader Sensor Product Use More Information Treatment Decisions Guide – Example Scenarios When You Wake-Up Before Breakfast After Breakfast Lunch After Exercising Before Dinner After Dinner What you see: After dinner, your Reader current glucose is 215 mg/dL but there is no trend arrow.
- Page 78 Product Overview Reader Sensor Product Use More Information Treatment Decisions Guide – Knowledge Check 1. What would you do if you scanned your Sensor and saw this symbol with your reading? Do not treat based on this reading – check my blood glucose with a test strip Make a treatment decision Previous Next...
- Page 79 Product Overview Reader Sensor Product Use More Information Treatment Decisions Guide – Knowledge Check 1. What would you do if you scanned your Sensor and saw this symbol with your reading? Do not treat based on this reading – check my blood glucose with a test strip Make a treatment decision Incorrect.
- Page 80 Product Overview Reader Sensor Product Use More Information Treatment Decisions Guide – Knowledge Check 1. What would you do if you scanned your Sensor and saw this symbol with your reading? Do not treat based on this reading – check my blood glucose with a test strip Make a treatment decision Correct! Anytime you see this symbol, check your blood glucose with a test strip before making treatment...
- Page 81 Product Overview Reader Sensor Product Use More Information Treatment Decisions Guide – Knowledge Check 2. What would you do if you are getting ready to eat lunch, you scan your Sensor and you get a reading that your glucose level is above your target range and changing slowly Do not treat based on this reading –...
- Page 82 Product Overview Reader Sensor Product Use More Information Treatment Decisions Guide – Knowledge Check 2. What would you do if you are getting ready to eat lunch, you scan your Sensor and you get a reading that your glucose level is above your target range and changing slowly Do not treat based on this reading –...
- Page 83 Product Overview Reader Sensor Product Use More Information Treatment Decisions Guide – Knowledge Check 2. What would you do if you are getting ready to eat lunch, you scan your Sensor and you get a reading that your glucose level is above your target range and changing slowly Do not treat based on this reading –...
- Page 84 Product Overview Reader Sensor Product Use More Information Treatment Decisions Guide – Knowledge Check 3. What would you do if your body was telling you that your glucose was low, but when you scanned your Sensor your reading was high? Do not treat based on this reading –...
- Page 85 Product Overview Reader Sensor Product Use More Information Treatment Decisions Guide – Knowledge Check 3. What would you do if your body was telling you that your glucose was low, but when you scanned your Sensor your reading was high? Do not treat based on this reading –...
- Page 86 Product Overview Reader Sensor Product Use More Information Treatment Decisions Guide – Knowledge Check 3. What would you do if your body was telling you that your glucose was low, but when you scanned your Sensor your reading was high? Do not treat based on this reading –...
- Page 87 Product Overview Reader Sensor Product Use More Information Treatment Decisions Guide – Knowledge Check 4. “Insulin stacking” is when you take two or more doses of rapid‐acting insulin too close together. Which of the following scenarios would avoid “insulin stacking”? You took your full breakfast insulin dose and ate breakfast.
- Page 88 Product Overview Reader Sensor Product Use More Information Treatment Decisions Guide – Knowledge Check 4. “Insulin stacking” is when you take two or more doses of rapid‐acting insulin too close together. Which of the following scenarios would avoid “insulin stacking”? You took your full breakfast insulin dose and ate breakfast.
- Page 89 Product Overview Reader Sensor Product Use More Information Treatment Decisions Guide – Knowledge Check 4. “Insulin stacking” is when you take two or more doses of rapid‐acting insulin too close together. Which of the following scenarios would avoid “insulin stacking”? You took your full breakfast insulin dose and ate breakfast.
- Page 90 Product Overview Reader Sensor Product Use More Information Treatment Decisions Guide – Knowledge Check 5. What would you do if you scanned your Sensor Reader before exercise, and you got this Reading? Do not treat based on this result – check my blood glucose with a test strip. Do something to bring my glucose up, like eat or take glucose tablets.
- Page 91 Product Overview Reader Sensor Product Use More Information Treatment Decisions Guide – Knowledge Check 5. What would you do if you scanned your Sensor Reader before exercise, and you got this Reading? Do not treat based on this result – check my blood glucose with a test strip. Do something to bring my glucose up, like eat or take glucose tablets.
- Page 92 Product Overview Reader Sensor Product Use More Information Treatment Decisions Guide – Knowledge Check 5. What would you do if you scanned your Sensor Reader before exercise, and you got this Reading? Do not treat based on this result – check my blood glucose with a test strip. Do something to bring my glucose up, like eat or take glucose tablets.
- Page 93 Product Overview Reader Sensor Product Use More Information Treatment Decisions Guide – Knowledge Check Congratulations – you have finished the knowledge assessment. Click Next to learn more about the System. Previous Next...
- Page 94 Product Overview Reader Sensor Product Use More Information Checking Glucose with a Test Strip You can use the Reader's built-in meter to check your blood glucose, whether you are wearing a Sensor or not. Be sure to read the test strip instructions for use prior to using the built-in meter. How to do it: Wash your hands with warm soapy water for accurate results.
- Page 95 Intended Use How to do it: The FreeStyle Libre Reader's built-in meter is for use outside the body only (in vitro diagnostic use) in the quantitative Wash your hands with warm soapy water for measurement of glucose in fresh whole blood for self testing by accurate results.
- Page 96 Product Overview Reader Sensor Product Use More Information Note Checking Glucose with a Test Strip You can use the Reader's built-in meter to check your blood glucose, whether you are wearing a Sensor or not. Be sure to read Do not use lotion or cream on the test site. Avoid moles, veins, the test strip instructions for use prior to using the built-in meter.
- Page 97 Product Overview Reader Sensor Product Use More Information Note Checking Glucose with a Test Strip You can use the Reader's built-in meter to check your blood glucose, whether you are wearing a Sensor or not. Be sure to read The Reader's built-in meter turns off after 2 minutes of inactivity. the test strip instructions for use prior to using the built-in meter.
- Page 98 Product Overview Reader Sensor Product Use More Information Checking Glucose with a Test Strip How to do it: Use your lancing device to obtain a blood drop and apply blood to the white area at the end of the test strip. Refer to your lancing device instructions for use if you need help using your lancing device.
- Page 99 Use your lancing device to obtain a blood drop and apply blood to the white area at the end of the test strip. Refer to The FreeStyle Libre Reader's built-in meter is for use outside the your lancing device instructions for use if you need help using body only (in vitro diagnostic use) in the quantitative your lancing device.
- Page 100 Product Overview Reader Sensor Product Use More Information Note Checking Glucose with a Test Strip E-3 means the blood drop is too small, or incorrect test How to do it: procedure, or there may be a problem with the test strip. E-4 means the blood glucose level may be too high to be Use your lancing device to obtain a blood drop and apply read by the System or there may be a problem with the test...
- Page 101 Product Overview Reader Sensor Product Use More Information Checking Glucose with a Test Strip How to do it: After reviewing your result, remove and discard the used test strip according to local regulations. Blood glucose results are marked on the results screen and in the Reader's Logbook with the symbol.
- Page 102 Intended Use After reviewing your result, remove and discard the used test strip according to local The FreeStyle Libre Reader's built-in meter is for use outside the regulations. body only (in vitro diagnostic use) in the quantitative measurement of glucose in fresh whole blood for self testing by Blood glucose results are marked on the results lay users from the fingers.
- Page 103 Product Overview Reader Sensor Product Use More Information Important Checking Glucose with a Test Strip Use only FreeStyle Precision Neo test strips. Other test strips may produce inaccurate results. How to do it: Read all the instructions in this section. Failure to follow instructions may cause incorrect blood glucose results.
- Page 104 Product Overview Reader Sensor Product Use More Information Note Checking Glucose with a Test Strip If you are using the App, you can enter your blood glucose result How to do it: into the App's Logbook. After reviewing your result, remove and discard the used test strip according to local regulations.
-
Page 105: Adding Notes
Product Overview Reader Sensor Product Use More Information Adding Notes Both the Reader and the App let you track food, insulin and exercise. How to do it with the Reader: Press the Home Button to turn on the Reader. Check your glucose. - Page 106 Product Overview Reader Sensor Product Use More Information Note Adding Notes Both the Reader and the App let you track food, insulin and exercise. You can add a note at the time of your glucose reading or within 15 minutes after your reading was obtained. Food and rapid-acting insulin notes are shown on...
- Page 107 Product Overview Reader Sensor Product Use More Information Adding Notes How to do it with the App: Tap the symbol on the My Glucose screen. Select the checkbox next to the note you would like to add. After you check the box, you can add more specific information to your note.
- Page 108 Product Overview Reader Sensor Product Use More Information Note Adding Notes You cannot add a blood glucose result note to a glucose reading. How to do it with the App: See Reviewing History section for how to enter blood glucose results in the App's Logbook.
- Page 109 Product Overview Reader Sensor Product Use More Information Note Adding Notes Notes are shown on your glucose graphs and in your Logbook as How to do it with the App: symbols. See App Symbols section for more information. Tap the symbol on the My Glucose screen.
-
Page 110: Reviewing History
Product Overview Reader Sensor Product Use More Information Reviewing History Reviewing and understanding your glucose history can be an important tool for improving your glucose control. Both the Reader and App store about 90 days of information and have several ways to review your past glucose readings, notes, and other information. - Page 111 Product Overview Reader Sensor Product Use More Information Important Reviewing History Reviewing and understanding your glucose history can be an Work with your health care professional to understand your important tool for improving your glucose control. Both the glucose history. Reader and App store about 90 days of information and have several ways to review your past glucose readings, notes, and other information.
- Page 112 Product Overview Reader Sensor Product Use More Information Reviewing History How to do it with the App: From the Main Menu, tap Logbook to view the Logbook or tap on one of the other history options under Reports. Previous Next...
- Page 113 Product Overview Reader Sensor Product Use More Information Important Reviewing History Work with your health care professional to understand your How to do it with the App: glucose history. From the Main Menu, tap Logbook to view the Logbook or tap on one of the other history options under Reports. Previous Next...
- Page 114 Product Overview Reader Sensor Product Use More Information Reviewing History Summary of History Options - Reader What data is used? What does this show? Example Sensor scan results and blood Shows entries for each time Logbook glucose test results from each you scanned your Sensor or Daily Graph day.
- Page 115 Product Overview Reader Sensor Product Use More Information Reviewing History Summary of History Options - Reader What data is used? What does this show? Example Sensor glucose readings from Shows a graph of your Sensor Logbook each day. glucose readings by day. The Daily Graph blue bar indicates your Target Glucose Range.
- Page 116 Product Overview Reader Sensor Product Use More Information Reviewing History Summary of History Options - Reader What data is used? What does this show? Example Sensor glucose readings Shows information about the Logbook collected in the last 7, 14, 30, average of your Sensor Daily Graph and 90 days.
- Page 117 Product Overview Reader Sensor Product Use More Information Reviewing History Summary of History Options - Reader What data is used? What does this show? Example Sensor glucose readings Shows the pattern and Logbook collected in the last 7, 14, 30, variability of your Sensor Daily Graph and 90 days.
- Page 118 Product Overview Reader Sensor Product Use More Information Reviewing History Summary of History Options - Reader What data is used? What does this show? Example Sensor glucose readings Shows the percentage of time Logbook collected in the last 7, 14, 30, your Sensor glucose readings Daily Graph and 90 days.
- Page 119 Product Overview Reader Sensor Product Use More Information Reviewing History Summary of History Options - Reader What data is used? What does this show? Example Sensor glucose readings Shows the number of low Logbook collected in the last 7, 14, 30, glucose events measured by Daily Graph and 90 days.
- Page 120 Product Overview Reader Sensor Product Use More Information Reviewing History Summary of History Options - Reader What data is used? What does this show? Example Sensor glucose readings Shows how often you scan Logbook collected in the last 7, 14, 30, your Sensor.
- Page 121 Product Overview Reader Sensor Product Use More Information Reviewing History Summary of History Options - App What data is used? What does this show? Example Sensor scan results from each Shows entries for each time Logbook day. You can also use the you scanned your Sensor as Daily Graph Logbook to manually enter...
- Page 122 Product Overview Reader Sensor Product Use More Information Reviewing History Summary of History Options - App What data is used? What does this show? Example Sensor glucose readings from Shows a graph of your Sensor Logbook each day. glucose readings by day. The Daily Graph green bar indicates your Target Glucose Range.
- Page 123 Product Overview Reader Sensor Product Use More Information Reviewing History Summary of History Options - App What data is used? What does this show? Example Sensor glucose readings Shows information about the Logbook collected in the last 7, 14, 30, average of your Sensor Daily Graph and 90 days.
- Page 124 Product Overview Reader Sensor Product Use More Information Reviewing History Summary of History Options - App What data is used? What does this show? Example Sensor glucose readings Shows the pattern and Logbook collected in the last 7, 14, 30, variability of your Sensor Daily Graph and 90 days.
- Page 125 Product Overview Reader Sensor Product Use More Information Reviewing History Summary of History Options - App What data is used? What does this show? Example Sensor glucose readings Shows the percentage of time Logbook collected in the last 7, 14, 30, your Sensor glucose readings Daily Graph and 90 days.
- Page 126 Product Overview Reader Sensor Product Use More Information Reviewing History Summary of History Options - App What data is used? What does this show? Example Sensor glucose readings Shows the number of low Logbook collected in the last 7, 14, 30, glucose events measured by Daily Graph and 90 days.
- Page 127 Product Overview Reader Sensor Product Use More Information Reviewing History Summary of History Options - App What data is used? What does this show? Example Sensor glucose readings Shows how often you scan Logbook collected in the last 7, 14, 30, your Sensor.
- Page 128 Indications for Use Reader Symbols The FreeStyle Libre Flash Glucose Monitoring System is a continuous glucose monitoring (CGM) device indicated for the management App Symbols of diabetes in persons age 18 and older. It is designed to replace blood glucose testing for diabetes treatment decisions.
- Page 129 When you see the symbol, you must check your blood glucose with a blood glucose meter before making any treatment decisions. Sensor readings may not accurately reflect blood glucose levels. If you are using the FreeStyle LibreLink app, you must also have access to a blood glucose monitoring system as the App does not provide one.
- Page 130 After the start-up period, the Sensor can be worn for up to the wear duration specified in your Sensor Kit's product insert. Some individuals may be sensitive to the adhesive that keeps the Sensor attached to the skin. If you notice significant skin irritation around or under your Sensor, remove the Sensor and stop using the System.
- Page 131 Select an appropriate Sensor site to help the Sensor stay attached to the body and prevent discomfort or skin irritation. Avoid areas with scars, moles, stretch marks, or lumps. Select an area of skin that generally stays flat during normal daily activities (no bending or folding).
- Page 132 The FreeStyle Libre Reader has a built-in blood glucose meter that is designed to be used only with FreeStyle Precision Neo blood glucose test strips and MediSense Glucose and Ketone Control Solution. Using other test strips with the Reader's built-in meter will produce an error or cause the Reader's built-in meter to not turn on or start a test.
- Page 133 Indications for Use The FreeStyle Libre Flash Glucose Monitoring System is a continuous glucose monitoring (CGM) device indicated for the management of diabetes in persons age 18 and older. It is designed to replace blood glucose testing for diabetes treatment decisions.
- Page 134 When you see the symbol, you must check your blood glucose with a blood glucose meter before making any treatment decisions. Sensor readings may not accurately reflect blood glucose levels. If you are using the FreeStyle LibreLink app, you must also have access to a blood glucose monitoring system as the App does not provide one.
- Page 135 After the start-up period, the Sensor can be worn for up to the wear duration specified in your Sensor Kit's product insert. Some individuals may be sensitive to the adhesive that keeps the Sensor attached to the skin. If you notice significant skin irritation around or under your Sensor, remove the Sensor and stop using the System.
- Page 136 Select an appropriate Sensor site to help the Sensor stay attached to the body and prevent discomfort or skin irritation. Avoid areas with scars, moles, stretch marks, or lumps. Select an area of skin that generally stays flat during normal daily activities (no bending or folding).
- Page 137 The FreeStyle Libre Reader has a built-in blood glucose meter that is designed to be used only with FreeStyle Precision Neo blood glucose test strips and MediSense Glucose and Ketone Control Solution. Using other test strips with the Reader's built-in meter will produce an error or cause the Reader's built-in meter to not turn on or start a test.
-
Page 138: Reader Symbols
Product Overview Reader Sensor Product Use More Information Reader Symbols Sensor may be inaccurate. Check blood Rapid-acting insulin note glucose with a test strip before making any treatment decisions Time changed on Reader Sensor Reminders Direction glucose is going Blood glucose test Caution Settings View previous/next screen... - Page 139 Product Overview Reader Sensor Product Use More Information App Symbols App icon Insulin (Rapid or Long-acting) note Sensor may be inaccurate. Check blood Exercise note glucose with a test strip before making any treatment decisions Time change Scan button Main menu Direction glucose is going Multiple/Custom notes Caution...
-
Page 140: System Specifications
Product Overview Reader Sensor Product Use More Information System Specifications Sensor Specifications Reader Specifications Sensor glucose assay method Amperometric electrochemical sensor Sensor glucose reading range 40 to 500 mg/dL Sensor size 5 mm height and 35 mm diameter Sensor weight 5 grams Sensor power source One silver oxide battery... - Page 141 (1 cycle per week for 3 years). Reader moisture Keep dry protection Power Adapter Abbott Diabetes Care PRT25611 Operating Operating and storage -1,250 ft (-381 meters) to temperature: 50 °F to 104 altitude 10,000 ft (3,048 meters) °F...
- Page 142 (CRC) generation and verification of data. Quality of Service (QoS): QoS for the FreeStyle Libre Reader and Sensor wireless communications using the near field communications is assured within the effective range of 4 cm between the Sensor and Reader that is specified to occur within 15 seconds.
Need help?
Do you have a question about the FreeStyle Libre and is the answer not in the manual?
Questions and answers