Table of Contents
Advertisement
Advertisement
Table of Contents
Troubleshooting

Summary of Contents for MakerBot Digitizer
- Page 1 USER MANUAL...
-
Page 3: Table Of Contents
TABLE OF CONTENTS WELCOME Safety and Compliance About your MakerBot Digitizer SETUP Accessory Checklist Unpacking the MakerBot Digitizer MakerBot Digitizer Placement Install MakerWare for Digitizer Calibration Set Preferences SCANNING Scanning 101 Scanning an Object Post-Scan Steps TROUBLESHOOTING AND MAINTENANCE Troubleshooting... -
Page 4: Welcome
Welcome to the Leading Edge of the Next Industrial Revolution! Let’s Get Started. - Page 5 3D printing was finding great 3D models. Now you hold one of the keys to crossing this hurdle, the MakerBot Digitizer Desktop 3D Scanner. The engineers here at MakerBot had a big task: build a machine that scans physical objects quickly and always delivers clean 3D models with no holes or extra pieces floating around.
-
Page 6: Safety And Compliance
D.C. 20402. Changes and Modifications not expressly approved by the manufacturer or registrant of this equipment can void your authority to operate this equipment under Federal Communications Commissions rules. MANUFACTURER MakerBot Industries, LLC One MetroTech Center 21st Floor Brooklyn, NY 11201... - Page 7 Caution: Avoid excessive humidity or temperatures. When the MakerBot Digitizer is in use, avoid temperatures above 32° C or below 0° C. Do not store the MakerBot Digitizer in areas where temperatures exceed 32° C or fall below 0° C.
- Page 8 The MakerBot Digitizer Desktop 3D Scanner uses two (2) Class 1 lasers when it is scanning. The Digitizer is reported certified as a Class 1 laser product under the requirements of 21 CFR (J) 1040.10 and IEC 60825-1 as per Laser Notice 50. Class 1 lasers are safe under all conditions of normal use.
- Page 9 Do not open the MakerBot Digitizer’s laser modules or attempt to repair them. Service on your MakerBot Digitizer’s lasers may only be performed by authorized, factory trained technicians. To report a problem with your MakerBot Digitizer or to arrange for service, email support@makerbot.com All maintenance tasks for the MakerBot Digitizer must be performed with the power turned off.
- Page 10 Les changements et modifications apportés à cet appareil sans l’autorisation expresse du fabricant ou du déclarant peuvent annuler votre autorisation à utiliser cet appareil aux termes du règlement des la Commission Fédérale des Communications. MANUFACTURER MakerBot Industries, LLC One MetroTech Center 21st Floor Brooklyn, NY 11201...
- Page 11 Attention: Evitez une humidité ou des températures excessives. Lorsque le MakerBot Digitizer est en cours de fonctionnement, évitez les températures supérieures à 32º C ou inférieures à 0º C. N’entreposez pas le scanner dans des endroits où les températures dépassent 32º C ou tombent en-dessous de 0º C.
- Page 12 SÉCURITÉ ET RESPECT DES NORMES Sécurité laser Le scanner de bureau 3D MakerBot Digitizer utilise deux (2) lasers de Classe 1 pour l’opération de numérisation. Les lasers de Classe 1 sont sans danger dans toutes les conditions d’utilisation normale. Cela signifie que la limite d’exposition admissible n’est pas dépassée si vous regardez un laser sans protection oculaire ou à...
- Page 13 BAS DE MAKERBOT DIGITIZER Réparations Attention: Ne pas ouvrir les modules laser de la MakerBot Digitizer ou d’essayer de les réparer. Les services aprèsvente sur les lasers de votre MakerBot Digitizer doivent être réalisés exclusivement par des techniciens agréés formés dans nos usines.
- Page 14 Veränderungen und Modifizierungen, die nicht ausdrücklich vom Hersteller oder vom Registranten dieses Gerätes genehmigt sind, können nach den Richtlinien der Federal Communications Commission Ihr Recht erlöschen lassen, dieses Gerät zu benützen. MANUFACTURER MakerBot Industries, LLC One MetroTech Center 21st Floor Brooklyn, NY 11201...
- Page 15 Vorsicht: Vermeiden Sie extreme Temperaturen oder Feuchtigkeit. Wenn der MakerBot Digitizer benützt wird, vermeiden Sie Temperaturen über 32° C oder unter 0° C. Bewahren Sie den MakerBot Digitizer nicht an Orten mit Temperaturen über 32° C oder unter 0° C auf.
- Page 16 SICHERHEIT UND EINHALTUNG DER RICHTLINIEN Laser-Sicherheit Der MakerBot Digitizer Desktop 3D Scanner verwendet zwei (2) Laser der Klasse 1 im Scan- Prozess. Laser der Klasse 1 sind unter Bedingungen des normalen Gebrauchs sicher. Das bedeutet, solange die maximal zulässige Bestrahlung (MZB) nicht überschritten wird, wenn man das bloße oder mit üblichen optischen Vergrößerungsbehelfen versehene Auge dem...
- Page 17 Service an Ihrem MakerBot Digitalisierer-Laser-Module darf nur von autorisierten, im Werk ausgebildeten Technikern ausgeführt werden. Darüber hinaus kann jegliche Manipulation an Ihrem MakerBot Digitizer oder das Entfernen von Schutzabdeckungen oder des Gehäuses die Garantie erlöschen lassen Um ein Problem mit Ihrem MakerBot Digitizer zu melden oder um einen Servicetermin zu vereinbaren, schreiben Sie an support@makerbot.com...
-
Page 18: About Your Makerbot Digitizer
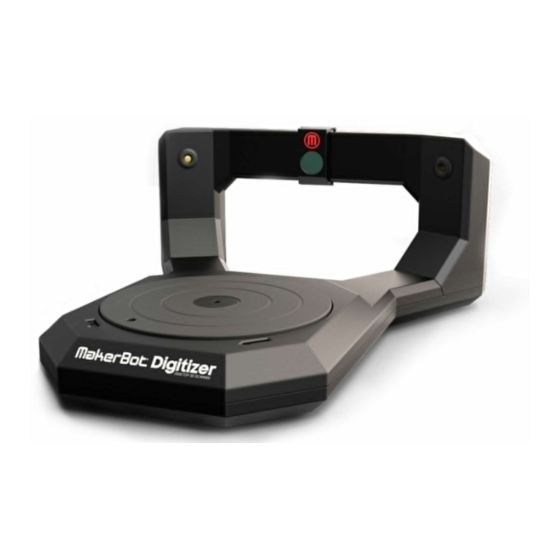
Digitizer software. MakerWare for Digitizer creates industry standard stereolithography (STL) files which can be imported into or modified with most 3D modeling software. Before you start using the MakerBot Digitizer, let us tell you a little more about how it works and what its capabilities are. - Page 19 ABOUT THE MAKERBOT DIGITIZER FRONT VIEW BACK VIEW WELCOME, LET’S GET STARTED...
- Page 20 ABOUT THE MAKERBOT DIGITIZER How it Works The MakerBot Digitizer Desktop 3D Scanner creates a digital 3D model of a physical object by taking a rapid sequence of pictures as the object rotates on the MakerBot Digitizer turntable. Here is how it happens: Two lasers, mounted on the left and right corners of the MakerBot Digitizer, create laser lines that outline the profile of the object, while a camera takes a series of photographs.
- Page 21 ABOUT THE MAKERBOT DIGITIZER What can be Scanned? Some objects will produce better scans than others. Here are a few guidelines to help you determine what will produce a good scan. GREAT TO SCAN • Objects that are larger than a 50 x 50 mm (2 x 2 in) cylinder •...
-
Page 22: Setup
Setting Up Your MakerBot Digitizer... - Page 23 In this chapter you will be guided through everything you need to do to set up your new MakerBot Digitizer Desktop 3D Scanner, from unpacking it to producing your first 3D scan.
-
Page 24: Accessory Checklist
ACCESSORY CHECKLIST POWER SUPPLY POWER CABLE CALIBRATION TOOL USB-A TO USB-B CABLE T15 TORX DRIVER RUBBER TRACTION FEET... -
Page 25: Unpacking The Makerbot Digitizer
UNPACKING YOUR MAKERBOT DIGITIZER Open the Box Place the MakerBot Digitizer box on a stable surface. Cut the tape on both sides of the box as well as the tamperproof sticker located on the front secure tab. Open Accessory Box Remove and open the accessory box. - Page 26 UNPACKING YOUR MAKERBOT DIGITIZER Lift MakerBot Digitizer out of Box Grasp the protective foam packaging at both sides and lift the MakerBot Digitizer out of the box. Remove Packaging Separate both foam packaging pieces from the MakerBot Digitizer and remove the clear...
- Page 27 Attach Rubber Traction Feet Locate the four rubber traction feet from the accessory box. Carefully turn the MakerBot Digitizer upside down and insert one rubber traction foot into each of the four holes on the underside of the MakerBot Digitizer.
-
Page 28: Makerbot Digitizer Placement
MakerBot Digitizer extends over the surface edge. If it is not in a stable position, the MakerBot Digitizer could fall, damaging itself and causing injury to the user. • Make sure to set up your Makerbot Digitizer at least one foot away from the nearest wall. AERIAL VIEW OF ROOM Set up at least 1 ft away from a wall. - Page 29 MakerBot Digitizer and plug the power cord into an electrical outlet. Caution: The socket-outlet must be installed near the equipment and must be easily accessible. Note: MakerBot’s distributor will provide a certified plug adapter with national pin configuration for international users. SETTING UP YOUR MAKERBOT DIGITIZER...
-
Page 30: Install Makerware For Digitizer
When you first run MakerWare or MakerWare for Digitizer, a folder called “My Things” (on PCs), or “Things” (on Macs), is created in your home directory. This is where your MakerBot Digitizer scans will be saved by default. -
Page 31: Calibration
Recalibrate the turntable and lasers about once a week—or every 20 scans—to make sure that scan quality remains constant. If you move, bump or drop your MakerBot Digitizer, the positions of the lasers and turntable might change slightly. In any of those cases, you might need to recalibrate the lasers and turntable. - Page 32 CALIBRATE YOUR MAKERBOT DIGITIZER Calibrate the MakerBot Digitizer Camera Locate the calibration tool from the accessory box and place it on the turntable with the letter A pointing up, as shown on the screen. Insert the tab on the lower edge of the calibration tool into the hole at the center of the turntable.
- Page 33 Continue. Calibration Complete Before you start scanning, let’s name your MakerBot Digitizer and set your sharing options. Click Continue again to begin. You can change your preferences at any point by choosing Settings from the File menu. On a Mac, the same options are available as Preferences in the MakerWare for Digitizer menu.
-
Page 34: Set Preferences
Click Skip this Step. You can log into Thingiverse at any time by choosing File > Settings on a PC or MakerWare for Digitizer > Preferences on a Mac, or by choosing Share on Thingiverse at the end of a scan. - Page 35 SET BASIC PREFERENCES SET-UP CONNECT SCAN Start Scanning Start Scanning The setup process is complete. Proceed to the next chapter to start scanning with your MakerBot Digitizer. SETTING UP YOUR MAKERBOT DIGITIZER...
-
Page 36: Scanning
Scanning with Your MakerBot Digitizer... - Page 37 MakerWare for Digitizer home screen. Before you start scanning with your MakerBot Digitizer, let’s go over some basics and best practices. Note: You can return to New Scan screen at any time by choosing New from the File Menu.
-
Page 38: Scanning 101
Then the information from the right and left scans are combined to create a detailed point cloud. After the scanning stage, MakerWare for Digitizer will convert the point cloud it has created into a continuous mesh. This process should take approximately two minutes. - Page 39 Tip: If your object doesn’t stay in place by itself, try resting the object on a piece of modeling clay. For more tips, go to the Learn More section at makerbot.com/digitizer Note that there may be exceptions to these rules. It’s not always possible to predict what position will produce the best scan, so if you’re having trouble getting a good scan of an...
- Page 40 SCANNING 101 Scan Presets To get the best scan possible, choose the scan preset that best matches the object you want to scan. Scan presets are based on an object’s shade value, and each preset covers a range of shades. An object’s shade value is described as “light,”...
- Page 41 Choose this for moderately dark neither light nor dark. objects. Note that extremely dark objects may still cause problems. Note: We love gnomes! If you have any, please digitize them and upload them to Thingiverse with the tag #GnomeScan. SCANNING WITH YOUR MAKERBOT DIGITIZER...
- Page 42 Rotate your object on the turntable to expose those areas to the camera. Click Start MultiScan to begin a new scan. MakerWare for Digitizer will gather the new set of scan data, combine it with the scan data you already have, and create a new mesh.
- Page 43 SCANNING 101 Crop MakerWare for Digitizer will make sure your scan is completely watertight, but a difficult to scan object or a bad lighting situation can create unwanted artifacts in your 3D mesh. For those situations, or for occasions when you need to give your scan a flat top or bottom, MakerWare for Digitizer includes a crop function.
- Page 44 SCANNING 101 Scanning Tips During a scan, the MakerBot Digitizer Desktop 3D Scanner shines laser beams on your object. The camera captures images of the laser lines and MakerWare for Digitizer translates those images into a point cloud. Objects that are either too reflective or not reflective enough will result in images that are difficult for the software to interpret.
-
Page 45: Scanning An Object
SCANNING AN OBJECT To begin a new scan, MakerWare for Digitizer must be in the New Scan state. You will be taken to the New Scan screen at the end of the initial calibration and setup routine. You can also access the New Scan screen at any time by choosing New Scan from the Scanner menu. - Page 46 If you can see yourself in the camera view, step out of the camera’s line of sight. Before starting to gather scan data, the Digitizer will capture an image of your object and its background and use it to filter the background out of the scan images.
- Page 47 • To zoom: scrollwheel After the MakerBot Digitizer finishes scanning your object, MakerWare for Digitizer will automatically turn the generated point cloud into a manifold 3D mesh. A manifold 3D mesh is completely enclosed and has no holes, reversed faces or extra geometry.
-
Page 48: Post-Scan Steps
“My Scan at [datestamp].” MULTISCAN Click Start MultiScan to add additional scan data. MakerWare for Digitizer will walk you through adding as many scans as you need to capture every part of your object. See page 42 for instructions on using MultiScan Technology. - Page 49 1. TAKE A PHOTO During the Take a Photo step, the camera view of your MakerBot Digitizer will appear at the right. To take a picture: • Center your object on the turntable so that it appears in the camera view.
- Page 50 The license is set to CC - Attribution - Non - Commercial by default. For descriptions of the available Creative Commons licenses, see creativecommons.org/licenses If you do not want to be guided through sharing your scans to MakerBot Thingiverse in the future, select the Don’t show again checkbox. If you want to skip the sharing process completely, click Skip this step.
- Page 51 PRINT WITH MAKERWARE MakerBot MakerWare is the software that drives MakerBot 3D printers. When you click Print with MakerWare, the most recent scan is opened in MakerWare. You can also open the most recently saved scan in MakerWare at any time by choosing Open in MakerWare from the File menu.
-
Page 52: Troubleshooting And Maintenance
Troubleshooting + Maintenance... - Page 53 This chapter describes basic troubleshooting and maintenance tasks for your MakerBot Digitizer Desktop 3D Scanner. For information on more advanced troubleshooting and maintenance tasks, go to makerbot.com/support/digitizer...
-
Page 54: Troubleshooting
MakerBot Digitizer to your computer. Try restarting the MakerBot Digitizer, rebooting your computer, or using a different USB port or USB cable. If MakerWare for Digitizer still does not recognize your Digitizer, please contact MakerBot Support by emailing support@makerbot.com The calibration routine fails... - Page 55 TROUBLESHOOTING PROBLEM SOLUTION The camera feed does not Restart the MakerBot Digitizer, reboot your appear in the viewport on the computer and make sure the USB cable is New Scan screen connected to both the computer and the MakerBot Digitizer.
- Page 56 Scanner menu. You receive a “Scan Failed” This means that MakerWare for Digitizer is message not collecting any data. If your object adheres to the guidelines listed on page 21, there may be a problem with the MakerBot Digitizer’s...
- Page 57 MultiScan Technology should only be used to combine scans of the same object, scanned under similar conditions. If MultiScan Technology fails to merge your scans, MakerWare for Digitizer will revert your scan to its previous state. TROUBLESHOOTING + MAINTENANCE...
-
Page 58: Maintenance
Calibration Recalibrate the MakerBot Digitizer’s turntable and lasers approximately once a week or every 20 scans to maintain optimal scan quality. To run the calibration routine, go to the Scanner menu and choose Calibrate Turntable & Lasers. - Page 59 MAINTENANCE Laser Alignment MakerWare for Digitizer will correct small changes in laser alignment by itself, so you will probably never need to manually adjust laser alignment. However, if the MakerBot Digitizer is jarred or shaken the lasers could be misaligned badly enough that they will need to be manually adjusted.
- Page 60 MAINTENANCE Caution: The range of the angle adjustment screw is limited. Do not use excessive force to turn the screw. Adjust the direction of the right laser. Turn the inner adjustment screw so that the laser line lines up with the spine of the calibration tool. Turn the adjustment screw clockwise to move the laser line to the right or counter-clockwise to move the laser to the left.
- Page 61 NOTES TROUBLESHOOTING + MAINTENANCE...
-
Page 62: Reference
Reference... - Page 63 This chapter includes hardware and software specifications for your MakerBot Digitizer Desktop 3D Scanner, a list of the menu options available in MakerBot MakerWare for Digitizer and a glossary to help you understand terms you may be unfamiliar with.
-
Page 64: Specifications
Scanner Specifications SCANNER Scan Technology Laser Line Triangulation Scan Volume 203 x 203 mm (8 x 8 in) cylinder SOFTWARE Software Bundle MakerBot MakerWare™ for Digitizer File Types STL, Thing Supports Windows (7+) Mac OSX (10.7+) Ubuntu Linux (12.04+) PHYSICAL DIMENSIONS Length 474.5 mm [18.68 in]... - Page 65 SPECIFICATIONS TEMPERATURE Ambient Operating Temperature 0°–32° C [32°–90° F] Storage Temperature 0°–32° C [32°–90° F] ELECTRICAL AC Input 100 – 240 V, ~2 amps, 50 – 60 Hz Power Requirements 12 V DC @ 2.08 amps Connectivity Lasers 2x Class 1 Laser Line Generators 1.3MP CMOS Image Sensor Sensor MECHANICAL...
-
Page 66: Menu Functions
Close: Quits MakerWare for Digitizer. If a completed scan is open but has not been saved, a dialog will alert you and ask you to confirm that you wish to quit MakerWare for Digitizer. On a Mac, this option will appear as Quit in the MakerWare for Digitizer menu. - Page 67 Align Lasers: Turns on both lasers for manual alignment. Update Firmware: Walks you through the process of uploading new firmware to your MakerBot Digitizer. If MakerWare for Digitizer is connected to the internet, it will notify you when a firmware update becomes available.
-
Page 68: Glossary
MakerBot Digitizer Desktop 3D Scanner. CLASS 1 LASER: The class of laser used in the MANIFOLD: A term used to describe 3D models MakerBot Digitizer. Class 1 lasers are safe under all conditions of normal use. that consist of one completely enclosed three-... - Page 69 MULTISCAN TECHNOLOGY: A feature of THINGS FOLDER: See “My Things folder”. MakerWare for Digitizer that allows you to scan an object from multiple angles and merge the TRANSLUCENT: A translucent object allows scans to create a better 3D model.
-
Page 70: Contact Us
Support makerbot.com/support Our website has extensive documentation and troubleshooting information about your MakerBot Digitizer Desktop 3D Scanner. It’s a great resource when you want to try to solve issues quickly on your own. support@makerbot.com If you ever need help resolving an issue with... - Page 71 NOTES REFERENCE...
-
Page 72: Terms
Terms... - Page 73 All information in this Manual is subject to change at any time without notice and is provided for convenience purposes only. MakerBot reserves the right to modify or revise the Manual in its sole discretion and at any time. You agree to be bound by any modifications and/or revisions.
- Page 74 MakerBot One MetroTech Center, 21st Floor, Brooklyn, NY support@makerbot.com makerbot.com...
Need help?
Do you have a question about the Digitizer and is the answer not in the manual?
Questions and answers