Table of Contents
Advertisement
Quick Links
QUICK-START INSTALLATION GUIDE
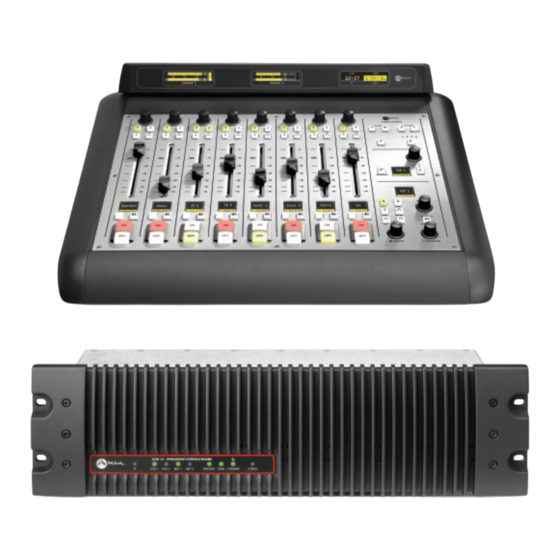
AXIA IQ IP-AUDIO CONSOLE
THANK YOU FOR PURCHASING THE AXIA IQ IP-AUDIO CONSOLE.
We have made the Axia iQ console system easy to set up and configure. This quick-start guide will take you through
the basic steps to configure your new iQ 8-Fader Main Frame and QOR.32 engine to have you broadcasting in no
time. Before we get started, let's make sure you have what you need.
REQUIRED EQUIPMENT, CABLES, AND ACCESSORIES:
There are a few additional items required for a successful installation. Check the list below and make sure
you have what you need.
Included items:
• iQ Main Frame and QOR.32
(packed separately)
• iQ Power cable
• 6-pin Molex™ cable
• Ethernet cable
Items you need to supply:
• PC with available Ethernet port connected to a
monitor and keyboard
• Audio cable and/or StudioHub adapters
Advertisement
Table of Contents

Related Manuals for Axia IQ


Summary of Contents for Axia IQ
- Page 1 THANK YOU FOR PURCHASING THE AXIA IQ IP-AUDIO CONSOLE. We have made the Axia iQ console system easy to set up and configure. This quick-start guide will take you through the basic steps to configure your new iQ 8-Fader Main Frame and QOR.32 engine to have you broadcasting in no time.
- Page 2 1. Connect the end of the provided 6-pin Molex cable without the strain relief to the Molex port (A) on the underside of the iQ Main Frame. 2. Connect the other end of the 6-pin Molex cable to the Console 1 port (B) on the QOR.32 unit.
-
Page 3: Network Configuration
255.255.255.0 to the connected PC. The default address of the QOR.32 will be 192.168.2.27. Note: If you wish to use a different IP address or subnet mask for your iQ, proceed to the next step below “Assigning a custom IP address to your iQ”, otherwise continue to Step 2 on the next panel. - Page 4 2. Open a web browser and type the assigned IP address of the iQ into the URL field (O). 3. The QOR Control Center (P) will launch. 4. Select “Console Config” (Q) in the left column navigation under Module Manager.
- Page 5 INPUT CONFIGURATION 1. Remain logged in to the QOR Control Center. 2. In the QOR Control Center navigation in the left column under IO Manager, click “Inputs” (T). 3. Enter useful labeling in the name field column (U) for Microphone-1. 4.
- Page 6 OUTPUT AND SOURCE CONFIGURATION 1. Remain logged in to the QOR Control Center. 2. In the QOR Control Center navigation in the left column under IO Manager, click “Outputs” (A) to view the Outputs screen (B) 3. Enter the name “Headphones” in the name field column (C) for Analog 1.
- Page 7 INSTALLATION HELP For more details on other configuration options, or for additional information about configuring a particular Axia iQ model, please access the full manual online at http:/ /www.telosalliance.com/Axia/iQ. If you have more questions, call the Telos Alliance 24/7 Support Team at +1 (216) 622-0247, or email us at support@telosalliance.com, we’d be happy to help...
- Page 8 4 of “Basic Local Input Configuration”. YOUR SETUP IS COMPLETE! That’s it! You are now ready to experience Axia iQ, the high performance audio console for today’s broadcast studio. © 2016 TLS Corp., All Rights Reserved.
Need help?
Do you have a question about the IQ and is the answer not in the manual?
Questions and answers