Table of Contents
Advertisement
Advertisement
Table of Contents

Related Manuals for Worlde EASYPAD


Summary of Contents for Worlde EASYPAD
- Page 1 WORLDE EASYPAD MIDI CONTROLLER USER’S MANUAL...
-
Page 2: Table Of Contents
Contents Introduction ............................. 3 Features ..............................3 Parts and their functions ......................... 4 Setup ..............................5 Making detailed settings ......................... 5 Global .............................. 5 Trigger pads ............................ 6 Assignable buttons .......................... 7 Transport buttons ..........................8 Specifications ............................9... -
Page 3: Introduction
Introduction Thank you for purchasing the WORLDE EASYPAD USB controller. To help you get the most out of your new instrument, please read this manual carefully. In order to use the functions of this product, you’ll need to make settings in the application you’re using. -
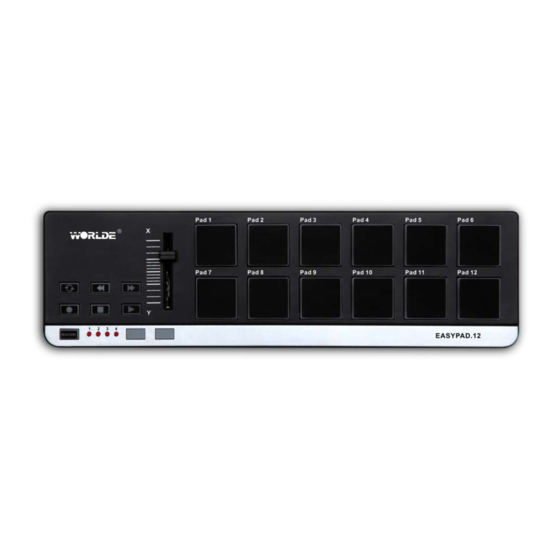
Page 4: Parts And Their Functions
(pads and buttons etc.) so that the controllers can be used to operate your DAW or software synthesizer. The EASYPAD has four banks. The four banks are collectively called a “bank set.” You can use EASYPAD software Editor to change the assignment of each controller. (➞ “Making detailed settings”) -
Page 5: Setup
Connections and power: Connect the EASYPAD to your computer with a USB cable. Making detailed settings The following settings cannot be edited from the EASYPAD itself, so you’ll need to use the EASYPAD software Editor. You can download the EASYPAD software Editor from the www.worlde.com.cn. -
Page 6: Trigger Pads
This specifies which MIDI channel the EASYPAD will use to transmit note messages, as well as MIDI messages that are sent when you press the button. This should be set to match the MIDI channel of the MIDI application that you’re controlling. -
Page 7: Assignable Buttons
This specifies the control change number of the control change message that is transmitted. On Value [0...127] This specifies the value of the message that is transmitted when the trigger pad turns on. Off Value [0...127] This specifies the value of the message that is transmitted when the trigger pad turns off. You can set this only if the assign type is “Control Change.”... -
Page 8: Transport Buttons
Transport buttons Operating the transport buttons will transmit either control change messages or MMC messages, depending on the assign type. For each of these six buttons, you can specify the message that is assigned, the way in which the button will operate when pressed, the control change number, or an MMC command. -
Page 9: Specifications
Included items: USB cable, Owner’s manual * Specifications and appearance are subject to change without notice. Sales Head Office: Hangzhou Worlde Digital Piano Co., Ltd Add:5 Houshan Rd, Wuchang Industrial Park, Yuhang District, Hangzhou, 310023,P.R.China Tel:0086 571 88730848 Fax:0086 571 88730748 Email:sales@worlde.com.cn...
Need help?
Do you have a question about the EASYPAD and is the answer not in the manual?
Questions and answers