Table of Contents
Advertisement
Quick Links
Advertisement
Table of Contents

Related Manuals for Compex GigaSwitch gsc2008wm


Summary of Contents for Compex GigaSwitch gsc2008wm
-
Page 2: Trademark Information
Novell Inc. All other brand and product names are trademarks or registered trademarks of their respective owners. Notice: Copyrights © 2002 by Compex, Inc. All rights reserved. Reproduction, adaptation, or translation without prior permission of Compex, Inc. is prohibited, except as allowed under the copyright laws. Manual Revision by Ong Manual Number: U-0347-V1.1C... -
Page 3: Fcc Notice
Compex, Inc. declares the following: Product Name: Compex 8-Port 10/100/1000Mbps Web Managed Gigabit Switch Model No.: Compex GSC2008WM conforms to the following Product Standards: Radiated Emission Standards: ETSI EN 300 328-2:July 2000;FCC 47 CFR Part15, Subpart B, ANSI C63.4-1992; 47 CFR Part 15, Subpart C (Section 15.247), ANSI C63.4-1992. -
Page 4: Technical Support Information
The warranty information and registration form are found in the Quick Install Guide. For technical support, you may contact Compex or its subsidiaries. For your convenience, you may also seek technical assistance from the local distributor, or from the authorized dealer/reseller that you have purchased this product from. -
Page 5: About This Document
In this document, special conventions are used to help and present the information clearly. The Compex 8-Port 10/100/1000Mbps Web Managed Gigabit Switch GSC2008WM is often referred to as Compex GSC2008WM in this document. Below is a list of conventions used throughout. -
Page 6: Table Of Contents
3.1.2 Rack-Mounted installation.................. 10 3.1.3 Desktop installation.................... 11 3.1.4 Rack-Mounted installation.................. 12 Chapter 4 Software Installation ................13 Configuration on PC settings ..................13 Configuration of Compex GSC2008WM using Web-based Interface ....... 13 4.2.1 Login to Web Browser Interface ................. 14... - Page 7 Table of Contents Chapter 5 Configure Compex GSC2008WM using Web Interface ....17 Port Configuration ......................17 Virtual LAN Configuration .................... 19 5.2.1 Examples on Virtual LAN .................. 21 Expand the limitation on bandwidth................22 5.3.2 Examples on Port Trunking ................23 Changing of IP Address....................
-
Page 8: Chapter 1 Product Overview
Through the management interface, you can also change the transmission mode of all ports on Compex GSC2008WM switch. This means that you can change the operating mode of any port to 10 Base-T half duplex, 10 Base-T full duplex, 100 Base-TX half duplex, 100 Base-TX full duplex or N-way Auto-negotiation at any time. - Page 9 • 10Base-T/100Base-TX/1000Base-T N-Way Auto-Negotiation In Compex GSC2008WM, all ports use the N-Way Auto-Negotiation mechanism to detect the speed of the attached network adapter. This feature gives users the freedom and convenience of connecting the switch to a 10Base-T, 100Base-TX or 1000Base-T network without doing any manual configuration and setup.
-
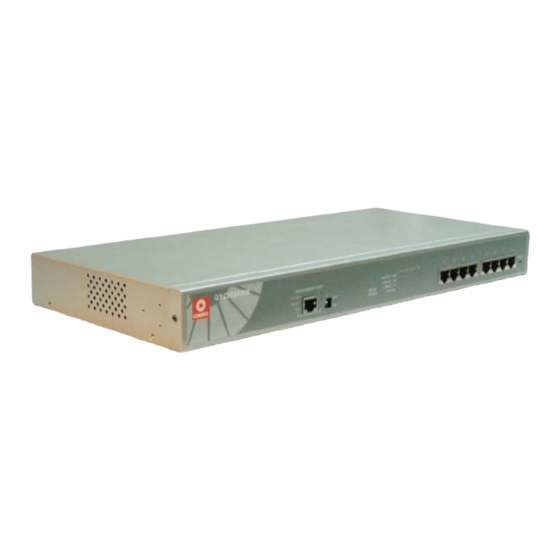
Page 10: Panel Views
Front Panel of Compex GSC2008WM LINK/ACT 1000 LINK/ACT 100 RESET READY LINK/ACT 10 POWER FDX/COL Figure 1.3b Front Panel of Compex GSC2008WM (Section #1) GSC2008WM MANAGEMENT PORT 10/100M LINK/ACT FULL Figure 1.3c Front Panel of Compex GSC2008WM (Section #2) 100-240VAC 1.0A 50-60Hz Figure 1.3d... -
Page 11: Panel Features
Chapter 1 Product Overview Panel Features Features Status and Indication POWER LED Steady Green Power is supplied to the device. No power is supplied to the device. READY LED Steady Green The device is ready to operate. The device is either not power up or problem has occurs. - Page 12 Chapter 1 Product Overview Features Status and Indication LINK/ACT 1000M Steady Green Individual port is connecting to LEDs 1000M mode. Blinking The port is transmitting or receiving data in 1000Mps • No network is established to the device, or • The network is either running in 10Mpbs or in 100Mbps.
-
Page 13: Specifications
Chapter 1 Product Overview Specifications • Industry Standards Complies with • IEEE 802.3 10Base-T • IEEE 802.3u 100Base-TX • IEEE 802.3ab 1000Base-T • IEEE 802.3x Flow Control • IEEE 802.1Q Tagged VLAN • IEEE 802.1p Priority Queuing • • Safety Certifications CE Mark •... - Page 14 Chapter 1 Product Overview • Environmental Operating temperature: 0ºC to 40ºC Requirements Storage temperature: -20ºC to 70ºC Operating humidity: 10% to 80% RH Storage humidity: 5% to 90% RH RH = Relative Humidity • Physical Dimension 433mm x 200mm x 44mm (L x D x H) •...
-
Page 15: Chapter 2 Getting Started
Chapter 2 Getting Started Chapter 2 Getting Started This chapter outlines the basic requirement for any installation and configuration on Compex GSC2008WM. Packaging Content Thank you for purchasing the Compex Web Managed Switch Series GSC2008WM. You will find the following items in the package: •... -
Page 16: Chapter 3 Hardware Installation
Chapter 3 Hardware Installation Compex GSC2008WM can be installed as a desktop unit or mounted on a 19-inch rack. There are two types of installation for Compex GSC2008WM, one is to connect your PC directly to the management port. Alternatively, you can configure by linking the management port to one of the LAN ports and configure the switch through one of the ports. -
Page 17: Rack-Mounted Installation
Compex GSC2008WM and the other end to the PC as shown in Figure 3.1a. 6. Next, insert the power cord to the socket located at the back of Compex GSC2008WM and power on the device. 7. Check that the POWER LED at the front panel of Compex GSC2008WM has lighted up. -
Page 18: Desktop Installation
Chapter 3 Hardware Installation Method #2 – Connect from Management Port to LAN port An alternative way to set up your Compex GSC2008WM is to connect the management port to one of the available LAN ports. Figure 3.1b Another method of connection 3.1.3... -
Page 19: Rack-Mounted Installation
1. Repeat Steps 1 to 3 found on Page 10. 2. Use a RJ45 MDIX crossover cable to connect one end to the management port of Compex GSC2008WM and the other end to any of the LAN Port as shown in Figure 3.1b. -
Page 20: Chapter 4 Software Installation
Software Installation Chapter 4 Software Installation This chapter explains the basic set up procedures of configuring Compex GSC2008WM using the web-based interface. Configuration on PC settings Each PC in the LAN must be configured in order for them to communicate with Compex GSC2008WM. -
Page 21: Login To Web Browser Interface
Software Installation Configuration of Compex GSC2008WM using Web-based Interface Activate your internet by running your browser on a workstation connected onto the same network as Compex GSC2008WM. Enter URL Address, http://192.168.100.128. 4.2.1 Login to Web Browser Interface The following is a list of the various ways for different browsers in accessing a website. - Page 22 After logging in to the Management system, the Main Page will display as shown in Figure 4.2b. The image of Compex GSC2008WM is shown on the upper right window. The status of each switch port (i.e. link, speed and duplex mode) can be seen clearly from the LED displays on the image.
- Page 23 Mac Search : search for the connected device in the network based on MAC address • Identity : check/change the system name, location or contact of Compex GSC2008WM OPERATION menu • Save Settings : save all settings • Restore Settings : restore all settings to factory default •...
-
Page 24: Chapter 5 Configure Compex Gsc2008Wm Using Web Interface
Port Configuration This function allows you to have an easy access to the network via the ports of Compex GSC2008WM. In order to configure any of the port in Compex GSC2008WM, you need to select the port from the image. Simply use your mouse and click on any of the ports and the setting will appear as shown below. - Page 25 Chapter 5 Configure Compex GSC2008WM using Web Interface Notice that the “Link state” option indicates ‘Up’. This shows that the port is connected to the network. It can either be in “Up” (Connected) or ‘Down’ (No connection) state. The options for individual parameters are shown below: Speed/Duplex To select the operation mode of the chosen port.
-
Page 26: Virtual Lan Configuration
LAN although they may be not on the same physical segment. However, all data packets in a VLAN are constrained, so different end stations in different VLANs cannot communicate with each other directly. Compex GSC2008WM supports port-based VLAN, i.e. the VLAN is specified by selecting a group of ports or tag-based VLAN. - Page 27 PVID The sequence number of a VLAN. Options: 1 to 3999 Port 1 to 8 The individual ports located at the front panel of Compex GSC2008WM. Options: exclude tag base port base The following steps show how Virtual LAN can be configured: 1.
-
Page 28: Examples On Virtual Lan
For example, Station 2 in the IT Department is using the subnet IP Address of 192.168.88.20. It has different subnet address as the other two Departments. After configuring the Virtual LAN through the web interface of Compex GSC2008WM, Station 4, which is in the HR Department, is able to communicate with Station 2. -
Page 29: Expand The Limitation On Bandwidth
Expand the limitation on bandwidth Port Trunking is the ability to group together several switch ports to increase the bandwidth between Compex GSC2008WM and other switch/es. This is an inexpensive method to increase throughput between switches. We define the Port Trunking as the ability to group a set of ports into a single logical link. -
Page 30: Examples On Port Trunking
Chapter 5 Configure Compex GSC2008WM using Web Interface The options for individual parameters are shown below: Select Trunk Group Allow you to choose your preferred trunking group in an easy way. Options: disable 1 group – [1,2] 2 group – [1,2] [3,4] 4 group –... -
Page 31: Changing Of Ip Address
Chapter 5 Configure Compex GSC2008WM using Web Interface From Figure 5.3b, we are using two Compex GSC2008WM to perform the trunking ability. For both units, Port 1 to 4 are selected as trunking ports, and Port 6 in Unit #2 is set as CPU port. After selecting the trunking group as [1,2]... - Page 32 Chapter 5 Configure Compex GSC2008WM using Web Interface The options for individual parameters are shown below: IP INDEX A number to identity the IP Configuration. Options: From 1 to 12 IP Address # An Internet Protocol (IP) address contains a full 4 bytes (32 bits) of data and can be subdivided into classes.
-
Page 33: Aging Control
Chapter 5 Configure Compex GSC2008WM using Web Interface Aging Control Aging control is for controlling the retention period of address entries in the switch’s forwarding table. If the aging control is enabled, a learned address entry (not include the static entry) will be removed from the forwarding table if there is no update within a pre-determined period (1~128 seconds). -
Page 34: Mirror Control
Chapter 5 Configure Compex GSC2008WM using Web Interface Mirror Control This function allows you to set up a ‘mirror’ port of any specified port/s from 1 to 7 with Port 8, such that you can monitor the transmitted or received traffics of the monitored port/s without intervening them. -
Page 35: Examples On Port Mirroring
Chapter 5 Configure Compex GSC2008WM using Web Interface 5.6.1 Examples on Port Mirroring Figure 5.6b Port 8 acts as a mirror port From the example shown in Figure 5.6b, Port 3 is connected to the network, and Port 8 is set as a mirror port. Choosing Port 3 transmitting packet to port 8 at the Mirror Control field indicates that whatever packets that are transmitted at Port 3 also sent a duplicate packet to Port 8. -
Page 36: Searching Of Address
Chapter 5 Configure Compex GSC2008WM using Web Interface Searching of Address With these Host and MAC Search functions, you can simply check any of the IP addresses in the network for a particular workstation. 5.7.1 Host Search Host Search is for searching a host by IP address on the network, and getting the port number to which the host is connected. -
Page 37: Mac Search
Chapter 5 Configure Compex GSC2008WM using Web Interface 5.7.2 MAC Search This feature helps to look for the particular workstation with MAC Address stated in the field. This provides a useful way while configuring the VLAN. The system will search through the device for the port’s ownership of that particular PC. -
Page 38: Save And Restore Settings
Chapter 5 Configure Compex GSC2008WM using Web Interface Save and Restore Settings 5.9.1 To Save Settings Save Settings is for storing the current settings and configurations into the switch. Once the switch is power-up or rebooted, the saved configurations and settings are loaded into the switch, so user does not need to reconfigure the switch. -
Page 39: 5.10 Reboot Switch
Reboot Switch is for rebooting switch remotely. It is useful when user restore saved configurations. Figure 5.10a Reboot Compex GSC2008WM Click “Yes” button to confirm rebooting Compex GSC2008WM. 5.11 Changing Password This option allows the System Administrator to amend the current password. -
Page 40: 5.12 Logging Out Of Web Interface
Chapter 5 Configure Compex GSC2008WM using Web Interface 5.12 Logging out of Web Interface Click the logout option from the Configuration Menu and the following screen will appear. Hit the “Continue” button if you wish to login again, or else just click the “X” at the right top corner of the page to close this web management interface. -
Page 41: 5.13 About System
GSC2008WM. Figure 5.13a Information on the System 5.14 Technical Support This page displays information on technical support. You may refer to the respective technical group supported by Compex in the different countries as shown below. Figure 5.14a Technical Support Information... -
Page 42: Chapter 6 Clearing Password And Restoring Default Ip Address
Chapter 6 Clearing Password and Restoring Default IP Address If the password or IP address of Compex GSC2008WM is lost, or you probably wish to upgrade your management firmware, you can easily operate the DIP switch located in the front panel. -
Page 43: Clearing Of Password
3. Power ON your device and wait for about 1 minute to proceed. 4. Change the DIP Switch in the sequence stated below within 30 seconds: Stage B Stage D Stage C Now, the IP Address of Compex GSC2008WM has set to factory default, which is 192.168.100.128. -
Page 44: Chapter 7 Upgrading New Firmware Configuration
Chapter 7 Upgrading New Firmware Configuration Chapter 7 Upgrading New Firmware Configuration To upgrade your management firmware, please follow the listed procedure. 1. Power OFF switch. 2. Set the DIP Switch 1 and 2 to UP position (OFF). 3. Power ON switch. 4.
Need help?
Do you have a question about the GigaSwitch gsc2008wm and is the answer not in the manual?
Questions and answers