Advertisement
Advertisement
Table of Contents

Related Manuals for Ripmax Acro Wot mk2


Summary of Contents for Ripmax Acro Wot mk2
- Page 1 Acro Wot - Instructions...
- Page 2 Acro Wot - Instructions The Designer Chris Foss outside his factory in 1990 Chris Foss Chris Foss The fascination of flight captured Chris's imagination early on in his life when he started building, from kits and plans, simple free flight gliders and rubber powered models. By his early teens, Chris was already experimenting with his own designs, several of which have been featured as constructional plans in various aeromodelling magazines.
-
Page 3: Fitting The Canopy
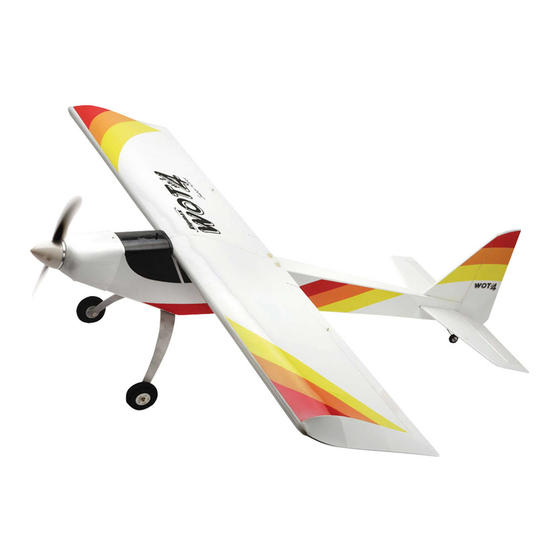
Acro Wot - Instructions Introduction Congratulations on your purchase of the Acro Wot Mk2 ARTF - the first Almost Ready to Fly version of Chris Foss' classic low-winger. Its unbeatable combination of great looks and superb flying performance make it a must-have... -
Page 4: Completing The Wing
Acro Wot - Instructions Completing the Wing STEP 6 Protect the covering with masking tape, then spread sufficient epoxy over the opposite panel joiner slot, wing joiner and root rib. Bring the two panels together ensuring the epoxy fills the join. Wipe off any excess that squeezes out of the joint, then use tape to hold the panels together as the adhesive cures. - Page 5 Acro Wot - Instructions STEP 12 Slide the aileron servo horn over the wire and re-fit to the servo. Snap a moulded keeper onto the pushrod to retain it as shown. Trim off the excess pushrod wire using side cutters. Repeat the procedure for the second aileron in exactly the same way.
- Page 6 Acro Wot - Instructions STEP 18 Screw the tailwheel assembly in position with the tailwheel wire in line with the rear of the fuselage. Fitting the Tail and Fin STEP 19 Using a sharp knife, carefully remove the film from the slot in both sides of the fuselage where the tailplane will mount.
- Page 7 Acro Wot - Instructions STEP 24 Remove the fin and cut away the covering from just below the marked lines to give a film-free surface for the glue to bond. IMPORTANT NOTE: Ensure that only the film is cut - not the fin - as this will seriously weaken the structure. STEP 25 With the covering removed, the fin and tailplane are ready to be installed.
- Page 8 Acro Wot - Instructions STEP 30 Now slide the first elevator into position ensuring that the joiner enters hole in the elevator and both hinges enter their pre-cut slots in the tailplane. Ensuring a gap-free hinge line and a 1mm gap between the elevator and tip, add a couple of drops of thin cyano to the top and bottom of each hinge.
-
Page 9: Radio Installation
Acro Wot - Instructions STEP 36 Apply epoxy to the slot in the rudder where the tailwheel wire will fit. Now slide the rudder into position ensuring that the tailwheel wire and both hinges enter their pre-cut slots/hole in the fin/rudder. Ensure a gap-free hinge line and a 1mm gap between the rudder counterbalance and tip of the fin. -
Page 10: Four Stroke Engine Installation
Acro Wot - Instructions STEP 42 Now connect one of the clevises to the rudder servo and feed the wire out through the corresponding slot in the rear of the fuselage. Use a scrap length of snake tube to help. Repeat for the second wire, connecting this to the other side of the servo horn. - Page 11 Acro Wot - Instructions STEP 48 Holding the engine steady, mark the position of the mounting holes on the mount as shown. STEP 49 Remove the engine and drill four clearance holes through the engine mounting beams to suit the bolts supplied. STEP 50 Prepare the fuel tank for fitting by assembling the tank stopper with the feed, vent and fuel pipes.
-
Page 12: Two Stroke Engine Installation
Acro Wot - Instructions STEP 54 Adjust the length of the linkage so that mid-throttle stick position corresponds to the carburettor being open 50%. Tighten the screw in the connector and adjust the high and low throttle positions. STEP 55 Connect the fuel line to the engine, pressure to the exhaust (if using exhaust pressure) and block the vent line. -
Page 13: Final Installation
Acro Wot - Instructions STEP 60 Screw the engine to the mount using the four bolts, washers and nuts supplied. Locate the throttle pushrod outer sleeve. Install the tube through the bulkhead and secure with a drop of cyano. Form a 'Z' bend in the throttle pushrod. Fit to the carburettor throttle lever and slide the pushrod into its outer. -
Page 14: Control Throws
Spare Parts and Service Spare parts are available for the Acro Wot ARTF from all Ripmax stocked model shops. In case of any difficulty, any product queries, or to locate your local Ripmax stockist, please write to the address below or visit www.ripmax.com Always fly responsibly and safely. - Page 15 Acro Wot - Instructions...
- Page 16 Acro Wot - Instructions...
Need help?
Do you have a question about the Acro Wot mk2 and is the answer not in the manual?
Questions and answers