Table of Contents
Advertisement
8488H-English_Manuals 11/11/14 2:36 PM Page 1
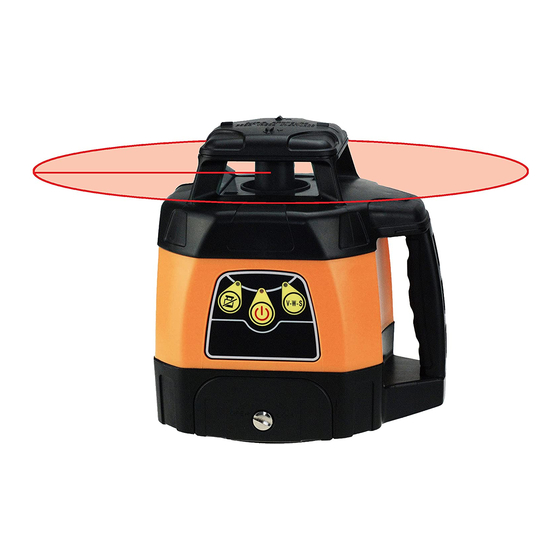
Electronic Self-Leveling Horizontal
Exterior Rotary Laser Kit
Model No. 40-6551
!
Instruction Manual
Congratulations on your choice of this Electronic Self-Leveling
Horizontal Exterior Rotary Laser. We suggest you read this instruction
manual thoroughly before using the instrument. Save this instruction
manual for future use.
This is a Class IIIa laser tool and is manufactured to comply with CFR 21,
parts 1040.10 and 1040.11 as well as international safety rule IEC 285.
©2015 Johnson Level & Tool
1
Advertisement
Table of Contents

Related Manuals for Johnson 40-6551


Summary of Contents for Johnson 40-6551
- Page 1 Save this instruction manual for future use. This is a Class IIIa laser tool and is manufactured to comply with CFR 21, parts 1040.10 and 1040.11 as well as international safety rule IEC 285. ©2015 Johnson Level & Tool...
-
Page 2: Table Of Contents
6. Operating Instructions 14. Accessories 7. Using the Product 15. Trouble Shooting 1. Kit Contents Description for Model 40-6551 Qty. Electronic Self-Leveling Horizontal Exterior Rotary Laser NiMH Rechargeable Battery Pack 6.4V Battery Adapter 4 “C” Alkaline Battery Pack (batteries not included) -
Page 3: Safety Instructions
• Do not attempt to repair or disassemble the laser tool. If unqualified persons attempt to repair this tool, warranty will be void. • Use only original Johnson ® parts and accessories purchased from your Johnson ® authorized dealer. Use of non-Johnson ®... -
Page 4: Location/Content
8488H-English_Manuals 11/11/14 2:36 PM Page 4 4. Location/Content of Warning Labels ©2015 Johnson Level & Tool... -
Page 5: Location Of Parts/Components
8488H-English_Manuals 11/11/14 2:36 PM Page 5 5. Location of Part/Components Rotary Head Laser Output Window Handle Keypad Battery Cover Battery Pack Locking Screw 5/8" - 11 Screw Thread in Bottom ©2015 Johnson Level & Tool... -
Page 6: Operating Instructions
Indication LED to charge for 12 plus hours. (2) The unit can still work during charging Fig. 3 with the adapter. (3) Do not charge alkaline batteries to avoid explosion. ©2015 Johnson Level & Tool... - Page 7 3. Press power button to turn power on. 4. Press the Tilt button to lock in the height of the laser. 5. After finishing operation or before moving the laser, turn the power off. ©2015 Johnson Level & Tool...
-
Page 8: Using The Product
LED Flashing Quickly = laser has been moved and height of laser may have been changed LED Off = Tilt mode is turned off Vibrate/V-W-S Mode LED LED On = laser is in vibrate/V-W-S mode LED Off = laser is not in vibrate/V-W-S mode ©2015 Johnson Level & Tool... - Page 9 The laser beam will blink on and off and the Tilt mode LED will blink quickly alerting the user the height of the laser may have been changed. Pressing the tilt mode button on the laser keypad will ©2015 Johnson Level & Tool...
- Page 10 Vibrate mode allows continuous operation during high winds, vibrations and shocks. Slight movements are ignored and the laser only enters Tilt mode if significant movement occurs. Press the Vibrate V-W-S button again to turn vibrate off. ©2015 Johnson Level & Tool...
- Page 11 LED display: down arrow, up arrow, horizontal on grade bar Dimensions: 6.30" x 3.35" x 1.10" (160 x 85 x 28mm) Weight: 1 lb. (0.45kg) Others: Rain and dust resistant ©2015 Johnson Level & Tool...
- Page 12 6) Power key 7) Beeper 8) Reception window 9) Fine/Coarse accuracy key 10) Beeper key 11) Back display window 12) Back on grade mark 13) Bracket screw thread 14) Battery cover screw 15) Battery cover ©2015 Johnson Level & Tool...
- Page 13 • Put the battery cover door back, and tighten the screw. Note: 1) Remove the battery when the unit is being stored for a long time. 2) When the low battery indicator is displayed, change the battery soon. ©2015 Johnson Level & Tool...
- Page 14 The sound symbol displayed on the LCD will change accordingly. Note: There will be two beeps when turning the unit on and off. There will be one beep when changing functions. ©2015 Johnson Level & Tool...
- Page 15 Laser signal Laser signal Laser signal Laser signal 1. When detecting a horizontal laser signal, it is important to have the horizontal bubble vial centered, as the deflection of the receiver will influence its receiving accuracy. ©2015 Johnson Level & Tool...
- Page 16 Low Battery Display Function When the battery sign blinks on the LCD, the battery is low and needs to be replaced. If the battery is very low, the unit will power off automatically. Replace the battery. ©2015 Johnson Level & Tool...
- Page 17 Rod Clamp Connecting to the rod clamp. Connecting to the grade rod. 5. Detector Maintenance • Keep the unit, particularly the reception window, clean. If it does get dirty, use a cloth to wipe it clean. ©2015 Johnson Level & Tool...
-
Page 18: Self-Check & Fine Calibration
B are more than 1/32" apart at 50’, the unit is out of calibration. 6. As shown, turn the instrument by 90° and place it on the platform, with the operating panel facing you. Perform 50’ ©2015 Johnson Level & Tool... - Page 19 Y-axis is selected when the V-W-S light is solid. Once the desired axis has been selected, the “UP Arrow” and “Down Aarow” buttons are used to adjust the position of the horizontal laser beam plane. ©2015 Johnson Level & Tool...
- Page 20 5. Press the “Enter” button on the remote control to accept the calibration value, noting that the status indicator goes “off”. 6. After calibration is completed, make sure to power off the unit and then power on again to activate the calibration. ©2015 Johnson Level & Tool...
-
Page 21: Technical Specifications
8.62" x 6.30" x 7.95" (219 x 160 x 202mm) Weight 4.65 lbs. (2Kg) Working Temperature 14°F to 113°F (-10°C to 45°C) Center Screw Thread 5/8" – 11 Rotation Speed 600 rpm IP Protection Class ©2015 Johnson Level & Tool... -
Page 22: Application Demonstrations
8488H-English_Manuals 11/11/14 2:36 PM Page 22 10. Application Demonstrations Squaring Leveling Grading Set Forms Elevation ©2015 Johnson Level & Tool... -
Page 23: Care And Handling
12. Product Warranty Johnson Level & Tool offers a three year limited warranty on each of its products. You can obtain a copy of the limited warranty for a Johnson Level & Tool product by contacting Johnson Level & Tool's Customer Service Department, as provided below, or by visiting our web site at www.johnsonlevel.com. -
Page 24: Warranty Registration
For further assistance, or if you experience problems with this product that are not addressed in this instruction manual, please contact our Customer Service Dept. In the U.S., contact Johnson Level & Tool’s Customer Service Department at 888-9-LEVELS. In Canada, contact Johnson Level & Tool’s Customer Service Department at 800-346-6682. -
Page 25: Accessories
NO WARRANTY. If you need any assistance in locating any accessories, please contact our Customer Service Department. In the U.S., contact Johnson Level & Tool’s Customer Service Department at 888-9-LEVELS. In Canada, contact Johnson Level & Tool’s Customer Service Department at 800-346-6682. -
Page 26: Trouble Shooting
• If the unit is out of calibration less than 1/8" at 50', follow calibration procedure in manual. • If the unit is out of calibration more than 1/8" at 50', contact an authorized Johnson service center or Johnson Level & Tool's customer service department. ©2015 Johnson Level & Tool... - Page 27 Johnson Level & Tool’s customer service department. • If the unit will not calibrate, contact an authorized Johnson service center or Johnson Level & Tool’s customer service department. • If the unit beeps and/or flashes constantly, check to see if the unit is being tilted to angles beyond the self-leveling range.
- Page 28 8488H-English_Manuals 11/11/14 2:37 PM Page 28 ©2015 Johnson Level & Tool...
Need help?
Do you have a question about the 40-6551 and is the answer not in the manual?
Questions and answers