Advertisement
Available languages
Available languages
Quick Links
Download this manual
See also:
Instruction Manual
8305H-All_Manuals 8/18/14 8:02 AM Page 1
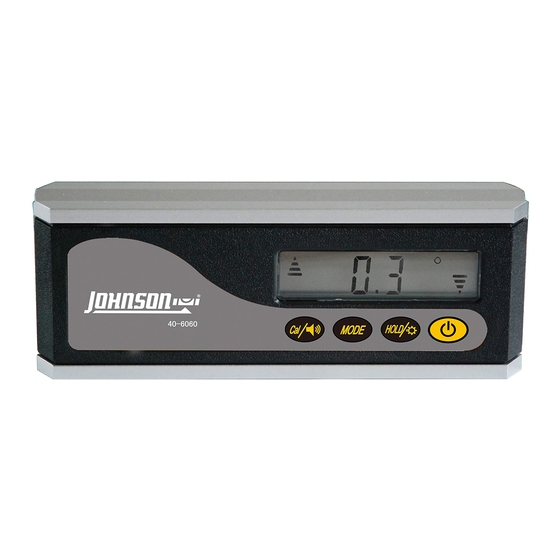
Magnetic Digital Level
Model No. 40-6060
Instruction Manual
Congratulations on your choice of this Magnetic Digital Level. We
suggest you read this instruction manual thoroughly before using the
instrument. Save this instruction manual for future use.
©2014 Johnson Level & Tool - Rev. 3
1
Advertisement

Related Manuals for Johnson 40-6060


Summary of Contents for Johnson 40-6060
- Page 1 Model No. 40-6060 Instruction Manual Congratulations on your choice of this Magnetic Digital Level. We suggest you read this instruction manual thoroughly before using the instrument. Save this instruction manual for future use. ©2014 Johnson Level & Tool - Rev. 3...
- Page 2 • 0º and 90º - position of inclination is confirmed by a signal tone • Automatic digit inversion for overhead measurements • Hold-function to freeze measurement • Magnetic base • 1/4” - 20 thread for connection to tripod ©2014 Johnson Level & Tool - Rev. 3...
- Page 3 8305H-All_Manuals 8/18/14 8:02 AM Page 3 3. Location of Part/Components LCD Display Battery Compartment ©2014 Johnson Level & Tool - Rev. 3...
-
Page 4: Operating Instructions
2. Always remove the batteries before storing the instrument. Display after Installing Batteries: 1. After installing new batteries, the LCD will display “good” and then show “-0-”. 2. Calibrate the instrument as described in self-check & fine calibration. ©2014 Johnson Level & Tool - Rev. 3... -
Page 5: Using The Product
Push again to turn off. Horn will start a slow beep at 10º and 80º and beep faster the closer you get to 0º or 90º. Once the instrument hits 0º or 90º, you will get a steady tone. ©2014 Johnson Level & Tool - Rev. 3... - Page 6 (more than 2 seconds) will turn on the LCD backlight. Power On/Off Key Power on and off the instrument by pressing this key. Automatic Shut-off This instrument will shut-off automatically if no operation is received within 20 minutes. ©2014 Johnson Level & Tool - Rev. 3...
- Page 7 The figure below shows the left side of the digital level needs to be moved up to achieve level. Shows that the digital level is level. Shows the measurement of the slope. ©2014 Johnson Level & Tool - Rev. 3...
- Page 8 10 seconds and write down the fourth degree reading when stable. 5. Of the four degree readings, if any two of the values have a difference over 0.2º, the unit must be recalibrated. Figure 1 Figure 3 Figure 2 Figure 4 ©2014 Johnson Level & Tool - Rev. 3...
- Page 9 Calibration key again, the LCD will show -1-. 2. Rotate the digital level 180º on the same plane, figure 10, wait 10 seconds and press the Cal key until the LCD displays -2-. ©2014 Johnson Level & Tool - Rev. 3...
-
Page 10: Technical Specifications
Dimensions 6.45" x 2.3" x 1.25" (164 x 60 x 32mm) Weight 0.66 lbs. (0.3 Kg) Working Temperature 14°F to 113°F (-10°C to +45°C) Center Screw Thread 1/4" – 20 ©2014 Johnson Level & Tool - Rev. 3... -
Page 11: Care And Handling
• Keep the level dry and clean. Remove any moisture or dirt with a soft, dry cloth. • Do not use harsh chemicals, strong detergents or cleaning solvents to clean the level. ©2014 Johnson Level & Tool - Rev. 3... -
Page 12: Product Warranty
8305H-All_Manuals 8/18/14 8:02 AM Page 12 9. Product Warranty Johnson Level & Tool offers a three year limited warranty on each of its products. You can obtain a copy of the limited warranty for a Johnson Level & Tool product by contacting Johnson Level & Tool's Customer Service Department, as provided below, or by visiting our web site at www.johnsonlevel.com. - Page 13 (section 6). •If the unit will not calibrate, contact our Customer Service Department. •If the unit turns off after a short time, install new alkaline batteries and clean the battery terminals. ©2014 Johnson Level & Tool - Rev. 3...
- Page 14 8305H-All_Manuals 8/18/14 8:02 AM Page 14 ©2014 Johnson Level & Tool - Rev. 3...
- Page 15 Felicitaciones por la compra de este Nivel Digital Magnético. Le sugerimos leer detenidamente y en su totalidad el manual de operación antes de utilizar el instrumento. Guarde este manual de operación para consultarlo en el futuro. ©2014 Johnson Level & Tool - Rev. 3...
- Page 16 • 0º y 90º - la posición de inclinación se confirma por un señal auditiva • Inversión automática de dígitos para mediciones elevadas • Función de suspensión para congelar la medición • Base magnética • Tornillo de 1/4 – 20 para conectarlo al trípode ©2014 Johnson Level & Tool - Rev. 3...
- Page 17 8305H-All_Manuals 8/18/14 8:02 AM Page 17 3. Ubicación de partes/componentes Pantalla LCD Compartimiento de baterías ©2014 Johnson Level & Tool - Rev. 3...
- Page 18 Indicación de pantalla después de instalar las baterías: 1. Después de instalar baterías nuevas, la pantalla LCD mostrará “good” (“buenas”) y después “-0-“. 2. Calibre el instrumento como se describe en la sección Auto-Chequeo y Calibración. ©2014 Johnson Level & Tool - Rev. 3...
- Page 19 Un pitido lento empezará a sonar a 10º y 80º y sonará más rápidamente entre más se acerque a 0º o 90º. Cuando el instru- mento alcanza 0º o 90º, el tono se vuelve constante. ©2014 Johnson Level & Tool - Rev. 3...
- Page 20 2 segundos para encender la luz LCD para iluminación posterior. Botón ON/OFF (para encendido y apagado) Presione este botón para encender y apagar el instrumento. Apagado Automático Este instrumento se apagará automáticamente si no se ha utilizado por 20 minutos. ©2014 Johnson Level & Tool - Rev. 3...
- Page 21 En la figura que aparece a continuación se muestra que es necesario subir la parte izquierda del nivel digital para lograr un nivel correcto. Aquí se muestra que el nivel digital está en posición correcta. Aquí se muestra la medición de inclinación. ©2014 Johnson Level & Tool - Rev. 3...
- Page 22 ángulo. 5. De las 4 lecturas de ángulo, si 2 de los valores tienen una diferen- cia de más de 0.2º, la unidad debe recalibrarse. Figura 1 Figura 3 ©2014 Johnson Level & Tool - Rev. 3...
- Page 23 -0- aparecerá en la pantalla LCD. Espere 10 segundos y después presione el botón CAL/SONIDO nuevamente. La pantalla LCD mostrará -1-. 2. Efectúe una rotación del nivel digital de 180º en el mismo plano ©2014 Johnson Level & Tool - Rev. 3...
- Page 24 Dimensiones 6.45" x 2.3" x 1.25" (164 x 60 x 32mm) Peso 0.66 lbs. (0.3 Kg) Temperatura de Trabajo 14°F a 113°F (-10°C a +45°C) Rosca de tornillo central 1/4" – 20 ©2014 Johnson Level & Tool - Rev. 3...
- Page 25 Mantenga la unidad del nivel seca y limpia. Elimine humedad o • suciedad con un paño seco y suave. No utilice químicos abrasivos, detergentes fuertes ni disolventes de • limpieza para limpiar el nivel. ©2014 Johnson Level & Tool - Rev. 3...
- Page 26 8305H-All_Manuals 8/18/14 8:02 AM Page 26 9. Garantía del Producto Johnson Level & Tool ofrece una garantía limitada de 3 años para cada uno de sus productos. Usted puede obtener una copia de la garantía limitada de un producto Johnson Level &...
- Page 27 •Si la unidad no puede calibrarse, comuníquese con nuestro Departamento de Servicio al Consumidor. •Si la unidad se apaga después de poco tiempo, instale baterías alcalinas nuevas y limpie los terminales de las baterías. ©2014 Johnson Level & Tool - Rev. 3...
- Page 28 8305H-All_Manuals 8/18/14 8:02 AM Page 28 ©2014 Johnson Level & Tool - Rev. 3...
- Page 29 Nous vous félicitons d'avoir choisi ce niveau numérique magnétique. Nous vous suggérons de lire attentivement ce mode d'emploi avant d'utiliser cet appareil. Conservez ce mode d'emploi pour pouvoir vous y référer ultérieurement. ©2014 Johnson Level & Tool - Rev. 3...
- Page 30 • Fonction « maintien » permettant de conserver la mesure affichée à l’écran • Base magnétique • Filetage de 1/4 po - 20 permettant de raccorder l’instrument à un trépied ©2014 Johnson Level & Tool - Rev. 3...
- Page 31 8305H-All_Manuals 8/18/14 8:02 AM Page 31 3. Emplacement des pièces/des composants Affichage à CL Compartiment des piles ©2014 Johnson Level & Tool - Rev. 3...
- Page 32 1. Après l'insertion de piles neuves, l'écran à CL affichera « good », puis « -0- ». 2. Calibrez l'instrument tel que décrit à la section « Contrôle automatique et calibrage fin ». ©2014 Johnson Level & Tool - Rev. 3...
- Page 33 émettra un bip lent à 10° et à 80°, et un bip plus rapide à mesure que vous vous rapprocherez du 0° ou de 90°. Lorsque l'in- strument atteint 0° ou 90°, un signal sonore continu est émis. ©2014 Johnson Level & Tool - Rev. 3...
- Page 34 à CL. Touche marche/arrêt (ON/OFF) Appuyez sur cette touche pour mettre l'instrument en marche et pour l'éteindre. Arrêt automatique Cet instrument s'éteint automatiquement lorsqu'il n'est pas utilisé pendant 20 minutes. ©2014 Johnson Level & Tool - Rev. 3...
- Page 35 La figure ci-dessous indique que l’utilisateur doit relever la partie gauche de l’instrument numérique pour le mettre de niveau. Indique que l’instrument est de niveau. Indique la valeur d’inclinaison de la pente. ©2014 Johnson Level & Tool - Rev. 3...
- Page 36 5. Parmi les quatre valeurs affichées en degrés, si deux d'entre elles affichent une différence de plus de 0,2°, l'utilisateur doit procéder à un nouveau calibrage du zéro. Figure 3 Figure 1 Figure 2 Figure 4 ©2014 Johnson Level & Tool - Rev. 3...
- Page 37 1. Mettez en marche l'instrument et placez-le sur une surface lisse et horizontale (voir la figure 9). Appuyez sur la touche de calibrage et maintenez-la enfoncée pendant 2 secondes; « -0- » s'affiche ©2014 Johnson Level & Tool - Rev. 3...
- Page 38 (164 x 60 x 32 mm) Poids 0,66 lb (0,3 kg) Température de fonctionnement -10° à +45 °C (14° à 113 °F ) Filetage de la vis centrale 1/4 po – 20 ©2014 Johnson Level & Tool - Rev. 3...
- Page 39 Veillez à ce que l’instrument soit toujours sec et propre. • Enlevez l’humidité ou la poussière à l’aide d’un chiffon doux et sec. N’utilisez pas de produits chimiques forts, de détergents • abrasifs ni de solvants pour nettoyer le niveau. ©2014 Johnson Level & Tool - Rev. 3...
- Page 40 ® . À défaut de quoi, la garantie limitée de Johnson Level & Tool (s’il y a lieu) sera nulle et AUCUNE GARANTIE ne pourra s’appliquer. Communiquez avec un de nos centres de service pour toute réparation qui n’est pas couverte par la garantie. Pour connaître la liste de nos centres de service, rendez-vous sur notre site Internet, le www.johnsonlevel.com, ou appelez...
- Page 41 •S'il est impossible de calibrer l'appareil, contactez notre Service à la clientèle. •Si l'appareil s'éteint après une courte période de temps, insérez de nouvelles piles alcalines et nettoyez les bornes des piles. ©2014 Johnson Level & Tool - Rev. 3...
- Page 42 8305H-All_Manuals 8/18/14 8:02 AM Page 42 ©2014 Johnson Level & Tool - Rev. 3...
Need help?
Do you have a question about the 40-6060 and is the answer not in the manual?
Questions and answers