Table of Contents
Advertisement
Quick Links
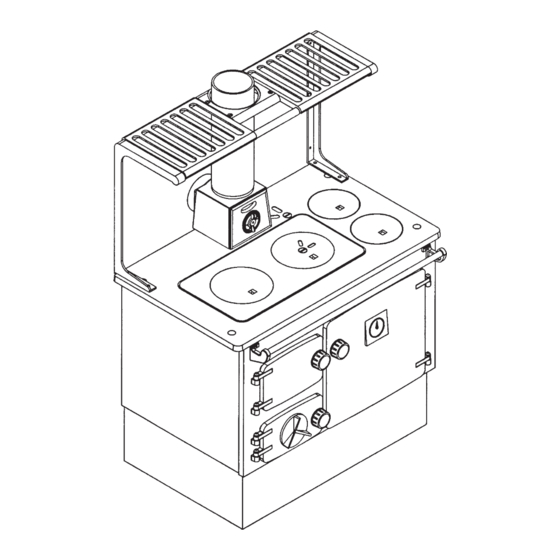
Mourne
Solid Fuel Cooker
To ensure safety, satisfaction and maximum service, this quality Cooker should be installed by a competent
person. The provision of a Central Heating or Domestic Hot Water facility requires that the hot water system involved
conforms fully to good plumbing practice and established standards.
INSTALLATION AND OPERATING INSTRUCTIONS
To Be Left With End User
Advertisement
Table of Contents

Subscribe to Our Youtube Channel
Related Manuals for Stanley Mourne


Summary of Contents for Stanley Mourne
- Page 1 Mourne Solid Fuel Cooker To ensure safety, satisfaction and maximum service, this quality Cooker should be installed by a competent person. The provision of a Central Heating or Domestic Hot Water facility requires that the hot water system involved conforms fully to good plumbing practice and established standards.
-
Page 2: Table Of Contents
Specification ............3 Mourne Installation Instructions for Plumber ....... . . 4 Site Assembly Instructions . -
Page 3: Introduction
The complete installation must be done in accordance with current Standards and Local Codes. It should be noted that the requirements and these publications may be superseded during the life of this manual. IMPORTANT NOTICE: Any alteration to this appliance that is not approved in writing by Waterford Stanley will render the guarantee void. -
Page 4: Specification
IMPORTANT - Control of Substances Harmful to Health: It is the Users/Installers responsibility to ensure that the necessary personal protective clothing is worn when handling materials that could be interpreted as being injurious to health a and safety. When handling Firebricks, Fire Cement or Fuels, use disposable gloves. Exercise caution and use disposable masks and gloves when handling glues and sealants. -
Page 5: Mourne Installation Instructions For Plumber
(a)The capacity of the storage cylinder does not exceed 30 gallons. Note: Where a Stanley Range is installed in a recess which is closed off by a register plate, the (b)The cylinder is lagged and is fixed upright. - Page 6 Fig.4 Parts removal before attaching the base. 3. Stand cooker on it’s base. Fig.5 Fig.7 1. Lay cooker on it’s back on an old blanket. 2. Attach end plates and front with screws provided. Fig.6 4. Move cooker into it’s location and replace all parts removed.
-
Page 7: Installation
INSTALLATION should have a cross sectional area of at least 176 Fig.8 sq. cm (28.28 ins) or an inner diameter of 15 to 23cm (6 to 9 ins). A similar direct air inlet is required in the room to support combustion. CHIMNEY/FLUES The chimney should have a cross sectional area of at least 176 sq. -
Page 8: Chimney Cleaning
Fig.9 STANLEY CAST IRON PIPES ARE HIGHLY RECOMMENDED FOR INTERIOR USE. NOTE: Where the appliance spigot or flue pipes protrudes into the chimney, care should be taken to ensure that it does not block the chimney. DOWN DRAUGHTS However well... -
Page 9: Use Of Existing Flues And Chimneys
USE OF EXISTING FLUES OR CHIMNEY’S terminal. These air vents must also be fire proofed as per Building Regulations. An existing flue pipe or chimney that has proven to be satisfactory when used with another solid fuel Air vents in internal walls should not communicate appliance can normally be used for this appliance with bedsits, toilets, bathrooms or rooms containing provided that its construction, condition and... -
Page 10: Plumbing
MOURNE STANLEY COOKER Central Heating and Indirect Domestic Hot Water. Recommended indirect cylinder 135 litres, depending on domestic requirements with a 28mm flow and return pipes not exceeding 7.8m each in length. -
Page 11: Heating
HEATING hot water straight back into the return. Such a valve can be operated either manually or Care should be taken to ensure that the heating electrically in conjunction with a return pipe installation is correctly installed and that it complies thermostat. -
Page 12: Exploded View
EXPLODED VIEW Bonnet Towel Rail Bracket (RH) Bonnet Door Towel Rail Spin Valve Oven Door Panel Sheet Iron Back Outlet Spigot Fire Door Lining Top Flue Spigot Fire Door Insulation Hot Plate Cup (LH) Fire Door Rope Hot Plate Cup (RH) Fire Door Insulation Panel Hot Plate Oven Door Rope... -
Page 14: Draining
Where the gravity and central heating circuits join together to return to the Cooker we recommend the use of an injector tee connection, situated as close to the unit as possible. This type of tee encourages a stable flow of hot water through both circuits and helps to prevent priority being given to the stronger flow, which is most commonly the pumped central heating circuit. -
Page 15: Important Notes
IMPORTANT NOTES Now that your Stanley solid fuel cooker is installed and no doubt you are looking forward to many comforts it will provide, we would like to give you some tips on how to get the best results from your cooker. -
Page 16: Lighting The Fire
LIGHTING THE FIRE Open the Fire Door and lower the Fire Fence or open the top fuelling cup. Fully open all dampers and the Primary Air Inlet Spin Valve. Kindle with paper and sticks in the usual way. Ignite by using a taper or rolled wad of paper inserted into the ashpan. Under no circumstances should any flammable liquid i.e. -
Page 17: Operating The Cooker
OPERATING THE COOKER Fig.15 FUELLING Using the recommended fuels, access is through the fire door or the fuelling cup. To fuel, lift and tilt the Fire Fence outwards. Note: When burning timber logs the fire fence may be removed to THE HOTPLATE simplify front loading, make sure that the logs are no longer than the recommended size so that the... -
Page 18: Overnight Burning
COOKER FLUE CLEANING A normal fire will provide sufficient hot water to Your Stanley Cooker should be cleaned out at least meet your needs. Increase the burning rate to heat once a week although this may be extended to two oven up to the required temperature. -
Page 19: Cleaning Instructions
CLEANING INSTRUCTIONS To remove all the accumulated deposits take off the Remove all loose fitting parts, hotplate, bonnet door cleaning plate situated immediately under the oven from the top of the cooker. Open the direct damper. on the front of the cooker and thoroughly clean out Where a flue chamber is fitted in conjunction with a the residue from the side flue, back flue and base vertical flue pipe remove the cleaning door from the... -
Page 20: Cleaning
Your new Stanley Cooker will give you every Fig.24 possible satisfaction in use and many years of service provided it is properly installed and maintained in accordance with our published instructions. CLEANING IMPORTANT: BE CAREFUL OF THE HOT APPLIANCE. General cleaning must be carried out when the cooker is cool. -
Page 21: Mild Steel
15K Central Heating Boiler CO ALARM MILD STEEL Waterford Stanley recommend the fitting of a CO The steel side panels and splash back must not be Alarm in the same room as the appliance, this is a cleaned with steel wool. Use only washing up liquid in hot water with a lint free cloth. -
Page 22: Fault Finding
FAULT FINDINGS Poor Chimney Draught (a) Obstruction (a) Clear and Clean (b) Too Low (b) Raise Height above Ridge (c) Too Wide (c) Fit Flue Liner 15 to 23 cm (d) Crack in Wall (d) Repair Cracks (e) Shared by another unit (e) Cut off other unit Excessive Chimney Draught (a) High chimney (a) Adjust bonnet spin valve... -
Page 23: Installation Check List
COOKER INSTALLATION CHECK LIST Tick Flue System 1. Minimum Flue Height of 4.6 metres (15 feet). 2. Appliance should be connected to a minimum of 1.8 metres (6 feet) of 125mm (5”) flue pipe with a horizontal run not exceeding 150mm (6”). 3. - Page 24 Manufactured by Waterford Stanley Ltd., Unit 401-403, IDA Industrial Estate, Cork Road, Waterford, Ireland. Tel: (051) 302300 Fax (051) 302315 www.waterfordstanley.com www.stanleystoves.com Rev:010 DP130913 N00118AXX...
Need help?
Do you have a question about the Mourne and is the answer not in the manual?
Questions and answers