Table of Contents
Advertisement
Quick Links
ation | installatie | installazione | instalación | instalação | instalace | installation | installatie | in
| instalación | instalação | instalace | installation | installatie | installazione | instalación | insta
ace | installation | installatie | installazione | instalación | instalação | instalace | installation | ins
lazione | instalación | instalação | instalace | installation | installatie | installazione | instalación
| instalace | installation | installatie | installazione | instalación | instalação | instalace | instal
atie | installazione | instalación | instalação | instalace | installation | installatie | installazione | i
instalação | instalace | installation | installatie | installazione | instalación | instalação | inst
installation instructions
FOR INSTALLATION ENGINEERS
[en]
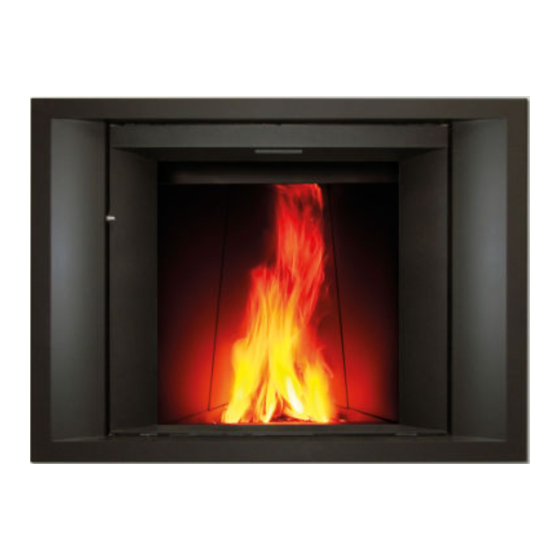
Stûv μM
0312 – SN 122141 > ...
Advertisement
Table of Contents

Related Manuals for Stuv Micromega


Summary of Contents for Stuv Micromega
-
Page 1: Installation Instructions
ation | installatie | installazione | instalación | instalação | instalace | installation | installatie | in | instalación | instalação | instalace | installation | installatie | installazione | instalación | insta ace | installation | installatie | installazione | instalación | instalação | instalace | installation | ins lazione | instalación | instalação | instalace | installation | installatie | installazione | instalación | instalace | installation | installatie | installazione | instalación | instalação | instalace | instal atie | installazione | instalación | instalação | instalace | installation | installatie | installazione | i... -
Page 2: Table Of Contents
This Stûv stove has been designed We recommend that you read these to offer you maximum comfort and instructions prior to installation. safety. It has been manufactured Some configurations might have an with the greatest of care. If however impact on the sequence of operations you should find the slightest to be performed. -
Page 3: Standards, Certification And Technical Characteristics
PRESENTATION OF THE PRODUCT Standards, certification and technical characteristics The Stûv μM stoves (for intermittent operation) comply with the requirements of EN European Standards in terms of efficiency, gas emissions, safety etc…. Data provided in this notice are supplied by a certified laboratory. Test results according to EN 13229 : 2001 and 13229–A2 : 2004 standards... - Page 4 Standards, certification and technical characteristics Other technical characteristics Minimum draught needed to obtain the rated calorific output 12 Pa Weight-flow ratio of smokes 9.6 g/s Average smoke temperature at rated power 273°C Minimum diameter of the duct for the intake of outside combustion air 100 cm Optimum output range for usage 5 –...
-
Page 5: Dimensions
Dimensions Ø 150 Ø 63 Stûv μM - installation [en] - 0312 SN 122141 - ... - Page 6 Dimensions 585** 166** Max 8 mm min 852 MAX 857 min 608 MAX 613 Sans prolongement Stûv min 6 mm min 6 mm Without extension Stûv min 135 Avec prolongement Stûv With extension Stûv A/B/C A/B/C MAX 167 *Hauteur de 180 mm si foyer sans piétment Stûv et 380 si le piétement est installé. *height of 180 mm when the fireplace is installed without support base and 380 mm when the fireplace is equipped with the base ** Dimension hors isolation...
- Page 7 Recommandations We strongly recommend you entrust Some national and local regulations the installation of this Stûv to a require the installation of an access qualified professional who is able to flap in the connection between the ensure that the characteristics of the stove and the smoke flue.
-
Page 8: Overview
Overview Supplied as standard with the stove [1] Stove [2] Smoke outlet cover Options [3] Upper smoke outlet, diam. 180 [4] Smoke duct diam. 180 mm [5] Rear smoke outlet, diam. 180 [6] Insulation kit [7] Straight or dog-legged outside air connection kit [8] Ventilation kit [9] Ventilation unit... -
Page 9: The Different Configurations
- The horizontal rear smoke outlet using the stainless steel Stûv kit [diagram 2]. Vertical position of the stove The Stûv microMega can be installed directly on the stove’s feet [diagram However, for an installation with forced convection or an open fire with min. -
Page 10: Preparation Of The Area
PREPARATION OF THE AREA Combustion air inlet Drawing of air from the room The stove requires air for combustion. Drawing of air from outside If the stove is not connected directly to an outside air inlet, a sufficient air The Stûv 16-in is designed to be inlet (approximately 100 cm ) should directly connected to an outside air... - Page 11 (whether it is connected to especially when it is working in open the stove or not) fire mode. The Stûv micromega is designed to be connected directly ... will be protected on the outside by to an outside air inlet (independent a grill [diagram 3] the free passage...
-
Page 12: Smoke Flue
(the At www.stuv.com > Which hot air escapes) [diagram 2], or cause fireplace fits your Stûv? you will the entry of cold air from outside find a simplified method for roughly [diagram 3]. - Page 13 Connection to the smoke flue Allow play of 2 mm/m for expansion of the flue. 60 mm Calculation of the height of the duct The height of the connection duct will be that of the distance from ground to ceiling minus: X - 1500 mm 1,300 mm for a stove without feet.
-
Page 14: Holding Capacity Of The Structure
Holding capacity of the structure Ensure that the resistance of the floor is sufficiently strong to support the stove and the construction of the cladding. If in any doubt, please consult a specialist. The stove's surroundings and decoration The recess Check the dimensions of the recess [diagram 1 &... - Page 15 The stove's surroundings and decoration The different set-ups The Stûv micromega can be fitted into a masonry recess or inserted like a wood-burning stove if accompanied by Stûv ready-to-install cladding. 1370 The stove can also be combined with a metal flange [diagram 3] or a wooden unit (in 2 different sizes) [diagrams 1 and 2].
-
Page 16: Circulation Of Convection Air
Circulation of convection air Natural or forced convection ? Configuration of the ducts Natural convection is sufficient in If you do not install a fan, ducts are most cases [diagram 1]. not mandatory. However, please note that a fibrous insulating material This configuration obviously allows inserted in the recess can give off easier (no electrical connection) and... -
Page 17: Forced Convection
Forced convection Please note ! The fans supplied by Stûv are designed to direct room air and not to be installed in the hot air circuit at the stove's outlet. 2 ways of creating an air circuit : – install ducts in the stove's inlet to draw in room air distant from the stove [diagram 1] or even from another room in the house. - Page 18 Forced convection The advantages and disadvantages of these 2 types of installation Outlet ducts Inlet ducts – depression near the stove that risks + excess pressure close to the system affecting the drawing of air (encourages the drawing of air) –...
-
Page 19: Tools
Insulating the fireplace : pros & cons Safety They are not designed to protect inflammable materials from excessive Take the necessary precautions to heating. prevent excessive heating of the recess walls and construction materials The advantage : reduction of heat close to the stove (e.g. -
Page 20: Installation
INSTALLATION On taking delivery of the equipment IMPORTANT! Signing the delivery forms signifies that you accept the product and acknowledge that the merchandise is compliant with the merchandise ordered. It is therefore very important to check the integrity of the merchandise on delivery. - Page 21 Unpacking To make transport easier, it is possible to remove the door as well as the side castings of the combustion chamber. These steps are optional but they make the stove considerably lighter. Once the door is open, it is recommended to block it in this position.
- Page 22 Unpacking Unscrew but do not remove the screw that holds in place the diverter closure panel [diagrams 17 & 18]. Stûv μM - installation [en] - 0312 SN 122141 - ...
-
Page 23: Moving The Stove
Unpacking Moving the stove Moving the stove – with a pallet truck : leave it on its pallet, – with purpose-built handles [diagram 1] ; they are reversible to allow handling in staircases for example [diagram 4]. Stûv μM - installation [en] - 0312 SN 122141 - ... -
Page 24: Preparation Of The Ducts
Preparation of the ducts Intake of air for combustion If you have selected this option, install the combustion air inlet duct. Convection air If necessary, prepare the ducts for the hot air outlet. Grills The air inlet and outlet grids should be positioned in such a way that they cannot become blocked. - Page 25 Positioning of the stove The stove should be installed: > On the ground or on a masonry base: Level the stove using the 4 adjustable feet [Diagram 4]. > On a Stûv support base (optional): Stûv μM - installation [en] - 0312 SN 122141 - ...
- Page 26 Positioning of the stove Stûv μM - installation [en] - 0312 SN 122141 - ...
-
Page 27: Convection
Convection In general In order to get the best from your Stûv micromega, we recommend that you use the maximum number of air inlets and outlets to encourage natural convection between the outer casing of the stove and the combustion chamber. - Page 28 Auxiliary ventilation Installation of the ventilation kit (optional) Installation of the thermal switch (optional) Stûv μM - installation [en] - 0312 SN 122141 - ...
- Page 29 Auxiliary ventilation Installation of the ventilation unit (optional) Stûv μM - installation [en] - 0312 SN 122141 - ...
- Page 30 Installation of the ventilation control system Check fuses are disconnected before any operation. IMPORTANT! Make sure that you position the various parts in such a way that makes access possible once the stove is installed and the recess closed. They must be located under the access hatch of the combustion chamber (inside the air unit, if necessary).
- Page 31 Installation of the ventilation control system (continued) To synchronise the unit with the remote control, press the red button until a continuous noise is emitted [diagram 8]. Next, press a button on the remote control. An intermittent sound is emitted [diagram 9]. From this point, the 2 devices are synchronised.
-
Page 32: Connection To The Smoke Flue
Auxiliary ventilation Installing an outside air inlet 4 different inlets are possible: 2 under the stove and 2 on the side. Connection to the smoke flue In the case of a connection duct for just one room, leave a gap of 2 mm/m lengthways to allow for expansion. - Page 33 Connection to the smoke flue Connection of the smoke flue to the rear of the stove Make sure you purchase the Stûv rear connection kit for this type of installation - Break the double ring found at the rear. IMPORTANT! - The central part may be disposed of.
-
Page 34: Adjusting The Diverter
Connection to the smoke flue Adjusting the diverter It is possible to adjust the draw of the chimney through the positioning of the diverter. Lifting the rear of the diverter increases the draw of inefficient chimneys. Make sure you move it step by step because lifting the diverter has a direct effect on the post-combustion of the stove... -
Page 35: Insulating The Fireplace
Insulating the fireplace If you install insulating materials around the stove, ensure you do not obstruct the stove's convection air inlets on the sides or at the back. Important! Do not insert anything between the folds illustrated on diagram 1. These folds serve to guarantee an insulating air space. -
Page 36: When The Installation Of The Stove Is Complete
Insulating the fireplace To place insulation around the stove: fold back the flaps designed for this purpose [diagram 6]. Place the insulation on the flap [diagram 7] and fix it down by screwing into the galvanised steel using thread-forming screws [diagram Construction of cladding When installing the casing or the construction surrounding the stove,... - Page 37 ADDRESS WHERE WORKS WERE CARRIED OUT ........POST CODE .................... TOWN/PLACE ..................COUNTRY ....................INSTALLATION ENGINEER COMPANY ....................YOUR STÛV STOVE MICROMEGA SERIAL N° ....................DATE OF INSTALLATION ................ FLUE CHARACTERISTICS HEIGHT OF FLUE IN M ................DIAMETER OF FLUE IN MM ..............
-
Page 39: Contacts
Aldershvilevej 84 – 2880 Bagsvaerd rue Jules Borbouse 4 01680 Vantaa T 51 33 10 93 B-5170 Bois-de-Villers (Belgium) T 400 872 858 info@stuv.com – www.stuv.com www.takkamaailma.com Importer for Estonia Tulering Kaminasalong Oü Importer for the UK Importer for Sweden Sopruse 145 –... - Page 40 This document is available in several languages : accept responsibility for any errors that may have been made. Contact your distributor or visit www.stuv.com Editor: Gérard Pitance – rue Jules Borbouse 4 – 5170 Bois-de-Villers – Belgium 93104357 - notice d'installation - Stûv microméga [EN]...
Need help?
Do you have a question about the Micromega and is the answer not in the manual?
Questions and answers