Table of Contents
Advertisement
Quick Links
Requires 8 "AA" Batteries
(Not Included)
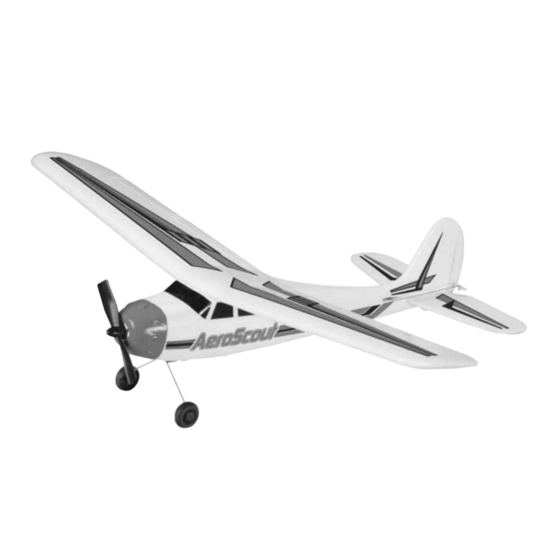
Please read though this instruction booklet to THOROUGHLY familiarize yourself with the assembly and flight characteristics of this
airplane prior to assembly. Please inspect all parts carefully before starting assembly! If any parts are missing, broken or defective,
or if you have any questions about the assembly or flying of this airplane, please call us at (217) 398-8970 and we'll be glad to help.
Hobbico
®
Inc. guarantees this kit to be free from defects in both material and workmanship at the date of purchase. This warranty
does not cover any component parts damaged by use or modification. In no case shall Hobbico's liability exceed the original
cost of the purchased kit. Further, Hobbico, Inc. reserves the right to change or modify this warranty without notice. In that
Hobbico, Inc. has no control over the final assembly or material used for final assembly, no liability shall be assumed nor accepted
for any damage resulting from the use by the user of the final user-assembled product. By the act of using the user-assembled
product, the user accepts all resulting liability. If the buyer is not prepared to accept the liability associated with the use of this
product, the buyer is advised to return this kit immediately in new and unused condition to the place of purchase. To make
a warranty claim send the defective part or item to Hobby Services at the address below:
Hobby Services
3002 N. Apollo Dr. Suite 1
Champaign IL 61822
USA
READ THROUGH THIS MANUAL BEFORE FLYING. IT
CONTAINS
IMPORTANT
WARNINGS CONCERNING THE USE OF THIS MODEL.
Entire Contents © Copyright 2006
™
ASSEMBLE ONLY WITH ADULT SUPERVISION
Include a letter stating your name, return shipping address, as much contact information as
possible (daytime telephone number, fax number, e-mail address), a detailed description of the
problem and a photocopy of the purchase receipt. Upon receipt of the package, the problem will
be evaluated as quickly as possible.
INSTRUCTIONS
WARRANTY
AND
Printed in China
Champaign, Illinois
HCAZ1990 for HCAA1990 V1.0
™
Advertisement
Table of Contents

Related Manuals for Flyzone AeroScout HCAA1990


Summary of Contents for Flyzone AeroScout HCAA1990
- Page 1 ™ ™ Requires 8 “AA” Batteries (Not Included) ASSEMBLE ONLY WITH ADULT SUPERVISION Please read though this instruction booklet to THOROUGHLY familiarize yourself with the assembly and flight characteristics of this airplane prior to assembly. Please inspect all parts carefully before starting assembly! If any parts are missing, broken or defective, or if you have any questions about the assembly or flying of this airplane, please call us at (217) 398-8970 and we’ll be glad to help.
- Page 2 FCC REQUIREMENT Carrier Frequency: 27.145MHz Carrier Frequency: 49.680MHz This device complies with Part 15 of the FCC Rules. Operation is subject to the following two conditions: (1) This device may not cause harmful interference, and (2) This device must accept any interference received, including interference that may cause undesired operation.
-
Page 3: Get The Model Ready To Fly
AIRFRAME PARTS AND HARDWARE GET THE MODEL READY TO FLY Preparing the Plane and Transmitter 1. Attach the landing gear by sliding the “U” bend into the plastic retainer as shown. 2. Remove the battery cover on the bottom of the transmitter and insert eight “AA”... - Page 4 Charging the Plane’s NiMH Batteries IMPORTANT! NEVER LEAVE A CHARGING BATTERY UNATTENDED. 4. Reinstall the battery cover. Ensure that the charge lead is not pinched or severed when the cover is reinstalled. 1. With the power switch on the transmitter set to “OFF,”...
-
Page 5: First Flight
4. After each flight, completely discharge the battery Battery Recycling by holding the plane and running the motor until the motor starts to pulse on and off. Remove the battery ATTENTION: The product you have pack from the airplane and allow it to cool purchased is powered by a rechargeable completely before recharging. - Page 6 PREPARE FOR TAKEOFF 1. Find an open area free of buildings, trees, power lines and people. 2. For your first few flights, fly only when the wind is calm. After you are comfortable with the airplane, you can fly in winds that are no more than 5 miles per hour.
-
Page 7: After The Flight
2. With the throttle fully depressed, hand launch the LANDING THE AERO SCOUT Aero Scout into the wind, at a slight upward angle. Note: For the first couple of flights, we recommend having a helper hand launch the airplane. It’s a known fact among fellow R/C pilots that your airplane will land. -
Page 8: Replacement Parts List
REPAIRS REPLACEMENT PARTS LIST Even the best R/C pilots in the world damage their To order replacement parts for your Aero Scout, use airplanes every now and then. In the unfortunate the order numbers in the list below. Replacement event that you damage your airplane, repairs are parts are available only as listed.
Need help?
Do you have a question about the AeroScout HCAA1990 and is the answer not in the manual?
Questions and answers