Table of Contents
Advertisement
Quick Links
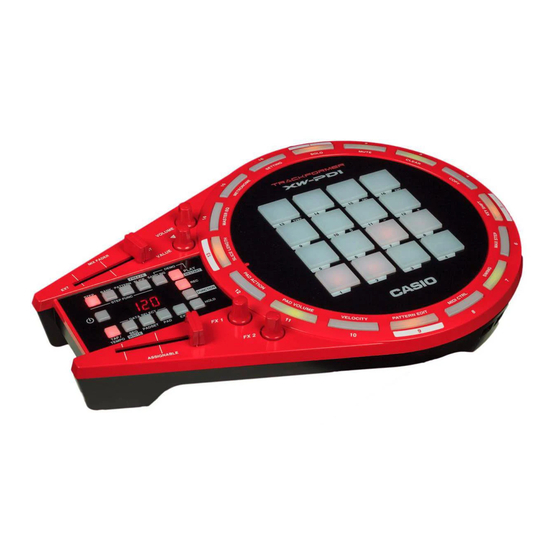
USER'S GUIDE ( Basics )
GUÍA DEL USUARIO ( Conceptos básicos )
Please keep all information for future reference.
Guarde toda información para tener como referencia futura.
Safety Precautions
Before trying to use this product, be sure to read the
"Safety Precautions" in this manual.
Precauciones de seguridad
Antes de intentar usar este producto, asegúrese de leer
las "Precauciones de seguridad" de este manual.
● For the separate "User's Guide (Tutorial)," visit the
CASIO Website URL below. You should also go to
the website for the latest product news.
http://world.casio.com/
● Para la "Guía del usuario (Tutorial)" por separado,
visite el sitio web de CASIO en la siguiete URL.
Visite el sitio web también para ver las últimas
novedades sobre nuestros productos.
http://world.casio.com/
XWPD1-ES-1A
EN/ES
Advertisement
Table of Contents

Related Manuals for Casio transformer xw-pd1


Summary of Contents for Casio transformer xw-pd1
- Page 1 ● Para la “Guía del usuario (Tutorial)” por separado, visite el sitio web de CASIO en la siguiete URL. Visite el sitio web también para ver las últimas novedades sobre nuestros productos.
-
Page 2: Important Safety Instructions
Never let children use an AC adaptor that is seriously damaged. • The product is not intended for children under 3 years. • Use only the CASIO AD-E95100L adaptor. • The AC adaptor is not a toy. -
Page 3: Table Of Contents
Guide (Tutorial) Safety Precautions............EN-3 Names of Controllers and their Functions ....EN-6 You can find the separate “User’s Guide (Tutorial)” at Connection Examples..........EN-8 the CASIO Website URL below. Power Requirements ..........EN-9 http://world.casio.com/ Changing Number and Value Settings ....EN-10 Returning TRACKFORMER to Initial Factory Defaults............EN-10... -
Page 4: General Guide
CASIO is prohibited under copyright laws. • IN NO EVENT SHALL CASIO BE LIABLE FOR • Even if the product is within its warranty period as ANY DAMAGES WHATSOEVER (INCLUDING, noted on the warranty certificate, use of the... -
Page 5: Safety Precautions
General Guide Safety Precautions Thank you for selecting this CASIO product. Be sure to read these “Safety Precautions” before trying to use it. After reading this User’s Guide, keep it in a safe place for future reference. About safety symbols Various symbols are used in this User’s Guide and on the product itself to ensure safe use, and to protect you and... - Page 6 1. Turn off power. 2. If you are using the AC adaptor for power, unplug it from the wall outlet. 3. Contact your original dealer or authorized CASIO service center. Disassembly and Modification Never try to take this product apart or modify it in any way. Doing so creates the risk of electric shock, burn injury, or other personal injury.
- Page 7 General Guide Caution! Batteries Misuse of batteries can cause them to leak, resulting in damage to nearby objects, or to explode, creating the risk of fire and personal injury. Be sure to observe the following points. • Use only batteries that are specified for this product. •...
-
Page 8: Names Of Controllers And Their Functions
General Guide Names of Controllers and their Functions This section explains the numbers and names used in this manual for buttons and controllers. : Indicates the page you should refer to for more information. Selector panel • SLICE button Enables slicing of sequence data or an external sound source using the sequence step keys. - Page 9 General Guide Sequence step keys 12, 13, 14, 14, 17 • TAP/TEMPO button Adjusts playback tempo. When using the step sequencer, toggle each step between on and off. These keys are also used when MIX FADER configuring detailed settings. Adjusts the volume balance between the internal sound source (sequence) and an external sound Pads 10, 11...
-
Page 10: Connection Examples
General Guide Battery compartment Speaker Connection Examples IMPORTANT! • Before connecting an external device, first set VOLUME to minimum volume. Household power outlet Smartphone Speaker EN-8... -
Page 11: Power Requirements
General Guide • Remove the battery compartment cover located in Power Requirements the center of TRACKFORMER’s bottom panel, and load six AA-size batteries into the battery TRACKFORMER supports operation using one of two compartment. Make sure the plus and minus ends of different power supplies: household electrical power the batteries are facing as shown in the illustration. -
Page 12: Changing Number And Value Settings
General Guide Turning Power On or Off Use pads 1 through 10 to input the value you want. Example: To select sequence data 010, input 010. Hold down the P (Power) button until figures appear on the display. This indicates that power is on. -
Page 13: Using Trackformer
Using TRACKFORMER Producing Sound Playing Back from an External Sound Source Different sounds are assigned to each of the 16 pads. Tapping a pad produces the sound assigned to it. Connect a music player or microphone to Use the VOLUME knob to adjust the volume level. TRACKFORMER (page EN-8). -
Page 14: Using The Step Sequencer To Create A Song
Using the Step Sequencer to Create a Song While holding down the SEQ selector button, What is a step sequencer? use the 11 (–) and 12 (+) buttons to select the desired file number. TRACKFORMER’s step sequencer is made up of up to 16 steps, four banks, and eight patterns. -
Page 15: Changing To Another Bank
Using the Step Sequencer to Create a Song To assign sounds while recording After tapping the pad of the sound you want to use, press a sequence step key. Press the PLAY selector button. This assigns the pad’s sound to the sequence step key. The sound will be produced whenever the sequence step key lights. -
Page 16: Changing To Another Pattern
Using the Step Sequencer to Create a Song Press pad 13. Changing to Another Pattern The filter effect is applied to the sequence data while the pad is depressed. Use the procedure below to change to another pattern • If you want an effect to be applied continually, hold for sequence data creation. -
Page 17: Deleting A Sequence
Using the Step Sequencer to Create a Song Use pads 11 (–) and 12 (+) to specify the Changing the Tone of All Pads number of the file where you want to store the sequence data. While holding down the PADSET selector •... -
Page 18: Sampling
Using the Step Sequencer to Create a Song Press the REC selector button. Display Name Description This starts recording. Indicator Sound Tapping the pad sounds a drum kit, or a snare drum or other single sound. This tone can be selected when “DRM”... -
Page 19: Working With An External Sound Source
Working with an External Sound Source You can connect a smartphone or other music player to Adjusting the Intensity of the TRACKFORMER and apply effects to the external Effect sound source. You can also connect a microphone to TRACKFORMER and use it as a microphone effector. While an effect is being applied, you can rotate the FX1 and FX2 knobs to adjust the intensity. -
Page 20: Applying The Scratch Effect
Working with an External Sound Source Hold down any one of the sequence step keys. This loops the sound registered to the sequence step key you are holding down and the following step sound only. • To loop three or more steps, hold down the step key that starts the loop as you press the sequence step key that ends the loop. -
Page 21: Reference
Reference Troubleshooting Problem Cause Required Action Reference No sound is produced 1. VOLUME knob is at the minimum 1. Rotate the VOLUME knob to the EN-11 when I tap a pad. setting. right. 2. MIX FADER is set to the EXT side. 2. -
Page 22: Product Specifications
Reference Product Specifications Model Name XW-PD1 Step Sequencer Data Number Preset: 100 User: 50 Padset Type Solo Synthesizer, PCM Melody, PCM Drum, User Sample Pad Type Sound, Note, Effect, Phrase Seq, User Sample Pad Number 4 pads × 4 pads = 16 pads Step Number 16 steps Bank Number... - Page 23 Reference Power Supply 2-way Batteries 6 AA-size manganese batteries or alkaline batteries, or Panasonic Group AA-size rechargeable eneloop batteries or AA-size rechargeable EVOLTA batteries Battery Life Approximately 5 hours (alkaline batteries, eneloop/EVOLTA rechargeable batteries) AC Adapter AD-E95100L Auto Power Off Approximately 6 minutes after last key operation during battery use, approximately 4 hours after last key operation during AC adaptor use, Auto Power Off can be disabled.
- Page 24 This recycle mark indicates that the packaging conforms to the environmental protection legislation in Germany. Esta marca de reciclaje indica que el empaquetado se ajusta a la legislación de protección ambiental en Alemania. MA1412-A Printed in China...
Need help?
Do you have a question about the transformer xw-pd1 and is the answer not in the manual?
Questions and answers