
Related Manuals for Medeli M20


Summary of Contents for Medeli M20
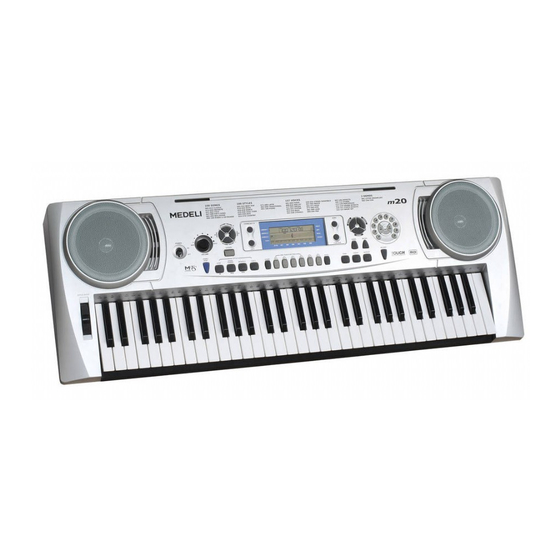
- Page 1 Electronic Keyboard Instruction Manual aw_M20_Manual_G07_150330 2015 17:11:43...
- Page 2 SUMMARY Congratulations on your purchase of this electronic keyboard! This keyboard is easy-to-use, with advanced functions especially suitable for self-learning beginners. No matter you are adult or children, you will enjoy playing the keyboard as it provides amazing styles for accompaniment, expressive tones, and real time record. Other features such as numbered musical notation display chord dictionary, variety of songs will help you better master the playing skill.
- Page 3 Important Notes Your keyboard will give you years of playing pleasure if you follow the simple rules given below: Location Cleaning Clean the unit with a soft dry cloth. Do not expose the unit to the following A slightly dampened cloth may remove conditions to avoid deformation, stubborn grime and dirt.
-
Page 4: Table Of Contents
Contents General Guide......Record............ *Start Record............. *Front Panel..........*Stop Record............*Rear Panel........... *Playback Record..........*LCD Display........... Function Menu........19-20 Preparation........*Transpose............. *Power Supply........... *Octave............*Setting the Music Stand......... *Beat.............. *Split Point............... *MIDI IN............Connections........*MIDI OUT............*Headphones Jack........*Accomp Volume..........*Sustain Jack......... -
Page 5: General Guide
Front Panel LITTLE BROWN JUG 2 1 2 15 16 POWER ON/OFF Rear Panel TEMPO +/- 2 1 2 MASTER VOLUME LEFT HAND LESSON MODE RIGHT HAND LESSON MODE / CHORD DICTIONARY LESSON FUNCTION DEMO STYLE MIDIOUT JACK VOICE SUSTAIN JACK 2 1 2 SONG AUX.OUT JACK... -
Page 6: Preparation
Power Supply Preparation This electronic keyboard can be powered by the current of a standard household wall outlet (using the specified AC adaptor) or by batteries. 1. Using the AC Adaptor Make sure that only the AC adaptor specified for this electronic keyboard is used. -
Page 7: Setting The Music Stand
Setting Music Stand Please set up the music stand as the instruction below: Connections Headphones Jack If you prefer to play with headphones for high quality personal monitoring, plug a set of stereo headphones into the rear panel PHONES jack. Plug a set of headphones into the PHONES jack and the speakers will be disabled automatically. -
Page 8: Voices And Effects
Voices and Effects There are 157 voices in total (See appendix), including 128 GM voices, 6 percussion voices, and synth voices. Select a Voice Press the [VOICE] button to enter the voice mode. The default VOICE 1 is NO:01; LCD will display VOICE 1 and its number. -
Page 9: Sustain
Voices and Effects Press [+/YES] / [-/NO] button or numeric keypad to select your desired voice. The default DUAL VOICE number is NO.50 Strings2. Press [DUAL] button again to turn off the DUAL VOICE. VOICE 2 will be disabled, the notes you play will return NOTE: to the single voice of VOICE 1. -
Page 10: Metronome
Metronome Press [METRO] button to enable to the metronome. Press [METRO] button again to disable it. Metronome could not be played in SONG / CHORD DICT mode. NOTE: Metronome can be played along with the tempo as accompaniment whenever you turn on a style. -
Page 11: Style Control
Style Control Domestic market: 106 Chinese styles6 ,PIANO styles10 including ,styles at all. Oversea market: 100 styles at all PIANO styles10 including Select a Style Press the [STYLE] button to set the keyboard to the style mode. The default STYLE 1 is NO:01; LCD will display the STYLE flag and its number. -
Page 12: Start A Style
Start a Style 1. Start immediately: Press [START/STOP] button to start the style, the drum beats of the style will be played at once. The beats will be shown on the LCD alternately. 2. A.B.C. mode The default setting of A.B.C. is disable. Press [A.B.C.] button to turn on this auto bass chord mode;... -
Page 13: Main/Fill
INTRO/ENDING: Press [INTRO/ENDING] key when the style is not playing, NOR or VAR flag will flash on LCD to Flashing indicate the intro is ready. Press [START/STOP] key, then the normal style will play after the intro style. Press [INTRO/ENDING] key when the style is playing, style will be stopped after the ending. -
Page 14: Stop A Style
Stop a Style Stop immediately The accompaniment can be stopped at any time by pressing the [START/STOP] button. Ending stop Press the [INTRO/END] button to complete the style with an ending section. The ending section will begin from the start of the next measure. Sync stop Press the [SYNC] button to stop playing the style;... -
Page 15: Chord Recognize
Chord Recognize The default mode after power on is A.B.C off. Press [A.B.C] key to turn on the auto bass chord, the A.B.C flag on LCD is lightened. The left area of keyboard is known as the chord area. When playing the chord, both the bass and the chord voice phonate. -
Page 16: Chord Basics
Chord Basics A chord, in music, is any harmonic set of three or more notes that is heard as if sounding simultaneously. The most frequently encountered chords are triads. A triad is a Fifth set of three notes that can be stacked in thirds. When stacked in thirds, the triad's members, from lowest pitched tone to highest, are called: the Root, the Third, and the Fifth. -
Page 17: Memory
Memory There are 6 memories(M1~M6) at all. Press and hold [STORE], press [M1] ( or [M2] - [M6] ) meanwhile. The data will be stored into M1 (M2-M6). The data which can be stored into the memory are as follows: VOICE DATA VOICE:VOICE 1, VOICE 2;... -
Page 18: Record
Start Recording Press the [RECORD] button, the four-beat on the LCD will flash simultaneity, indicating the " record waiting Flash simultaneously status " . A voice, style and memory can be selected in this status. The ACCOMP track and MELODY track can be recorded together. -
Page 19: Function Menu
Function Menu Press [FUNCTION] key to enter the menu of function. Option LCD Display Range Default The default option of the menu is " TRANSPOSE " . TRANSPOSE XPS 00 -6...6 Everytime when you enter the menu, it will return to the OCTAVEOCT OCT 00 -1...1... -
Page 20: Split Point
Split Point Press the [FUNCTION] button to enter SPLIT POINT sub-menu. The LCD displays the current split point value. Use [+/YES] / [-/NO] to select the beat value. The keyboard can be also used to change the split point. The key of the split point is the part of the left area. MIDI OUT TRANSMIT can be used to set the channel of MIDI OUT. -
Page 21: Song
Song There are total 100 songs in this keyboard (see Appendix). Each song can be practised in the MELODY OFF mode. START/STOP the song Press [SONG] button to enter the " song mode " , the song flag on the LCD will show up. All songs will be played in a loop. -
Page 22: Lesson 1
Lesson 1-Practice an timing Press [LESSON] button to enter the LESSON 1 mode, the lesson 1 flag is lightened on the LCD. Evaluation is based on the accuracy of the time value, and the accuracy of note playing will not be graded. Press [START/STOP] to begin. -
Page 23: Lesson 3
Lesson 3-Melody off Press [LESSON] button in LESSON 2 to enter the LESSON 3 mode. In this mode, evaluation is based on the correctiveness of both the time value and notes. Press [START/STOP ] button to begin. If [R] is selected, the melody in the right hand will be muted. -
Page 24: Chord Dictionary
Chord Dictionary If you know the name of a chord but don't know how to play it, you can use the Chord Dictionary function. Press [CHORD DICT./R] button to enter the DICT mode. The LCD shows " dict ". In this mode, the keyboard notes in the right area can be played to assign the Chord Type and the Chord Root. -
Page 25: Midi Function
MIDI Function 1. WHAT'S MIDI MIDI Musical Instrument Digital Interface. The standard interface between PC and Electronic instrument. This keyboard is equipped with standard MIDI interface, including 1 MIDI IN and 1 MIDI OUT. CONNECTION This keyboard can be connected with PC or other MIDI equipment. MIDI CONNECTION CONNECTION RULE a. -
Page 26: Specifications
Specifications LCD display Multi-functional LCD Keys 61 keys with Touch Response Polyphony 32-note polyphony(max) Voice 157 Voices Style 100 Styles Demo Song 100 Songs; 2 Demos Volume Knob,Accomp volume +/-, Tempo +/-, Chord DICTR, LEFT , Lesson, Voice, Style, Song, O.T.S. , M1-M6, Store, Start/Stop, Sync, Control button Intro/Ending, Main/Fill, A.B.C. -
Page 27: Appendix
Appendix 1- Voice List Name STRING ENSEMBLE SYNTH VOICE EFFECTS PIANO Strings 1 70elep Rain Grand Piano Strings 2 Fzpiano SoundTrk Synth Strings 1 Bright Piano Crystal Synth Strings 2 El Grd Piano Atmosphr Choir Aahs Honky-Tonk Piano Bright Voice Ooh Elec Piano 1 Harppian Synth Voice... -
Page 28: Appendix 2- Style List
Appendix 2- Style List 8/16BEAT SOUL & FUNK TRADITIONAL 8 Beat 1 Funky Pop March 1 8 Beat 2 Jazz Funk March 2 8 Beat 3 Cool Funky German March 8 Beat 4 Soul 1 6/8 March 60's 8 Beat Soul 2 Polka 8 Beat Ballad... -
Page 29: Appendix 3- Song List
My Bonnie Appendix 3- Song List Yankee Doodle Red River Valley Auld Lang Syne 01~14 CL ASSICAL When The Saints Go Marching In Cannon Twinkle Twinkle Little Star Thais Meditation Happy Birthday To You Old France Little Brown Jug Minuet Michael Row The Boat Ashore Ode To Joy Old King Cole... -
Page 30: Appendix 4- Demo List
Appendix 4- Demo List Number Name Little Brown Jug Cha Cha Appendix 5- Chord List Chord Name/[Abbreviation] Normal Voicing Chord(C) DISPLAY Major [M] 1-3-5 Sixth [6] 1-(3)-5-6 Major seventh[M7] 1-3-(5)-7 Major add ninth [M(9)] CM(9) CM (9) 1-2-3-5 Augmented [aug] Caug Caug 1-3-#5... -
Page 31: Appendix 6- Midi List
Appendix 6- MIDI List Function Remarks Transmitted Recognized Basic Default Channel Changed 1-16ch 1-16ch Default Mode Messages Altered *********** Note 18-114 0...127 Number True voice *********** 0...127 Velocity : Note on O 9nH,V=1-127 O 9nH,V=1-127 Noteoff (9nH,V=0) X (9nH,V=0; 8nH,V=0-127 After Keys Touch... - Page 32 Version:_G07 aw_M20_Manual_G07_150330 2015 17:11:51...
Need help?
Do you have a question about the M20 and is the answer not in the manual?
Questions and answers