Table of Contents
Advertisement
Advertisement
Table of Contents

Subscribe to Our Youtube Channel
Related Manuals for Medeli MC780


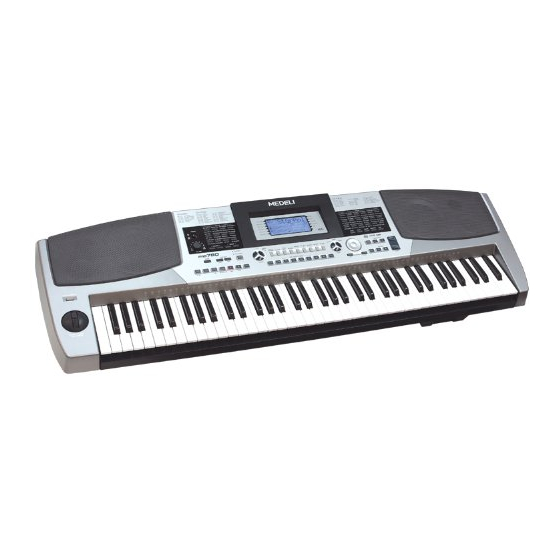
Summary of Contents for Medeli MC780
- Page 2 Congratulations! C o n g r a t u l a t i o n s o n y o u r p u r c h a s e o f t h i s E l e c t r o n i c k e y b o a r d ! The keyboard is an user friendly keyboard with fabulous sound quality and advance feature such as style record and self-learning.
- Page 3 Precautions WARNING Always follow the basic precautions listed below to avoid the possibility of serious injury or even death from electrical shock, short-circuiting, damages, fire or other hazards. These precautions include, but are not limited to, the following: Location Cleaning Clean the unit with a soft dry cloth.
- Page 4 Main Feature KEYBOARD STYLE RECORD 76-key touch response keyboard 3 recording styles LCD DISPLAY MEMORY FEATURE The keyboard indicates the note you playing on 48 memories, 8 banks with 6 memories each. the staff SD CARD VOICE Portable storage device to save and load the 559 voices in total, 36 voices can be selected user songs, user styles and memory datas.
-
Page 5: Table Of Contents
Contents Mixer Menu ..........General Guide........Front Panel............Memory..........LCD Display............. Bank................Rear Panel..............Memory Data................Top Panel............... Store and Load............Connections........8-10 One Touch Setting..........Power Jack..............Setting Music Rest..........Record..........28-30 Headphones Jack..........28-29 Record Song..........AUX OUT Jack..........Playback Song............ -
Page 6: General Guide
General Guide Front Panel 35 36 POWER ON/OFF button -ACCOMP button VOLUME knob -MELODY 1 button ACCOMP + / ACCOMP - button -MELODY 2 button TEMPO + / TEMPO - button -MELODY 3 button STYLE direct select button -MELODY 4 button MIXER button -MELODY 5 button FUNCTION BACK / FUNCTION NEXT button... -
Page 7: Lcd Display
LCD Display ACCOMP MELODY 1 - MELODY 5 DUAL SPLIT TOUCH SUSTAIN VOICE/STYLE/DEMO/SONG RECORD / STYLE RECORD MEASURE BEAT TEMPO CHORD MEMORY / ONE TOUCH SETTING LEFT / RIGHT HAND LESSON MODE NOTE Indication TREBLE CLEF BASS CLEF FILL A / B Rear Panel USB jack MIDI IN jack... -
Page 8: Connections
Connections Power Jack First, please ensure the keyboard is turned off, then turn the volume switch to reach the minimum volume level. Connect the adaptor into the AC wall outlet and the cord into the unit. The power jack is located on the rear panel of the keyboard body. -
Page 9: Aux Out Jack
AUX OUT Jack The AUX.OUT jack delivers the output signal of the MIDI IN MIDI IN MIDI OUT MIDI OUT keyboard to an external amplifier. SUSTAIN SUSTAIN VOLUME VOLUME AUX.OUT AUX.OUT PHONES PHONES Use an audio cord to plug into the [AUX.OUT] jack located on the rear panel;... -
Page 10: Usb Jack
USB Jack Connect PC or other USB host devices that support USB Audio. You can simply connect the MIDI/USB converter to your USB play on your computer and plug the MIDI in and out cables into the piano, after the driver is installed and initialization is finished, you can choose USB Audio Device in the device menu of the software to transfer midi data. -
Page 11: Preparation
Preparation Power Switch & Volume First, please ensure the correct connection based on previous instruction. Turn the volume switch to reach the minimum volume level, then turn the [POWER] switch on. The LCD display lights up. Adjust volume Use the [VOLUME] control switch to adjust the volume to your desired level. -
Page 12: Voices And Effects
Voices and Effects Voice select StGrPn1 559 voices in total, including 128 GM voices and 9 percussion voices . When it is power on, LCD lightens the VOICE R1 " " flag and displays the 001 voice name. Press the voice direct select button or use the [+/YES], [-/NO] button and DIAL to select the others. -
Page 13: Lower Voice/Split Point
Lower Voice/Split point You can play two sounds on different parts of the keyboard. It is called Split mode. TheStr DUAL SPLIT Press [SPLIT] button to turn on the LOWER VOICE, LCD lights the SPLIT flag and displays "VOICE L" and its name. TOUCH When you play in real time, you can activate Split Mode SUSTAIN... -
Page 14: Sustain
Sustain This function helps you to get a voice with a sustained effect, while playing the keyboard. TheStr DUAL SPLIT Press [SUSTAIN] button to activate the sustain effect, TOUCH LCD lights the SUSTAIN flag. SUSTAIN Press [SUSTAIN] button again to eliminate the DUAL TOUCH SPLIT... -
Page 15: Transpose
Transpose You can shift the pitch of the entire keyboard with the TRANSPOSE function by adjusting the pitch in semitone steps. Transpos Press the [TRANSPOSE +] or [TRANSPOSE -] button for the first time to enter the Transpose setting mode, LCD displays current transpose value briefly. -
Page 16: Style Control
Style Control Select a Style The keyboard has a total of 203 styles, from 001 to 203, including 3 user styles. The default style is 001. 8BtRock DEMO Press [STYLE] button to set the keyboard to the STYLE VOICE "style mode". The "STYLE " flag and the style number will show up on the display. -
Page 17: Start A Style
Start a Style Start immediately: Use [START/STOP] button to start the style. Chord. Mode: Press first Press the [CHORD MODE] button for the first time to enter the FINGERED mode, the relevant LED is lightened. The left area of keyboard are known as the chord area, when playing the chord, both the bass and the chord voice phonate. -
Page 18: Fill A/B
Fill A/B In NORMAL mode, press [A] button to insert 1 measure fill and LCD flashes 'A'. After one measure is over, NORMAL style will be returned. 8Beat2 In NORMAL mode, press [B] button to insert 1 measure fill and LCD flashes 'B'. After one measure is over, VARIATION mode will be started. -
Page 19: Fade
Fade FADE IN: Press the [FADE] button when style is not playing , "FADE" LED lights. Light "FADE" LED glimmers after style begins to play, style volume Glimmer will increase from 0 to maxima between 10 seconds, style is played normally subsequently, 'FADE' LED darkens. Darken after glimmer 10 seconds Press the [FADE] button again while FADE OUT state , "FADE"... -
Page 20: Tempo
Tempo 8Beat2 Use the [TEMPO+] or [TEMPO-] button and the - TEMPO + [+/YES] or [-/NO] button and the DIAL to adjust the tempo from 30 to 280. Press the [TEMPO+] and [TEMPO-] synchronously 8Beat2 to set to the default tempo. - TEMPO + Selecting the style when it stops, the tempo will change with the style automatically to the default one. -
Page 21: Recognizing Chords
Recognizing Chords Default mode for A.B.C. is off on the keyboard. Press the [CHORD MODE] button for the first time to enter the FINGERED mode, the relevant LED is lightened. The left area of keyboard are known as the chord area, when playing the chord, both the bass and the chord voice phonate. -
Page 22: Chord Basics
Chord Basics A chord, in music, is any harmonic set of three or more notes that is heard as if sounding simultaneously. The most frequently encountered chords are triads. A triad is a set of three notes that can be stacked in thirds. When stacked in thirds, the triad's members, from lowest pitched tone to highest, are called: the Root, the Third, and the Fifth. -
Page 23: Function Menu
Function Menu Press [FUNCTION/NEXT] or [FUNCTION/BACK] button to enter the menu of function. The default option of the menu is "TUNE". When you enter the menu next time, you will find the option is the same as last time. Press [FUNCTION/NEXT] or [FUNCTION/BACK] button to select the option to be set. Use [+/YES] / [-/NO] or the DIAL to set the parameter. -
Page 24: Split Point
Split Point This function sets the point that separate the entire keyboard to two section. FUNCTION The LCD displays the split point value. BACK NEXT Use [+/YES] / [-/NO] or DIAL to change the split point. You may also use keyboard to change the split point by simply selecting the note you desired to be the point of separation. -
Page 25: Chorus Level
Chorus Level FUNCTION The LCD displays the chorus level. The level ranges from 0 to 127. The default value is floating and BACK NEXT follows the voice. -/NO +/YES Use [+/YES] / [-/NO] or DIAL to change the chorus level. MIDI Setting FUNCTION RECEIVE can be used to set the channel of MIDI IN. -
Page 26: Mixer Menu
Mixer Menu MIXER FUNCTION Press the [MIXER] button to enter the menu of mixer. The default option of the menu is "Rhythm_s", then BACK NEXT the option you enter next time will be the same as last time you exit. Press the [MIXER] button continuously to select the option you want, then use the [+/YES] / [-/NO] button or the DIAL to set the parameters. -
Page 27: Memory
Memory Memory feature can be used to preset 48 complete control-panel setups which could be recalled whenever needed. Bank There are 8 banks in total; each bank has 6 memories (M1~M6). Press [BANK] button, the LCD displays "00x Mem Bank", Mem Bank with 00x showing the Bank that has been selected. -
Page 28: One Touch Setting
One Touch Setting When One Touch Setting is switched on, you can instantly recall all auto accompaniment related settings including voices selection and digital effects simply with a single touch of a button. In this function, 4 types of parameters (M1~M4) will beloaded to match the current style. - Page 29 Waiting for recording: Press the [RECORD] button for the second time to enter the record mode. The LCD lightens the REC flag, four beats flashes synchronously to indicate waiting for recording. Flash synchronously At the same time an empty track will be selected to be StGrPn1 recorded automatically and relative track flag flashes (the selection order is Melody1,Melody2...Melody5 and Accomp,...
-
Page 30: Playback Song
Playback Song Press the [PLAY/STOP] button for the first time to enter the user song selected mode. The LCD displays the current song name and number. Play_song Use the [+/YES] or [-/NO] button and DIAL to select one you want to play. Press the [PLAY/STOP] button for the second time to playback the user song. -
Page 31: Style Record
Style Record Style record allows user to produce a new rhythm through recording and editing an built-in style. Be note that the built-in rhythm are programmed with CM7.3 styles can be recorded and the data will not be lost after the power is off. -
Page 32: Record A New Style
Copy Use the [+/YES] or [-/NO] button and DIAL to select the others includes Record, Copy, Quantify, Edit and Delete. -/NO +/YES Quantify If the user style selected is empty, only Record and Copy can be selected. Edit At any moment of style being recorded, pressing [STYLE RECORD] button again will exit from the Delete recording state. - Page 33 8BtRock FUNCTION Press [FUNCTION / NEXT] to enter rhythm selection menu. BACK NEXT GtPop1 Press [+/YES], [-/NO] button or rotate the DIAL to select a original rhythm. Press [FUNCTION / BACK] to return previous menu. -/NO +/YES Main_A FUNCTION Press [FUNCTION/NEXT] button to enter the paragraph BACK NEXT menu.
-
Page 34: Copy A Style
Copy a Style Copy Select COPY in style record menu level2. -/NO +/YES 8BtRock Press [FUNCTION/NEXT] button to enter rhythm selection menu. FUNCTION BACK NEXT Press [+/YES], [-/NO] button or rotate the DIAL to select a user style that needs to be copied. Sure? Press [FUNCTION/NEXT] button to enter next menu. -
Page 35: Edit A Style
Main_A Press [FUNCTION/NEXT] to enter the paragraph menu. FUNCTION Press [+/YES], [-/NO] button or rotate the DIAL to select the BACK NEXT paragraph of rhythm: Main _ A, Main _ B, Intro _ M, Intro_m, Fill _ A, Fill _ B, Ending _ M, Ending _ m. Chord1 FUNCTION Press... -
Page 36: Delete A Style
8BtRock Press [FUNCTION/NEXT] button to enter page of the abbreviation of style name. FUNCTION Only 8 characters or digits can be inputted. BACK NEXT Flash Save? Press [FUNCTION/NEXT] button to enter next menu, FUNCTION LCD now displays "Save? " BACK NEXT Press [+/YES] to confirm, otherwise press [-/NO] to return to previous menu. -
Page 37: Song
Song There are 100 songs in total. Carmen 1 DEMO START/STOP the song: STYLE VOICE Press [SONG] button to enter the song mode, the song flag on LCD is lightened. It will play all songs in circle. Press [START/STOP] button to stop playing the song, SONG but it will not quit the song mode. -
Page 38: Lesson 1
According to the type of the song, the content of your practice by left hand is not the same. If you choose chord song, the left hand practices the chord, otherwise, left hand practise the melody. When the song is playing, the staff displayed on the LCD indicate the melody and chord position, LCD shows the last note played by RIGHT track, and it will be convenient for you to practice . -
Page 39: Lesson 3
Lesson 3 L&R MosetaDn CHORD DICT. Press [LESSON] button in LESSON 2 to enter the LESSON 3 mode. LESSON 3 LESSON In LESSON 3 mode, it will score your practice by the correction of the time value and note. Press [START/STOP ] button to start to practise. - Page 40 DICT 2 (CHORD TEST MODE) Dict.2 Press [R] button again to enter DICT 2 mode. The chord L&R CHORD DICT. area on the LCD will display a random chord , while the keyboard position doesn't display anything on LCD. When you play the correct chord within 3 seconds, LESSON 1 the next chord (random) will be displayed on LCD to LESSON...
-
Page 41: Pedal
Pedal Foot Switch FUNCTION The keyboard can assign the pedal in function menu. (See FUNCTION) BACK NEXT -/NO +/YES PEDAL SUSTAIN If pedal assign is set as "sustain", the notes played before you step on have a sustain effect. Release the pedal, sustain effect is turned off . -
Page 42: Play
In the SD mode, it won't respond to the other function. Use the [+/YES], [-/NO] button and DIAL to choose the SD menu you want. FOLDER01 Press the [EXECUTE] button to take a step forward. Press the [MENU] button to take a step back. Please refer to page 42 for naming function. -
Page 43: Load
Load Load LoadSong Select the menu "Load" and press the [EXECUTE] button, the Load menu are displayed on the LCD, it includes "Load Song", "LoadSty" and "LoadMem". Use the [+/YES],[-/NO] LoadSty buttonand DIAL to select one. LoadMem Load Song -/NO +/YES Select the menu "LoadSong"... -
Page 44: Save
Save Save Select the menu "Save" and press the [EXECUTE] button, the Save menu are displayed on the LCD, it includes SaveSong "SaveSong", "SaveSty" and "SaveMem". You can select either with DIAL or the [+/YES] and the SaveSty [-/NO] button The operation of SAVE is same as PLAY. -
Page 45: Delete
SaveMem Save Memory Select the menu "SaveMem" and press the [EXECUTE] button, you can select the storage directory with DIAL or FOLDER01 the [+/YES] ,[-/NO] button. Press the [EXECUTE] button to enter next step, LCD will naming play display the state, you can the keyboard to MEM_1111... - Page 46 The file name includes 1-8 characters which can be inputted with the keyboard. Keyboard & ASCII Character Relative Table is as follows: Explanation: [BACK]: [SHIFT]: [DELETE]: To erase the character which 26 letters will be displayed with move the current cursor to the left. cursor flashes.
-
Page 47: Midi Function
MIDI Function What is MIDI MIDI stands for Musical Instrument Digital Interface " ", that is the standard interface between a PC and other MIDI IN MIDI IN MIDI OUT SUSTAIN VOLUME VOLUME AUX.OUT AUX.OUT PHONES PHONES electronic instrument(s). USB connection can be used for midi data transference with computer or other USB host devices that support USB audio device with an USB cable. -
Page 48: Midi Connection
MIDI Connection Connection rule In midi connection, the equipment which control another one is called "Host equipment", while another is called "Affiliated equipment". The host equipment's MIDI OUT connects with affiliated equipment's MIDI IN Note that MIDI OUT cannot be connected with MIDI IN on the same equipment. -
Page 49: Specifications
Specifications LCD display Multi-functional LCD Keys 76 keys with touch response Polyphony 64-note polyphony(max) Voice 559 Voices Style 203 Styles, including 3 user styles. 100 Songs Song 2 Demos Demo Power on/off, Master Volume, Accomp +/-,Tempo +/-, Lesson, L&R, Control button Chord Dictionary, Mixer, Function Back/Next, Voice, Style, Song, O.T.S. -
Page 50: Appendix
Appendix 1-Voice List Velocity Crossfade E.P. 2 Name Name Piano Layered E.P. 1 Vibraphone 1 / W Layered E.P. 2 Vibraphone 2 / W Stereo Grand Piano 1 Vibraphone & Bell Stereo Grand Piano 2 Nylon E.P. ibraphone & Harpsichord Warm E.P. - Page 51 Name Name Name Fretless Bass Detuned 2 Accordion 2 Stereo Muted G.T. Accordion 3 Fretless Bass Detuned 3 OverDriven G.T. 1 Chorus Accordion Slap Bass 1 OverDriven G.T. 2 Mustte Slap Bass 2 Detuned Overdriven G.T. Accord It Solo Slap Bass 3 Distortion G.T.
- Page 52 Name Name Name Tremolo Strings 1 Echo Synth Voice Synth Brass 2 Tremolo Strings 2 Orchestra Hit 1 Synth Brass 3 Synth Brass 4 Slow Tremolo Strings 1 Orchestra Hit 2 Slow Tremolo Strings 2 Orchestra Hit Octave Synth Brass 5 Pizzicato Strings 1 Orchestra Hit Stereo Leap Brass...
- Page 53 Name Name Name PWM Pad Sitar Blown Bottle Sine Pad Detuned Sitar Shakuhachi Warmly Pad Banjo Whistle 1 Horn Pad Shamisen Whistle 2 Pad 3 (Polysynth) Koto Ocarina Click Pad Lead Kalimba Analog Pad Bagpipe Lead 1 (square) Poly Pad Fiddle Square Poly Synth Pad...
- Page 54 Name Name Stereo Strings & Piano Breath Noise 2 Orchestra Heartbeat Full Strings 1 Laugh Full Strings 2 Applause 2 Symphonic Helicopter 1 Stereo Choir & Strings Fire Trombone & Stereo Strings Punch Club Brass ScratchCut Woodwinds & Strings Fight 1 Pan Flute &...
-
Page 55: Appendix 2-Style List
Appendix 2- Style List Number Name Number Name Number Name Quick Step 8BEAT Natural Ballad DANCE 8 Beat Rock Love Ballad Down Beat Guitar Pop 1 Easy Ballad Techno 8 Beat 1 Slow Ballad Progressive Sweet Beat Folk Ballad 8 Beat Dance Rap 1 Pop Ballad 1 8 Beat Disco... - Page 56 Number Name Number Name Number Name Acid Jazz Lambada Polka2 Cool Jazz Ballad Pop Cha Cha1 US March Swing Shuffle Pop Cha Cha2 Musette Big Band 40 ' s Salsa French Musette Big Band Medium Bossa1 Mazurke Dixieland World 1-Mar Acoustic Jazz Enka Ballad ORIENTAL...
-
Page 57: Appendix 3-Song List
Appendix 3-Song List Number Name It`S Been A Long Long Time CLASSICAL Edelweiss Carmen-Entracte II O Sole Mio Annen Polka Der Deitcher`S Dog Skip To My Side Joy to The World Brahms Waltz Silent Night Aida Ave Maria Chant Sans Paroles Op.40 No.6 Five Hundred Miles L'Arlesienne Happy New Year... -
Page 58: Appendix 4-Demo List
Appendix 4-Demo List Number Name Jazz Dream of freedom Appendix 5- Chord List • • •• ••... -
Page 59: Appendix 6-Midi Implementation Chart
Appendix 6- MIDI Implementation Chart Function Transmitted Recognized Remarks Basic Default Channel Changed 1- 16ch 1- 16ch Default Mode Messages Altered *********** Note 0- 127 0- 127 Number 0- 127 True voice *********** Velocity: Note on 9nH,V=1-127 9nH,V=1- 127 Note off 9nH,V=0 (9nH,V=0;... - Page 60 Version: G03...
Need help?
Do you have a question about the MC780 and is the answer not in the manual?
Questions and answers