Table of Contents
Advertisement
Quick Links
Advertisement
Table of Contents

Subscribe to Our Youtube Channel
Related Manuals for Medeli MC 860


Summary of Contents for Medeli MC 860
- Page 2 Congratulations! Congratulations on your purchase of this electronic keyboard! This electronic keyboard is an easy-to-use professional keyboard with great functions. The hi-quality PCM voices will perfectly express your performance. You can record your very own style and save your files to a floppy disk. With the USB port, you can easily connect the keyboard to a PC. Enjoy your performance with it! Before you use it, we recommend you to carefully read through this manual.
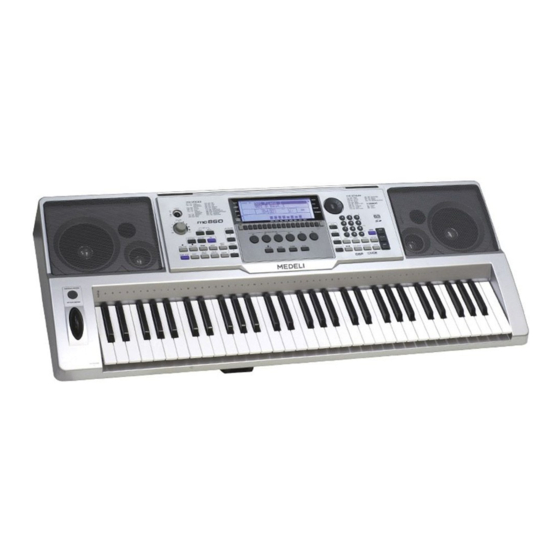
- Page 3 Main Features KEYBOARD: 61 keys keyboard, 3 touch levels. DISPLAY: Multi-functional LCD which can display up to 2 lines x 21 characters and velocity status of 16 channels. OPERATION: User friendly interface, using number keyboard and dial-keys to select/apply all functions. VOICES: 350 voices, including 9 user voices.
-
Page 4: Table Of Contents
Contents General Guide One Touch Setting Power Supply Memory Using the AC adaptor 2.Using batteries Synth Connections Album 1 The Headphones Jack 2.The Sustain Jack Demo 3.The Aux.Out Jack 4.The Volume Jack SD Function 27-30 1.Playback the MIDI files 27-28 Voices and Effects 8-10 2.Save files... -
Page 5: General Guide
General Guide PO W ER VOL UME AC MP PLAY > EXIT ACC. VOLU ME < BACK NEXT > VO ICE MA X STYL E RE C S TEP R EC STY LE DE MO LOA D DIREC T TE MPO ONE TOUCH SETTING SYN C START SYNC STO P... -
Page 6: Power Supply
Power Supply This electronic keyboard can be powered by the current from a standard household wall outlet (using the specified AC adaptor) or by batteries. Using The AC Adaptor The adaptor shall be 12V DC output, and center positive type. MIDI THRU MIDI IN MIDI OUT... -
Page 7: Connections
Power Supply Caution! Improper handling of batteries can cause outburst or leakage; might also create personal injury or damages of the keyboard. Be sure to take the following important precautions when using batteries: Never use batteries of different types. Never mix old batteries with new ones. Always make sure the batteries are removed from the keyboard's battery compartment. -
Page 8: Voices And Effects
Voices and Effects 350 voices in total (See appendix: page 41) The keyboard contains vast selection of musical instrument voices . Check out the details of all voices on the Voice List on page 41, try more voices for more playing experiences. Select a Voice VOICE Press... -
Page 9: Split Point
Voices and Effects Split Point In the Split Voice mode, you can assign two diff- erent voices to opposite sections of the keyboard, to play one voice with your left hand while your right hand plays another voice. F 3 is the default split point . -
Page 10: Pitch Bend
Voices and Effects Pitch Bend The pitch bend wheel can be used to bend the note upwards or downwards, ranging between +/-2 semitones. When the wheel is released, the note will return back to the normal status. Modulation Press and hold [MODULATION] button. -
Page 11: The Accompaniment Sections
Style Control The Accompaniment Sections The Accompaniment Sections consist Intro, Normal, Variation, Fill In A , Fill In B and Ending. Using different sections according to different structures of different songs, allows you to enhance the quality of each piece of music. INTRO FILL IN FILL IN... -
Page 12: Fill A/B
Style Control Sync start: DECT A.B.C. SYNC START SYNC STOP MIXER MENU Press [SYNC START] button to enter the sync start waiting mode. The 4 beats on LCD flash together. MEASURE BEAT MEMORY TICK O.T.S. If the A.B.C. mode is on , play any key in left area Flash of keyboard, the style start playing with bass and chord. -
Page 13: Stop A Style
Style Control In VARIATION mode, press [FILL IN NORMAL] button to insert 1 measure fill and LCD flashes 'NOR' . After one measure is over, MAIN style will be started. Note: Hold down the [FILL IN NORMAL] [FILL IN VARI- FILL IN FILL IN START/STOP... -
Page 14: Recognzing Chords
Style Control Recognizing Chords Default mode for A.B.C. is off on the keyboard. DECT A.B.C. SYNC START SYNC STOP MIXER MENU " " Press [A.B.C.] button to turn on this auto bass chord function . The left section of the keyboard is known as the chord area , while playing the chord, both the bass "... - Page 15 Style Control Chord Basics Three or more notes played together constitute a chord " ". The most basic chord type is the "triad" consisting three notes: the root, third, and fifth degrees of the corresponding scale. A "C major triad", for example, is made up of the notes C (the root), E(the third note of the C major scale),and G (the fifth note of the C major scale).
-
Page 16: Tempo Control
Style Control Tempo Control TEMPO Press the [TEMPO+] [TEMPO-] button. The tempo value would keep flashing for about 9 seconds. In the meantime, the tempo can be MEMO RY MEASURE BEAT TICK O.T.S. adjusted by the dial in the range of 30-280. TEMPO Press the [TEMPO+]... -
Page 17: Mixer Menu
Mixer Menu Track Channel Parameter Range Defau lt Valu e ACMP CH7-CH14 0-127 The keyboard has 8 accompaniment tracks: CHORD 1 CH12 0-127 - CHORD 2 CH13 CHORD 1, CHORD2, CHORD 3, CHORD 4, - CHORD 3 CH14 CHORD 5,BASS, PERCUSSION,and DRUM. -... -
Page 18: Function Menu
Function Menu Press the [FUNCTION] button toenter Function " " menu. Metronome Select "Metronome "from the FUNCTION menu, with dial,[+],[-] ALBUM TEMPO MEASURE BEAT MEMORY FUNCTION TICK O.T.S. Press the [NEXT] button to enter the metronome mode. Use the dial,[+],[-] to select on or off. -
Page 19: Utility
Function Menu Utility Select UTILITY from the FUNCTION menu, with dial [+] [-] , . Press the [NEXT] button, you can then select TOUCH,SPLIT POINT,PITCH BEND TEMPO MEAS URE BEAT MEMORY TICK O.T.S. RANGE, PORTAMENTO, PORTAMENTO TIME and PAD ASSIGN with dial, [+]/[-] >... - Page 20 Function Menu PORTAMENTO TIME In Portamento Time menu, press the [NEXT] button to adjust Portamento Time parameter with TEMPO MEASURE BEAT MEMORY TICK O.T . S. dial,[+],[-] Parameter Range: from 0 to 3. The smaller the parameter is, the higher the speed of the porta- EXIT >...
-
Page 21: Dsp
Function Menu You can select the DSP FUNCTION menu, with dial [+],[-] . Press the [NEXT] button and to select TEMPO MEASURE BEAT MEMORY REVERB TYPE, REVERB LEVEL, CHORUS TICK O.T.S. TYPE, CHORUS LEVEL with dial [+],[-] REVERB TYPE > EXIT In REVERB TYPE menu, press the [NEXT... -
Page 22: Function Default Setting
Function Menu MIDI OUTPUT SOURCE In MIDI OUTPUT SOURCE menu, press the > EXI T [NEXT] button, you can select the MIDI OUTPUT <BACK NEXT> SOURCE with dial,[+],[-] TEMPO MEASURE BEAT MEMORY TICK O.T.S. Parameter Range : from 001(local)-002(external) When you select 001(local), MIDI OUT will send out the correlated messages of local VOICE 1. -
Page 23: One Touch Setting
One Touch Setting One Touch Setting is a powerful and convenient " style mode function that allows you to reconfigure " all settings of the instrument with the touch of a single button. Parameters: Voice R1 number and volume Dual function Voice R2 number and volume REVERB and CHORUS type and level Octave... -
Page 24: Memory
Memory Memory can be used to memorize 48 complete control-panel setups (8 banks with 6 presets each) that you can recall whenever needed. Data stored by the memory Voice R1, Voice R2, Voice L, Sustain, Style, Tempo, Function Parameters, Mixer Parameters, SYNTH Parameters, ACMP Volume and Octave. -
Page 25: Synth
Synth The SYNTH Mode provides the tools for creating your own original tones. Simply select one of the built-in tones and change its parameters to create your own music. POLY/MONO TRANSPOSE SYNTH Press the [SYNTH] button to enter SYNTH function. TEMPOVEL MEASURE BEAT... -
Page 26: Album
Album The keyboard provide 100 types of graceful acc- ALBUM ompaniments settings. FUNCTION Press [ALBUM] button to enter the synchronized start mode. The screen will display the ALBUM TEMPO MEASURE BEAT MEMORY TICKO.T.S. icon, the sequence number and the song name. flash You can select your demanded album with dial... -
Page 27: Sd Function
SD Function Insert an SD card, you can playback the MIDI files, save your data, and load back or delete a file by using the [LOAD], [SAVE] [UTILITY] button. NOTE: The keyboard can support the SD card which is formatted with FAT32 or FAT16, if your card is using FAT12 or other file system, it will not be supported. -
Page 28: Save Files
SD Function Play back the MIDI files from the card FILL IN FILL IN START/STOP INTRO NORMAL VARIATION ENDING press [START/STOP] after selecting your favorite midi song, it goes to playback the song. Press [START/STOP] again to stop the song MIDI001.MID playing. -
Page 29: Load Or Delete Files
SD Function Load or Delete Files LOAD Insert a card, press [UTILITY] button, you will : " see the menu U1: Load & Delete ", then UTILITY pressing [NEXT] button to enter this sub-menu. U2:Format Disk SAVE TEM PO ME AS URE BEAT MEMORY T ICK O.T.S . -
Page 30: Format Files
SD Function Format Files LOAD U1:Load & Delete Insert a card, press [UTILITY] button, you can :" choose to enter U2:Format ". UTILITY TEMPO MEAS URE BE AT ME MORY TICK O.T .S . SAVE ress [NEXT] to confirm to format the card. U1:Load &... -
Page 31: Squencer
Sequencer You can record and edit one user song up to 16 tracks; you can also record 5 user styles by using style recording. Real-Time Recording STYLE REC STEP REC Recording Melody Track Press [REC] button. The REC flag will appear on the screen and will enter real time recording mode. - Page 32 Sequencer STYLE REC STEP REC Overwriting Track with Recorded Data Press [REC] to enter record mode. The tracks with recorded data will lighten on LCD. MEASURE BEAT MEMORY TICK O.T.S . For Melody Track A new track will be flashing with a "...
-
Page 33: Step Recording
Sequencer Step Recording STYLE REC STEP REC Creating a New Track Press [STEP REC] button to enter Step Record menu, the [STEP REC] flag would be turned on. Select the track edit function by using [+] [-] T EMPO V EL ME AS URE BEAT ME MORY... - Page 34 Sequencer Creating a ACMP track > EXIT <BACK NEXT> Select the ACMP track. Press [NEXT] to confirm. T EMP O ME AS URE BE AT ME MORY TIC K O.T.S. You can now turn the dial or press [+] [-] select the desired style.
- Page 35 Sequencer Search and Edit Old Melody Data > EXIT When a track is selected with recorded data, Use <BACK NEXT> [NEXT] [BACK] to search through the old data. If the current data is a note event, the voice of the note would be pronounced when the [NEXT] [BACK]...
-
Page 36: Style Recording
Sequencer Style Recording Style record allows users to record, produce and compile a new rhythm. The built-in rhythm of the electronic organ regards all chord types as CM7 in the base, thus please be advised to regard CM7 as the fundamental key while producing your own rhythm. - Page 37 Sequencer > EXIT Next, decide which user style slot would be used <BACK NEXT> to store the new style after recording. BEAT MEMORY MEASURE TICK O.T .S. Press [NEXT] button to confirm your selection, the style record is on the synchronized start >...
- Page 38 Sequencer Copy a Style You can copy an existing Style to a user style memory slot for back up or further editing. Simply follow steps below. Select Copy Style in the style record menu. " " Press [NEXT] to Confirm. TEMPO MEASUR E B EAT...
- Page 39 Sequencer Edit Event US4:Copy part Select Edit Event in the style record menu. " " Press [NEXT] to Confirm. MEMORY TEMPO VE L MEASURE BEAT TICK O.T.S. Select the user style that you'd like to edit. > EXIT Part: MAIN B Press [NEXT] to confirm.
-
Page 40: Squencer
Sequencer US5:Edit events Edit Style Select Edit Style in the style record menu. " " TEM PO V EL ME AS UR E BEAT ME MORY TICK O.T.S. Press [NEXT] to Confirm. > EXIT Default Tempo: <BACK NEXT> Select the user style that you'd like to edit. TEM PO V EL ME AS UR E... -
Page 41: Direct Menu
Direct Menu DECT A.B.C. SYNC START SYNC STOP MIXER MENU Press [DIRECT MENU] button to select all relative operations to the current mode. For example, press [DIRECT MENU] button when it is on the style mode, you can select a style or to turn on the preset tempo etc. -
Page 42: Digital I/O
Digital I/O Now, you can choose the USB interface or traditional midi cable for midi data transferal, the USB interface helps you to connect the system with the computer in order to send messages conveniently. The USB Jack Connect PC or any USB Audio compatible host devices with an USB cable. -
Page 43: Specifications
Specifications Keyboard 61 keys with Touch Respones Voice 350 Voices Style 115 Styles Demo Song 3 Demo songs Album Song 100 Album songs Display Multi-functional LCD display with blue backlight Switch and Buttons POWER SWITCH, VOLUME, ACCOMP VOLUME +/-, TEMPO +/-, A.B.C., NEXT,BACK,MIXER,DIRECT MENU, LOAD,UTILITY,SAVE,VOICE,LOWER,STYLE,ALBUM, DEMO,DSP,DUAL,FUNCTION,O.T.S.,FREEZE,SUSTAIN, TRANSPOSE,POLY/MONO,SYNTH,TOUCH,BANK,STORE,... -
Page 44: Appendix 1-Voice List
Appendix 1- Voice list Ensemble Piano Pipe Organ 2 Reed Ethnic Drum Set Strings Ensemble1 Sweet Organ 2 Soprano Sax 1 Standard Kit Piano 1 Sitar Piano Soft Church Organ 1 Strings Ensemble2 Banjo Soprano Sax 2 Room Kit Piano Tender Church Organ 2 Sound Track 1 Tenor Sax 1... -
Page 45: Appendix 2-Style List
Appendix 2 - Style list 8 BEAT DANCE BALL ROOM 8Beat 1 Disco1 Tango2 8 Beat 2 Disco 2 Cha Cha2 8 Beat 3 Dance Beguine 8 Beat 4 House Rhumba 2 8 Beat 5 Techno Samba2 8 Beat 6 SWING &... -
Page 46: Appendix 3-Chord List
Appendix 3 - Chord list Chord Name [Abbreviation] Normal Voicing Chord(C) Display Major[M] 1-3-5 Major sixth [6] 1-(3)-5-6 Major seventh [M7] 1-3-(5)-7 Major seventh add sharp eleventh [M7(#11)] 1-(2)-3-#4-(5)-7 CM7(#11) CM7(#11) Major add ninth [M9] 1-2-3-5 CM(9) CM(9) Major seventh ninth [M7(9)] 1-2-3-(5)-7 CM7(9) CM7(9) -
Page 47: Appendix 4-Demo List
Appendix 4 - Demo list Name Fusion Jazz World Appendix 5 - Album list 0 01 Ble ssin g The Ple asa nt O ne D raw s Stand A t Ease And Stand A Attention And Stand Well One Do se O f Thai N urse's The Mo on R epr esen ts M y Heart Dance Mus ics 0 70... -
Page 48: Appendix 6-Midi List
Appendix 6 - MIDI list Function Transmitted Recognized Remarks Basic Default Channel Changed 1- 16ch 1- 16ch × Default × Mode Messages × Altered *********** Note 0— 127 0— 127 *********** Number : True voice 0— 127 〇 9nH,V=1 - 127 〇...
Need help?
Do you have a question about the MC 860 and is the answer not in the manual?
Questions and answers
Porque el panel de botones frontal no funcionan
Где скачать драйвер для Мидели мс860