Table of Contents
Advertisement
Advertisement
Table of Contents

Related Manuals for Euromaid IMZ90


Summary of Contents for Euromaid IMZ90
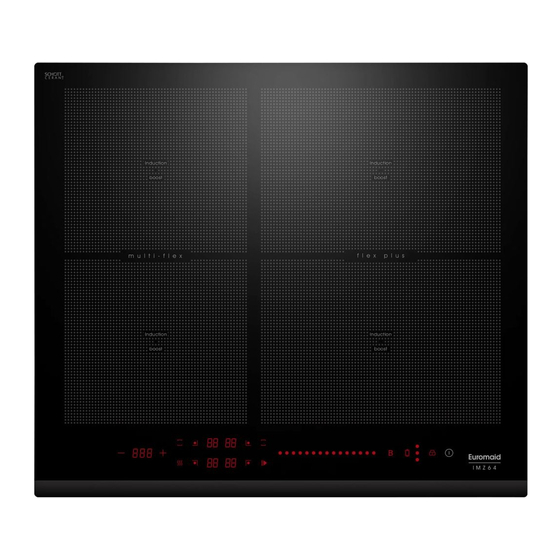
- Page 1 IMZ90 90cm Induction Cooktop USER MANUAL Euromaid price, quality, performance...
- Page 3 Dear Customer, Congratulations on purchasing your new product from Home Appliances. To register your Parts and Labour Warranty, some conditions apply, please refer to your warranty card for more details and contact our Customer Care team on: 1800 444 357 Our Customer Care Centre is there to ensure you get the most out of your appliance.
- Page 4 NOTE: This User Instruction Manual contains important information, including safety & installation points, which will enable you to get the most out of your appliance. Please keep it in a safe place so that it is easily available for future reference; for you or any person not familiar with the operation of the appliance.
-
Page 5: Table Of Contents
Content Foreword ................ 4 1.1 Safety Warnings ................4 1.2 Installation ................. 4 1.2.1 Electrical Shock Hazard ..........4 1.2.2 Cut Hazard ..............4 1.2.3 Important safety instructions ........... 4 1.3 Operation and maintenance ............5 1.3.1 Electrical Shock Hazard ..........5 1.3.2 Health Hazard ............... - Page 6 9.3 After installing the hob, make sure that ........23 9.4 Before locating the fixing brackets ..........23 9.5 Adjusting the bracket position ............. 24 9.6 Cautions ................... 24 9.7 Connecting the hob to the mains power supply ......24...
-
Page 7: Foreword
Foreword Safety Warnings Your safety is important to us. Please read this information before using your cooktop. Installation 1.2.1 Electrical Shock Hazard • Disconnect the appliance from the mains electricity supply before carrying out any work or maintenance on it. •... -
Page 8: Operation And Maintenance
incorporates an isolating switch providing full disconnection from the power supply. • Failure to install the appliance correctly could invalidate any warranty or liability claims. Operation and maintenance 1.3.1 Electrical Shock Hazard • Do not cook on a broken or cracked cooktop. If the cooktop surface should break or crack, switch the appliance off immediately at the mains power supply (wall switch) and contact a qualified technician. -
Page 9: Cut Hazard
1.3.4 Cut Hazard • The razor-sharp blade of a cooktop scraper is exposed when the safety cover is retracted. Use with extreme care and always store safely and out of reach of children. • Failure to use caution could result in injury or cuts. 1.3.5 Important safety instructions •... - Page 10 Induction glass surface as this can scratch the glass. • Do not use scourers or any other harsh abrasive cleaning agents to clean your cooktop, as these can scratch the Induction glass. • If the supply cord is damaged, it must be replaced by the manufacturer, its service agent or similarly qualified persons in order to avoid a hazard.
-
Page 11: Product Induction
Congratulations on the purchase of your new Induction Hob. We recommend that you spend some time to read this Instruction / Installation Manual in order to fully understand how to install correctly and operate it. For installation, please read the installation section. Read all the safety instructions carefully before use and keep this Instruction / Installation Manual for future reference. -
Page 12: Working Theory
Read this guide, taking special note of the ‘Safety Warnings’ section. • Remove any protective film that may still be on your Induction hob. • Technical Specification Cooking Hob IMZ90 Cooking Zones 6 Zones Supply Voltage 220-240V~ Installed Electric Power 10800W Product Size L×W×H(mm) -
Page 13: Choosing The Right Cookware
Choosing the right Cookware Only use cookware with a base suitable for induction cooking. • Look for the induction symbol on the packaging or on the bottom of the pan. • You can check whether your cookware is suitable by carrying out a magnet test. Move a magnet towards the base of the pan. -
Page 14: Pan Dimension
Pan Dimension The cooking zones are, up to a limit, automatically adapted to the diameter of the pan. However the bottom of this pan must have a minimum of diameter according to the corresponding cooking zone. To obtain the best efficiency of your hob, please place the pan in the centre of the cooking zone. Cooking zone The base diameter of induction cookware Minimum (mm) -
Page 15: Finish Cooking
The display will automatically turn off after 1 minute if no suitable pan is placed on it. 3.4.2 Finish cooking Touching the heating zone selection control that you wish to switch off Turn the cooking zone off by touching the slider to the left. Make sure the display shows “0”. -
Page 16: Keep Warm
a) Touching the boost control “ ”, then the cooking zone will revert to its original setting. b) Touching the slider control, then the cooking zone will revert to the level you select. • The function can work in all cooking zones •... -
Page 17: Locking The Controls
pot, oval, rectangular and elongated pans make sure to place the pans centered on the cooking zone covering both cross. Examples of good pot placement and bad pot placement. As big one To activate the flexible area as a single big zone, simply press the dedicated key 1. -
Page 18: Timer Control
3.4.7 Timer control You can use the timer in two different ways: You can use it as a minute minder. In this case, the timer will not turn any cooking zone off when the set time is up. You can set it to turn one or more cooking zones off after the set time is up. The timer of maximum is 99 min. -
Page 19: Default Working Times
Touch timer control again, the “1” will flash. set the time by touching the slider control (e.g.9), now the timer you set is 96 minutes. When the time is set, it will begin to count down immediately. The display will show the remaining time and the timer indicator flash for 5 seconds. -
Page 20: Cooking Guidelines
Cooking Guidelines Take care when frying as the oil and fat heat up very quickly, particularly if you’re using PowerBoost. At extremely high temperatures oil and fat will ignite spontaneously and this presents a serious fire risk. Cooking Tips When food comes to the boil, reduce the temperature setting. •... -
Page 21: Heat Settings
key) has been left on the hob, the hob automatically go on to standby in 1 minute. The fan will keep cooking down the induction hob for a further 1 minute. Heat Settings The settings below are guidelines only. The exact setting will depend on several factors, including your cookware and the amount you are cooking. -
Page 22: Hints And Tips
Boilovers, melts, and Remove these immediately with a • Remove stains left by melts and hot sugary spills on fish slice, palette knife or razor sugary food or spillovers as soon the glass blade scraper suitable for Induction as possible. If left to cool on the glass cooktops, but beware of hot glass, they may be difficult to cooking zone surfaces:... -
Page 23: Failure Display And Inspection
Some pans make This may be caused by the This is normal for cookware and crackling or clicking construction of your cookware does not indicate a fault. noises. (layers of different metals vibrating differently). The induction hob This is caused by the technology This is normal, but the noise should makes a low humming of induction cooking. - Page 24 E1/E2 Abnormal supply voltage Please inspect whether power supply is normal. Power on after the power supply is normal. E3/E4 Temperature sensor of the ceramic glass Please restart after the plate Is high induction hob cools down. Temperature sensor of the IGBT Please restart after the Is high induction hob cools down.
-
Page 25: Installation
The Main board is Replace the power board. damaged. Fan motor sounds The fan motor is Replace the fan. abnormal. damaged. The above are the judgment and inspection of common failures. Please do not disassemble the unit by yourself to avoid any dangers and damages to the induction hob. Installation Selection of installation equipment Cut out the work surface according to the sizes shown in the drawing. -
Page 26: Before Installing The Hob, Make Sure That
A(mm) B(mm) C(mm) 50 mini 20 mini Air intake Air exit 5mm Before installing the hob, make sure that The work surface is square and level, and no structural members interfere with space requirements. • The work surface is made of a heat-resistant material. •... -
Page 27: Adjusting The Bracket Position
Adjusting the bracket position Fix the hob on the work surface by screw 4 brackets on the bottom of hob (see picture) after installation. Cautions 1. The induction hotplate must be installed by qualified personnel or technicians. We have professionals at your service. - Page 28 If the cable is damaged or to be replaced, the operation must be carried out the by after-sale agent • with dedicated tools to avoid any accidents. If the appliance is being connected directly to the mains an omnipolar circuit-breaker must be •...
- Page 29 BLANK PAGE...
- Page 30 BLANK PAGE...
- Page 31 BLANK PAGE...
- Page 32 Euromaid price, quality, performance...
Need help?
Do you have a question about the IMZ90 and is the answer not in the manual?
Questions and answers