Table of Contents
Advertisement
Advertisement
Table of Contents
Troubleshooting

Related Manuals for DoAll ZV-3620


Summary of Contents for DoAll ZV-3620
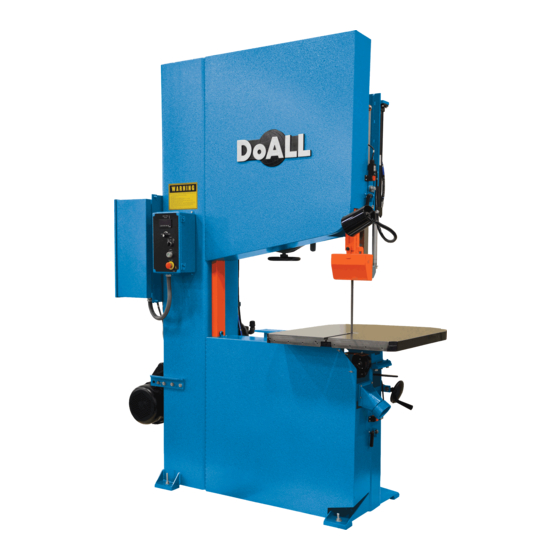
- Page 1 ZV-3620 Serial No: 565-03101 to Band Sawing Machine...
- Page 2 DAMAGE CLAIM PROCEDURES VISIBLE DAMAGE AT THE TIME OF DELIVERY: Note damage on carrier’s delivery receipt. Accept the shipment. It can be returned later if repairs are not possible in the field. Request a “damage inspection” from the delivery carrier: The carrier will send his own people or contract an independent agency to make the inspection.
- Page 3 For Sales, Parts and Service, call 1-888-362-5572 DoALL SAWING PRODUCTS 2375B TOUHY AVENUE ELK GROVE, ILLINOIS 60007 U.S.A. The following registered trademarks of the DoALL Company are used in this manual: DoALL, Dart, Tensigage and Zephyr. PRINTED IN U.S.A. PB-507.5 (2-10)
-
Page 4: Table Of Contents
TABLE OF CONTENTS MACHINE DIMENSIONS LUBRICATION Lubrication Chart ............ Floor Plan ............... Lubrication Diagram ..........Floor Plan With HMD Hydraulic Table ....Front View .............. MAINTENANCE Front View With HMD Hydraulic Table ....Changing Belt ............MACHINE FEATURES Electric Motors ............Head Components .......... -
Page 5: Machine Dimensions
MACHINE DIMENSIONS INCHES (± .03) MILLIMETERS (± 1 mm) Table Dimensions Standard Glide Hydraulic Table Table Table 36.25 32.63 41.00 (920.8) (828.8) (1041.4) 30.50 25.39 32.00 (774.7) (644.9) (812.8) Optional FLOOR PLAN... -
Page 6: Floor Plan With Hmd Hydraulic Table
MACHINE DIMENSIONS (Continued..) INCHES (± .03) MILLIMETERS (± 1 mm) FLOOR PLAN With HMD HYDRAULIC TABLE... -
Page 7: Front View
MACHINE DIMENSIONS (Continued..) Dimensions INCHES (± .03) MILLIMETERS (± 1 mm) 20.00" (508.0) 15.50" (393.7) 103.25" (2622.6) Work 30.00" (762.0) 25.50" (647.7) 113.25" (2876.6) Height 36.00" (914.4) 31.50" (800.1) 119.25" (3029.0) 42.00" (1066.8) 37.50" (952.5) 125.25" (3181.4) FRONT VIEW... -
Page 8: Front View With Hmd Hydraulic Table
MACHINE DIMENSIONS (Continued..) INCHES (± .03) "A" and "B" Is Dependent On Work Height Ordered. MILLIMETERS (± 1 mm) FRONT VIEW With HMD HYDRAULIC TABLE... -
Page 9: Machine Features
MACHINE FEATURES FRONT VIEW... -
Page 10: Front View With Hmd Hydraulic Table
MACHINE FEATURES (Continued..) FRONT VIEW With HMD HYDRAULIC TABLE... -
Page 11: Rear View
MACHINE FEATURES (Continued..) REAR VIEW... -
Page 12: Raer View With Hmd Hydraulic Table
MACHINE FEATURES (Continued..) REAR VIEW With HMD HYDRAULIC TABLE... -
Page 13: Installation
INSTALLATION LIFTING All the “left”, “right”, “front” and “rear” designations in this manual are as viewed by the operator facing the machine’s pushbutton A tapped hole is located on top of the machine’s controls. column. Screw a forged 3/4-10NC eye-bolt into this hole for lifting purposes. -
Page 14: Electrical Installation
ELECTRICAL INSTALLATION Electrical installation must be made by authorized electrical maintenance personnel only! Refer to the machine specifications plate on the machine frame to verify that the electrical supply circuit will meet the voltage/phase/frequency/ amperage requirements listed. A basic data plate is reproduced on this manual’s introductory page. -
Page 15: Table Alignment (Hmd Table)
TABLE ALIGNMENT (HMD Table) Turn the disconnect switch to "ON". Then: (a) Push the Hydraulic Start pushbutton to activate the hydraulics; (b) Turn the Post selector switch to Place the machine in desired location. Place "UP" and raise the post to its highest position; (c) a level on the machine table base plate. -
Page 16: Preparation For Use
TABLE ALIGNMENT (HMD Table) (Continued..) Add or remove shims under the base pads until the correct post to square clearance is obtained. With an indicator mounted to the saw guide post, check table travel by positioning the indicator to read off of the T-slot in the table. Traverse the table through its full travel and adjust to achieve from 0 to .015 inch per 30 inches (0 to 0.38 mm per 762.0 mm) of travel. -
Page 17: Operation
OPERATION SAFETY PRECAUTIONS Warning Label - READ and UNDERSTAND. FRICTION SAWING Thicker the workpiece, the faster the band speed required and heavier the feed force. For example, band speed should be at least The design of this machine makes it ideal for 6000 fpm (1828.8 m/min.) for 1/4 inch (6.4 mm) friction sawing. In friction sawing, momentary thick carbon steel; 12,500 fpm (3810.0 m/min.) contact between the material being cut and the for one (1) inch (25.4 mm) thick material. - Page 18 MACHINE CONTROLS (Continued..) Controls for the optional DBW-15 Buttwelder are described in a seperate instruction manual. TABLE CONTROLS (If Supplied) Feed Force. This controls the force against the saw band. Force is indicated on a graduated dial around the control. Table Controls.
-
Page 19: Band Speed Control
Band speed is changed by turning the Band Speed control to the desired speed as indicated on the band speed display. Information about any DoALL saw bands and their applications can be obtained from During machine operation, keep the following band a DoALL sales representative. - Page 20 SAW BAND PREPARATION (Continued..) Saw Band Removal Always use extreme care when handling saw Insert-Type Saw Guide Adjustment bands. Wear gloves. These instructions apply to both the upper Turn the band tension handwheel to release saw and lower insert-type saw guide blocks. band tension. Then: (a) Open both bandwheel doors;...
-
Page 21: Post Adjustment
The machine must be bolted to the floor for table loads over 100 pounds (45.4 kg). Using theTensigage. A DoALL Tensigage can also be used to check the band tension. A reading of 2.2 units indicates correct band tension. Tension may be checked “reading up” or “reading down”. -
Page 22: Dust Spout
WORKTABLES AND ADJUSTMENTS Carefully move the stock toward the saw band and begin the cut. Adjust the band speed as (Continued..) necessary during the cutting procedure. Optional HMD Hydraulic Worktable For HMD hydraulic table: (a) Turn the Feed • The HMD-36 worktable measures 34.00 by 42.00 Force and Table Speed knobs to "0"... - Page 23 TYPICAL SAWING PROCEDURES (Continued..) Internal Contours To prepare for internal contour sawing: (a) Drill a starting hole in the stock; (b) Run the saw band through the hole; (c) Weld the saw band. Insulate the saw band from contact with the stock or the worktable will insure a better weld.
-
Page 24: Lubrication
AS REQUIRED for the best oils and/or fluids for your application. Oil-Mist Lubricator (For Optional Roller Saw CHECK WEEKLY DoALL cutting fluids and/or oils (AL- Guides). Keep filled and hoses clear. AS REQUIRED 2000). DBW-15 Buttwelder (Optional). Lubricate as required per DBW-15 Instruction Manual. -
Page 25: Lubrication Diagram
LUBRICATION DIAGRAM REAR VIEW HMD TABLE OPTION... -
Page 26: Maintenance
MAINTENANCE CHANGING BELT Belts on the spindle pulley and motor pulley will stretch during use. This stretch is taken up by tighten the belt tension screw located below the drive motor. To replace the belts: (a) Turn the belt tension screw counterclockwise to relax belt tension;... -
Page 27: Hydraulic Table (Optional)
Remove these materials as soon as possible. The Open the bleed valve on the cap end of the cylinder; DoALL Company recommends removing chip (b) Move the Table Feed Control to “REVERSE” collections at least twice per each eight (8) hour and retract the cylinder. -
Page 28: Bandwheel Tire Replacement (Sheet Metal Bandwheels)
BANDWHEEL TIRE REPLACEMENT (Sheet DO NOT drive or hammer against the rim Metal Bandwheels) flange or bandwheel flange at any time. This procedure requires the following items: (a) Put the tire and rim in a vertical position. Next, with A hammer; (b) A length of steel bar with one end a block of wood held firmly against the inside web sharpened (such as a dull chisel);... -
Page 29: Bandwheel Tire Replacement (Cast Aluminum Bandwheels)
BANDWHEEL TIRE REPLACEMENT (Sheet Prepare the caulking gun conversion kit as follows: (a) Insert the adhesive cartridge, nose first, through Metal Bandwheels) (Continued..) the oval opening of the sleeve until the cartridge flange fits snugly against the end of the sleeve; (b) Place the two stem plunger in the back of the cartridge;... -
Page 30: Bandwheel Tire Replacement (Sheet Metal
BANDWHEEL TIRE REPLACEMENT (Sheet Metal Bandwheels) (Continued..) Clamp the Bandwheel and Tire Do-ecurely. Clamp a flat board on top of the bandwheel to keep the glued portion of the tire in place. If necessary, clamp the bandwheel down to the table. With two (2) screwdrivers, stretch the tire over the bandwheelalways keeping one screwdriver stretching the tire as you move around the rim until... -
Page 31: Trouble Shooting
TROUBLE SHOOTING Repair and adjustment procedures should be Check for an incorrect saw band tension setting. made by experienced maintenance personnel, or by a DoALL service representative. SAW BAND IS CUTTING INACCURATELY Reference to the machine’s electrical and hydraulic schematics will be helpful. Check for worn blade teeth. Inserts that are too wide for the blade will damage the teeth set. - Page 32 NO COOLANT FLOW (If Applicable) TROUBLE SHOOTING (Continued..) PREMATURE BLADE TEETH DULLING Make sure reservoir is full. Check for a clogged coolant applicator nozzle. The saw band is not being “broken” in on the first few cuts. Reduce the feeding pressure when making Check for a clogged or kinked coolant hose.
-
Page 33: Trouble Shooting
TROUBLE SHOOTING (Continued..) TABLE FEED PRESSURE TOO LOW Table feed cylinder is damaged or worn. System pressure too low. Adjust pressure. Table feed pressure control valve spring, ball or ball seat are damaged. Check for leaks in the hydraulic lines and connec- tions. -
Page 34: Accessories
The following are accessories sometimes Before attempting a long cut, check to see that the used during sawing operations. A DoALL saw band is not worn on one side. This will cause sales representative can advise you about the stock to wander relative to the rip fence guide bar. -
Page 35: Dbw-15 Buttwelder
DBW-15 BUTTWELDER Information covering blade welding, plus operation and maintenance of the optional DBW-15 Buttwelder (with flash grinder and blade shear, portable or machine mounted) are provided in a seperate instruction manual included with the welder. WORKHOLDING JAW The workholding jaw is used for off-hand and contour sawing. -
Page 36: Glide Table
See the literature sent with the unit for information The following optional saw guides may be used to on installation, operation, maintenance and help increase productivity and economy. adjustments. Information and availability of all DoALL saw bands and guides can be obtained from a DoALL sales representative. -
Page 37: Safety Equipment
MATERIAL HANDLING EQUIPMENT Special material handling equipment can enhanced the performance of your machine. Contact your DoALL sales representative for information on any material handling needs that could increase your productivity.
Need help?
Do you have a question about the ZV-3620 and is the answer not in the manual?
Questions and answers