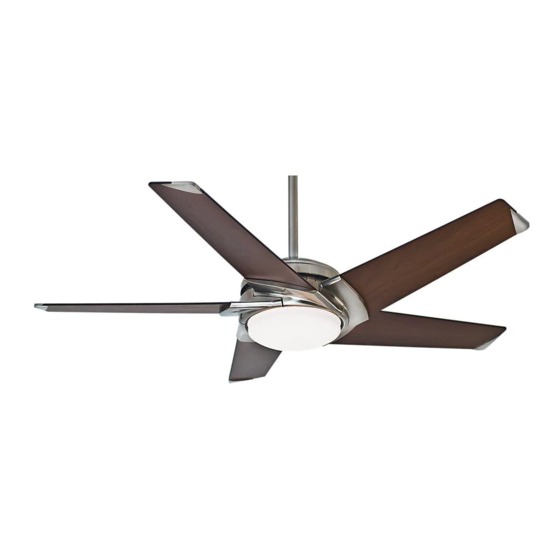
Casablanca stealth Manual
Hide thumbs
Also See for stealth:
- Instructions manual (18 pages) ,
- Owner's manual (17 pages) ,
- Owner's manual and installation manual (2 pages)
Advertisement
Table of Contents
Congratulations on purchasing your new
Casablanca® ceiling fan! It will provide
comfort and performance in your home
or office for many years. This installation
and operation manual contains complete
instructions for installing and operating
your fan.
We are proud of our work and appreciate
the opportunity to supply you with the
best ceiling fan available anywhere in the
world.
To register your fan, please visit:
www.CasablancaFanCo.com/register
Save your receipt for proof of purchase.
What to Expect with
Your Installation
Tools Needed
30 inches
7 feet
2
Downrod
6
Globe
Remote Control
12
1
M8524-01 • 04/29/14 • © Casablanca Fan Company
www.CasablancaFanCo.com
Mounting Options
Ladder
3
Wiring
Canopy
9
Operation, Maintenance
& Cleaning
13
1.888.227.2178
Ceiling Bracket
4
5
Blades
10
11
Troubleshooting
?
?
?
14
15
Advertisement
Table of Contents

Related Manuals for Casablanca stealth


Summary of Contents for Casablanca stealth
- Page 1 Canopy Blades best ceiling fan available anywhere in the world. To register your fan, please visit: www.CasablancaFanCo.com/register Save your receipt for proof of purchase. Operation, Maintenance Globe Remote Control & Cleaning Troubleshooting M8524-01 • 04/29/14 • © Casablanca Fan Company...
-
Page 2: What To Expect With Your Installation
Assess ceiling angle Select a downrod length installed and used in accordance with the instructions may cause harmful interference to radio communications. M8524-01 • 04/29/14 • © Casablanca Fan Company... -
Page 3: Tools Needed
Tools Needed www.CasablancaFanCo.com 1.888.227.2178 Pliers Wire Strippers Screwdrivers Ladder Power Drill 9/64” Drill Bit (optional) (optional) If mounting to a support structure, you will also need these tools. M8524-01 • 04/29/14 • © Casablanca Fan Company... -
Page 4: Mounting Options
You need BOTH You need ONLY a Longer a Longer Downrod & Downrod an Angled Mounting Kit *most common M8524-01 • 04/29/14 • © Casablanca Fan Company M8524-01 • 04/29/14 • © Casablanca Fan Company... -
Page 5: Ceiling Bracket
To avoid possible electrical shock, before 1-888-277-2178. installing your fan, disconnect the power by turning off the circuit breakers to the outlet Refer to warning w.1 on pg. 2 box associated with the wall switch location. M8524-01 • 04/29/14 • © Casablanca Fan Company... - Page 6 Steps 1-5 to remove standard downrod pipe Longer Downrod for angled ceilings or ceilings 10’ or higher Shorter Downrod for fans installed close to ceiling Steps 6-10 to reassemble with new pipe M8524-01 • 04/29/14 • © Casablanca Fan Company...
- Page 7 4-5 full turns) until it stops. with pliers. DO NOT can be inserted. from the top of the downrod. HAND TIGHTEN. 8” 3/8” If the setscrew is not tightened securely, the fan may fall. M8524-01 • 04/29/14 • © Casablanca Fan Company...
- Page 8 Put the wires and downrod through the canopy. Let the canopy sit loosely on top of the fan. CANOPY OR WIRES. Place the downrod ball into the slot in the ceiling bracket. M8524-01 • 04/29/14 • © Casablanca Fan Company...
- Page 9 Spread the wires apart, with the grounded wires on one side of Refer to CAUTION c.1 on pg. 2 the outlet box and the ungrounded wires on the other side of the outlet box. M8524-01 • 04/29/14 • © Casablanca Fan Company...
- Page 10 Insert the two canopy screws lifted into place, the canopy fits into the screw holes are aligned. found in the hardware bag. the hanging bracket as shown. Note: Fan style may vary. M8524-01 • 04/29/14 • © Casablanca Fan Company...
- Page 11 Insert four blade assembly screws and four two blade tip screws, found in blade washers, found in the hardware hardware bag. bag, into each blade as shown. Install the screws into the posts in each blade arm. M8524-01 • 04/29/14 • © Casablanca Fan Company...
-
Page 12: Operation Instructions
See next page for fan operation instructions. M8524-01 • 04/29/14 • © Casablanca Fan Company... -
Page 13: Remote Control
“ON.” Replace the battery door. and replace the battery door. To pair the remote, hold down the Set button for 5 seconds. Pairing is complete when the small LED button on the remote flashes twice. M8524-01 • 04/29/14 • © Casablanca Fan Company... - Page 14 LED button on the remote more than one second. Light will flashes to indicate a signal has cycle from brightest to dimmest. been sent to the fan. Release the light button when desired brightness is achieved. M8524-01 • 04/29/14 • © Casablanca Fan Company...
-
Page 15: Troubleshooting
For more information on ENERGY STAR, visit fan speeds again. remote. www.energystar.gov. AUTHORIZED SERVICE CENTERS For the most updated listing of Casablanca Authorized Service Centers, visit www.CasablancaFanCo.com or call toll free 1-888-227-2178. M8524-01 • 04/29/14 • © Casablanca Fan Company...
Need help?
Do you have a question about the stealth and is the answer not in the manual?
Questions and answers