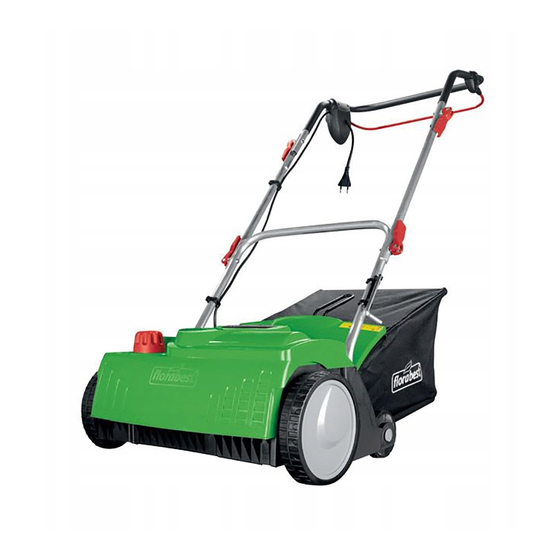
FLORABEST FLV 1300 A1 Original Operation Manual
Electric scarifier / lawn aerator
Hide thumbs
Also See for FLV 1300 A1:
- Translation of original operation manual (98 pages) ,
- Operation manual (66 pages)

Related Manuals for FLORABEST FLV 1300 A1


Summary of Contents for FLORABEST FLV 1300 A1
- Page 1 FLV 1300 A1 ® Electric Scarifier / Lawn Aerator Translation of original operation manual...
- Page 2 Before reading, unfold the page containing the illustrations and familiarise yourself with all functions of the device. GB / IE Translation of original operation manual Page...
-
Page 5: Table Of Contents
Content Use............5 This implement is used: Safety.instructions.........5 As a lawn aerator and to rake leaves, Symbols / Instructions on the imple- moss and weeds out of the lawn and ment ............6 to collect these leaves and plant resi- Symbols in the manual ......6 dues. -
Page 6: Symbols / Instructions On The Implement
Symbols / Instructions on the implement Remove any soil residue from the springs of the impact protection cover and/or the WARNING! housing to ensure that the cover closes These Instructions must be read! correctly. When operating without the coll- ection basket, the impact protection cover must be completely closed. - Page 7 that the workspace is tidy and not Preparations: • Never allow children and people who blocked. are not familiar with these Operating Check the condition of your extension Instructions to use the implement. cable and the connecting cable of Local regulations may stipulate a mini- your equipment.
- Page 8 • Always switch off the implement and terrain. Always work across slopes - never up and down! Be particularly disconnect the power plug:- careful when changing the travelling - Whenever you leave the implement direction. Do not work on very steep - Before you clean the ejector open- slopes.
- Page 9 • Ensure that all nuts, bolts and screws • Keep the extension cables away from are firmly tightened and that the im- the teeth. The teeth may damage the plement is in a safe working state. cables and result in contact with live •...
-
Page 10: Functional.parts
Functional parts Assembling instructions .The.most.important.func- tional.parts.are.illustrated. on.the.cover.page. Prior to any work on the implement always disconnect the plug from 1 Unlocking button the power socket! 2 Power cable (10 m) Extent of the delivery 3 Starting lever 4 Upper handle bar 5a+b 4 screws and 4 wing nuts to se- Carefully unpack the implement and cure the bar... -
Page 11: Mounting And Emptying The Collection Bag
Operation 3. Hang the cable strain relief (19a) on the upper handle bar (4). Please observe local regulations Attach the clip ring to the ten- concerning noise protection. It is sion adjuster bracket (19b) be- quite possible that local rules and neath the cable tension adjuster regulations may limit the time of (19a) on the upper handle (4). -
Page 12: Switching On And Off
Working with the implement The setting button is not intended for height adjustment but rather to compensate for wear. Selection of To maintain a well cared-for lawn it should a readjustment position without the be aerated every 4 to 6 weeks. corresponding wear can overload Verticuting is a more intensive intervention the motor and damage the cylinder. -
Page 13: Exchanging The Cylinder
aerating or verticuting the individual 5. Insert the new cylinder by revers- lanes should always overlap by a few ing the sequence. Ensure that centimetres. Dwelling too long at the the flattened side of the bearing same place while the implement is shell (28) is first inserted in the running can damage the grass sward. -
Page 14: Storage
Spare parts • Completely empty the collection bag. • Always keep the implement clean. Do not use cleaning agents or solvents. Refer to the specified Service Address, Fax No. to purchase spare parts. Orders We cannot be held liable for damage caused must specify the Order number. -
Page 15: Technical.data
• Implements.dispatched.by.unpaid. carriage.–.as.bulky.goods,.by.ex- press.or.other.special.freight.forms. –.will.not.be.accepted. • We will dispose of your implements free of charge Technical data Electric.Scarifier./.Aerator. FLV.1300.A1 Motor input........1300 W Rated voltage ..... 230V~, 50 Hz Protection Class ........ Degree of protection ......IPX4 Rotating speed of the tool (n ...........3600 min (r.p.m) Cylinder width ...... -
Page 16: Trouble.shooting
Trouble shooting Problem Possible.cause Remedy Foreign body on cylinder Remove foreign body Damaged sprung tines or Exchange cylinder Abnormal noises, cylinder knives clatter or Cylinder incorrectly Install cylinder correctly (see vibrations mounted chapter on exchanging the cylinder) Toothed-belt slip Repair by After-Sales Service Check power socket, cable, line;... -
Page 18: Ec.declaration.of.conformity
EC Declaration of Conformity We confirm, that the design type of the Electric.Scarifier./.Aeratorr design.Series.FLV.1300.A1 Serial number 1009000001 - 1012109500 Is compliant with the current versions of the following relevant EU guidelines: 2006/42/EC.•.2004/108/EC.•.2000/14/EC In order to guarantee compliance, the following harmonised standards, na- tional standards and regulations have been applied: EN.60335-1/A13:2008.•.EN.62233:2008 .EN.60335-2-92:2005.•.EN.13684:2004+A3:2009... -
Page 19: Exploded.drawing
Exploded Drawing informative... -
Page 21: Grizzly.service-Center
Grizzly Service-Center DES.UK.Ltd. Unit B7 Oxford Street Industrial Park Vulcan Road Bilston, West Midlands WV14 7LF Tel: 0870 7876177 Tel from Ireland: 0044 870 787 6177 Fax: 0870 7876168 Fax from Ireland: 0044 870 787 6168 Email: grizzly@deslimited.com 2010-10-29-rev02-op... - Page 22 IAN 56205 Grizzly Gartengeräte GmbH & Co. KG Am Gewerbepark 2 D-64823 Groß-Umstadt Last Information Update: 10 / 2010 Ident.-No.: 76007327102010 - 6...
Need help?
Do you have a question about the FLV 1300 A1 and is the answer not in the manual?
Questions and answers