Sign In
Upload
Manuals
Brands
Panasonic Manuals
Projector
PT-MZ10K
Panasonic PT-MZ10K Manuals
Manuals and User Guides for Panasonic PT-MZ10K. We have
3
Panasonic PT-MZ10K manuals available for free PDF download: Operating Instructions Manual
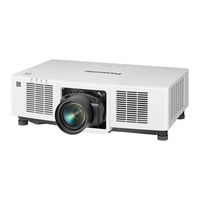
Panasonic PT-MZ10K Operating Instructions Manual (248 pages)
Brand:
Panasonic
| Category:
Projector
| Size: 29.16 MB
Table of Contents
Table of Contents
2
Read this First
5
Chapter 1 Preparation
19
Precautions for Use
20
Intended Use of the Product
20
Cautions When Transporting
20
Cautions When Installing
20
Security
23
Digital Link
23
Art-Net
23
Application Software Supported by the Projector
23
Storing
24
Disposal
24
Cautions on Use
24
Accessories
25
Optional Accessories
26
About Your Projector
27
Remote Control
27
Projector Body
29
Preparing the Remote Control
32
Inserting and Removing the Batteries
32
When Using the Multiple Projectors
32
Connecting the Remote Control to the Projector with a Cable
32
Chapter 2 Getting Started
33
Setting up
34
Usable Outlet
34
Installation Mode
34
Parts for Installation (Optional)
36
Projected Image and Throw Distance
36
Adjusting Adjustable Feet
42
Attaching/Removing the Projection Lens (Optional)
43
Attaching the Projection Lens
43
Removing the Projection Lens
44
Connecting
46
Before Connecting
46
Connecting Example: AV Equipment
47
Connecting Example: Computers
48
Connecting Example Using DIGITAL LINK
49
Connecting Example When Using the Contrast Synchronization Function/Shutter Synchronization Function
50
Chapter 3 Basic Operations
52
Switching On/Off the Projector
53
Connecting the Power Cord
53
Power Indicator
55
Switching on the Projector
56
When the Initial Setting Screen Is Displayed
57
Making Adjustments and Selections
64
Switching off the Projector
65
Projecting
66
Selecting the Input Signal
66
Adjusting the Focus, Zoom, and Lens Shift
67
Adjusting the Focus Balance
68
Executing the Lens Calibration
69
Moving the Projection Lens to the Home Position
70
Lens Shift Range
71
Operating with the Remote Control
72
Using the Shutter Function
72
Using the On-Screen Display Function
72
Using the Automatic Setup Function
73
Using the Function Button
73
Displaying Internal Test Pattern
73
Using the Status Function
74
Setting ID Number of the Remote Control
74
Chapter 4 Settings
75
Menu Navigation
76
Navigating through the Menu
76
Main Menu
77
Sub-Menu
78
[PICTURE] Menu
81
[Picture Mode]
81
[Contrast]
81
[Brightness]
81
[Color]
82
[Tint]
82
[Color Temperature]
82
[Gamma]
83
[System Daylight View]
84
[Sharpness]
84
[Noise Reduction]
84
[Dynamic Contrast]
85
[System Selector]
86
[Default Picture Mode]
87
[POSITION] Menu
88
[Shift]
88
[Aspect]
88
[Zoom]
89
[Clock Phase]
90
[Geometry]
90
[ADVANCED MENU] Menu
96
[Digital Cinema Reality]
96
[Blanking]
96
[Input Resolution]
97
[Clamp Position]
97
[Edge Blending]
98
[Frame Response]
100
[Raster Position]
100
[DISPLAY LANGUAGE] Menu
101
Changing the Display Language
101
[DISPLAY OPTION] Menu
102
[Color Adjustment]
102
[Color Correction]
102
[Screen Setting]
103
[Auto Signal]
103
[Auto Setup]
103
[Backup Input Setting]
104
[Hdmi In]
106
[DVI-D In]
108
[Sdi In]
109
[Rgb In]
111
[Digital Link In]
112
[On-Screen Display]
113
[Menu Mode]
115
[Image Rotation]
116
[Back Color]
116
[Startup Logo]
116
[Uniformity]
116
[Shutter Setting]
118
[Freeze]
120
[Waveform Monitor]
120
[Cut Off]
122
[PROJECTOR SETUP] Menu
123
[Projector ID]
123
[Projection Method]
123
[Lens]
124
[Operation Setting]
129
[Light Output]
131
[Standby Mode]
131
[Quick Startup]
132
[No Signal Setting]
132
[Initial Startup]
135
[Startup Input Select]
135
[Date and Time]
136
[Schedule]
137
[Multi Projector Sync]
138
[Remote1 Mode]
142
[Function Button]
142
[Filter Counter]
143
[Status]
143
[Info Monitor Setting]
145
[Data Cloning]
147
[Save All User Data]
147
[Load All User Data]
147
[Initialize]
147
[Service Password]
149
[TEST PATTERN] Menu
150
[Test Pattern]
150
[SIGNAL LIST] Menu
151
Registering New Signals
151
Renaming the Registered Signal
151
Deleting the Registered Signal
151
Protecting the Registered Signal
152
Expanding Signal Lock-In Range
152
Sub Memory
153
[SECURITY] Menu
154
[Security Password]
154
[Security Password Change]
154
[Display Setting]
154
[Text Change]
155
[Control Device Setup]
155
[Control Device Password Change]
156
[NETWORK] Menu
157
[Digital Link Mode]
157
[Digital Link Status]
157
[Network Setup]
158
[Network Control]
158
[Network Status]
159
[Digital Link Menu]
159
[Art-Net SETUP]
159
[Art-Net CHANNEL SETTING]
160
[Art-Net STATUS]
161
Chapter 5 Operations
162
Network Connection
163
Connecting Via Wired LAN
163
Web Control Function
166
Computer that Can be Used for Setting
166
Accessing from the Web Browser
166
Using the Information Monitor Function
190
Screen Mode
190
Top Menu
190
Sub-Menu
190
Basic Operation Procedure in the Menu Operation Mode
191
[USER VIEW] Menu
191
[SETUP] Menu
192
[STATUS] Menu
195
Error Notification Mode
197
Using the Data Cloning Function
198
Copying the Data to Another Projector Via LAN
198
Updating the Firmware
200
Updating the Firmware Via LAN
200
Chapter 6 Maintenance
206
Light Source/Temperature/Filter Indicators
207
When an Indicator Lights up
207
Maintenance/Replacement
209
Before Performing Maintenance/Replacement
209
Maintenance
209
Replacing the Unit
212
Troubleshooting
213
[SELF TEST] Indications
215
Chapter 7 Appendix
217
Technical Information
218
Pjlink Protocol
218
Using Art-Net Function
219
Control Commands Via LAN
223
SERIAL/MULTI PROJECTOR SYNC IN>/<SERIAL/MULTI PROJECTOR SYNC OUT> Terminals
227
REMOTE 1 IN> Terminal
231
Control Device Password
231
Upgrade Kit
232
List of Compatible Signals
233
Specifications
238
Dimensions
241
Precautions for Attaching the Ceiling Mount Bracket
242
Index
244
Advertisement
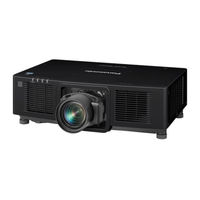
Panasonic PT-MZ10K Operating Instructions Manual (247 pages)
Brand:
Panasonic
| Category:
Projector
| Size: 29.08 MB
Table of Contents
Table of Contents
2
Read this First
5
Chapter 1 Preparation
19
Precautions for Use
20
Intended Use of the Product
20
Cautions When Transporting
20
Cautions When Installing
20
Security
23
Digital Link
23
Art-Net
23
Application Software Supported by the Projector
23
Storing
24
Disposal
24
Cautions on Use
24
Accessories
25
Optional Accessories
26
About Your Projector
27
Remote Control
27
Projector Body
29
Preparing the Remote Control
32
Inserting and Removing the Batteries
32
When Using the Multiple Projectors
32
Connecting the Remote Control to the Projector with a Cable
32
Chapter 2 Getting Started
33
Setting up
34
Usable Outlet
34
Installation Mode
34
Parts for Installation (Optional)
36
Projected Image and Throw Distance
36
Adjusting Adjustable Feet
42
Attaching/Removing the Projection Lens (Optional)
43
Attaching the Projection Lens
43
Removing the Projection Lens
44
Connecting
46
Before Connecting
46
Connecting Example: AV Equipment
47
Connecting Example: Computers
48
Connecting Example Using DIGITAL LINK
49
Connecting Example When Using the Contrast Synchronization Function/Shutter Synchronization Function
50
Chapter 3 Basic Operations
52
Switching On/Off the Projector
53
Connecting the Power Cord
53
Power Indicator
55
Switching on the Projector
56
When the Initial Setting Screen Is Displayed
57
Making Adjustments and Selections
64
Switching off the Projector
65
Projecting
66
Selecting the Input Signal
66
Adjusting the Focus, Zoom, and Lens Shift
67
Adjusting the Focus Balance
68
Executing the Lens Calibration
69
Moving the Projection Lens to the Home Position
70
Lens Shift Range
71
Operating with the Remote Control
72
Using the Shutter Function
72
Using the On-Screen Display Function
72
Using the Automatic Setup Function
73
Using the Function Button
73
Displaying Internal Test Pattern
73
Using the Status Function
74
Setting ID Number of the Remote Control
74
Chapter 4 Settings
75
Menu Navigation
76
Navigating through the Menu
76
Main Menu
77
Sub-Menu
78
[PICTURE] Menu
81
[Picture Mode]
81
[Contrast]
81
[Brightness]
81
[Color]
82
[Tint]
82
[Color Temperature]
82
[Gamma]
83
[System Daylight View]
84
[Sharpness]
84
[Noise Reduction]
84
[Dynamic Contrast]
85
[System Selector]
86
[Default Picture Mode]
87
[POSITION] Menu
88
[Shift]
88
[Aspect]
88
[Zoom]
89
[Clock Phase]
90
[Geometry]
90
[ADVANCED MENU] Menu
96
[Digital Cinema Reality]
96
[Blanking]
96
[Input Resolution]
97
[Clamp Position]
97
[Edge Blending]
98
[Frame Response]
100
[Raster Position]
100
[DISPLAY LANGUAGE] Menu
101
Changing the Display Language
101
[DISPLAY OPTION] Menu
102
[Color Adjustment]
102
[Color Correction]
102
[Screen Setting]
103
[Auto Signal]
103
[Auto Setup]
103
[Backup Input Setting]
104
[Hdmi In]
106
[DVI-D In]
108
[Sdi In]
109
[Rgb In]
111
[Digital Link In]
112
[On-Screen Display]
113
[Menu Mode]
115
[Image Rotation]
116
[Back Color]
116
[Startup Logo]
116
[Uniformity]
116
[Shutter Setting]
118
[Freeze]
120
[Waveform Monitor]
120
[Cut Off]
122
[PROJECTOR SETUP] Menu
123
[Projector ID]
123
[Projection Method]
123
[Lens]
124
[Operation Setting]
129
[Light Output]
131
[Standby Mode]
131
[Quick Startup]
132
[No Signal Setting]
132
[Initial Startup]
135
[Startup Input Select]
135
[Date and Time]
136
[Schedule]
137
[Multi Projector Sync]
138
[Remote1 Mode]
142
[Function Button]
142
[Filter Counter]
143
[Status]
143
[Info Monitor Setting]
145
[Data Cloning]
147
[Save All User Data]
147
[Load All User Data]
147
[Initialize]
147
[Service Password]
149
[TEST PATTERN] Menu
150
[Test Pattern]
150
[SIGNAL LIST] Menu
151
Registering New Signals
151
Renaming the Registered Signal
151
Deleting the Registered Signal
151
Protecting the Registered Signal
152
Expanding Signal Lock-In Range
152
Sub Memory
153
[SECURITY] Menu
154
[Security Password]
154
[Security Password Change]
154
[Display Setting]
154
[Text Change]
155
[Control Device Setup]
155
[Control Device Password Change]
156
[NETWORK] Menu
157
[Digital Link Mode]
157
[Digital Link Status]
157
[Network Setup]
158
[Network Control]
158
[Network Status]
159
[Digital Link Menu]
159
[Art-Net SETUP]
159
[Art-Net CHANNEL SETTING]
160
[Art-Net STATUS]
161
Chapter 5 Operations
162
Network Connection
163
Connecting Via Wired LAN
163
Web Control Function
166
Computer that Can be Used for Setting
166
Accessing from the Web Browser
166
Using the Information Monitor Function
189
Screen Mode
189
Top Menu
189
Sub-Menu
189
Basic Operation Procedure in the Menu Operation Mode
190
[USER VIEW] Menu
190
[SETUP] Menu
191
[STATUS] Menu
194
Error Notification Mode
196
Using the Data Cloning Function
197
Copying the Data to Another Projector Via LAN
197
Updating the Firmware
199
Updating the Firmware Via LAN
199
Chapter 6 Maintenance
205
Light Source/Temperature/Filter Indicators
206
When an Indicator Lights up
206
Maintenance/Replacement
208
Before Performing Maintenance/Replacement
208
Maintenance
208
Replacing the Unit
211
Troubleshooting
212
[SELF TEST] Indications
214
Chapter 7 Appendix
216
Technical Information
217
Pjlink Protocol
217
Using Art-Net Function
218
Control Commands Via LAN
222
SERIAL/MULTI PROJECTOR SYNC IN>/<SERIAL/MULTI PROJECTOR SYNC OUT> Terminals
226
REMOTE 1 IN> Terminal
230
Control Device Password
230
Upgrade Kit
231
List of Compatible Signals
232
Specifications
237
Dimensions
240
Precautions for Attaching the Ceiling Mount Bracket
241
Index
243
Panasonic PT-MZ10K Operating Instructions Manual (221 pages)
Brand:
Panasonic
| Category:
Projector
| Size: 12.55 MB
Table of Contents
Table of Contents
2
Read this First
0
Cautions When Installing
2
Cautions When Transporting
2
Intended Use of the Product
2
Table of Contents
2
Art-Net
5
Digital Link
5
Security
5
Chapter 1 Preparation
6
Cautions on Use
6
Disposal
6
Storing
6
Precautions for Use
7
Accessories
7
Optional Accessories
8
About Your Projector
9
Remote Control
9
Projector Body
11
Preparing the Remote Control
14
Inserting and Removing the Batteries
14
When Using the Multiple Projectors
14
Connecting the Remote Control to the Projector with a Cable
14
Chapter 2 Getting Started
15
Setting up
16
Usable Outlet
16
Installation Mode
16
Parts for Installation (Optional)
18
Projected Image and Throw Distance
18
Adjusting Adjustable Feet
24
Attaching/Removing the Projection Lens (Optional)
25
Attaching the Projection Lens
25
Removing the Projection Lens
26
Connecting
28
Before Connecting
28
Connecting Example: AV Equipment
29
Connecting Example: Computers
30
Connecting Example Using DIGITAL LINK
31
Connecting Example When Using the Contrast Synchronization Function/Shutter Synchronization Function
32
Chapter 3 Basic Operations
34
Switching On/Off the Projector
35
Connecting the Power Cord
35
Power Indicator
37
Switching on the Projector
38
When the Initial Setting Screen Is Displayed
39
Making Adjustments and Selections
46
Switching off the Projector
47
Projecting
48
Selecting the Input Signal
48
Adjusting the Focus, Zoom, and Lens Shift
49
Adjusting the Focus Balance
50
Executing the Lens Calibration
51
Moving the Projection Lens to the Home Position
52
Lens Shift Range
53
Operating with the Remote Control
54
Using the Shutter Function
54
Using the On-Screen Display Function
54
Using the Automatic Setup Function
55
Using the Function Button
55
Displaying Internal Test Pattern
55
Using the Status Function
56
Setting ID Number of the Remote Control
56
Chapter 4 Settings
57
Menu Navigation
58
Navigating through the Menu
58
Main Menu
59
Sub-Menu
60
English - 79
61
[PICTURE] Menu
63
[Picture Mode]
63
[Contrast]
63
[Brightness]
63
[Color]
64
[Tint]
64
[Color Temperature]
64
[Gamma]
65
[System Daylight View]
66
[Sharpness]
66
[Noise Reduction]
66
[Dynamic Contrast]
67
[System Selector]
68
[Default Picture Mode]
69
[POSITION] Menu
70
[Shift]
70
[Aspect]
70
[Zoom]
71
[Clock Phase]
72
[Geometry]
72
[ADVANCED MENU] Menu
78
[Digital Cinema Reality]
78
[Blanking]
78
[Input Resolution]
79
[Clamp Position]
79
[Edge Blending]
80
[Frame Response]
82
[Raster Position]
82
[Normal]
82
[DISPLAY LANGUAGE] Menu
83
Changing the Display Language
83
[DISPLAY OPTION] Menu
84
[Color Adjustment]
84
[Color Correction]
84
[Off]
84
[Screen Setting]
85
[Auto Signal]
85
[Auto Setup]
85
[Backup Input Setting]
86
[Off]
86
[Off]
87
[Hdmi In]
88
[DVI-D In]
90
[Sdi In]
91
[Rgb In]
93
[Digital Link In]
94
[On-Screen Display]
95
[Off]
96
[Menu Mode]
97
[Normal]
97
[Off]
97
[Image Rotation]
98
[Back Color]
98
[Startup Logo]
98
[Uniformity]
98
[Shutter Setting]
100
[Freeze]
102
[Waveform Monitor]
102
[Cut Off]
104
[PROJECTOR SETUP] Menu
105
[Projector ID]
105
[Projection Method]
105
[Lens]
106
[Operation Setting]
108
[Light Output]
110
[Standby Mode]
111
[Quick Startup]
111
[No Signal Setting]
112
[Initial Startup]
115
[Startup Input Select]
115
[Date and Time]
115
[Schedule]
116
[Multi Projector Sync]
118
[Remote1 Mode]
121
[Function Button]
122
[Filter Counter]
122
[Status]
123
[Info Monitor Setting]
124
[Data Cloning]
126
[Save All User Data]
126
[Load All User Data]
127
[Initialize]
127
[Service Password]
128
[TEST PATTERN] Menu
129
[Test Pattern]
129
[SIGNAL LIST] Menu
130
Registering New Signals
130
Renaming the Registered Signal
130
Deleting the Registered Signal
130
Protecting the Registered Signal
131
Expanding Signal Lock-In Range
131
Sub Memory
132
[SECURITY] Menu
133
[Security Password]
133
[Security Password Change]
133
[Display Setting]
133
[Text Change]
134
[Control Device Setup]
134
[Control Device Password Change]
135
[NETWORK] Menu
136
[Digital Link Mode]
136
[Digital Link Status]
136
[Network Setup]
137
[Network Control]
137
[Network Status]
138
[Digital Link Menu]
138
[Art-Net SETUP]
138
[Art-Net CHANNEL SETTING]
139
[Art-Net STATUS]
140
Chapter 5 Operations
141
Network Connection
142
Connecting Via Wired LAN
142
Web Control Function
145
Computer that Can be Used for Setting
145
Accessing from the Web Browser
145
Using the Information Monitor Function
168
Screen Mode
168
Top Menu
168
Sub-Menu
168
Basic Operation Procedure in the Menu Operation Mode
169
[USER VIEW] Menu
169
[SETUP] Menu
170
[STATUS] Menu
173
Error Notification Mode
175
Using the Data Cloning Function
176
Copying the Data to Another Projector Via LAN
176
Updating the Firmware
178
Updating the Firmware Via LAN
178
Chapter 6 Maintenance
184
Light Source/Temperature/Filter Indicators
185
When an Indicator Lights up
185
Maintenance/Replacement
187
Before Performing Maintenance/Replacement
187
Maintenance
187
Replacing the Unit
190
Troubleshooting
191
[SELF TEST] Indications
193
Chapter 7 Appendix
195
Technical Information
196
Pjlink Protocol
196
Using Art-Net Function
197
Control Commands Via LAN
201
SERIAL/MULTI PROJECTOR SYNC IN>/<SERIAL/MULTI PROJECTOR SYNC OUT> Terminals
205
REMOTE 1 IN> Terminal
209
Control Device Password
209
Upgrade Kit
210
List of Compatible Signals
211
Specifications
216
Dimensions
219
Precautions for Attaching the Ceiling Mount Bracket
220
Advertisement
Advertisement
Related Products
Panasonic PT-MZ10KLBU7
Panasonic PT-MZ10KLWU7
Panasonic PT-MZ10KU
Panasonic PT-MZ10KL
Panasonic PT-MZ13K
Panasonic PT-MZ13KLBU7
Panasonic PT-MZ16KL
Panasonic PT-MZ14K
Panasonic PT-MZ11K
Panasonic PT-MZ14KL
Panasonic Categories
Camcorder
Air Conditioner
TV
Digital Camera
Cordless Telephone
More Panasonic Manuals
Login
Sign In
OR
Sign in with Facebook
Sign in with Google
Upload manual
Upload from disk
Upload from URL