Lexmark MS312 Manuals
Manuals and User Guides for Lexmark MS312. We have 5 Lexmark MS312 manuals available for free PDF download: Service Manual, User Manual, Manual
Lexmark MS312 Service Manual (343 pages)
Table of Contents
-
-
-
Paper Jams77
-
25Y Paper Jams101
-
-
Close Front Door105
-
Insert Tray [X]106
-
Memory Full [38]108
-
-
-
111 Errors122
-
121 Errors126
-
126 Errors128
-
132 Errors129
-
Errors130
-
140 Errors131
-
155 Errors132
-
900 Errors135
-
Errors140
-
94Y Errors140
-
Errors141
-
Errors143
-
96Y Errors144
-
97Y Errors145
-
98Y Errors146
-
99Y Errors147
-
-
Other Symptoms152
-
Service Menus
161-
Menus List163
-
Diagnostics Menu163
-
Registration163
-
Print Tests164
-
Hardware Tests165
-
Duplex Tests166
-
Input Tray Tests168
-
Output bin Tests169
-
Base Sensor Test170
-
Device Tests170
-
Printer Setup171
-
EP Setup172
-
Reports174
-
Event Log174
-
Exit Diags175
-
-
Factory Defaults176
-
Reports176
-
Tray Linking177
-
Panel Menus177
-
PPDS Emulation177
-
A5 Loading177
-
Reduced Curl177
-
Safe Mode178
-
Demo Mode178
-
Energy Conserve178
-
Font Density178
-
Font Sharpening179
-
USB Speed179
-
USB Pnp179
-
Exit Config Menu179
-
Parts Removal
183-
-
Front Removals227
-
Bezel Removal235
-
UICC Removal238
-
Bail Removal243
-
Bottom Removals252
-
Advertisement
Lexmark MS312 Service Manual (295 pages)
Machine Type 4514-330
Table of Contents
-
Preface
19 -
-
-
Paper Jams40
-
-
-
-
111 Errors83
-
Errors85
-
Errors86
-
Errors87
-
133 Errors88
-
Errors89
-
155 Errors90
-
900 Errors93
-
912 Errors98
-
94Y Errors98
-
959 Errors101
-
96Y Errors102
-
97Y Errors103
-
99Y Errors104
-
-
Service Menus
117-
Menus List118
-
Diagnostics Menu119
-
Registration119
-
Print Tests120
-
Hardware Tests120
-
Button Test121
-
Dram Test121
-
Duplex Tests122
-
Quick Test122
-
Left Margin123
-
Top Margin123
-
Input Tray Tests124
-
Output bin Tests125
-
Base Sensor Test125
-
Device Tests126
-
Printer Setup126
-
Flash Test126
-
Processor ID127
-
EP Setup128
-
Ep Defaults128
-
Transfer Adjust128
-
Print Contrast128
-
Gap Adjust129
-
Reports130
-
Event Log130
-
Exit Diags131
-
-
Factory Defaults131
-
Reports132
-
Tray Linking132
-
Panel Menus132
-
PPDS Emulation133
-
A5 Loading133
-
Reduced Curl133
-
Safe Mode133
-
Demo Mode133
-
Energy Conserve134
-
Font Density134
-
Font Sharpening134
-
USB Speed134
-
USB Pnp135
-
Exit Config Menu135
-
-
-
Front Removals183
-
Bezel Removal191
-
UICC Removal194
-
Bail Removal199
-
Bottom Removals208
-

Lexmark MS312 User Manual (226 pages)
Brand: Lexmark
|
Category: All in One Printer
|
Size: 6.55 MB
Table of Contents
-
-
Networking19
-
Using MS312
26 -
-
Printing
53 -
-
-
Paper Menu75
-
Reports Menu87
-
-
Ipv6 Menu94
-
Security Menu100
-
Settings Menu102
-
Print Settings114
-
Setup Menu114
-
Finishing Menu115
-
Quality Menu117
-
Postscript Menu118
-
Pcl Emul Menu119
-
Utilities Menu123
-
Html Menu126
-
Image Menu127
-
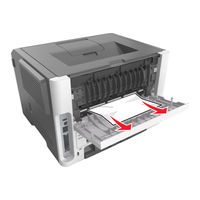
Clearing Jams
129-
Avoiding Jams129
-
MS312 Jams130
-
-
-
Storing Supplies151
Advertisement

Lexmark MS312 User Manual (210 pages)
Table of Contents
-
-
Networking19
-
-
Printing
54 -
-
-
Paper Menu75
-
Reports Menu87
-
-
Ipv6 Menu94
-
Security Menu100
-
Settings Menu102
-
Print Settings110
-
Setup Menu110
-
Finishing Menu111
-
Quality Menu113
-
Xps Menu114
-
Postscript Menu114
-
Pdf Menu119
-
Html Menu122
-
Image Menu123
-
Clearing Jams
125

Lexmark MS312 Manual (110 pages)
Product Study Guide
Brand: Lexmark
|
Category: All in One Printer
|
Size: 4.52 MB