Sign In
Upload
Manuals
Brands
Canon Manuals
Printer
Laser Shot LBP5000
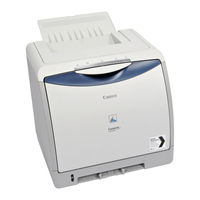
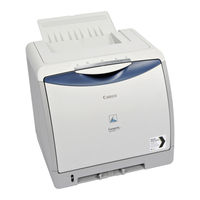
Canon Laser Shot LBP5000 Manuals
Manuals and User Guides for Canon Laser Shot LBP5000. We have
5
Canon Laser Shot LBP5000 manuals available for free PDF download: User Manual, Network Manual, Service Manual, Getting Started Manual, Release Note
Canon Laser Shot LBP5000 User Manual (418 pages)
Laser Beam Printer
Brand:
Canon
| Category:
Printer
| Size: 25.41 MB
Table of Contents
Chapter 8 Appendix
4
How this Manual Is Organized
4
Table of Contents
5
Preface
11
How to Use this Manual
11
Symbols Used in this Manual
11
Buttons Used in this Manual
11
Displays Used in this Manual
12
Illustrations Used in this Manual
12
Abbreviations Used in this Manual
13
Legal Notices
14
FCC (Federal Communications Commission)
14
EMC Directive (220 - 240 V Model)
15
Laser Safety (110 - 127/220 - 240 V Models)
15
International Energy Star-Program
16
WEEE Directive
16
Trademarks
17
Copyright
17
Disclaimers
17
Legal Limitations on the Usage of Your Product and the Use of Images
18
Important Safety Instructions
19
Installation
19
Power Supply
21
Handling
22
Maintenance and Inspections
23
Consumables
24
Chapter 1 Before You Start
26
Features and Benefits
27
Parts and Their Functions
29
Printer Unit
29
Front View
29
Rear View
30
Inner View
31
Indicators
31
Connecting the Power Cord
33
Turning the Printer ON/OFF
35
Turning the Printer on
35
Turning the Printer off
36
Power Saving (Sleep Mode)
37
Connecting to a Computer
39
Using a USB Cable
39
On the Computer
40
Using a LAN Cable
41
Chapter 2 Loading and Outputting Paper
45
Paper Requirements
45
Usable Paper
45
Paper Size
45
Paper Type
46
Plain Paper
46
Index Card
47
Abbreviations of Paper Sizes
48
Printable Area
49
Unusable Paper
50
Storing Paper
51
Storing Printouts
51
Paper Source
52
Paper Source Type
52
Paper Capacity of Paper Source
53
Selecting a Paper Source
53
Precautions for Handling the Manual Feed Slot or Paper Cassette
55
Output Tray
56
Paper Capacity of the Output Tray
56
Loading Plain Paper, Heavy Paper, Transparencies, or Labels in the Paper Source
57
Loading Paper in the Paper Cassette
57
Paper Guide
61
Loading Paper in the Manual Feed Slot
66
Loading Index Card Size Media in the Paper Source
69
Loading Index Card Size Media in the Paper Cassette
69
Loading Index Card Size Media in the Manual Feed Slot
77
Loading Envelopes in the Paper Source
80
Loading Envelopes in the Paper Cassette
80
Loading an Envelope in the Manual Feed Slot
87
Loading Custom Size Paper (Non-Standard Paper) in the Paper Source
90
Loading Custom Size Paper in the Paper Cassette
90
Loading Custom Size Paper in the Manual Feed Slot
97
Registering a Custom Paper Size (Non-Standard Paper)
99
Setting up the Printer Driver and Printing
102
Chapter 3 Setting up the Printing Environment
108
Introduction
109
After Installing the Printer
109
Tasks to Perform each Time You Print
109
System Requirements
109
Installing the CAPT Software
111
Installing from CD-ROM Setup
112
Connector on the Printer
112
Installing with Plug and Play
120
For Windows 98/Me
120
For Windows 2000
129
For Windows Xp/Server 2003
134
Installing from [Add Printer Wizard]
139
For Windows 98/Me
139
For Windows 2000
143
For Windows Xp/Server 2003
149
After Completing Installation
156
Checking the Operations by Configuration Page Print
158
Printing from a Network Computer by Sharing the Printer on a Network
161
Print Server Settings
162
Preparing the Printer Sharing Settings
163
Printer Sharing Settings
164
Installation on Clients
169
Installing from CD-ROM Setup
170
Installing from [Add Printer Wizard]
177
Installing from [Windows Explorer]
181
Uninstalling the CAPT Software
182
Chapter 4 Printing a Document
184
Setting Printer Information before Printing
186
Printing from an Application
188
Specifying the Printing Preferences
192
For Windows 98/Me
192
Displaying the [Document Properties] Dialog Box from an Application
192
Displaying the [Printer Properties] Dialog Box from the [Printers] Folder
194
For Windows 2000/Xp/Server 2003
195
Displaying the [Document Properties] Dialog Box from an Application
195
Displaying the [Document Properties] Dialog Box from the [Printers and Faxes] Folder or the [Printers] Folder
197
Displaying the [Printer Properties] Dialog Box from the [Printers and Faxes] Folder or the [Printers] Folder
198
Deleting/Pausing/Resuming a Print Job
200
Using the Various Printing Functions
202
Utilizing a Variety of Options for Printing
202
Various Pages in the Printer Driver
208
[Page Setup] Sheet
210
[Finishing] Sheet
215
[Paper Source] Sheet
219
[Quality] Sheet
220
[Configuration]/[Device Settings] Sheet
226
[Profile] Sheet (Windows 2000/Xp/Server 2003 Only)
227
Preview
229
Printing Multiple Pages on One Sheet
230
Scaling Print Output
232
Scaling a Document Automatically
232
Scaling a Document Manually
233
Poster Printing
234
Watermark Printing
235
Editing Watermarks
236
Printing Borders and Printing Date
237
Printing with a Gutter
239
Specifying the Paper Output Method
240
Printing with Upper Left of Sheet as Starting Point
241
Printing with the Data 180 Degrees Rotated
242
Smoothing out Rough-Textured Images
244
Printing with Toner Density Adjusted
245
Color Settings
247
Specifying the Brightness and Contrast
249
Printing a Color Sample (Windows 2000/Xp/Server 2003 Only)
251
Specifying "Profiles
252
Adding a "Profile
253
Editing/Deleting a Profile
255
Editing Jobs with Pagecomposer
256
How to Use Online Help
259
Displaying Online Help on the Options Displayed on the Screen
259
Displaying Online Help on the Operation Procedures
260
Retrieving the Option about Which You Want to Know with Keywords and Displaying Its Online Help
262
Manuals
265
Installing the Manuals
265
Uninstalling the Manuals
267
Printer Status Window
268
Functions on the Printer Status Window
269
Other Functions
270
Displaying the Printer Status Window
271
[Preferences] Menu
273
[Consumables/Counters] Menu
274
[Utility] Menu
274
[Device Settings] Menu
275
[Refresh]
276
[Resolve Error]
276
Displaying Printer Status When Using a Print Server
276
Chapter 5 Routine Maintenance
278
Replacing Toner Cartridges
279
When a Message Appears
279
Replacing Toner Cartridges
281
Open the Front Cover
282
Precautions for Handling Toner Cartridges
291
Storing Toner Cartridges
293
Calibrating the Printer
294
Performing Calibration Manually
294
Performing Calibration Automatically at the Designated Time
295
Automatically Performing Calibration Periodically
297
Cleaning the Fixing Roller
299
Cleaning the Outside of the Printer
301
Moving the Printer
304
Handling the Printer
312
Chapter 6 Optional Accessories
314
Optional Accessories
314
Paper Feeder
315
Optional Accessories
315
Network Board
316
Paper Feeder
317
Installation Space
318
Removing the Packing Materials
319
Moving the Printer
323
Installing the Paper Feeder
327
Removing the Paper Feeder
331
Network Board
333
Parts and Their Functions
334
Installing the Network Board
335
Setting the Network Board
339
Problems on Installing the Network Board
342
Resetting the Network Board
344
Removing the Network Board
346
Chapter 7 Troubleshooting
348
Troubleshooting Map
349
Alarm Indicator
350
Paper Jams
351
Procedure for Clearing Paper Jams
354
Service Call Display
361
Print Quality Problems
364
Paper Problems
373
When Nothing Is Printed
375
Installation Problems
376
When Uninstallation Fails
377
Uninstalling the USB Class Driver
379
Problems on Local Installation
382
Installation Problems When the Printer Is Shared on a Network
383
Problems on Installing the Network Board
384
Miscellaneous Problems
386
Confirming the Printer Features
388
Appendix
392
Specifications
393
Hardware Specifications
393
Software Specifications
395
Dimensions of each Part
396
About Color Printing
398
The Three Primary Colors of Light and Color
398
Method for Expressing Color
399
About Color Printing
400
Achieving more Beautiful Color Printing
401
Adjusting the Resolution
402
Netspot Device Installer
403
Print Monitor Installer
404
Netspot Console
405
Windows Firewall
406
Configuring Windows Firewall to Unblock Communication with the Client Computers
407
Configuring Windows Firewall to Block Communication with the Client Computers
408
Configuring Windows Firewall to Unblock Communication with the Print Server
410
Index
411
Location of the Serial Number
416
Advertisement
Canon Laser Shot LBP5000 Service Manual (162 pages)
Brand:
Canon
| Category:
Printer
| Size: 14.85 MB
Table of Contents
Table of Contents
7
Chapter 1 PRODUCT DESCRIPTION
15
Features
19
Feature
19
System Construction
19
System Construction
20
Product Specifications
20
Product Specifications
21
Name of Parts
22
External View
22
Cross Section View
24
Using the Machine
25
Control Panel
25
Safety
26
Safety of the Laser Light
26
Regulations under the Center for Devices and Radiological Health (CDRH)
26
Handling the Laser Unit
26
Safety of Toner
26
Chapter 2 TECHNICAL REFERENCE
29
Functional Configuration
35
Outline
35
Basic Sequense
35
Basic Sequence of Operation
35
Power-On Sequence
35
Laser Exposure System
36
Overview/Configuration
36
Outline
36
Laser Control
38
Outline
38
Laser Emission Control
38
Automatic Power Control (APC)
39
Horizontal Synchronous Control
39
Image Mask Control
39
Fault Detection
40
Laser Scanner Motor Control
40
Outline
40
Speed Control
40
Phase Control
40
Fault Detection
41
Image Formation System
41
Overview/Configuration
41
Outline
41
Image Formation Process
42
Electrostatic Latent Image Formation Block
43
Developing Block
44
Transfer Block
45
Fixing Block
46
Drum Cleaning Block
46
High-Voltage Control
47
Outline
47
Generation of the Primary Charging Bias
48
Generation of the Developing Bias
48
Generation of the Transfer Bias
48
Generation of the Fixing Bias
49
Electrostatic Eliminate Bias
49
ETB Drive Roller Bias
49
Image Stabilizaton Control
49
Overview of the Image Stabilization Control Mechanism
49
Environment Corrective Control
49
Image Density Corrective Control (D-Max Control)
49
Image Halftone Corrective Control (D-Half Control)
50
Image Density Detection Control
50
Overview of Color Misregistration Corrective Control
50
Color Misregistration Detection
50
Toner Cartridge
51
Outline
51
Memory Tag Control
52
Detection of Toner Cartridge Presence/Absence
52
Detecting the End of Life of the Cartridge
52
Detecting the Level of Toner
53
Transfer Unit
53
ETB Unit
53
ETB Cleaning
54
Pickup/Feeding/Delivery System
55
Overview/Configuration
55
Outline
55
Other Control
57
Outline
57
Picking up Paper from the Cassette
58
Picking up Paper from the Manual Feeder
58
Moving the Print Paper
58
Transport Speed Control
59
Paper Loop Control
59
Automatic Release of Fixing Pressure Mechanism
60
Detecting Jams
61
Jam Detection Outline
61
Delay Jams
61
Stationary Jams
61
Other Jams
61
Outline
61
Pick-Up Delay Jam
61
Delivery Delay Jam
61
Pickup Stationary Jam
61
Delivery Stationary Jam
61
Duplex Feeding
62
Outline
62
Duplexing Feed Operation
64
Duplexing Driver PCB
64
Fixing Unit System
65
Overview/Configuration
65
Outline
65
Various Control Mechanisms
66
Fixing Temperature Control
66
Fixing Temperature Control
67
Protective Functions
68
Outline
68
Fault Detection
68
External and Controls System
68
Power Supply
68
Low-Voltage Power Supply PCB
68
Other Function
69
Protective Functions
69
Engine Control System
70
Construction
70
Outline
70
DC Controller
70
Sleep Function
70
Connection Power Supply Detection
70
Operation of Individual Blocks
71
Fan/Motor Control
72
Main Motor Fault Detection
72
Fan Motor Fault Detection
72
Video Controller PCB
72
Outline
72
Overview of the Block
73
Chapter 3 DISASSEMBLY and ASSEMBLY
75
Before Parts Replacement
81
Outline
81
External and Controls System
82
Rear Cover
82
Preparation for Removing the Rear Cover
82
Removing the Rear Cover
82
Right Cover
82
Preparation for Removing the Right Cover / Right Cassette Cover
82
Removing the Right Cover / Right Cassette Cover
82
Removing the Right Cover/Right Cassette Cover
83
Left Cover
84
Preparation for Removing the Left Cover / Left Cassette Cover
84
Removing the Left Cover / Left Cassette Cover
84
The Former Procedure of Removing the Left Cover/Left Cassette Cover
84
Upper Cover
85
Preparation for Removing the Upper Cover
85
Removing the Upper Cover
85
The Former Procedure of Removing the Upper Cover
85
Front Cover
85
Preparation for Removing the
85
Removing the
85
The Former Procedure of Removing the
86
Removing the
86
Delivery Tray
87
Removing the Delivery Tray
87
Face-Down Cover
87
Preparation for Removing the Face-Down Cover
87
Removing the Face-Down Cover
87
The Former Procedure of Removing the Face-Down Cover
87
Preparation for Removing the
87
Removing the
87
The Former Procedure of Removing the
87
Main Drive Unit
88
Preparation for Removing the Main Drive Assembly
88
Removing the Main Drive Assembly
88
The Former Procedure of Removing the Main Drive Assembly
90
Removing the Main Drive Assembly
90
Duplexing Drive Unit
92
Preparation for Removing the Duplexing Drive Assembly
92
Removing the Duplexing Drive Assembly
92
Main Motor
92
Preparation for Removing the Main Motor
92
Removing the Main Motor
93
The Former Procedure of Removing the Main Motor
93
DC Controller PCB
93
Preparation for Removing the DC Controller PCB
93
Removing the DC Controller PCB
93
The Former Procedure of Removing the DC Controller PCB
93
Video Controller PCB
94
Preparation for Removing the Video Controller PCB
94
Removing the Video Controller PCB
94
The Former Procedure of Removing the Video Controller PCB
94
Removing the Video Controller
94
Memory Controller PCB
95
Preparation for Removing the Memory Controller PCB
95
Removing the Memory Controller PCB
95
The Former Procedure of Removing the Memory Controller PCB
96
Removing the Memory Controller PCB
96
Duplexing Driver PCB
96
Preparation for Removing the Duplexing Driver PCB
96
Removing the Duplexing Driver PCB
96
Low-Voltage Power Supply Assembly
97
Preparation for Removing the Low-Voltage Power Supply PCB
97
Removing the Low-Voltage Power Supply PCB
97
The Former Procedure of Removing the Low-Voltage Power Supply PCB
98
Removing the Low-Voltage Power Supply PCB
98
High-Voltage PCB
99
Preparation for Removing the High-Voltage Power Supply PCB
99
Removing the High-Voltage Power Supply PCB
99
The Former Procedure of Removing the High-Voltage Power Supply PCB
99
Removing the High-Voltage Power Supply PCB
100
Sub High-Voltage Power Supply PCB
100
Preparation for Removing the Sub High-Voltage Power Supply PCB
100
Removing the Sub High-Voltage Power Supply PCB
101
Machine Outside Environment Sensor
101
The Former Procedure of Removing the Site Environment Sensor
101
Removing the Site Environment Sensor
101
Cartridge Fan
101
Preparation for Removing the Cartridge Fan
101
Removing the Cartridge Fan
101
The Former Procedure of Removing Removing the Cartridge Fan
101
Fixing Fan 1
101
Preparation for Removing the Fixing Fan
101
Removing the Fixing Fan
102
Laser Exposure System
102
Laser Scanner Unit
102
Preparation for Removing the Laser Scanner Unit
102
Removing the Laser Scanner Unit
102
The Former Procedure of Removing the Laser Scanner Unit
103
Removing the Laser Scanner Unit
103
Image Formation System
105
MCY Developing Cylinder Drive Solenoid
105
Preparation for Removing the MCY Developing Cylinder Drive Solenoid
105
Removing the MCY Developing Cylinder Drive Solenoid
105
Bk Developing Cylinder Drive Solenoid
105
Preparation for Removing the Bk Developing Cylinder Drive Solenoid
105
Removing the Bk Developing Cylinder Drive Solenoid
105
The Former Procedure of Removing the MCY Developing Cylinder Drive Solenoid
105
The Former Procedure of Removing the Bk Developing Cylinder Drive Solenoid
106
Removing the Bk Developing Cylinder Drive Solenoid
106
ETB Unit
106
Preparation for Removing the ETB Unit
106
Removing the ETB Unit
106
The Former Procedure of Removing the ETB Unit
107
Removing the ETB Unit
107
Static Charge Eliminator
108
Preparation for Removing the Static Eliminator
108
Removing the Static Eliminator
108
Pickup/Feeding/Delivery System
108
Paper Pick-Up Feeder Unit
108
Preparation for Removing the Pickup Feeding Assembly
108
Removing the Pickup Feeding Assembly
108
The Former Procedure of Removing the Pickup/Transport Assembly
109
Removing the Pickup/Transport Assembly
109
Pickup Motor
110
Preparation for Removing the Pickup Motor
110
Removing the Pickup Motor
110
Removing the Pickup/Transport Assembly
110
The Former Procedure of Removing the Pickup Motor
111
Cassette Pickup Roller
111
Removing the Pickup Roller
111
Cassette Pick-Up Solenoid
111
Preparation for Removing the Cassette Pickup Solenoid
111
Removing the Pickup Motor
111
Removing the Cassette Pickup Solenoid
112
The Former Procedure of Removing the Cassette Pickup Solenoid
112
Cassette Separation Pad
112
Removing the Separation Pad
112
Manual Paper Sensor
112
Preparation for Removing the Manual Feed Paper Sensor
112
Removing the Manual Feed Paper Sensor
112
The Former Procedure of Removing the Manual Feeder Paper Sensor
113
Removing the Manual Feeder Paper Sensor
113
Registration before Sensor
113
Preparation for Removing the Registration Sensor
113
Removing the Registration Sensor
113
The Former Procedure of Removing the Registration Sensor
113
Removing the Manual Feed Paper Sensor
113
Removing the Registration Sensor
114
Duplexing Reverse Motor
114
Preparation for Removing the Duplexing Reversing Motor
114
Removing the Duplexing Reversing Motor
114
Duplexing Feed Motor
114
Preparation for Removing the Duplexing Feed Motor
114
Removing the Duplexing Feed Motor
115
Fixing System
115
Fixing Assembly
115
Preparation for Removing the Fixing Assembly
115
Removing the Fixing Assembly
115
The Former Procedure of Removing the Fixing Assembly
116
Removing the Fixing Assembly
116
Fixing Film Unit
116
Preparation for Removing the Fixing Film
116
Removing the Fixing Film
116
The Former Procedure of Removing the Fixing Film
118
Removing the Fixing Film
118
Fixing Pressure Roller
120
Preparation for Removing the Fixing Pressure Roller
120
Removing the Fixing Pressure Roller
120
The Former Procedure of Removing the Fixing Pressure Roller
120
Removing the Fixing Pressure Roller
121
Fixing Motor
121
Preparation for Removing the Fixing/Delivery Motor
121
Removing the Fixing/Delivery Motor
121
The Former Procedure of Removing the Fixing/Delivery Motor
121
Countermeasures
137
Image Faults
137
Out of Focus
137
Color Misalignment
137
Measurement and Adjustment
137
Test Print
137
Adjustment of Electrical Components
138
After Replacing the DC Controller PCB
138
After Replacing the Video Controller PCB
138
Replacing EEPROM (When E747-000 Occurs)
138
Adjustment of Fixing System
138
Checking the Nip Width (Fixing Pressure Roller)
138
Adjustment of Pickup/Feeding/Delivery System
139
When Replacing the Registration Roller
139
Service Tools
140
Standard Tools
140
Solvent/Oil List
140
Location of Convectors
140
Connectors
140
Error Code
143
Error Code
145
Service Mode
147
Outline
147
Service Mode Table
147
Service Mode Items
147
Chapter 6 APPENDIX
149
Outline of Electrical Components
153
Clutch/Solenoid
153
Solenoids
153
Motor/Fan
154
Motors and Fans
154
Sensor
156
Sensors
156
Canon Laser Shot LBP5000 Network Manual (193 pages)
Laser Beam Printer
Brand:
Canon
| Category:
Printer
| Size: 14.88 MB
Table of Contents
How this Manual Is Organized
3
Table of Contents
4
Preface
7
How to Use this Manual
7
Symbols Used in this Manual
7
Buttons Used in this Manual
7
Displays Used in this Manual
8
Abbreviations Used in this Manual
8
Legal Notices
9
Trademarks
9
Copyright
9
Disclaimers
10
Chapter 1 Before You Start
11
Requisite Tasks before Printing or Managing the Printing Operation
12
Configuring the Printer to Print in a Network Environment
12
Installing the Printer Driver
13
Performing the Protocol Settings for the Printer
13
Managing the Printer in the Network Environment
14
System Requirements
15
Printer Driver
15
Print Monitor Installer (Canon CAPT Print Monitor)
15
Remote UI
16
Netspot Device Installer
17
Chapter 2 Setting up the Network Environment for Printing
19
Installing the CAPT Software
20
Installing the CAPT Software from CD-ROM Setup
20
Installing the Printer Driver Manually Using Various Utility Software
32
IP Address Setting Using Netspot Device Installer
33
IP Address Setting Using the ARP/PING Command
40
IP Address Setting Using the Printer Status Window
42
Installing the Canon CAPT Print Monitor
44
Installing the Printer Driver from [Add Printer Wizard]
49
For Windows
58
After Completing Installation
73
Checking the Operations with Network Status Print
75
Protocol Settings for the Printer
78
Protocol Settings Using the Remote UI
78
Protocol Settings Using Netspot Device Installer
88
Select the Printer
90
Protocol Settings Using FTP Client
92
Uninstalling the CAPT Software
95
Uninstalling the Printer Driver
95
Uninstalling Canon CAPT Print Monitor
97
Uninstalling Netspot Device Installer
99
Chapter 3 Managing the Printer in the Network Environment
102
Managing the Printer
102
Managing the Printer Using the Remote UI
103
Restricting the Users Who Can Print
104
Restricting the Users Who Can Monitor/Change the Settings Using the SNMP Protocol
110
Restricting the Users Who Can Perform the Multicast Discovery
118
Restricting the Devices that Can Access with MAC Addresses
123
Obtaining/Checking the Security Access Logs
129
Obtaining a Security Access Log
129
Checking the Security Access Logs
133
Initializing the Network Settings
137
Managing the Printer Using FTP Client
142
Managing the Printer Using Netspot Device Installer
145
Configurable Devices
145
Installing Netspot Device Installer
146
Running Netspot Device Installer
151
When Running Netspot Device Installer Installed on a Computer
151
When Running Netspot Device Installer from the Supplied CD-ROM
152
How to Use Netspot Device Installer
152
Chapter 4 Troubleshooting
153
Installation Problems
154
When Uninstallation Fails
154
When Uninstallation Fails
155
Miscellaneous Problems
157
Checking the Network Board Functions
161
Chapter 5 Appendix
165
Network Setting Items
166
Software that Can be Used for the Network Settings
171
Initializing the Network Settings
172
Using the Unicast Communication Mode
176
Unicast Communication Mode
176
Setting a Computer to Enter into the Unicast Communication Mode
177
Installing Canon CAPT Print Monitor
177
Installing the Printer Driver
178
Setting the Network Board to Enter into the Unicast Communication Mode
182
Updating the Firmware
185
Specifications
190
Hardware Specifications
190
Software Specifications
190
Index
191
Advertisement
Canon Laser Shot LBP5000 Getting Started Manual (52 pages)
Laser Beam Printer
Brand:
Canon
| Category:
Printer
| Size: 3.89 MB
Table of Contents
Optional Accessories
3
Installation Environment
4
System Environment
5
Installing the Printer
7
Carrying the Printer to the Installation Site
7
Loading Paper in the Paper Cassette
18
Loading Paper in the Manual Feed Slot
21
Output Tray
23
Connecting the Power
24
After Completing Installation
30
Paper Cassette
31
Installing the Optional Accessories
37
Installing the Paper Feeder
37
Removing the Packing Materials
38
Installing the Network Board
45
Licence Agreement
45
Network Board
46
Canon Laser Shot LBP5000 Release Note (3 pages)
Built-in Networking, Auto-Duplexing and 21ppm colour printing
Brand:
Canon
| Category:
Printer
| Size: 0.05 MB
Advertisement
Related Products
Canon I-Sensys LBP5050
Canon LBP5050 Series
Canon LBP5050N
Canon LBP5000 Series
Canon LBP5700
Canon LBP5800
Canon Laser Shot LBP-5200
Canon Color imageRUNNER LBP5360
Canon Color imageRUNNER LBP5960
Canon imageRUNNER LBP5368
Canon Categories
Printer
Digital Camera
All in One Printer
Camcorder
Scanner
More Canon Manuals
Login
Sign In
OR
Sign in with Facebook
Sign in with Google
Upload manual
Upload from disk
Upload from URL