PRESONUS StudioLive CS18AI Owner's Manual
Ethernet avb control surface
Hide thumbs
Also See for StudioLive CS18AI:
- Visual quickstart manual (130 pages) ,
- Owner's manual (88 pages)

Related Manuals for PRESONUS StudioLive CS18AI


Summary of Contents for PRESONUS StudioLive CS18AI
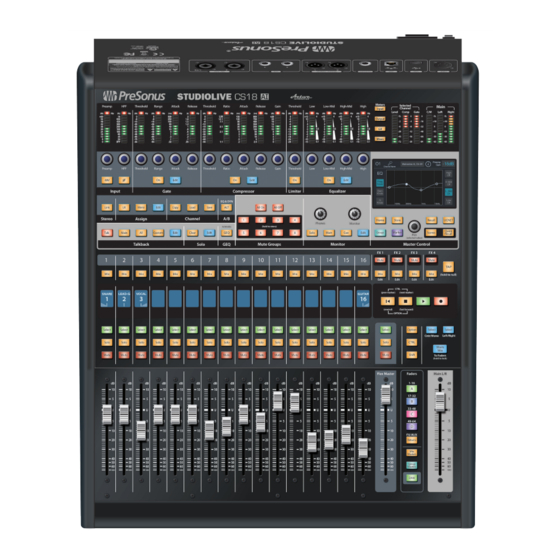
- Page 1 StudioLive CS18AI ™ Ethernet AVB Control Surface Owner’s Manual ® English www.presonus.com...
-
Page 2: Table Of Contents
Accessing Channels with Layers and Filter DCA Groups — 28 Introduction — 1 Basic Channel Operation Summary — 30 StudioLive CS18AI Control Surface Features — 2 Processing Signals with the Fat Channel — 31 Active Integration — 2 Channel Strip Controls — 48 What is in the Box —... -
Page 5: Overview
Ethernet cable. The StudioLive CS18AI is perfectly suited for a variety of applications, including live-sound mixing, fixed installations, theaters, broadcast, houses of worship, and professional recording. -
Page 6: Studiolive Cs18Ai Control Surface Features
The StudioLive CS18AI is an important addition to PreSonus Active Integration-equipped products, supplying hands-on control of the RM-series mixers and Studio One DAW. With UC Surface multi-touch control software for Mac, Windows, and iPad and the StudioLive CS18AI control surface, you can choose to work the way you want. -
Page 7: What Is In The Box
StudioLive CS18AI Overview ™ Owner’s Manual What is in the Box What is in the Box Your StudioLive CS18AI package contains the following: • PreSonus StudioLive CS18AI Ethernet AVB control surface • 3-foot (1m) Ethernet cable • IEC power cord •... -
Page 8: What You Will Need
Manual describes how the CS18AI works with these products. Throughout this manual you will find Power User Tips. These tips provide mixing tricks, some of which are unique to StudioLive CS18AI control surfaces, and offer explanations of various audio terms. Thank you, once again, for buying... -
Page 9: Table Of Contents
Many technical issues can arise when using a standard computer as a digital audio workstation (DAW) and when networking wireless devices. PreSonus can only provide support for issues that directly relate to the StudioLive CS18AI control surface and Ethernet AVB interface, RM-series mixers, UC Surface control software, QMix-AI, Capture, and Studio One. -
Page 10: Getting Started
It only takes a few steps to get your StudioLive CS18AI control surface up and running: Register your CS18AI in your My PreSonus account. See Section 2.3 Registering Your CS18AI Control Surface for more information. Update the CS18AI firmware, if necessary. See Section 2.4 Updating CS18AI Firmware for more information. -
Page 11: Registering Your Cs18Ai Control Surface
Go to my.presonus.com. Log in or create a new account if you don’t already have one. Once you have logged into your My PreSonus account, click the Register a Product button at the top of the page. The Register Product dialog appears. -
Page 12: Updating Cs18Ai Firmware
StudioLive CS18AI connected to an Internet-connected network. Updating CS18AI Firmware Please be sure to review all instructions before updating your StudioLive CS18AI. Note: Be sure to confirm that your RM-series mixer is running the most up-to-date firmware. For more information on updating RM mixer firmware, see Section 3.8 How to Update StudioLive RM Mixer... - Page 13 Knowledge Base article. Log in to your my.presonus.com account. Once you have logged in, click the My Products button at the top of the page. If the Hardware button on the My Products page is not highlighted,...
- Page 14 If there is more than one update displayed, be sure to click the Download link for the one with the highest version number. IMPORTANT: The StudioLive CS18AI control surface, StudioLive AI console mixers, and StudioLive AI RM mixers each use different firmware files.
- Page 15 StudioLive CS18AI Getting Started ™ Owner’s Manual Updating CS18AI Firmware Depending on your computer’s system preferences, the firmware .zip archive file might not automatically decompress. If it doesn’t, double-click the file, and it will decompress. Open the firmware folder; you will find five files inside. You will need all five files to upgrade your controller.
-
Page 16: Rear
StudioLive CS18AI Getting Started ™ Owner’s Manual Updating CS18AI Firmware 11. Select and copy/paste or drag the five firmware files to the root directory of your thumb drive. If the files are inside a folder, the update will not execute correctly. - Page 17 StudioLive CS18AI Getting Started ™ Owner’s Manual Updating CS18AI Firmware 14. From the Home page, click the System button. 15. On the System page, click the Firmware button. 16. The Firmware Version page has a section for the CS18AI and another for the RM mixer.
-
Page 18: Powering And Testing The Cs18Ai
Your CS18AI features a suite of test modes useful for confirming basic operation of the front panel controls. IMPORTANT: The StudioLive CS18AI should be disconnected from your RM mixer or computer running Studio One while performing these tests. When testing is complete, power cycle (power off and then on) your unit. - Page 19 StudioLive CS18AI Getting Started ™ Owner’s Manual Powering and Testing the CS18AI Touch the icon for the test mode you want to enable. The icon becomes colored to show the test is active. Multiple tests can be enabled and run simultaneously. •...
-
Page 20: Networking The Studiolive Cs18Ai Control Surface
StudioLive CS18AI Networking the StudioLive CS18AI Control Surface ™ Owner’s Manual Networking Overview Networking the StudioLive CS18AI Control Surface Networking Overview Control and Audio Data Connections Two types of data flow between your CS18AI control surface and your RM mixer or computer: control and audio. - Page 21 Studio One software or any application where the CS18AI’s onboard audio inputs and outputs are not needed. Note: The StudioLive CS18AI does not support hot-swapping the Wi-Fi LAN adapter. The LAN adapter must be connected when you power up your CS18AI.
- Page 22 Your system is now configured to connect to the new wireless network. Every time you turn on your StudioLive CS18AI, it will: Look for a wired Ethernet connection and use it if one is found.
-
Page 23: Connecting The Studiolive Cs18Ai To One Studiolive Rm Mixer
Networking the StudioLive CS18AI Control Surface ™ Owner’s Manual Connecting the StudioLive CS18AI to one StudioLive RM Mixer Connecting the StudioLive CS18AI to one StudioLive RM Mixer Your StudioLive CS18AI can be connected to a single StudioLive RM-series mixer in any of these ways: •... - Page 24 Networking the StudioLive CS18AI Control Surface ™ Owner’s Manual Connecting the StudioLive CS18AI to one StudioLive RM Mixer Touch the Mixer Control field. A menu drops down with a list of StudioLive RM-series mixers currently available on the network. Touch the name of the RM-series mixer you want to control in the list to select it.
- Page 25 CS18AI but routing audio to and from the CS18AI’s audio inputs and outputs requires an AVB-compatible switch. Connect your StudioLive CS18AI to your StudioLive RM mixer using an AVB switch, as shown, before powering on your system. AI Mixer AVB Card AVB Switch Power on the switch and then power on both the CS18AI and the RM mixer.
- Page 26 Networking the StudioLive CS18AI Control Surface ™ Owner’s Manual Connecting the StudioLive CS18AI to one StudioLive RM Mixer Touch the Mixer Control field. A menu drops down with a list of RM-series mixers currently available on the network. Touch the name of the StudioLive RM-series mixer you want to control in the list to select it.
-
Page 27: Connecting The Cs18Ai To An Rm Mixer And Studio
StudioLive CS18AI Networking the StudioLive CS18AI Control Surface ™ Owner’s Manual Connecting the CS18AI to an RM Mixer and Studio One Connecting the CS18AI to an RM Mixer and Studio One Your CS18AI can be used to control the transport, markers, automation, and mix of your Studio One DAW software. - Page 28 StudioLive CS18AI Networking the StudioLive CS18AI Control Surface ™ Owner’s Manual Connecting the CS18AI to an RM Mixer and Studio One Touch the Software Control field. A menu drops down listing all available instances of Studio One running on computers on the network.
-
Page 29: Connecting The Cs18Ai To Your Audio System
Line inputs 3 and 4 are assigned as the stereo Digital Return input of the RM mixer. Mic and Line Inputs The StudioLive CS18AI has two line inputs on TRS jacks and two combo jack inputs that accept either microphone-level signals on XLR connectors or line-level signals on ¼-inch TRS jacks. -
Page 30: Headphone And Monitor Outputs
Power User Tip: Phantom power is a system for powering condenser microphones, DI boxes, and other devices by supplying a DC voltage over a mic cable. The StudioLive CS18AI controller supplies +48V, which is the most commonly used phantom power voltage. - Page 31 StudioLive CS18AI Connecting the CS18AI to Your Audio System ™ Owner’s Manual Headphone and Monitor Outputs Monitor Outputs The monitor outputs are balanced XLR-M jacks and are convenient for control room monitoring when the CS18AI is used to control Studio One or for monitoring in broadcast applications.
-
Page 32: Controlling Studiolive Rm-Series Mixers With The Cs18Ai
Controlling StudioLive RM-series Mixers with the CS18AI Accessing Channels with Layers and Filter DCA Groups The StudioLive CS18AI is capable of controlling up to 64 StudioLive RM- series mixer channels and provides active access to 16 channels at a time. As described in Chapter 2, there are two ways to access channels on the CS18AI: •... - Page 33 StudioLive CS18AI Controlling StudioLive RM-series Mixers with the CS18AI ™ Owner’s Manual Accessing Channels with Layers and Filter DCA Groups Accessing Filter DCA Groups Filter DCA Groups can be accessed using the Groups view on the touchscreen or from the Group Masters layer. To access a group from the Groups view on the touchscreen: Press the Groups button in the Master Control area.
-
Page 34: Basic Channel Operation Summary
StudioLive CS18AI Controlling StudioLive RM-series Mixers with the CS18AI ™ Owner’s Manual Basic Channel Operation Summary When there are more than 16 Filter DCA Groups, they are split into multiple layers. Press the Shift button to access the additional group masters. While the Group Masters layer is active, you can mix by balancing the groups you’ve created, such as Drums, Horns, Guitars, Keyboards, and Vocals. -
Page 35: Processing Signals With The Fat Channel
Here is a good general procedure for setting the channel preamp gain: Bring down all faders on your StudioLive CS18AI to the ∞ setting. Make sure that the preamp level is all the way down. - Page 36 StudioLive CS18AI Controlling StudioLive RM-series Mixers with the CS18AI ™ Owner’s Manual Processing Signals with the Fat Channel When editing Fat Channel settings with these controls, the settings values are displayed in two ways: • In the default meter mode (all meter mode buttons off), the meter above each control indicates the value of the control.
- Page 37 StudioLive CS18AI Controlling StudioLive RM-series Mixers with the CS18AI ™ Owner’s Manual Processing Signals with the Fat Channel Input The Input section contains the settings for preamp gain, highpass filter (HPF), +48V phantom power, and polarity. Preamp adjusts the gain of the channel’s analog input. It is very important to properly adjust this control in order to minimize noise and avoid overload distortion.
- Page 38 StudioLive CS18AI Controlling StudioLive RM-series Mixers with the CS18AI ™ Owner’s Manual Processing Signals with the Fat Channel 48V engages phantom power for the microphone input on the selected channel. This feature can be individually enabled for each channel. WARNING: Phantom power is required for condenser microphones but can severely damage some dynamic mics, especially ribbon mics.
- Page 39 StudioLive CS18AI Controlling StudioLive RM-series Mixers with the CS18AI ™ Owner’s Manual Processing Signals with the Fat Channel Gate Range sets the amount of gain reduction that the gate produces. The range can be set from 0 to -84 dB. Range control is not available when using the expander. Gate Attack sets the rate at which the gate opens on the selected channel or output.
- Page 40 StudioLive CS18AI Controlling StudioLive RM-series Mixers with the CS18AI ™ Owner’s Manual Processing Signals with the Fat Channel Gate Edit opens the Gate view on the touchscreen. Exp turns the noise gate into an expander. The StudioLive RM allows you to choose between an expander and a noise gate for each channel or output.
- Page 41 StudioLive CS18AI Controlling StudioLive RM-series Mixers with the CS18AI ™ Owner’s Manual Processing Signals with the Fat Channel Compressor The Compressor meter in the Selected Channel area displays the amount of gain reduction currently being applied by the compressor. Compressor On button toggles the compressor on and off for the selected channel or output bus.
- Page 42 StudioLive CS18AI Controlling StudioLive RM-series Mixers with the CS18AI ™ Owner’s Manual Processing Signals with the Fat Channel Compressor Attack sets the compressor’s attack setting for the selected channel or output bus. Attack sets the speed at which the compressor acts on the input signal.
- Page 43 StudioLive CS18AI Controlling StudioLive RM-series Mixers with the CS18AI ™ Owner’s Manual Processing Signals with the Fat Channel Compressor Gain sets the makeup gain setting of the compressor for the selected channel or output bus. When compressing a signal, gain reduction usually results in an overall attenuation of level.
- Page 44 StudioLive CS18AI Controlling StudioLive RM-series Mixers with the CS18AI ™ Owner’s Manual Processing Signals with the Fat Channel Limiter Threshold sets the threshold of the limiter for the selected channel or output bus. When the signal’s amplitude (level) exceeds the threshold setting, the limiter is engaged.
- Page 45 StudioLive CS18AI Controlling StudioLive RM-series Mixers with the CS18AI ™ Owner’s Manual Processing Signals with the Fat Channel EQ Edit button opens the EQ view on the touchscreen. The three button on the left of the screen toggle the parameters being controlled by the four EQ encoders.
-
Page 46: Internal Effects
StudioLive CS18AI Controlling StudioLive RM-series Mixers with the CS18AI ™ Owner’s Manual Processing Signals with the Fat Channel Stereo Linking Stereo linking is done within the Fat Channel. Input channels, aux buses, and subgroups can be linked to create a stereo pair. A stereo link can be enabled when either channel in the pair is selected. - Page 47 StudioLive CS18AI Controlling StudioLive RM-series Mixers with the CS18AI ™ Owner’s Manual Processing Signals with the Fat Channel Copy-and-Paste Fat Channel Settings In addition to being able to create and save custom Fat Channel presets, every setting in the Fat Channel can be copied from one channel or bus to any other channel or bus.
- Page 48 Loading Fat Channel Presets The StudioLive RM comes with a suite of channel-strip presets created by professional users of PreSonus products. These presets provide a great jumping-off point to create a mix quickly and easily. The StudioLive RM also allows you to create your own library of presets.
- Page 49 StudioLive CS18AI Controlling StudioLive RM-series Mixers with the CS18AI ™ Owner’s Manual Processing Signals with the Fat Channel Saving Fat Channel Presets If you have created a channel-strip setting in the Fat Channel that you would like to save to the Channel Preset library, press the Fat Channel’s Save button. Notice that the touchscreen displays the Channel Preset menu.
- Page 50 StudioLive CS18AI Controlling StudioLive RM-series Mixers with the CS18AI ™ Owner’s Manual Processing Signals with the Fat Channel A/B Fat Channel Settings StudioLive RM-series mixers let you create two complete Fat Channel settings for each channel and bus and compare the two using the Alt EQ & Dyn button. In this way, you can experiment with a new sound without having to struggle to re-create your old standby, and after several minutes of careful adjustment, you can verify that a new Fat Channel setting is better than it was before you started tweaking.
- Page 51 StudioLive CS18AI Controlling StudioLive RM-series Mixers with the CS18AI ™ Owner’s Manual Processing Signals with the Fat Channel Mixes displays the output level of each of the 16 aux mixes or subgroups. Main meters display the level of the Main Center/Mono, Left, and Right outputs.
-
Page 52: Channel Strip Controls
StudioLive CS18AI Controlling StudioLive RM-series Mixers with the CS18AI ™ Owner’s Manual Channel Strip Controls Channel Strip Controls The CS18AI has 16 channel strips used to display input channels, return channels, mix masters, and group masters. Each channel strip includes a scribble strip display; buttons for Select, Solo, and Mute;... -
Page 53: Global Mixer Controls
Global Mixer Controls In addition to the Fat Channel controls, the StudioLive CS18AI has a section of Global controls for accessing talkback, Solo modes, graphic EQ, mute groups, monitoring, and more. - Page 54 StudioLive CS18AI Controlling StudioLive RM-series Mixers with the CS18AI ™ Owner’s Manual Global Mixer Controls Edit brings up the talkback custom assignment view in the touchscreen. From here you can select any combination of aux mixes to receive talkback. At the top of the Talkback Assign screen you can see the current talkback input source and a gear icon.
- Page 55 StudioLive CS18AI Controlling StudioLive RM-series Mixers with the CS18AI ™ Owner’s Manual Global Mixer Controls the Main bus (that is, if Channel 3 is soloed, you will only hear Channel 3 in your mains). This makes a great fine-tuning tool but it can quickly destroy a live mix. We highly recommend that you drop out of this mode once the show has started.
- Page 56 StudioLive CS18AI Controlling StudioLive RM-series Mixers with the CS18AI ™ Owner’s Manual Global Mixer Controls When in the GEQ screen, you’ll see EQ bands for 20 Hz to 640 Hz. Pressing the right arrow will display 640 Hz to 20 kHz. To adjust a band, touch the band you want to change.
- Page 57 StudioLive CS18AI Controlling StudioLive RM-series Mixers with the CS18AI ™ Owner’s Manual Global Mixer Controls Mute Groups StudioLive RM-series mixers feature eight mute groups. A mute group allows you to mute and unmute multiple channels and buses with the press of a single button.
- Page 58 When the group has been stored, it will illuminate. Monitor The StudioLive CS18AI features a headphone output and monitor outputs, giving you the ability to monitor multiple sources. The Monitor bus on the CS18AI allows you to monitor the main outputs, Solo bus, or a cue source that is selected from the Main Mono/Center bus, digital return, stereo tape input, or any aux mix.
-
Page 59: Master Control And Touchscreen
StudioLive RM mixer. This is also where you’ll access the primary settings and preferences for your RM mixer and StudioLive CS18AI controller. Touchscreen Your StudioLive CS18AI color touchscreen provides contextual information to help you navigate and control your mix. - Page 60 StudioLive CS18AI Controlling StudioLive RM-series Mixers with the CS18AI ™ Owner’s Manual Master Control and Touchscreen Channel and Mix Settings Pressing the gear icon in the Selected Channel banner in the touchscreen will open the Settings screen. Here you can change the name, channel type, source, select button color, and more.
- Page 61 StudioLive CS18AI Controlling StudioLive RM-series Mixers with the CS18AI ™ Owner’s Manual Master Control and Touchscreen Edit is only shown when the selected mix is setup as a subgroup. Pressing this button will open the Channel Assignments screen. From here you can quickly assign channels to the subgroup. Pre 1/Pre 2/Post is available when the selected mix is an aux mix and determines where the input channels enter the signal chain.
- Page 62 Master Control and Touchscreen Home The Home screen is the first view to be shown on the StudioLive CS18AI when it’s powered on. From here you can navigate to the primary menus and mix options. System brings you to the main system settings for the CS18AI and connected RM mixer.
- Page 63 StudioLive CS18AI Controlling StudioLive RM-series Mixers with the CS18AI ™ Owner’s Manual Master Control and Touchscreen The top right will display the IP address of the CS18AI. This can be useful when troubleshooting network and connection issues. The rest of the screen is divided into two sections. The left is for selecting an available StudioLive RM mixer for control.
- Page 64 StudioLive CS18AI Controlling StudioLive RM-series Mixers with the CS18AI ™ Owner’s Manual Master Control and Touchscreen Markers When used with Studio One or Capture, the Markers view can be used to navigate to markers and create new markers. Scenes and Quick Scenes Creating a scene requires simply dialing in a mix and saving it.
- Page 65 StudioLive CS18AI Controlling StudioLive RM-series Mixers with the CS18AI ™ Owner’s Manual Master Control and Touchscreen Touch the location to which you want to store a mix scene to select it. Press the Store button in the Master Control area. The text entry screen will appear, allowing you to name the scene.
- Page 66 StudioLive CS18AI Controlling StudioLive RM-series Mixers with the CS18AI ™ Owner’s Manual Master Control and Touchscreen Touch the location from which you want to recall a mix scene to select it. Set up any scene filters you want to use to limit which data is loaded. Press the Recall button in the Master Control area.
- Page 67 StudioLive CS18AI Controlling StudioLive RM-series Mixers with the CS18AI ™ Owner’s Manual Master Control and Touchscreen Press the Scenes button in the Master Control area. The button lights and the Screens page appears. Use the onscreen arrow buttons to scroll to the location of the mix scene you want to load.
-
Page 68: System Menu
• Faders System Menu The main system settings for your StudioLive CS18AI and connected StudioLive RM mixer are found in the System menu. To get to this view, press the Home button and select System. This screen is split into two sections. On the left are settings, and on the right are the additional setup menus. - Page 69 StudioLive CS18AI Controlling StudioLive RM-series Mixers with the CS18AI ™ Owner’s Manual System Menu Footswitch changes the parameter assigned to the rear-panel footswitch jack. By default the footswitch is set to Tap Tempo. You can also assign it to control the effects mute, Record start/stop, or talkback or to drop a marker or load the selected scene.
- Page 70 StudioLive CS18AI Controlling StudioLive RM-series Mixers with the CS18AI ™ Owner’s Manual System Menu Touch the Other field and set the option as desired. For devices running QMix-AI, the choices are None or Wheel Only. Wheel Only restricts the user to using only the Wheel of Me on the mix to which the device has access.
-
Page 71: Working With Filter Dca Groups
StudioLive RM mixer. The left side of the screen will show the firmware version and update button for the connected StudioLive RM mixer. The right side shows the same for the StudioLive CS18AI. For detailed instructions on updating your firmware refer to Section 2.4 Updating CS18AI Firmware. - Page 72 StudioLive CS18AI Controlling StudioLive RM-series Mixers with the CS18AI ™ Owner’s Manual Working with Filter DCA Groups Here are some of the things Filter DCA Groups can do that make your job easier: • Channels are automatically grouped based on channel type. Drums, Vocals, Guitars, and Keyboards are just a few of the factory-supplied channel types for tagging channels.
- Page 73 StudioLive CS18AI Controlling StudioLive RM-series Mixers with the CS18AI ™ Owner’s Manual Working with Filter DCA Groups Touch the channels you want included in the group. Touch the up and down arrows or use the encoder under the touchscreen to scroll through the list of available channels. When you have configured the group as desired, touch the Name field.
- Page 74 StudioLive CS18AI Controlling StudioLive RM-series Mixers with the CS18AI ™ Owner’s Manual Working with Filter DCA Groups When a group is selected two things will happen: The channel strips will filter out all channels not in the group, only displaying the channels in the group.
- Page 75 StudioLive CS18AI Controlling StudioLive RM-series Mixers with the CS18AI ™ Owner’s Manual Working with Filter DCA Groups Touch the channel number on the page to add or remove the channel from the group. When the channel number is highlighted blue, it is in the group; when it is gray, it is not included in the group.
- Page 76 StudioLive CS18AI Controlling StudioLive RM-series Mixers with the CS18AI ™ Owner’s Manual Working with Filter DCA Groups Mixing with Filter DCA Groups Once your Filter DCA Groups are set up, you’ll find mixing on the CS18AI a refreshing experience compared with traditional digital mixers. Here’s a prime example of mixing with the power of Filter DCA Groups.
-
Page 77: Aux Mixes And Subgroups
StudioLive CS18AI Controlling StudioLive RM-series Mixers with the CS18AI ™ Owner’s Manual Aux Mixes and Subgroups Aux Mixes and Subgroups The mix buses on the RM-series can be configured as either aux mixes or subgroups. The StudioLive RM allows you to add global dynamics processing and EQ to these mix buses. - Page 78 StudioLive CS18AI Controlling StudioLive RM-series Mixers with the CS18AI ™ Owner’s Manual Aux Mixes and Subgroups To pan a channel in the stereo aux mix, select the channel and use the Pan/ Value encoder under the touchscreen to adjust the pan for the selected channel.
- Page 79 StudioLive CS18AI Controlling StudioLive RM-series Mixers with the CS18AI ™ Owner’s Manual Aux Mixes and Subgroups You will find many uses for subgroups that will make mixing more convenient and provide better control of your mix. Grouping individual channels that create a drum mix will let you do Fat Channel processing on the entire drum set, which can be helpful to get a full sound that sits well in your mix.
- Page 80 StudioLive CS18AI Controlling StudioLive RM-series Mixers with the CS18AI ™ Owner’s Manual Aux Mixes and Subgroups Open the Mix Setting by pressing the gear icon to the right of the selected mix name on the touchscreen. Press the Sub button on this screen to change the linked Aux Mixes 15 and 16 to a stereo subgroup.
-
Page 81: Internal Effects Mixes
StudioLive CS18AI Controlling StudioLive RM-series Mixers with the CS18AI ™ Owner’s Manual 5.10 Internal Effects Mixes Assigning a Channel to a Subgroup Select the channel you’d like to assign to a subgroup by pressing the Select button on the associated channel strip. This will display the Fat Channel for the selected channel. - Page 82 StudioLive CS18AI Controlling StudioLive RM-series Mixers with the CS18AI ™ Owner’s Manual 5.10 Internal Effects Mixes Turn up the faders for the channels you’d like to send to the effects. Turn up the master effects-send level using the Flex Master fader. Since the effects returns for the Main Mix are turned up to unity by default, if you’re monitoring your Main Mix you should now hear the effects in your mix.
- Page 83 StudioLive CS18AI Controlling StudioLive RM-series Mixers with the CS18AI ™ Owner’s Manual 5.10 Internal Effects Mixes Editing an Effects Processor To open the FX Edit view, you can press the FX Mix button for the processor you want to use or navigate to the screen from the Home screen. a.
- Page 84 StudioLive CS18AI Controlling StudioLive RM-series Mixers with the CS18AI ™ Owner’s Manual 5.10 Internal Effects Mixes Tap Tempo The Tap Tempo button lets you easily set the time of the delay effect to match the tempo of the song being played. Tap can be assigned to either the FX C or FX D delay processor.
- Page 85 StudioLive CS18AI Controlling StudioLive RM-series Mixers with the CS18AI ™ Owner’s Manual 5.10 Internal Effects Mixes The following parameters are available for the nine reverb types the StudioLive offers: Decay. Decay is the time (in seconds) required for the reflections (reverberation) to die away.
- Page 86 StudioLive CS18AI Controlling StudioLive RM-series Mixers with the CS18AI ™ Owner’s Manual 5.10 Internal Effects Mixes Variable Feedback. Variable feedback, or regeneration, produces multiple decaying repeats. Increasing the feedback value increases the number of echoes, as well as the resonance that is created as one echo disappears into another. F_Frequency.
-
Page 87: Rear Panel
StudioLive CS18AI Rear Panel ™ Owner’s Manual Physical Connections and Controls Rear Panel Physical Connections and Controls Power Switch. Power Inlet. A standard IEC AC power inlet. Lamp Jack. The 4-pin XLR lamp jack provides 12 volts to support high-intensity lamps. USB Port. - Page 88 StudioLive CS18AI Rear Panel ™ Owner’s Manual Physical Connections and Controls Mic/Line Inputs. These XLR-TRS combo jacks feed the microphone and line inputs for the control surface. The XLR feeds through a recallable XMAX preamp. The TRS input feeds the line-level input and bypasses the preamp with a fixed signal to the analog-to-digital converter.
-
Page 89: Reference
StudioLive CS18AI Reference ™ Owner’s Manual StudioLive CS18 Technical Specifications Reference StudioLive CS18 Technical Specifications Network Type Ethernet / AVB Microphone Inputs Type XLR Female (via Combo), Balanced Remote Maximum Input Level +12 dBu, ±0.5 dB, Unity Gain Gain Control Range 65 dB, ±1 dB Gain 0 to +65 dB, ±1 dB... -
Page 90: Headphone Outputs
StudioLive CS18AI Reference ™ Owner’s Manual StudioLive CS18 Technical Specifications Headphone Outputs Type ¼” TRS Female, Stereo, Unbalanced Maximum Output Level 120 mW/channel @ 60 Ω Frequency Response 20 Hz to 20 kHz, ±0.5 dB Dynamic Range (A-wtd) > 103 dB THD+N 0.01%, 1 kHz, max gain, 20 Hz BW, unwtd Crosstalk (1 kHz, channel-to-channel) -
Page 91: Warranty Information
PreSonus-branded products under normal use. This Limited Warranty applies only to hardware products manufactured by or for PreSonus that can be identified by the PreSonus trademark, trade name, or logo affixed to them. Exclusions and Limitations This warranty does not cover the following: Damage caused by accident, abuse, improper installation, failure to follow instructions in the applicable owner’s manual or improper... - Page 92 PreSonus will repair or replace, at our sole and absolute option, products covered by this warranty at no charge for labor or materials. If the product must be shipped to PreSonus for warranty service, the customer must pay the initial shipping charges. PreSonus will pay the return shipping charges.
- Page 93 Exclusion of Damages PRESONUS’S LIABILITY FOR ANY DEFECTIVE PRODUCT IS LIMITED TO THE REPAIR OR REPLACEMENT OF THE PRODUCT, AT PRESONUS’S SOLE OPTION. IF PRESONUS ELECTS TO REPLACE THE PRODUCT, THE REPLACEMENT MAY BE A RECONDITIONED UNIT. IN NO EVENT WILL PRESONUS BE LIABLE FOR DAMAGES...
- Page 95 © 2015 PreSonus Audio Electronics, Inc. All Rights Reserved. AudioBox, Nimbit, PreSonus, QMix, StudioLive, and XMAX are trademarks or registered trademarks of PreSonus Audio Electronics, Inc. Capture and Studio One are trademarks or registered trademarks of PreSonus Software Ltd. Mac and Mac OS are registered trademarks of Apple, Inc., in the U.S. and other countries.
- Page 96 StudioLive CS18AI ™ Ethernet AVB Control Surface Owner’s Manual 18011 Grand Bay Ct. • Baton Rouge, ® Louisiana 70809 USA• 1-225-216-7887 Part# 70-22000026-A www.presonus.com...