Table of Contents
Advertisement
Available languages
Available languages
Quick Links
Advertisement
Table of Contents

Related Manuals for Grundig SC- 660 PLL


Summary of Contents for Grundig SC- 660 PLL
- Page 1 ALARM SAATLİ RADYO KULLANIM KILAVUZU SONOCLOCK SC- 660 PLL...
- Page 2 ___________________________________________________________...
-
Page 3: Güvenli̇k Tali̇matlari
GÜVENLİK TALİMATLARI Ambalaj İçin Uyarı! Ulusal Çevre Mevzuatımız gereği Ambalajlar, geri dönüştürülebilir malzemel- erden üretilmiştir. Ambalajların normal ev çöpüne atılmaması, yerel otoritenin belirttiği ambalaj toplama noktalarına atılması sağlanmalıdır. Pil İçin Uyarı! Ulusal Çevre Mevzuatımız gereği Üründe bulunan Pil uygun şekilde geri dönüştürülmeli veya yerel otoritenin belirttiği atık pil kutusuna atılmalıdır. - Page 4 GÜVENLİK _____________________________________________ Bu cihaz ses sinyallerinin okunması için tasarlanmıştır. Bunun dışındaki amaçlarda kesinlikle kullanılmamalıdır. Cihaz sadece şebeke kablosunun fişi prizden çekildiğinde şebekeden tamamen ayrılır. Cihazı uzun bir süre kullanmayacaksanız, şebeke kablosunun fişini mutlaka çekiniz. Cihazı neme (su damlaması ve sıçraması) karşı koruyunuz. Cihazın üstüne içine sıvı doldurulmuş...
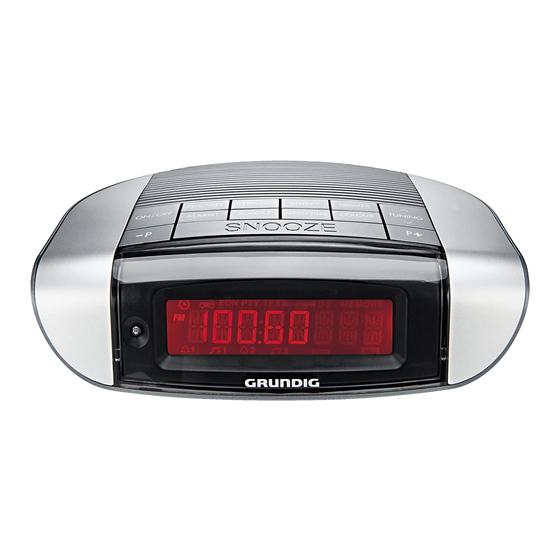
- Page 5 GENEL BAKIŞ __________________________________________ Şekilleri daima görebilmek için 2. sayfayı dışarıya katlayınız. Üst yüzeydeki kullanma elemanları ON/OFF Hazır beklemedeki (Stand-by) radyoyu açar ve tekrar hazır bekleme durumuna getirir. RDS/WEC Radyo modunda çeşitli RDS bilgileri arasında değiştirir; hafta sonu için alarmı kapatır ve tekrar açar. SLEEP/NAP Sleep-Timer ayarını...
- Page 6 GENEL BAKIŞ __________________________________________ Ön taraftaki kullanma elemanları AUTO DIMMER Göstergenin aydınlığını otomatik olarak çevrenin aydınlığına göre ayarlar. Saati, tarihi, uyandırma zamanlarını ve FM program bilgilerini Gösterge gösterir. Sağ taraftaki kullanma elemanları Ses seviyesini değiştirmek için döner düğme. Sol taraftaki kullanma elemanları Kulaklık soketi, jack fişli (ø...
- Page 7 GÜÇ KAYNAĞI ________________________________________ Şebeke gerilimi ile çalıştırma Şebeke adaptörü tip etiketinde (cihazın altında) yazılı olan şebeke geriliminin yerel şebeke gerilimine uygun olup olmadığını kontrol ediniz. Değilse, yetkili satıcınıza başvurunuz. Şebeke kablosunun fişini prize (230 V~, 50/60 Hz) takınız. Dikkat: Cihaz şebeke kablosu üzerinden elektrik şebekesine bağlanır. Cihazı elektrik şebe- kesinden tamamen ayırmak istiyorsanız, şebeke kablosunu çekmelisiniz.
- Page 8 AYARLAR _______________________________________________ Cihaz ilk defa elektrik şebekesine bağlandığında, önce otomatik bir program arama işlemi başlar. Programlar otomatik olarak program yerlerine kaydedilir. Arama sona erdiğinde bir demo programı başlar. Demo programını sona erdirmek için »ON/OFF« tuşuna basınız. Program yeri 1'e kaydedilmiş olan radyo programı duyulur.
-
Page 9: Saat Ayarı
AYARLAR _______________________________________________ Programların program yerlerine kaydedilmesi TUNING » « ile istenen programı seçiniz. Kayıt işlevini başlatmak için »MEM/TIME« tuşuna basınız. – Gösterge: Program yeri göstergesi »00« ve »MEMORY« yanıp söner. »P + 3 »P – « ya da « ile istenen program yerini seçiniz. Uyarı: Program yerlerine daha önce kaydedilmiş... - Page 10 AYARLAR _______________________________________________ Gün ayarı Cihazı »ON/OFF« ile hazır bekleme (Stand-by) konumuna getiriniz. »SNOOZE« tuşuna basınız ve basılı tutunuz. TUNING Günü » « ile ayarlayıp »SNOOZE« tuşunu bırakınız. – Gösterge: Güncel gün. RDS saat senkronizasyonunun devre dışı bırakılması ve etkinleştirilmesi Cihazı »ON/OFF« tuşuna basarak hazır bekleme durumuna (Stand-by) getiriniz. RDS saat senkronizasyonunu devre dışı...
- Page 11 AYARLAR _______________________________________________ Cihazın resetlenmesi Kısa süreli aşırı gerilim veya elektrostatik yüklenme gibi nedenlerden işlev hataları oluştuğunda, cihaz resetlenmelidir. O ana kadar kaydedilen değişiklikler silinmez. Cihaz açık durumda iken, örneğin bir ataşman ile, cihazın altındaki »RESET«'e bastırınız. Uyarı: Kaydedilen ayarları silmek istiyorsanız, şebeke kablosunu çekip tampon pilleri çıkartınız.
- Page 12 ÇALIŞTIRMA ___________________________________________ Genel Açma ve kapatma Cihazı »ON/OFF« ile hazır bekleme (Stand-by) konumundan açınız. Cihazı »ON/OFF« tuşuna basarak hazır bekleme durumuna (Stand-by) getiriniz. Ses ayarı » « ile (cihazın sağ tarafında) istenen ses seviyesini seçiniz. Gösterge fon ışıklarının parlaklığının ayarlanması »DIMMER«...
-
Page 13: Radyo Modu
ÇALIŞTIRMA ___________________________________________ Radyo modu En iyi FM (UKW) alımı için FM antenini uygun yöne ayarlamak yeterlidir. Açma Cihazı »ON/OFF« ile hazır bekleme (Stand-by) konumundan açınız. – Gösterge: »FM« Kısaca frekans veya program adı, daha sonra da saat ve gün. – Şimdi en son seçilmiş olan radyo programını duyarsınız (Last Station Memory). Kayıtlı... - Page 14 ÇALIŞTIRMA ___________________________________________ RDS saat senkronizasyonu Bazı RDS programları bir RDS saat sinyali gönderir. Sinyal alış seviyesi yüksekse, bu zaman bilgileri ile otomatik olarak saat ayarı da yapılır (Gösterge: » « yanıp söner); bu ayar saat senkronizasyonu etkin ise mümkündür (bkz. sayfa 12). Saat senkronizasyonu tamamlandıktan sonra »...
- Page 15 ÇALIŞTIRMA ___________________________________________ TUNING« veya Aramayı istenen bir yönde başlatmak için » »TUNING « tuşuna basınız. – Gösterge: »PTY« yanıp söner. – Seçilen program tipi bulunduğunda, radyoda ilgili program duyulur. – Seçilen program tipi bulunamazsa göstergede kısaca »NO MATCH« görünür. Cihaz başlangıçtaki programa geri döner. Uyarı: TUNING«...
- Page 16 ÇALIŞTIRMA ___________________________________________ Sinyal sesi ile uyandırma Cihazı »ON/OFF« tuşuna basarak hazır bekleme durumuna (Stand-by) getiriniz. Sinyal sesi ile uyandırmayı (»e«) etkinleştirmek için »ALARM1« veya »ALARM2« tuşuna ekranda »e 1« veya »e 2« görünene kadar tekrar tekrar basınız. – Cihaz ayarlanmış olan saatte sinyal sesi ile uyandırır (uyandırma süresi 90 dakika).
-
Page 17: Sleep Timer
ÇALIŞTIRMA ___________________________________________ Hafta sonu için uyandırmaya ara vermenin devre dışı bırakılması/etkinleştirilmesi Hazır beklemede (Stand-by) »RDS/WEC« tuşuna birkaç kez basınız. – Gösterge: » «. – Hafta sonu için alarm (uyandırma) kapatılır. Yeniden »RDS/WEC« tuşuna basınız. – Gösterge: » « silinir. – Hafta sonu için alarm (uyandırma) etkinleşir. Sleep-Timer Cihazda, radyoyu önceden ayarlanan bir süre sonunda kapatan Sleep-Timer işlevi mevcuttur. - Page 18 ÇALIŞTIRMA ___________________________________________ Hatırlatma zamanlayıcısı Hatırlatma zamanlayıcısı önceden ayarlanmış olan bir süre sonunda (10 ile 120 dakika arasında) bir sinyal sesi ile hatırlatma yapar. Hatırlatma zamanlayıcısının etkinleştirilmesi Cihazı »ON/OFF« tuşuna basarak hazır bekleme durumuna (Stand-by) getiriniz. »SLEEP/NAP« ile istenen hatırlatma zamanını ardışık olarak (basılı tutun) ya da adım adım (tekrar tekrar basın) ayarlayınız.
-
Page 19: Teknik Bilgiler
BİLGİLER ________________________________________________ Teknik bilgiler Bu cihaz geçerli AB yönetmeliklerine uygun olarak parazitlere karşı korunmalıdır. Bu ürün, 2004/108/AT ve 2006/95/AT Avrupa Direktiflerine uygundur. Bu cihaz VDE 0860 emniyet talimatlarına ve uluslararası IEC 65 emniyet yönetmeliklerine uygundur. 230 V, 50/60 Hz Güç beslemesi: DIN 45324, % 10 THD 500 mW Çıkış... - Page 20 SAFETY _________________________________________________ This device is designed for the playback of audio signals. Any other use is expressly prohibited. The only way to completely disconnect the device from the mains is to pull out the mains plug. Pull out the plug of the mains cable if you know that the device will not be used for a long period of time.
- Page 21 OVERVIEW ____________________________________________ Fold out page 2 so that you have the illustrations in front of you. Controls on the top ON/OFF Switches the radio to and from standby mode. RDS/WEC Switches between different RDS station information bulletins in radio mode. Switches the alarm standby off for the weekend and on again.
-
Page 22: Controls On The Front
OVERVIEW ____________________________________________ Controls on the front AUTO DIMMER Automatically adjusts the brightness of the display to the brightness of the surroundings. Display Displays the current time, date, the alarm times and FM station information. Controls on the right Control dial for volume control. Controls on the left Headphone jack for connecting headphones or an ear- phone set with a jack plug (ø... -
Page 23: Mains Operation
POWER SUPPLY ______________________________________ Mains operation Note: Check that the mains voltage on the type plate (on the bottom of the device) corresponds to your local mains supply. If this is not the case, contact your specialist dealer. Plug the mains cable into the socket (230 V~, 50/60 Hz). Note: The mains plug is used to connect the device to the mains supply. -
Page 24: Automatic Station Search
SETTINGS ______________________________________________ When the device is connected to the mains for the first, time, an automatic station search starts. Stations are automatically saved to the presets. At the end of the search a demo program starts. To end the demo program, press »ON/OFF«. -
Page 25: Setting The Time
SETTINGS ______________________________________________ Storing stations as presets TUNING Press » « to select the station you want to store. Press »MEM/TIME« to activate the memory function. – Display: the preset displays »00« and »MEMORY« flash. »P + »P – Press « or «... -
Page 26: Setting The Alarm Times
SETTINGS ______________________________________________ Setting the week day Switch the device to standby mode with »ON/OFF«. Press »SNOOZE« and hold it down. TUNING Set the day of the week with » « and release »SNOOZE«. – Display: the current day. Deactivating and activating RDS time synchronisation Press »ON/OFF«... -
Page 27: Resetting The Device
SETTINGS ______________________________________________ Resetting the device If malfunctions occur due to brief mains overloads or static electricity charges, reset the device. Any stored settings are retained. When the device is switched on, press »RESET« on the base of the device, for example, using a paper clip. Note: If you wish to delete the stored settings, pull out the mains plug and remove the back-up batteries. -
Page 28: General Information
OPERATION ___________________________________________ General information Switching on and off Switch on the device from standby mode with »ON/OFF«. Switch on the device to standby mode with »ON/OFF«. Adjusting the volume Set the desired volume with » « (right side of the device). Setting the brightness of the backlight display Repeatedly press »DIMMER«... -
Page 29: Radio Mode
OPERATION ___________________________________________ Radio mode For the best FM (UHF) reception it is sufficient to align the wire antenna accordingly. Switching on Switch on the device from standby mode with »ON/OFF«. – Display: »FM« briefly the frequency of the station, then the time and the day. -
Page 30: Radio Text
OPERATION ___________________________________________ RDS time synchronisation Some RDS stations transmit an RDS time signal. If the reception is good, this time information will update the time (display: » « flashes), as long as the time synchronisation is activated (see page 12). After successful time synchro- nisation, »... -
Page 31: Alarm Mode
OPERATION ___________________________________________ TUNING« or To start the search in the desired direction press » »TUNING «. – Display: »PTY« flashes. – If the desired programme type has been found, the corresponding pro- gramme can be heard. – If the programme type could not be found, »NO MATCH« appears briefly in the display. -
Page 32: Interrupting The Alarm
OPERATION ___________________________________________ Alarm with signal tone Press »ON/OFF« to switch the device to standby. Activate the alarm signal as the alarm sound (»e«) by pressing »ALARM1« or »ALARM2« repeatedly until »e 1« or »e 2« appears in the display. – The device wakes you up at the set time with the signal tone (alarm duration is 90 minutes). -
Page 33: Sleep Timer
OPERATION ___________________________________________ Deactivating/activating the alarm function for the weekend In standby press »RDS/WEC«. – Display: » «. – The alarm function is deactivated for the weekend. Press »RDS/WEC« again. – Display: » « disappears. – The alarm function is activated for the weekend. Sleep timer The device has a sleep timer, which switches it off in radio mode at a preset time. -
Page 34: Reminder Timer
OPERATION ___________________________________________ Reminder timer The reminder timer reminds you after a certain time (between 10 and 120 minutes) with a signal tone. Activating the reminder timer Press »ON/OFF« to switch the device to standby. Set the desired reminder time progressively by pressing and holding down »SLEEP/NAP«... -
Page 35: Environmental Note
INFORMATION _______________________________________ Environmental note This product has been made from high-quality parts and materials which can be re-used and recycled. Therefore, do not throw the product away with normal household waste at the end of its life. Take it to a collection point for recy- cling electrical and electronic devices. -
Page 36: Technical Data
INFORMATION _______________________________________ Technical data This device is noise-suppressed according to the applicable EU directives. This product fulfils the European directives 89/336/EEC, 73/23/EEC and 93/68/EEC. This device conforms to the safety regulation VDE 0860 and therefore the international safety regulation IEC 65. Power supply: 230 V, 50/60 Hz Output:... - Page 37 Garanti belgesi üzerinde tahrifat yapıldığı, ürün üzerindeki orijinal seri numarası kaldırıldığı veya tahrif edildiği takdirde bu garanti geçersizdir. Müşteri Hizmetleri: Tüm sorularınız için Grundig Hizmet Merkezi’ni haftanın 7 günü 24 saat aşağıdaki numaradan arayabilirsiniz. Grundig Hizmet Merkezi 444 9 888 (Sabit telefonlardan veya cep telefonlarından alan kodu çevirmeden *)
- Page 38 ÜRÜNÜNÜZ 2 (İKİ) YIL SÜRE İLE GARANTİ EDİLMİŞTİR. Garanti süresi Alarm Saatli Radyonun, kullanım kılavuzunda gösterildiği şekilde kullanılması ve Grundig’in yetkili kıldığı servis elemanları dışındaki şahıslar tarafından bakım, onarım veya başka bir nedenle müdahale edilmemiş olması şartıyla, malın bütün parçaları dahil olmak üzere tamamen malzeme, işçilik ve üretim hatalarına karşı...