Intermec PD41 Manual
Hide thumbs
Also See for PD41:
- Service manual (110 pages) ,
- User manual (108 pages) ,
- Programmer's manual (38 pages)
Table of Contents
Advertisement
Quick Links
QUESTIONS?
Ask the experts at POSMicro.com.
1.800.241.6264
Live Chat Now
support@POSMicro.com
Monday - Friday 6 AM to 5 PM Pacific Time
1.800.241.6264
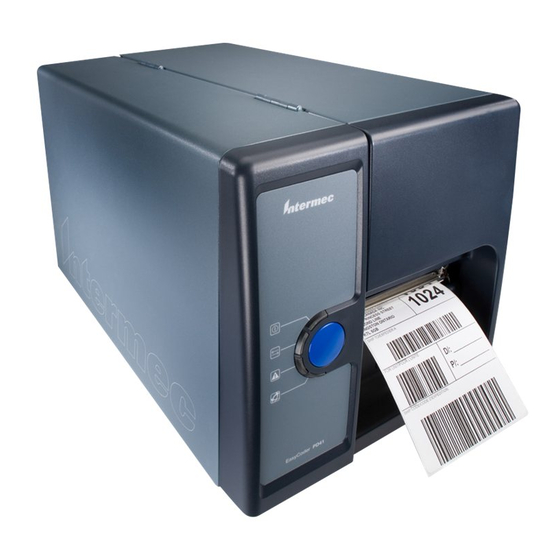
Intermec PD41 Manual
More information available at
BULk DISCOUNTS
FREE SHIPPING*
*Free ground shipping to the continental USa on orders over $100.
For Help Call
POSMicro.com
SE HaBLa
ESpañOL
Advertisement
Table of Contents
Troubleshooting

Related Manuals for Intermec PD41


Summary of Contents for Intermec PD41
- Page 1 For Help Call 1.800.241.6264 Intermec PD41 Manual More information available at POSMicro.com QUESTIONS? BULk DISCOUNTS SE HaBLa Ask the experts at POSMicro.com. ESpañOL FREE SHIPPING* 1.800.241.6264 Live Chat Now support@POSMicro.com Monday - Friday 6 AM to 5 PM Pacific Time...
- Page 2 PD41 | PD42 Commercial Printer User’s Manual...
- Page 3 Intermec Technologies Corporation. Information and specifications contained in this document are subject to change without prior notice and do not represent a commitment on the part of Intermec Technologies Corporation. © 2009-2010 by Intermec Technologies Corporation. All rights reserved.
- Page 4 This page records changes to this document. Version Number Date Description of Change • 11/2010 Added methods to verify a USB mass storage device is supported by the printer. • Expanded the Upgrading Firmware procedure. PD41 and PD42 Commercial Printer User’s Manual...
- Page 5 PD41 and PD42 Commercial Printer User’s Manual...
-
Page 6: Table Of Contents
Manually Configuring IP Settings ......... 25 PD41 and PD42 Commercial Printer User’s Manual... - Page 7 Downloading Fonts and Graphics ..........62 PD41 and PD42 Commercial Printer User’s Manual...
- Page 8 Accessories for the Printer ............107 PD41 and PD42 Commercial Printer User’s Manual...
- Page 9 Devices and Directories..........132 viii PD41 and PD42 Commercial Printer User’s Manual...
- Page 10 ..............139 PD41 and PD42 Commercial Printer User’s Manual...
- Page 11 Contents PD41 and PD42 Commercial Printer User’s Manual...
-
Page 12: Before You Begin
Global Services and Support Warranty Information To understand the warranty for your Intermec product, visit the Intermec web site at www.intermec.com and click Support > Returns and Repairs > Warranty. -
Page 13: Web Support
Donggu, Daegu City, Korea jmyou@idif.co.kr korlim@gw.idif.co.kr E-mail: Who Should Read This Manual This user’s guide is written for the person who is responsible for installing, configuring, and maintaining the PD41 or PD42 printer. PD41 and PD42 Commercial Printer User’s Manual... -
Page 14: Related Documents
(as .pdf files) that you can download for free. To download documents 1 Visit the Intermec web site at www.intermec.com. 2 Click the Products tab. 3 Using the Products menu, navigate to your product page. For example, to find the CN3 computer product page, click Computers >... - Page 15 Before You Begin PD41 and PD42 Commercial Printer User’s Manual...
-
Page 16: Using The Printer
Using the Printer In this chapter, you will find these sections: • Learning About the Printers • Loading Media • Loading Thermal Transfer Ribbon • Printing a Test Label • Creating and Printing Labels... -
Page 17: Learning About The Printers
Verify a USB mass storage device is supported by the printer. • Using a USB mass storage device to upgrade firmware. Identifying the Parts of the Printer Use this section to familiarize yourself with the parts of the PD41 and PD42 printers. Control LEDs (4) Print button... -
Page 18: Selecting The Printer Command Language
Rear View of the PD41 and PD42 Printers Selecting the Printer Command Language The PD41 and PD42 printers come loaded with five different printer command languages. On the PD42 printer, you select the command language the first time you power up the printer. For more information see the following procedure. - Page 19 Chapter 1 — Using the Printer The PD41 printer always starts up using the Fingerprint printer language because it does not have a screen to select the command language. You will need to use the printer home page or PrintSet to choose a printer command language.
-
Page 20: Understanding The Front Panel
PrintSet” on page Understanding the Front Panel The PD41 control panel consists of one button and four LEDs. The PD42 control panel consists of one button, four LEDs, a screen, and five soft keys. Use the next two sections to understand how to use the front panel on each printer. -
Page 21: Understanding The Print Button And Leds
The printer is transferring data. green Error Solid or There is an error condition with the flashing printer. Most causes of an error condition are hardware related. For help, see “Printer Problems and Possible Solutions” on page PD41 and PD42 Commercial Printer User’s Manual... -
Page 22: Understanding The Pd42 Screen And Soft Keys
The printer can tell you if a specific error has occurred or if it is waiting for input from you. Fingerprint 10.6.0 The PD42 Screen and Soft Keys PD41 and PD42 Commercial Printer User’s Manual... - Page 23 Applies a setting or selects a command. Allows you to edit a value. Decreases the selected number. Increases the selected number. Exits or cancels editing, test mode, and dump mode. Continue. Saves to file. PD41 and PD42 Commercial Printer User’s Manual...
-
Page 24: Understanding Printer States
Dumpmode The printer is in Dumpmode, which means it is listening on all communication ports and prints incoming characters. Upgrading Firmware is being upgraded. Error The printer is in an error state. PD41 and PD42 Commercial Printer User’s Manual... - Page 25 Fingerprint Idle 10.2.0 Running application Setup, navigation Setup, edit value i-mode F1 F2 F3 F4 F5 Printing Paused Testmode Extended Testmode Dumpmode Upgrading Active Soft Keys in Different Printer States PD41 and PD42 Commercial Printer User’s Manual...
-
Page 26: Loading Media
Tickets with black marks, with or without perforations To load media for tear-off printing 1 Open the media cover. 2 Pull out the printhead lever and turn it counterclockwise. Lift up on the label feed guide. PD41 and PD42 Commercial Printer User’s Manual... -
Page 27: Loading Media For Peel-Off (Self-Strip) Printing
After a label is removed, the sensor lets the printer know it is okay to print another label. Peel-off printing only supports self- adhesive labels with a liner. PD41 and PD42 Commercial Printer User’s Manual... - Page 28 For more information on the internal rewinder kit, see “Accessories for the Printer” on page 107. To load media for peel-off printing 1 Remove the thumbscrew that attaches the front cover and remove PD41 and PD42 Commercial Printer User’s Manual...
- Page 29 3 Load a media roll onto the media supply hub. Be sure to push the roll all the way against the inner wall of the printer and adjust the edge guide. 4 Route the media through the print mechanism and back into the media compartment. PD41 and PD42 Commercial Printer User’s Manual...
- Page 30 Chapter 1 — Using the Printer 5 Wrap the liner around the internal rewinder takeup roll and lock it in place. 6 Reset the label feed guide and the printhead lever. PD41 and PD42 Commercial Printer User’s Manual...
-
Page 31: Loading Thermal Transfer Ribbon
If you see a mark on the paper, your ribbon is wound ink out. PD41 and PD42 Commercial Printer User’s Manual... - Page 32 = Ink out Determining Whether Your Ribbon is Wound Ink In or Ink Out To load thermal transfer ribbon 1 Open the media cover. 2 Pull out the printhead lever and turn it counterclockwise. PD41 and PD42 Commercial Printer User’s Manual...
- Page 33 4 For ink out ribbon (—): route the ribbon around the printhead and set the ink position lever to the left. 5 For ink in ribbon(---): route the ribbon around the printhead and set the ink position lever to the right. PD41 and PD42 Commercial Printer User’s Manual...
-
Page 34: Printing A Test Label
6 Select your media type by releasing the Print button when your type of media appears on the screen. SELECT MEDIA MARK SELECT MEDIA SELECT MEDIA CONTINUOUS PD41 and PD42 Commercial Printer User’s Manual... -
Page 35: Creating And Printing Labels
Downloads page for your printer on www.intermec.com. You can also use Fingerprint and IPL to create and print labels. For more information, see either the Intermec Fingerprint Command Reference Manual or the IPL Command Reference Manual. PD41 and PD42 Commercial Printer User’s Manual... -
Page 36: Connecting The Printer
Connecting the Printer Use this chapter to understand how to connect the printer to your PC or your network. This chapter contains these sections: • Connecting the Printer to Your PC • Connecting the Printer to Your Network • Connecting Peripherals to the USB Host Port... -
Page 37: Connecting The Printer To Your Pc
Chapter 2 — Connecting the Printer Connecting the Printer to Your PC You can easily connect the PD41 or PD42 commercial printer to your PC using one of these ports: • USB device port RS-232 serial interface port • •... -
Page 38: Connecting The Printer To A Pc Through The Ieee 1284 Port
Connecting the Printer to a PC Through the IEEE 1284 Port You can use the parallel connection with LabelShop or the Intermec InterDriver. The parallel port supports Universal Plug and Play (UPnP) and additional status reporting through IEEE 1284 nibble ID mode. -
Page 39: Connecting The Printer To Your Network
Alert handling. Setting Up Ethernet Communications Use the Ethernet port to set up the PD41 or PD42 as a network printer. The printer is set to automatically retrieve an IP number from the network (DHCP) once it is turned on. You can use the network connection either with LabelShop or the Intermec InterDriver. -
Page 40: Manually Configuring Ip Settings
Ready-to-Work indicator is flashing to indicate a network error, you can use PrintSet (available on the PrinterCompanion CD or as a download from www.intermec.com) to correct the network settings. Manually Configuring IP Settings You can configure the IP settings of your printer by sending Fingerprint or IPL commands through a serial connection. - Page 41 ,m2 is the router address in the format n.n.n.n, where n is a number from 0 to 255. Note: You must specify at least two of the three parameters for the command to take effect. PD41 and PD42 Commercial Printer User’s Manual...
-
Page 42: Setting Up 802.11 Radio Communications
1 Download and install PrintSet on your PC. 2 Connect one end of the serial cable to the back of the printer and connect the other end of the cable to a serial COM port on the PC. PD41 and PD42 Commercial Printer User’s Manual... - Page 43 Stop bits 3 From the host PC, check the wireless settings. For help, see “Manually Configuring IP Settings” on page If you are using IPL, send these commands to the printer: <STX><SI>wt,SSID<ETX> <STX><SI>wt,WEP<ETX> PD41 and PD42 Commercial Printer User’s Manual...
-
Page 44: Configuring 802.11 Wireless Security Using Ipl
Manual or the IPL Command Reference Manual. You can download both documents from the Intermec web site at www.intermec.com. Configuring 802.11 Wireless Security Using IPL Use the following procedures to configure 802.11 wireless security parameters on your printer using IPL. - Page 45 Send the WPA-PSK or WPA2-PSK command to set a pre-shared key: <STX><SI>ws,WPA,ON<ETX> <STX><SI>ws,WPA2,ON<ETX> <STX><SI>ws,WPA_PSK, xxxxxxxxxx<ETX> where xxxxxxxxxx is a value between 8 and 64 characters. 3 Send the following command to activate the settings: <STX><SI>ws,ACTIVE,1<ETX> PD41 and PD42 Commercial Printer User’s Manual...
- Page 46 ACQUIRE_PAC to on or off. • Send the following command to set PAC to use /tmp/my.pac with a pass phrase of “verysecret”: <STX><SI>ws,PAC,/tmp/my.pac @verysecret<ETX> • Send the following command to set ACQUIRE_PAC to on: <STX><SI>ws,ACQUIRE_PAC,ON<ETX> PD41 and PD42 Commercial Printer User’s Manual...
-
Page 47: Configuring 802.11 Wireless Security Using Fingerprint
You may need to send the following command several times for the wireless station to connect: <STX><SI>ws,ACTIVE,1<ETX> Configuring 802.11 Wireless Security Using Fingerprint Use the following procedures to configure 802.11 wireless security parameters on your printer using IPL. PD41 and PD42 Commercial Printer User’s Manual... - Page 48 WPA or WPA2 authentication. Send the WPA-PSK or WPA2-PSK command to set a pre-shared key: setup "wlan","WPA","ON" setup "wlan","WPA2","ON" setup "wlan","WPA_PSK","xxxxxxxxxx" setup "wlan","ACTIVE","1" setup write "wlan","uart1:" where xxxxxxxxxx is a value between 8 and 64 characters. PD41 and PD42 Commercial Printer User’s Manual...
- Page 49 PAC file provisioning is enabled. You can set ACQUIRE_PAC to on or off. • Send the following command to set PAC to use /tmp/my.pac with a pass phrase of “verysecret”: setup "8021x","PAC","/tmp/my.pac @verysecret" PD41 and PD42 Commercial Printer User’s Manual...
-
Page 50: Connecting Peripherals To The Usb Host Port
Connecting Peripherals to the USB Host Port You can connect these peripheral devices to the USB host interface port on the printer: • USB mass storage device • Keyboard • Bar code scanner • USB hub PD41 and PD42 Commercial Printer User’s Manual... -
Page 51: Using A Usb Mass Storage Device
Connecting a Keyboard to the USB Host Port You can use an external USB keyboard to: input data in Fingerprint applications. Some applications may • require more complex input from users than the simple push of a button. PD41 and PD42 Commercial Printer User’s Manual... -
Page 52: Connecting A Bar Code Scanner To The Usb Host Port
Fingerprint application. The keyboard layout you choose in setup (see previous procedure) applies for connected scanners too. Note: You can only use a bar code scanner with printers that are running Fingerprint firmware. PD41 and PD42 Commercial Printer User’s Manual... - Page 53 HID (keyboard or scanner) peripheral to the USB hub at a time. If the USB hub is powered, you can connect multiple USB mass storage devices and multiple HID peripherals at once. PD41 and PD42 Commercial Printer User’s Manual...
-
Page 54: Configuring The Printer
Configuring the Printer Use this chapter to understand how to configure the printer, upgrade firmware, and download fonts and graphics. This chapter contains these sections: • Configuring the Printer • Upgrading the Firmware • Downloading Fonts and Graphics... -
Page 55: Configuring The Printer
At startup, the firmware determines if optional equipment such as a cutter or an interface board is installed in the printer, and these are added to the Setup tree. PD41 and PD42 Commercial Printer User’s Manual... - Page 56 EMULATION FEEDADJ The Main Nodes of the Setup Menu in Fingerprint Starting point SETUP: SETUP: SER-COM SETUP: CONFIGURATION SETUP: NETWORK SETUP: SETUP: MEDIA TEST/SERVICE The Main Nodes of the Setup Menu in IPL PD41 and PD42 Commercial Printer User’s Manual...
-
Page 57: Configuring The Printer From The Home Page
Active Command Set, MAC address, and IP address of your printer. The home page also displays the contents of the image buffer, as well as the status of the Ready-to-Work indicator. 3 Click Configuration. PD41 and PD42 Commercial Printer User’s Manual... -
Page 58: Configuring Communications Settings
3 Click Submit Setup. Configuring Media Settings Use the media page to view and change media settings such as XSTART position, media type, and contrast. To configure media settings 1 Click Printer > Media. PD41 and PD42 Commercial Printer User’s Manual... -
Page 59: Configuring Print Engine Settings (Fingerprint Only)
Submit Setup. You will receive a message that reads “Application change will take effect at reboot.” You can choose to select Reboot or wait until you are done making other configuration changes. PD41 and PD42 Commercial Printer User’s Manual... -
Page 60: Configuring Alerts
• Specify a Delay repeat in the text field. • Select seconds or occurrences in the Delay Unit list. • Enter a message in the Message text field. 3 Select the Notification method. PD41 and PD42 Commercial Printer User’s Manual... - Page 61 The Delay repeat setting represents how often the alert message will be sent when the preset value is reached. Notification Method The method used to send an alert message. You can choose from mail, SNMP-trap, or both. PD41 and PD42 Commercial Printer User’s Manual...
-
Page 62: Configuring General Network Settings
Understanding the General Network Settings Setting Description Printer Name The network identification name (WINS name) of the printer. The default name is INTERMEC followed by the last six positions of the MAC address. System Location (Optional) The printer location. System Contact (Optional) The printer administrator. -
Page 63: Configuring Mail Settings
Submit Mail Settings to send the changes to the printer. • Submit & Send test mail to send the changes to the printer and test your new settings. Use the following table to understand the mail settings. PD41 and PD42 Commercial Printer User’s Manual... -
Page 64: Configuring Snmp Settings
After you add a trap, it appears in the Trap Address Settings list. You can edit or delete each trap in the list by clicking Edit or Delete. 4 Click Submit SNMP settings. PD41 and PD42 Commercial Printer User’s Manual... -
Page 65: Configuring Tcp/Ip Settings
Use the TCP/IP settings page to view and change TCP/IP network settings. To configure TCP/IP settings 1 Click Network Admin > TCP/IP. 2 View or update your settings. 3 Click Submit TPC/IP settings. PD41 and PD42 Commercial Printer User’s Manual... - Page 66 The IP address is specified as an address and a prefix separated by a slash. You can use “::” to represent a large number of consecutive zeros. You should typically set the prefix to 64. Example: 2001:DB8:0:F101::2/64 PD41 and PD42 Commercial Printer User’s Manual...
-
Page 67: Configuring The Network Type
Configuring Avalanche Settings Use the Avalanche page to view and change Wavelink Avalanche settings. To configure Avalanche settings 1 Click Network Admin > Avalanche. 2 View or update your settings. PD41 and PD42 Commercial Printer User’s Manual... -
Page 68: Configuring Wireless Lan Settings
Mode Set the operating mode of the device to Ad-Hoc or Infrastructure. Set Wired Equivalent Privacy (WEP) to on or off. WEP Keys You can enter values for up to 4 WEP keys. PD41 and PD42 Commercial Printer User’s Manual... -
Page 69: Configuring 802.1X Settings
Use the 802.1x page to view and change 802.1x security settings. To configure 802.1x settings 1 Click Network Admin > 802.1x. 2 View or update your settings. 3 Click Submit 802.1x settings. PD41 and PD42 Commercial Printer User’s Manual... - Page 70 If a pass phrase is required, add it to the end of the path in the form of “@passphrase”. PD41 and PD42 Commercial Printer User’s Manual...
-
Page 71: Configuring Smartsystems Settings
1 Make sure that you have a PC running Microsoft Windows 98 or later. 2 Download PrintSet from the Downloads page of the Intermec web site at www.intermec.com. 3 Connect your printer to your PC using a serial cable. For help, see “Connecting the Printer to a PC Through the Serial Port”... -
Page 72: Configuring The Printer Using Commands Sent From Your Pc
You can use SmartSystems Foundation to change configuration settings on your printer. The printer ships with the SmartSystems client loaded on it. The console is part of SmartSystems Foundation and is available from the Intermec web site. To download SmartSystems Foundation, go to www.intermec.com/products/ smrtsysfoundation/index.aspx. -
Page 73: Choosing An Ethernet Or Wireless Network
Setup mode. 5 Reboot the printer for the change to take effect. Using Printer Commands to Choose the Network Type You can send Fingerprint or IPL commands using a serial connection to the printer. PD41 and PD42 Commercial Printer User’s Manual... -
Page 74: Upgrading The Firmware
3 Reboot the printer for the change to take effect. Upgrading the Firmware The latest firmware and software is available for download from the Downloads page on the Intermec web site at www.intermec.com. You can upgrade the firmware on your printer using: •... - Page 75 6 Extract the .zip file to a folder on your PC. To upgrade using PrintSet 1 Download the latest version of PrintSet from the Intermec web site at www.intermec.com. 2 Select File > Add Printer. The Add Printer Wizard starts.
- Page 76 To upgrade using a serial or USB connection • Use Fingerprint or IPL commands to send the upgrade file to your printer. For help, see the Intermec Fingerprint Command Reference Manual IPL Command Reference Manual. PD41 and PD42 Commercial Printer User’s Manual...
-
Page 77: Downloading Fonts And Graphics
2 Double-click the file, and then click Upgrade. Downloading Fonts and Graphics The PD41 and PD42 support 10 scalable Unicode TrueType fonts as standard. The Unicode standard allows the use of special characters for various languages including non-Latin fonts, such as Arabic, Cyrillic, Chinese (including enhanced Simplified Chinese GB18030), Japanese, Korean, and Hebrew. - Page 78 • Fingerprint or IPL commands. For help, see the Intermec Fingerprint Command Reference Manual or the IPL Command Reference Manual. • a CompactFlash card or external USB mass storage device (maximum 2 GB). PD41 and PD42 Commercial Printer User’s Manual...
- Page 79 Chapter 3 — Configuring the Printer PD41 and PD42 Commercial Printer User’s Manual...
-
Page 80: Troubleshooting And Maintaining The Printer
Troubleshooting and Maintaining the Printer Use this chapter to troubleshoot and maintain the printer. This chapter contains these sections: • Troubleshooting the Printer • Adjusting the Printer • Maintaining the Printer... -
Page 81: Troubleshooting The Printer
69. If you cannot find the answer to your problem, you may need to contact Product Support. Contacting Product Support Before you call Intermec Product Support, you may want to visit the Intermec technical knowledge base (Knowledge Central). To do so, go www.intermec.com and click Support >... -
Page 82: Possible Pd42 Printer Error Icons/Messages
“The printers can enter various states which indicate the current mode of operation.” on page Restart the printer in Test mode and select the appropriate media type. For help, see “Using Testmode” on page PD41 and PD42 Commercial Printer User’s Manual... - Page 83 Testfeed not done. Press Testfeed ( Cutter not found. A cut command has been sent to the printer, but the printer cannot find the cutter. Make sure the cutter is installed properly. PD41 and PD42 Commercial Printer User’s Manual...
-
Page 84: Troubleshooting Printer Problems And Finding Solutions
• Make sure you are using the correct Ethernet cable. • Make sure you have Ethernet selected as the Network Type. For help, see “Choosing an Ethernet or Wireless Network” on page PD41 and PD42 Commercial Printer User’s Manual... - Page 85 “Adjusting the Label Stop Sensor” on page • Make sure the sensors are clean. For help, see “To clean the printhead” on page Printing is slow. Make sure your printing application is working correctly. PD41 and PD42 Commercial Printer User’s Manual...
- Page 86 The printout is uneven Check the printhead balance. For help, see across the media path. “Adjusting Printhead Balance” on page • Check the printhead pressure. For help, see “Adjusting Printhead Pressure” on page PD41 and PD42 Commercial Printer User’s Manual...
-
Page 87: Troubleshooting Communication Problems
While the printer is receiving data, the Ready-to-Work indicator blinks. After a half of a second, if no more characters have been received, the printer times out. The program considers the transmission terminated and prints out a label. PD41 and PD42 Commercial Printer User’s Manual... -
Page 88: Using Dump Mode
2 Navigate to Test/Service> Data Dump. 3 Toggle to Yes and then press The printer is now in Dump mode. To exit Dump mode • Turn the printer off and then back on again. PD41 and PD42 Commercial Printer User’s Manual... -
Page 89: Using Testmode And Extended Testmode To Troubleshoot
6 Select your media type by releasing the Print button when your type of media appears on the screen. SELECT MEDIA MARK SELECT MEDIA SELECT MEDIA CONTINUOUS The printer prints several test labels containing hardware, setup, and network information and then enters Dump mode. PD41 and PD42 Commercial Printer User’s Manual... -
Page 90: Using Extended Testmode
All three LEDs flash rapidly four times to signal that Extended Testmode is active. 4 Release the Print button and lower the printhead. You are now in Extended Testmode and the following screen appears. SELECT MEDIA PD41 and PD42 Commercial Printer User’s Manual... - Page 91 “Using Dump Mode” on page Factory Default Restore factory default settings. Select the option and then follow the onscreen instructions. Setup and Exit Exit Extended Testmode and enter Setup mode. Exit Exit Extended Testmode. PD41 and PD42 Commercial Printer User’s Manual...
-
Page 92: Adjusting The Printer
If your labels look like the following illustration, you may want to try adjusting the ribbon shield. Test Label B Test Label A 1234567890 1234567890 Low Quality Printouts Caused by Ribbon Wrinkling PD41 and PD42 Commercial Printer User’s Manual... -
Page 93: Clearing Media Jams
Clearing Media Jams Common causes of media jams include media not being loaded properly or the printer not being maintained properly. To clear a media jam 1 Turn off the printer. PD41 and PD42 Commercial Printer User’s Manual... -
Page 94: Adjusting The Printhead
Adjusting Printhead Balance The printer is adjusted at the factory for full-width media. If you are using media that is less than full-width, Intermec recommends that you adjust the position of the printhead balance boxes so that the printhead is correctly pressured against the media. If your printouts are lighter on one side than the other, it is most likely due to an unbalanced printhead. - Page 95 3 Move the balance boxes: • outward for wider media. • inward for narrower media. Balance box 4 Close the printhead and load the ribbon. 5 Test and readjust the balance boxes if necessary. PD41 and PD42 Commercial Printer User’s Manual...
-
Page 96: Adjusting Printhead Pressure
“Adjusting Printhead Balance.” To adjust the printhead pressure 1 If you have installed thermal transfer ribbon, remove it. 2 Pull out on the printhead lever and turn it counterclockwise to lift the printhead. PD41 and PD42 Commercial Printer User’s Manual... -
Page 97: Adjusting Printhead Dot Line
You also need to make sure that the printhead dot line and the platen roller are parallel. To adjust the printhead dot line 1 If you have installed thermal transfer ribbon, remove it and close the printhead. PD41 and PD42 Commercial Printer User’s Manual... - Page 98 2 Use a slotted screwdriver to turn the two screws at the top of the printhead bracket counterclockwisea single turn. 3 Pull out on the printhead lever and turn it counterclockwise to lift the printhead. PD41 and PD42 Commercial Printer User’s Manual...
- Page 99 5 Close the printhead and using the slotted screwdriver to turn the two screws at the top of the printhead bracket clockwise a single turn. 6 If you are using thermal transfer ribbon, load it. 7 Test and readjust if necessary. PD41 and PD42 Commercial Printer User’s Manual...
-
Page 100: Adjusting The Label Stop Sensor
1 Pull out on the printhead lever and turn it counterclockwise to lift the printhead. 2 Use the sensor lever at the rear side of the print mechanism to move the sensor inward or outward. Sensor lever PD41 and PD42 Commercial Printer User’s Manual... - Page 101 • LSS Manual: Shows the sensor setting established by the latest Testfeed. LSS Manual is intended to be used by Intermec service personnel only. To run the LSS Auto test 1 Make sure the printer is correctly configured for the type of media you are using.
- Page 102 When the label stop sensor detects a black mark, the cursor moves to the left. LSS AUTO If the cursor behaves as described in Steps 7 and 8, the label stop sensor is working and is properly aligned. PD41 and PD42 Commercial Printer User’s Manual...
-
Page 103: Maintaining The Printer
Does the label stop sensor work with another type of media? • Maintaining the Printer To ensure high productivity and a long life for your printer, Intermec recommends that you regularly inspec the printer and its environment to make sure that it is operated under optimal conditions. -
Page 104: Cleaning The Printhead
7 Allow the printhead to dry for a minute or more before loading a new supply of media and ribbon. Cleaning the Media Compartment Regular cleaning of the printer’s media compartment ensures smoother printing operation and avoids problems with media jams. PD41 and PD42 Commercial Printer User’s Manual... -
Page 105: Cleaning The Exterior Of The Printer
If you use the printer in an environment where the premises are cleaned by a water hose or steam, move the printer to another room or cover it very carefully with a plastic sheet and make sure that the power cord is unplugged. PD41 and PD42 Commercial Printer User’s Manual... -
Page 106: Specifications
Specifications This appendix contains specifications for the printer and media. It also contains information on the accessories for the printers. -
Page 107: Printer Specifications
8 MB Flash • • 16 MB SDRAM • CompactFlash (CF) card (optional) • USB memory device (optional) Miscellaneous • ARM 9 microprocessor • 240 x 160 pixel LCD screen with LED backlight PD41 and PD42 Commercial Printer User’s Manual... - Page 108 Ribbon Width (min/max) 30 to 110 mm (1.18 to 4.33 in) Ribbon Roll Diameter (outer) 76 mm (2.99 in) (max) 450 m (1475 ft) of ribbon Ribbon Roll Core Diameter 25.4 mm (1.00 in) (inner) PD41 and PD42 Commercial Printer User’s Manual...
-
Page 109: Interfaces
Appendix A — Specifications Interfaces This section describes the standard interfaces available on the PD41 and PD42 printers. RS-232 Serial Interface Use this table to understand the default settings of the serial port. Default Settings of the Serial Port Parameter... -
Page 110: Usb Interface
USB Interface The printer supports USB full speed v2.0 Host. To use the USB interface to print from a PC, you need to have the Intermec InterDriver printer driver installed on your PC. For help setting up USB communications, see “Connecting the Printer to a PC... -
Page 111: Usb Host Interface
45 cable. The interface supports 10/100 Mbps Fast Ethernet (10BASE- T, 100BASE-TX) and is fully compliant with the IEEE 802.3u standard. The network card MAC address can be found on the label below the socket. Ethernet Socket Ethernet Connector PD41 and PD42 Commercial Printer User’s Manual... -
Page 112: Parallel Ieee 1284 Interface
Select Printer nAutoFd 15 to 16 Not connected Chassis ground External +5 V DC Max 500 mA 19 to 30 Signal ground nInit nFault Printer Signal ground 34 to 35 Not connected nSelectIn PD41 and PD42 Commercial Printer User’s Manual... -
Page 113: Media Specifications
Maximum 118 mm (4.65 in) Minimum 25.0 mm (1.00 in) Media Type Set media type to one of these values: • Fingerprint: FIX LENGTH STRIP • • VAR LENGTH STRIP • IPL: CONTINUOUS PD41 and PD42 Commercial Printer User’s Manual... - Page 114 The liner must not extend more than a total of 1.6 mm (0.06 in) outside the face material and should protrude equally on both sides. Media Width Excluding Liner (c) Measurement Value Maximum 116.4 mm (4.58 in) Minimum 23.8 mm (0.94 in) PD41 and PD42 Commercial Printer User’s Manual...
- Page 115 Appendix A — Specifications Media Type Set media type to one of these values: • Fingerprint: FIX LENGTH STRIP • • VAR LENGTH STRIP • IPL: CONTINUOUS • ESim: CONTINUOUS SELF-ADHESIVE STRIP Self-Adhesive Strip PD41 and PD42 Commercial Printer User’s Manual...
- Page 116 6.0 mm (0.2 in) * The print length is limited by memory constraints Label Gap (e) Measurement Value Maximum 26.0 mm (1.02 in) Recommended 3.0 mm (0.12 in) Minimum 1.2 mm (0.05 in) PD41 and PD42 Commercial Printer User’s Manual...
- Page 117 SELF-ADHESIVE STRIP SELF-ADHESIVE LABELS Feed direction Self-Adhesive Labels Media Type Set media type to one of these values: • Fingerprint: LABEL (w GAPS) • IPL: GAP • ESim: GAP/NOTCH PD41 and PD42 Commercial Printer User’s Manual...
- Page 118 2.5 mm (0.10 in) on either side of the LSS detection position (c). Detection Slit Height (e) Measurement Value Maximum 26.0 mm (1.02 in) Recommended 3.0 mm (0.12 in) Minimum 1.2 mm (0.05 in) PD41 and PD42 Commercial Printer User’s Manual...
- Page 119 ESim: MARK Note: Do not allow a perforation to break the edge of the media, because the media may split and jam the printer. TICKETS & TAGS Feed direction Tickets With Gaps (Gap Stock) PD41 and PD42 Commercial Printer User’s Manual...
- Page 120 3.0 mm (0.12 in) Black Mark Y-Position (f) Intermec recommends that you place the black mark as close to the front edge of the ticket as possible and use a negative Stop Adjust value to control the media feed, so the tickets can be properly torn off.
- Page 121 LBLCOND to temporarily disable the sensor for a specified amount of media feed to avoid unintentional detection. For help, see the Intermec Fingerprint Command Reference Manual. TICKETS WITH MARKS Feed direction Tickets With Black Mark (Mark Stock) PD41 and PD42 Commercial Printer User’s Manual...
-
Page 122: Accessories For The Printer
Appendix A — Specifications Accessories for the Printer You can use these accessories (sold and ordered separately) with the PD41 and PD42 printer. To order accessories, contact your local Intermec sales representative. Internal Rewinder Use this accessory, which comes with a guide shaft, for peel-off (self- strip) printing. - Page 123 Appendix A — Specifications PD41 and PD42 Commercial Printer User’s Manual...
-
Page 124: Default Settings
Default Settings... -
Page 125: Default Configuration
4 Reboot the printer. The following tables list the default values of the configuration commands supported on the PD41 and PD42 printers. If you restore the printer to factory default settings, these are the values it uses. The commands are grouped by function and reflect the organization of the IPL and Fingerprint setup menus. - Page 126 IPv6 address Nameserver Nameserver6 DHCP response Broadcast MAC address Network type Ethernet Test/Service Parameters Parameter Default Value Testprint Config Test labels Format Page Font Data dump Memory reset LSS test LSS Auto Cmd language PD41 and PD42 Commercial Printer User’s Manual...
-
Page 127: Fingerprint Default Configuration
Default Value Baud rate 9600 Character length Parity None Stop bits Flow control RTS/CTS Disable ENQ/ACK Disable XON/XOFF; data to host Disable XON/XOFF; data from host Disable New line CR/LF Receive buffer 1024 bytes PD41 and PD42 Commercial Printer User’s Manual... - Page 128 Interface USB Device USB keyboard Network Parameters Parameter Default Value IP selection DHCP+BOOTP IP address Netmask Default router IPv6 selection Auto IPv6 address Nameserver Nameserver6 DHCP response Broadcast MAC address Network type Ethernet PD41 and PD42 Commercial Printer User’s Manual...
- Page 129 Paper type Thermal transfer Contrastt Testfeed <no value> Testfeed mode Fast Len (slow mode) Print Defs Parameters Parameter Default Value Testprint Print speed 100 mm/sec LSS test LSS Auto Clip default Cmd language PD41 and PD42 Commercial Printer User’s Manual...
-
Page 130: Esim Default Configuration
Parameter Default Value Interface USB Device USB keyboard Network Parameters Parameter Default Value IP selection DHCP+BOOTP IP address Netmask Default router IPv6 selection Auto IPv6 address Nameserver Nameserver6 DHCP response Broadcast MAC address PD41 and PD42 Commercial Printer User’s Manual... - Page 131 Global Ref (R) Testfeed <no value> Power up No motion Head close No motion Print Defs Parameters Parameter Default Value Print speed Print direction Sensor LTS disable Cutter Cut position Comman language ESim PD41 and PD42 Commercial Printer User’s Manual...
- Page 132 Hardware Info Charset Paramters Parameter Default Value Charset Bits Date Time Paramters Parameter Default Value Date Time Hour: Current hour Minute: Current minute Seconds Current second Year Current year Month Current month Current day PD41 and PD42 Commercial Printer User’s Manual...
- Page 133 Appendix B — Default Settings PD41 and PD42 Commercial Printer User’s Manual...
-
Page 134: Fingerprint, Ipl, And Esim Setup Menus
The setup parameters of the printer control the way the printer operates. This chapter provides an overview of the menu structure you can use to configure setup parameters on the PD42 printer. To change the setup parameters on the PD41, see “Configuring the Printer” on page... -
Page 135: Fingerprint Setup Menus
DATA TO HOST: DATA FROM HOST: ENABLE ENABLE Scroll forward Scroll forward Scroll back Scroll back Fingerprint Net-Com, NET1 Menu SETUP: NET-COM, NET1 NET-COM, NET1 NEW LINE NEW LINE: CR/LF BAUDRATE; NEW LINE: PD41 and PD42 Commercial Printer User’s Manual... -
Page 136: Fingerprint Com Menu
NAME SERVER 6: BROADCAST BROADCAST ETHERNET ETHERNET FD::1 FD::1 UNICAST UNICAST WIRELESS 802.11 WIRELESS 802.11 Fingerprint Emulation Menu SETUP: EMULATION EMULATION: EMULATION: MODE ADJUST ADJUST: MODE: DISABLED BASE (mmX10) BAUDRATE; ADJUST: STOP (mmX10) PD41 and PD42 Commercial Printer User’s Manual... -
Page 137: Fingerprint Feedadjust Menu
TESTFEED MODE: SLOW Press <Enter> to per- form a testfeed. Scroll forward CONTRAST: Values are read-only. CONTRAST: Scroll back CONTRAST: CONTRAST: CONTRAST: CONTRAST: +10% CONTRAST: -10% CONTRAST: CONTRAST: CONTRAST: CONTRAST: Scroll forward Scroll back PD41 and PD42 Commercial Printer User’s Manual... -
Page 138: Fingerprint Print Defs Menu
IPL COM Menu SETUP: COM: COM: INTERFACE USB KEYBOARD INTERFACE: USB KEYBOARD: USB DEVICE BAUDRATE; USB KEYBOARD: IEEE 1284 SWEDISH USB KEYBOARD: FRENCH USB KEYBOARD: GERMAN USB KEYBOARD: USER DEFINED Scroll forward Scroll back PD41 and PD42 Commercial Printer User’s Manual... -
Page 139: Ipl Network Menu
MEMORY RESET: LSS AUTO CONFIG: CONFIG: CMD LANGUAGE: CONFIGURATION ESIM CMD LANGUAGE: ZSIM CMD LANGUAGE: Scroll forward Scroll forward LSS AUTO: DSIM CMD LANGUAGE: Scroll back Scroll back FINGERPRINT CMD LANGUAGE: DIRECT PROTOCOL PD41 and PD42 Commercial Printer User’s Manual... -
Page 140: Ipl Media Menu
PRINT SPPED: Scroll forward NONE EMULATION MODE: DISABLE EMULATION MODE: 6 IN/SEC Scroll back 5MIL ENABLE EMULATION MODE: Scroll forward 86XX-10MIL EMULATION MODE: Scroll forward Scroll back 86XX-15MIL Scroll back Scroll forward Scroll back PD41 and PD42 Commercial Printer User’s Manual... -
Page 141: Esim Setup Menus
ESim Com Menu SETUP: COM: COM: INTERFACE USB KEYBOARD INTERFACE: USB KEYBOARD: USB DEVICE BAUDRATE; USB KEYBOARD: IEEE 1284 SWEDISH USB KEYBOARD: FRENCH USB KEYBOARD: GERMAN USB KEYBOARD: USER DEFINED Scroll forward Scroll back PD41 and PD42 Commercial Printer User’s Manual... -
Page 142: Esim Network Menu
ETHERNET FD::1 FD::1 UNICAST UNICAST WIRELESS 802.11 WIRELESS 802.11 ESim Feedadjust Menu SETUP: FEEDADJ FEEDADJ: FEEDADJ: TOP FORM BACKUP TEAR BAR OFFSET TOP FORM BACKUP: TEAR BAR OFFSET: ENABLE TOP FORM BACKUP: DISABLE PD41 and PD42 Commercial Printer User’s Manual... -
Page 143: Esim Media Menu
NETWORK INFO TESTPRINT: BAR CODES #2 ESIM TEST LABEL DSIM TESTPRINT: TESTPRINT: FINGERPRINT DIAMONDS TESTPRINT: TESTPRINT: CHESS TESTPRINT: PICKET BARCODE TESTPRINT: LADDER BARCODE TESTPRINT: SETUP INFO Scroll forward Scroll back <Enter> to print PD41 and PD42 Commercial Printer User’s Manual... -
Page 144: Esim Charset Menu
CODE PAGE ESim Date Time Menu SETUP: DATE TIME DATE TIME: DATE TIME: DATE TIME: DATE TIME: DATE TIME: DATE TIME: HOUR SECONDS YEAR MONTH MINUTE HOUR: SECONDS: YEAR: MONTH: MINUTE: HOUR: 2009 PD41 and PD42 Commercial Printer User’s Manual... - Page 145 Appendix C — Fingerprint, IPL, and ESim Setup Menus PD41 and PD42 Commercial Printer User’s Manual...
-
Page 146: Advanced Configuration
Advanced Configuration This appendix contains information on the printer file system and how to modify the appearance of the printer web page. -
Page 147: Printer File System (Fingerprint)
Directories or files with lowercase names will be inaccessible for Fingerprint commands and programs. Depending on how you choose to navigate the file system on the printer, you will need to use different commands. PD41 and PD42 Commercial Printer User’s Manual... - Page 148 The power fail file system is used to store files that need to be saved at power down. Files stored on this unit cannot exceed the size of 256 bytes each, and the total size of the “pffs” unit is 32 KB. PD41 and PD42 Commercial Printer User’s Manual...
-
Page 149: Customing The Printer Home Page
This process makes the real-time generated pages of the printer appear in the Intermec style. The colors and logo of the customer will be ignored. Web Style Guide Files The printer network cards are prepared for customization of the default web pages in a more permanent way by changing the configuration of the engine that generates the pages. -
Page 150: Content Of A Web Style Guide File
Optional Environment Variables The optional environment variables are used to specify extra parameters; for instance, these variables permit to change the printer’s model name. The web server only recognizes the following model names: • PD41 PD41 and PD42 Commercial Printer User’s Manual... - Page 151 Support link, this is the link associated withe the support tag. suna Support link name, this is the label to be shown on the web page. teco Text color, TEXT attribute of the BODY tag. vlco Visited link color. PD41 and PD42 Commercial Printer User’s Manual...
-
Page 152: X-Www-Url-Encoding Syntax Rules
%<ASCII Hex>. For example, space in the ASCII table has the Hex number 20 so it corresponds to %20. For example, “Intermec Technologies Corporation” corresponds to “Intermec%20Technologies%20Corporation” (it can also be written “Intermec+Technologies+Corporation”). - Page 153 • If variables are specified more than one time, the last value is the one assumed. Intermec recommends that you use the FTP server to transfer the files. Example (the default Web Style Guide): bgco=%23ffffff&loat=src%3d\%22/rom/images/ itclogo1.gif\%22+align%3dbottom+alt%3d\%22Intermec_...
-
Page 154: Index
Index... - Page 155 Extended Testmode Fingerprint using Line Analyzer Com menu, IPL command language changing from web page EAP Type, choosing 802.1x with selecting web page communication settings, Emulation menu, Fingerprint configuring enter Dump mode communications PD41 and PD42 Commercial Printer User’s Manual...
- Page 156 Fingerprint printer Fingerprint IEEE 1284 Com menu interface board accessory configuring wireless security interface, pins and descriptions default configuration Emulation menu IEEE 1284 port, using to connect Feedadjust menu printer to PC PD41 and PD42 Commercial Printer User’s Manual...
- Page 157 IP feed direction, configuring settings loading IPV4 settings, web page description peel-off self-strip IPV6 settings, web page menu, ESim descriptions menu, Fingerprint menu, IPL roll diameter, max and min keyboard settings, configuring PD41 and PD42 Commercial Printer User’s Manual...
- Page 158 PC icons active in each understanding password printers changing with web page accessories home page adjusting Pause, soft key configuring PD41 PD41 and PD42 Commercial Printer User’s Manual...
- Page 159 SmartSystems roll diameter, max and min configuring with web page shield, adjusting Foundation, using to configure tension, adjusting printer width, max and min PD41 and PD42 Commercial Printer User’s Manual...
- Page 160 802.11 kit accessory specifications wireless LAN, configuring from tickets with gaps, media web page specifications wireless security troubleshooting configuring from web page communication problems configuring with Fingerprint printer configuring with IPL PD41 and PD42 Commercial Printer User’s Manual...
- Page 161 Index configuring with Fingerprint configuring with IPL WPA2 configuring with Fingerprint configuring with IPL WPA2-PSK configuring with Fingerprint configuring with IPL WPA-PSK configuring with Fingerprint configuring with IPL ZSim, language description PD41 and PD42 Commercial Printer User’s Manual...
- Page 163 Worldwide Headquarters 6001 36th Avenue West Everett, Washington 98203 U.S.A. tel 425.348.2600 fax 425.355.9551 www.intermec.com © 2010 Intermec Technologies Corporation. All rights reserved. PD41 and PD42 Commercial Printer User’s Manual *935-032-002* P/N 935-032-002...