Intermec EasyCoder PD41 User Manual
Intermec easycoder pd41: user guide
Hide thumbs
Also See for EasyCoder PD41:
- Manual (163 pages) ,
- Service manual (110 pages) ,
- Programmer's manual (38 pages)
Table of Contents
Advertisement
Quick Links
Advertisement
Table of Contents
Troubleshooting

Related Manuals for Intermec EasyCoder PD41


Summary of Contents for Intermec EasyCoder PD41
- Page 1 User’s Guide EasyCoder® PD41 Printer...
- Page 2 Intermec Technologies Corporation. © 2005, 2006 by Intermec Technologies Corporation. All rights reserved. The word Intermec, the Intermec logo, Norand, ArciTech, CrossBar, Data Collection Browser, dcBrowser, Duratherm, EasyADC, EasyCoder, EasyLAN,...
-
Page 3: Table Of Contents
......1 Description of EasyCoder PD41 ..... .2 Unpacking the Printer . - Page 4 Extended Testmode ..... . . 47 Upgrading Firmware......51 EasyCoder PD41 Printer User’s Guide...
- Page 5 About Test labels ......80 Serial Communication Setup ..... . .80 EasyCoder PD41 Printer User’s Guide...
- Page 6 Printhead Kit ........96 EasyCoder PD41 Printer User’s Guide...
-
Page 7: Before You Begin
Intermec equipment. You can be seriously injured, and equipment and data can be damaged if you do not follow the safety warnings and cautions. Be sure to read the EasyCoder PD41 Safety Instructions, where the basic safety precautions regarding the operation of the PD41 are described and illustrated. -
Page 8: Global Services And Support
Before You Begin Global Services and Support Warranty Information To understand the warranty for your Intermec product, visit the Intermec web site at www.intermec.com and click Service & Support. The Intermec Global Sales & Service page appears. From the Service & Support menu, move your pointer over Support, and then click Warranty. -
Page 9: Who Should Read This Manual
EasyCoder PD41 Printer. This User’s Guide provides you with information about the features of the EasyCoder PD41, and how to install, configure, operate, maintain, and troubleshoot it. Related Documents This table contains a list of related Intermec documents and their part numbers. - Page 10 2 Click Service & Support > Manuals. 3 In the Select a Product field, choose the product whose documentation you want to download. To order printed versions of the Intermec manuals, contact your local Intermec representative or distributor. EasyCoder PD41 Printer User’s Guide...
-
Page 11: Getting Started
Getting Started This chapter introduces the EasyCoder PD41, and explains how to get your new printer connected to your system and print a test label. The chapter covers the following topics: • Description of the EasyCoder PD41 • Installing the Printer... -
Page 12: Description Of Easycoder Pd41
The EasyCoder PD41 supports Intermec Fingerprint (FP v10.X.X) as well the Intermec Programming Language (IPL v10.X.X). The printer is also designed to work with the Intermec Direct Protocol programming language (a slave protocol, subset of Fingerprint), the Intermec InterDriver and Intermec LabelShop. - Page 13 3 Check to make sure any options you ordered are included. 4 In addition to the options you may have ordered, the box should contain the following: 1 – Intermec EasyCoder PD41 printer 2 – One or more country-specific power cords 3 – USB cable 4 –...
-
Page 14: Product Identification
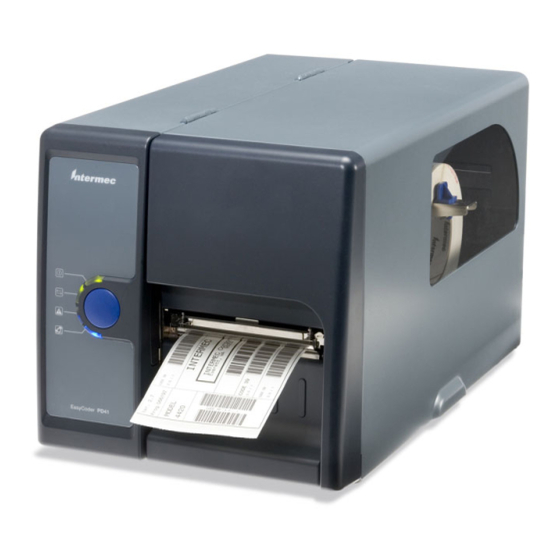
The machine and serial number labels are attached to the printer’s rear plate, and contain information on type, model and serial number as well as AC voltage and frequency. Front View Side door Control LEDs Print Button EasyCoder PD41: Front view EasyCoder PD41 Printer User’s Guide... -
Page 15: Controls And Indicators
A more complete description of the LEDs can be found in Chapter 2. Control LEDs LED name Light Color Symbol Function Power Green Power indicator. Ready/Data Green Printer ready. Error Error indicator. Ready-to-Work Blue Intermec Ready-to-Work ™ ™ indicator. EasyCoder PD41 Printer User’s Guide... -
Page 16: Rear View
EasyCoder PD41: Rear View Connectors Ethernet RJ-45 connector USB port MAC address label Serial RS-232 port Parallel IEEE 1284 port Compact Flash slot Power On/Off switch AC power cord socket Rear view: Connection sockets EasyCoder PD41 Printer User’s Guide... -
Page 17: Media Compartment
Media supply post Ribbon supply shaft Ribbon rewind shaft EasyCoder PD41: Media Compartment Print Mechanism Ribbon Label taken sensor Media feed rods Printhead Printhead balance boxes Tear bar lever Thermal printhead EasyCoder PD41: Print Mechanism EasyCoder PD41 Printer User’s Guide... -
Page 18: Installing The Printer
Fingerprint and IPL Your PD41 printer is equipped with Fingerprint or IPL (Intermec Programming Language) firmware. This affects the functionality of the printer and, to a certain extent, how you interact with it. In this manual you will come across information... -
Page 19: Connecting The Printer To Your System
Chapter 1 — Getting Started Connecting the Printer to your System The EasyCoder PD41 is fitted with a USB Type B connector for the USB interface port and one 9-pin D-style subminiature (DB9) socket for the RS-232 serial interface port. In addition to... -
Page 20: Connecting The Printer Through The Parallel Port
Fingerprint command. See “Changing Configuration Settings” on SETUP page 44, or refer to the Intermec Fingerprint v10.X.X Programmer’s Reference Manual. IPL users should turn to the EasyLAN Software for PD41 Installation Instructions for information on how to manually configure the network connection. - Page 21 Error Tickets with black mark Ready-to-Work Blue Continuous stock The printer will print several test labels containing the printer’s setup parameters. It will then enter Dumpmode. 6 Press the Print button once to exit Dumpmode. EasyCoder PD41 Printer User’s Guide...
- Page 22 Chapter 1 — Getting Started EasyCoder PD41 Printer User’s Guide...
-
Page 23: Operating The Printer
LEDs and the Print button. This chapter covers the following topics: • Loading Media • LED indicators and the Print button EasyCoder PD41 Printer User’s Guide... -
Page 24: Loading Media
Chapter 2 — Operating the Printer Loading Media The EasyCoder PD41 can print on labels, tickets, tags and continuous stock in various formats. Tear-Off (straight-through) Operation This section describes the case when media is torn off manually against the printer’s tear bar. This method is also known as “straight-through”... - Page 25 Lift the label feed guide. Load a media roll onto the media supply hub, pushing it all the way in. Lock the position of the media roll Guide the media through the rods. with the media edge guide. EasyCoder PD41 Printer User’s Guide...
- Page 26 Reset the label feed guide and the Close the side door. Press the Print printhead lever. button to advance the media. EasyCoder PD41 Printer User’s Guide...
-
Page 27: Peel-Off (Self-Strip) Operation
Only self-adhesive labels with liner can be used in peel-off operation. Peel-Off Remove the front cover. Open the cover, mount the media roll, and route the media through the media feed rods. EasyCoder PD41 Printer User’s Guide... - Page 28 Route the liner through the print Wrap the liner on the liner takeup roll mechanism and back as shown and lock it in place. above. Reset the label feed guide and the Reattach the front cover. printhead lever. EasyCoder PD41 Printer User’s Guide...
- Page 29 Peel-Off, continued Push in the location indicated above Turn the Label-Taken Sensor (LTS) to a to bring out the label-taken sensor. fully horizontal position. Close the side door. Press the Print button to feed the media. EasyCoder PD41 Printer User’s Guide...
-
Page 30: Loading Thermal Transfer Ribbon
Make sure to select a ribbon type that matches the type of receiving material and set up the printer accordingly. The EasyCoder PD41 can use transfer ribbon rolls wound with the ink-coated side facing either outward or inward. - Page 31 In case you are using ink-in ribbon, Move the ink-position lever to the left route the ribbon as shown in this for ink-out ribbon, and to the right for figure. ink-in ribbon. EasyCoder PD41 Printer User’s Guide...
- Page 32 Chapter 2 — Operating the Printer Loading Ribbon, continued Reset the printhead lever to its original position. Close the side door. EasyCoder PD41 Printer User’s Guide...
-
Page 33: Led Indicators And The Print Button
Testmode or Extended Testmode, see “Running Testmode” in Chapter 5. The red Error LED will be lit or flash when an error condition has occured. This will also cause the Ready-to-Work LED to flash or turn off. EasyCoder PD41 Printer User’s Guide... -
Page 34: Print Button
Direct Protocol error handler. Print Button The Print button has different functionality depending on the printer’s state. Different actions can be specified by pressing the button less than and more than one second respectively. EasyCoder PD41 Printer User’s Guide... - Page 35 Continuous feed Enter Pause while button is mode pressed Application Defined by application running Printing Pause print job Paused (FP) Continue print job Cancel print job Paused (IPL) Continue print job Error See Chapter 4, “Troubleshooting” EasyCoder PD41 Printer User’s Guide...
- Page 36 Chapter 2 — Operating the Printer EasyCoder PD41 Printer User’s Guide...
-
Page 37: Maintaining The Printer
This chapter covers the following topics: • General Maintenance Advice • Printhead Cleaning • Internal Cleaning • External Cleaning EasyCoder PD41 Printer User’s Guide... -
Page 38: General Maintenance Advice
Chapter 3 — Maintaining the Printer General Maintenance Advice In order to attain optimal productivity and a long life for your EasyCoder PD41, it is recommended that you regularly inspect the printer and its operation environment to ensure the printer is operated correctly. -
Page 39: Internal Cleaning
External Cleaning Making sure to keep the printer clean externally will reduce the risk of dust or foreign particles reaching the inside of the printer and affect printer functionality. EasyCoder PD41 Printer User’s Guide... - Page 40 If the printer is used in an environment where the premises are cleaned by a water hose or steam, move the printer to another room or cover it very carefully with a plastic sheet and make sure that the power cord is unplugged. EasyCoder PD41 Printer User’s Guide...
-
Page 41: Troubleshooting
Troubleshooting This chapter helps to diagnose problems that may occur during printer operation and how to resolve them. This chapter covers the following topics: • Printer Operation Problems • Print Quality Problems • Troubleshooting Adjustments EasyCoder PD41 Printer User’s Guide... -
Page 42: Printer Operation Problems
• Check that media is loaded correctly. rewinder, abnormal function occurs. Printer keeps printing or • Check media settings. feeding when it should • Check label gap sensor position. stop. • Sensors may be dirty. Printing is slow. • Check application. EasyCoder PD41 Printer User’s Guide... -
Page 43: Print Quality Problems
• Check the lateral position of label gap sensor. • Check the edge guide and media guide. • Check the media (insufficient transparency, interfering preprint lines in black mark operation, etc.) • Check if platen roller needs cleaning or replacement. EasyCoder PD41 Printer User’s Guide... -
Page 44: Ready-To-Work™ Indicator
The follwing two procedures can solve ribbon wrinkling problems. Ribbon Tension Adjustment 1 Push the knob on the ribbon supply hub. 2 Rotate it clockwise to increase breaking force or counterclockwise to decrease breaking force. Ribbon tension adjustment EasyCoder PD41 Printer User’s Guide... -
Page 45: Clearing Media Jams
3 Pull out the media from the print mechanism. If the media has been wound up or is stuck on the platen roller, carefully remove it by hand without using any sharp EasyCoder PD41 Printer User’s Guide... -
Page 46: Printhead Adjustments
3 Lift the printhead by pulling the printhead lever out and flipping it a quarter of a turn counterclockwise. 4 Move the balance box on the right side (outer) top the right (outward) for wider media, and inwards (to the left) for narrower media. EasyCoder PD41 Printer User’s Guide... - Page 47 4 Use a straight-slot screwdriver to turn the screw at the top of the balance boxes clockwise to increase the pressure, or counterclockwise to decrease the pressure. EasyCoder PD41 Printer User’s Guide...
-
Page 48: Adjusting Printhead Dot Line
5 Carefully turn both screws at the front of the printhead clockwise a quarter of a turn at a time (a full turn corresponds to 0.55 mm, which is a lot). Make sure to make identical adjustments on both screws. If you are unsure, EasyCoder PD41 Printer User’s Guide... -
Page 49: Label Gap Sensor Adjustments
Adjusting Label Gap Sensor Position 1 Use the lever at the rear side of the print mechanism to move the sensor inward or outward. EasyCoder PD41 Printer User’s Guide... - Page 50 Chapter 4 — Troubleshooting Sensor lever 2 Check the point of detection from the front (with the printhead lifted.) Point of detection EasyCoder PD41 Printer User’s Guide...
-
Page 51: Setting Up The Printer
Setting up the Printer The EasyCoder PD41 has many settings that control printer operation, communication settings, media types and more. This chapter describes the printer’s startup sequence and explains how to set or change setup parameters. It also includes a description of the two Testmodes available, and a guide on firmware upgrading. -
Page 52: The Printer Startup Sequence
It is recommended to start custom applications by writing the name of the desired program (“ProgramName.PRG”) in the APPLICATION file in “c/”. See the Intermec Fingerprint v10.0.0 Programmer’s Reference Manual to learn how to edit and save a file to the printer. - Page 53 3 Check to see if button is pressed. If so, go to Testmode. 4 Continue Power-Up. Run a testfeed. The process of entering and using Testmode and Extended Testmode is described later in this chapter. EasyCoder PD41 Printer User’s Guide...
-
Page 54: Changing Configuration Settings
You will find PrintSet 4 on the Printer Companion CD, and on the Intermec website. This printer configuration program works on computers equipped with Windows 98 and up, and allows you to easily change all of the setup parameters. -
Page 55: Running Testmode
Testmode which will go through a sequence of actions; these can be controlled by pressing the Print button at the cue of different LED flash patterns. The sequence of steps in testmode is shown in the tables below: EasyCoder PD41 Printer User’s Guide... - Page 56 Testmode: Printing Test Labels Data/ Step Ready Error Button Comment The printer will then print four test labels after the testfeed in step 4. To skip any test labels tap the button. EasyCoder PD41 Printer User’s Guide...
-
Page 57: Extended Testmode
Press and hold the Print button and switch the printer On. Extended Testmode is activated after 10 seconds. flash flash flash All 3 LEDs flash rapidly four times. Extended Testmode is activated. Release button to continue. EasyCoder PD41 Printer User’s Guide... -
Page 58: Low
Tap the Print button to start Testfeed (Mode slow). Test label is printed. LEDs flash once per second. Press Print button and hold it to exit Test Label function and return to Step 6. EasyCoder PD41 Printer User’s Guide... - Page 59 Lift the printhead, tap the Print button, and lower the printhead. LEDs will flash. Tap the button. Printer will start resetting to factory defaults. This is indicated by scrolling LEDs. LED flashes once per second, indicating factory default reset is done. EasyCoder PD41 Printer User’s Guide...
- Page 60 (out of Testfeed mode.) Extended Testmode: 7e - Exit Data/ Step Ready Error Button Comment LEDs flash once per second. Tap the Print button to exit Extended Testmode. The LEDs flash rapidly, and printer is ready for use. EasyCoder PD41 Printer User’s Guide...
-
Page 61: Upgrading Firmware
1 Visit the Intermec web site at www.intermec.com. 2 Click Service & Support > Downloads. 3 In the Select a Product field, choose the EasyCoder PD41 and you will be presented with the latest software available. 4 Download the latest firmware version to your computer. - Page 62 Chapter 5 — Setting up the Printer EasyCoder PD41 Printer User’s Guide...
-
Page 63: Technical Data
Technical Data This Appendix lists technical specifications for the EasyCoder PD41. The appendix contains: • Table of Printer Specifications EasyCoder PD41 Printer User’s Guide... -
Page 64: Printer Specifications
406.4 mm (16 in.) Modes of Operation Tear-Off (Straight- through) Cut-off Option with cutter Peel-Off (self-strip) Option with internal rewinder Firmware (Fingerprint) Operating System Fingerprint v10.0.X Includes Direct Protocol Smooth Fonts TrueType and TrueDoc fonts EasyCoder PD41 Printer User’s Guide... -
Page 65: Standard
Ribbon width 30 to 110 mm (1.18 to 4.33 in.) Ribbon Roll Diameter 76 mm (2.99 in.) equivalent to 450 meters (outer) (1471 ft) of ribbon. Inner core Diameter 25.2 to 25.6 mm (1 in.) EasyCoder PD41 Printer User’s Guide... - Page 66 4 MB Flash, 8 MB SDRAM. Interfaces RS-232 Serial Ethernet Yes/Option IEEE 1284 Parallel Yes/Option CompactFlash Accessories and Options Internal Rewinder and Batch Takeup Cutter Printhead 203/300 dpi EasyLAN Ethernet Interface Parallel IEEE 1284 Interface EasyCoder PD41 Printer User’s Guide...
-
Page 67: Media Specifications
This appendix illustrates the different media types the EasyCoder PD41 can operate with, and states the allowed dimensions of the paper, ribbon and rolls. This appendix covers the following topics: • Media Roll Sizes • Paper Types and Sizes EasyCoder PD41 Printer User’s Guide... -
Page 68: Media Roll Sizes
60 to 250 μm Thickness 2.3 to 9.8 mils Thicker media may be used, but print quality will be reduced. the stiffness is also important, and must be balanced against thickness to maintain print quality. EasyCoder PD41 Printer User’s Guide... -
Page 69: Ribbon Size
The core of the ribbon must be 25.2-25.6 mm (1 inch), as the empty ribbon core included in the box. The outer dimensions of the ribbon roll may be: Max. diameter 76 mm 2.99 inches Max. width 110 mm 4.33 inches Min. width 30 mm 1.18 inches EasyCoder PD41 Printer User’s Guide... -
Page 70: Paper Types And Sizes
Appendix B — Media Specifications Paper Types and Sizes Non-Adhesive Strip a: Media Width Maximum: 118.0 mm 4.65 inches Minimum: 25.0 mm 1.00 inches Paper Type Setup • Variable length strip • Fixed length strip NON-ADHESIVE STRIP Non-adhesive strip EasyCoder PD41 Printer User’s Guide... -
Page 71: Self-Adhesive Strip
1.6 mm (0.06) inches outside the face material. c: Media Width (excluding liner) Maximum: 116.4 mm 4.58 inches Minimum: 23.8 mm 0.94 inches Paper Type Setup • Variable length strip • Fixed length strip SELF-ADHESIVE STRIP Self-adhesive strip EasyCoder PD41 Printer User’s Guide... -
Page 72: Self-Adhesive Labels
The Label Gap sensor must be able to detect the front edges of the labels. It can be moved 0 to 57 mm (0 to 2.24 inches) from the inner edge of the media. Paper Type Setup • Labels with Gaps EasyCoder PD41 Printer User’s Guide... - Page 73 Appendix B — Media Specifications SELF-ADHESIVE LABELS FEED DIRECTION Self-adhesive Labels EasyCoder PD41 Printer User’s Guide...
-
Page 74: Tickets With Gaps
3.0 mm 0.12 inches Paper Type Setup • Tickets with Gaps Note: Do not allow any perforation to break the edge of the media as this may cause the media to split and jam the printer. EasyCoder PD41 Printer User’s Guide... - Page 75 Appendix B — Media Specifications TICKETS & TAGS FEED DIRECTION Tickets with Gaps EasyCoder PD41 Printer User’s Guide...
-
Page 76: Tickets With Black Mark
It is recommended that you place the black mark as close to the front edge of ticket as possible and use a negative Stop Adjust value to control the media feed, so the tickets can be properly torn off. Paper Type Setup • Tickets with Mark EasyCoder PD41 Printer User’s Guide... - Page 77 Do not allow any perforations to break the edge of the media as this may cause the media to split and jam the printer. TICKETS WITH MARKS FEED DIRECTION Tickets with Black Mark EasyCoder PD41 Printer User’s Guide...
- Page 78 Appendix B — Media Specifications EasyCoder PD41 Printer User’s Guide...
-
Page 79: Setup Parameters (Fingerprint)
This appendix lists all of the setup parameters that you can configure to fit your operating environment. This appendix covers the following topics: • Setup Description • Serial Communication Setup • Feed Adjust Setup • Media Setup • Print Definitions Setup EasyCoder PD41 Printer User’s Guide... -
Page 80: Setup Description
Baud Rate The baud rate is the transmission speed in bits per second. There are 10 options: • 300 • 600 • 1200 • 2400 • 4800 • 9600 (default) • 19200 • 38400 • 57600 EasyCoder PD41 Printer User’s Guide... -
Page 81: High
Eight bits are recommended, since that option allows more special characters and characters that are used exclusively in foreign languages. Refer to the Intermec Fingerprint v10.X.X, Programmer’s Reference Manual for more information. • 7 (Characters ASCII 000 to 127 decimal) •... -
Page 82: Feed Adjust Setup
Default value is 0, which places the origin a certain distance back from the forward edge of the copy. • A positive start adjustment means that the specified length of media will be fed out before the printing starts. Thus, the EasyCoder PD41 Printer User’s Guide... -
Page 83: Media Setup
By increasing the value for the X-start parameter, the origin will be moved outwards, away from the inner edge of the media path. In other words, the larger X-start value, the wider inner margin and the less available print width. EasyCoder PD41 Printer User’s Guide... - Page 84 Any object or field extending outside the print window in any direction will either be clipped or cause an error condition (Error 1003 “Field out of label”), see Intermec Fingerprint v10.xx, Programmer’s Reference Manual. EasyCoder PD41 Printer User’s Guide...
- Page 85 It is important to select the correct media type, so the printer can communicate the following errors. • Error 1005 “Out of paper” indicates that the last ordered copy could not be printed because of an empty media stock. EasyCoder PD41 Printer User’s Guide...
-
Page 86: Paper Type
Labels, tickets, tags, strip, and ribbons for various types of application are available from Intermec. To attain optimal printout quality and extending the life of the printhead, use Intermec supplies. Heat setting recommendations for Intermec media can be found from the Intermec website: www.intermec.com/eprise/main/Intermec/Content/Products/... -
Page 87: Thermal Transfer Printing
The receiving material has been excluded from this table, since the ribbon has the largest impact for heat settings for thermal transfer settings. Use the above settings as initial values, and adjust the Ribbon Constant if necessary. EasyCoder PD41 Printer User’s Guide... -
Page 88: Contrast
50-150 mm/s (2-6 ips) for the 203dpi printhead and 50-100 mm/s (2-4 ips) for the 300 dpi printhead. Default is 100 mm/s (4 ips) and 75 mm/s (3 ips) for 203 and 300 dpi printheads respectively. EasyCoder PD41 Printer User’s Guide... -
Page 89: Setup Parameters (Ipl)
This appendix lists all of the setup parameters that you can configure to fit your operating environment. This appendix covers the following topics: • Setup Description • Serial Communication Setup • Media Setup • Configuration Setup • Returning to Factory Default Setup EasyCoder PD41 Printer User’s Guide... -
Page 90: Setup Description
Baud Rate The baud rate is the transmission speed in bits per second. There are 10 options: • 1200 • 2400 EasyCoder PD41 Printer User’s Guide... - Page 91 • None (default) • Even • Odd • Space Stop Bits The number of stop bits specifies how many bits will define the end of a character. There are two options: • 1 (default) • 2 EasyCoder PD41 Printer User’s Guide...
- Page 92 Label skipping Printing Intermec Standard Protocol The Intermec Printer Standard Protocol is a half-duplex protocol. All data transmissions to the printer consist of status inquiry (ENQ), status dump (VT), or message blocks. Each message block starts with the Start of Text (STX) character and ends with the End of Text (ETX) character.
-
Page 93: Media Setup
Default. • Mark is used for labels, tickets, or strip provided with black marks at the back. • Continuous is used for continuous stock without any detection slots or black marks. EasyCoder PD41 Printer User’s Guide... - Page 94 Standard supplies from Intermec are labeled with a 3-digit media sensitivity number which is used to specify the media grade. Look for the media sensitivity number on: •...
- Page 95 The default sensitivity number is 420 for direct thermal printing and 567 for thermal transfer printing. Note: A list of Sensitivity numbers for different ribbon and media types can be found on the Intermec website. Go to www.intermec.com. Choose Products > Printers, and click Heat settings.
-
Page 96: Configuration Setup
To make the printer work in Peel off (self-strip) mode, that is, waiting for a label to be removed before the next label is printed, the self-strip mode must be enabled. This can be done by executing the following commands: EasyCoder PD41 Printer User’s Guide... -
Page 97: Returning To Factory Default Setup
Disable self-strip <STX><SI>t0<ETX> Enable self-strip <STX><SI>t1<ETX> Returning to Factory Default Setup You can restore all the printer’s default settings in extended testmode (see page 47), or by using the Factory Default Wizard in PrintSet 4. EasyCoder PD41 Printer User’s Guide... - Page 98 Appendix D — Setup Parameters (IPL) EasyCoder PD41 Printer User’s Guide...
-
Page 99: Interfaces
Interfaces This appendix describes the default interfaces, as well as the optional kits that add functionality to your EasyCoder PD41. This appendix covers the following topics: • RS-232 Serial Interface • USB Interface • EasyLAN Ethernet Interface (Option) • Parallel IEEE 1284 Interface (Option) -
Page 100: Rs-232 Serial Interface
The printer end is a DB-9pin plug, as shown below. RS-232 DB9-pins Signals on the printer’s serial port: DB-9 Signal Meaning External +5V DC Max 500mA Transmit data Receive data Ground Clear to send Request to send EasyCoder PD41 Printer User’s Guide... -
Page 101: Usb Interface
Intermec USB printer to a host, you should use different USB ports. The USB cable included with the EasyCoder PD41 has a USB Type A connector on one end to connect to a PC, and a USB TypeB connector to connect to the printer. -
Page 102: Easylan Ethernet Interface
The parallel port supports Windows plug-n-play and additional status reporting through IEEE 1284 nibble ID mode. Interface cable Parallel cable compatible with PC. Pinout Description Function Transmitter Comment nStrobe host Data 0-7 host nAcknowledge printer Busy printer Perror printer Select printer EasyCoder PD41 Printer User’s Guide... - Page 103 Appendix E — Interfaces Pinout Description Function Transmitter Comment nAutoFd 15-16 Not connected Chassis ground External +5V DC Max 500mA 19-30 Signal ground nInit nFault printer Signal ground 34-35 Not connected nSelectln EasyCoder PD41 Printer User’s Guide...
- Page 104 Appendix E — Interfaces EasyCoder PD41 Printer User’s Guide...
-
Page 105: Options
Options This appendix describes the options that add functionality to your EasyCoder PD41 Printer. For a complete description and installations instructions, see the respective installation instructions document for each kit. Please note that several of these options can only be factory-fitted or installed by an authorized service technician. -
Page 106: Easylan Ethernet Interface
The printer can be fitted with either a 203dpi or 300dpi printhead. These printheads use different PCBs (printed circuit board?). The printhead kit is thus available as a replacement kit (printhead only), or as a complete kit (printhead plus PCB). EasyCoder PD41 Printer User’s Guide... - Page 107 Appendix F — Options EasyCoder PD41 Printer User’s Guide...
- Page 108 Corporate Headquarters 6001 36th Avenue West Everett, Washington 98203 U.S.A. tel 425.348.2600 fax 425.355.9551 www.intermec.com EasyCoder PD41 Printer User’s Guide *1-960652-01* P/N 1-960652-01...