Table of Contents
Advertisement
Advertisement
Table of Contents

Related Manuals for Breville twin paddle


Summary of Contents for Breville twin paddle
- Page 2 product safety READ CAREFULLY AND KEEP FOR FUTURE REFERENCE This product can be used by children aged 8 years and above, and persons who require supervision, provided: • they are familiar with the hazards associated with the product, and, • they receive instruction by a competent person on how to safely use the product.
-
Page 3: Before First Use
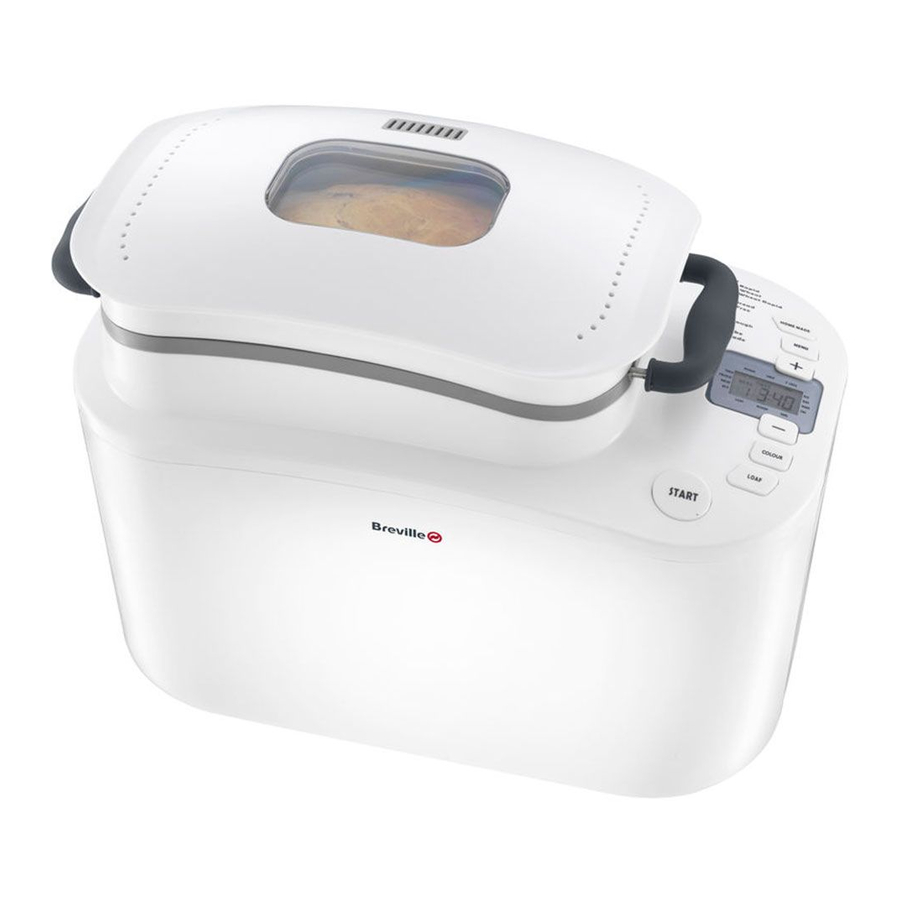
before first use Do not immerse the bread maker or power cord and plug in water or any other liquid. Before using your breadmaker for the first time, wash the inside of the bread pan and the kneading paddles with hot, soapy water. Rinse and dry thoroughly. Using a damp cloth or sponge, wipe the interior of the breadmaker, the inside of the lid and the exterior of the breadmaker. - Page 4 features Viewing window Allows you to check on the progress of your bread during ccoking. Bread pan handles Cool touch bread pan handles make the bread pan easy and safe to fit and remove. Control buttons and LCD display Body Kneading/mixing paddle (x 2) Twin kneading/mixing paddles for optimum performance.
- Page 5 Due to our policy of continuous improvement, the actual product may differ slightly from the one illustrated in these instructions.
-
Page 6: Control Panel And Display
control panel and display HOME MADE button Allows you to program your own bread recipes. MENU button Selects one of the preset cooking programs. + button Allows you to increase times and temperatures when you are programming the Home Made recipe feature. Also used in conjunction with the – button to set a delay time period if you don’t want your breadmaker to start cooking immediately. - Page 7 MENU MEDIUM LARGE X LARGE TIMER RISE TIMER MENU BAKE PREHEAT WARM KNEAD REST LIGHT MEDIUM DARK LOAF Selected loaf size MEDIUM LARGE X LARGE RISE TIMER TIMER MENU BAKE PREHEAT WARM KNEAD REST LIGHT MEDIUM DARK Total cooking time remaining Selected crust colour Selected program Current program stage...
- Page 8 control panel and display START This button is used for starting and stopping the selected program. To start a program, press the START button once. A short beep will sound, the colon (:) in the time display will flash and the program will start. All the other buttons on the control panel will be deactivated except the START button when the program has begun.
- Page 9 COLOUR The colour button allows you to select the colour of the loaf’s crust. Choose from LIGHT, MEDIUM or DARK. The default crust colour is medium. The selected crust colour will be indicated on the display. LOAF This button allows you to choose from a MEDIUM (900g), LARGE (1.2kg) or X LARGE (1.4kg) loaf.
- Page 10 using your bread maker Never exceed the maximum capacity of your bread maker (1.5kg). Place your bread maker away from direct sunlight, draughts, or heating appliances and radiators. These can adversely affect the operation of your bread maker and spoil the results.
- Page 11 LOAF...
-
Page 12: Using The Delay Timer
using your bread maker Using the delay timer If you are using the breadmaker in hot or humid weather with a delay time greater than 2 hours, there is a danger of the bread rising too quickly. To prevent this, reduce the liquid by one or two tablespoons, increase the salt by ⅛ to ¼ of a teaspoon and reduce the sugar by up to one half of the amount indicated in the recipe. - Page 13 using the home made feature The Home Made feature allows you to create your very own bread making programs. A bread making program consists of 15 programmable steps. You can program each step and control precisely what your bread maker does. Once you have created your own program it will stay in your bread maker’s memory until you change it in some way (e.g.
- Page 14 using the home made feature 4. Press the MENU button once to move on to step 2 (1st kneading cycle time). Use the + or – buttons to enter 5. Maximum time you can enter is 10 minutes. 5. Press the MENU button once to move on to step 3 (rest period time). Use the + or – buttons to enter 3.
- Page 15 Notes You can use the MENU button during programming (and before you press the HOME MADE button at step 18) to step through and check each stage of your program. If you want to change any step in your program before you have finished programming, use the MENU button to go to that step then make your change.
- Page 16 program times Menu (Program) Description MEDIUM (900g) Number LIGHT MEDIUM DARK White 3:25 3:30 3:35 White Fast Bake Whole-wheat 3:55 4:00 4:05 Whole-wheat Fast Bake Crusty White 4:05 4:10 4:20 Sweet Bread 3:15 3:19 3:23 Gluten Free 2:45 Cake Total cooking time 1:30 Dough Total processing time 1:30 Pasta Dough...
- Page 17 LARGE (1.2kg) X LARGE (1.4kg) Keep warm Timer Delay LIGHT MEDIUM DARK LIGHT MEDIUM DARK 3:30 3:35 3:40 3:35 3:40 3:45 60 min 1:20 60 min 4:05 4:10 4:15 4:10 4:15 4:20 60 min 1:35 60 min 4:10 4:15 4:25 4:15 4:20 4:30...
-
Page 18: Hints And Tips
hints and tips General If your bread isn’t coming out the way you like, try changing the recipe slightly. Don’t be afraid to experiment and before long you’ll be baking perfect loaves each and every time. Always add the ingredeients in the order shown in the recipe. It’s important to keep the yeast away from the liquids. -
Page 19: Slicing Bread
Freshness Ensure all ingredients are fresh and used before the specified use-by-date. Avoid using perishable ingredients such as milk, yoghurt, eggs or cheese with the time delay function. Store dry ingredients in airtight containers, to prevent drying out. Slicing Bread For best results, wait at least 10 minutes before slicing, as the bread needs time to cool. - Page 20 ingredients used in bread making Yeast Yeast is a vital ingredient when bread making, without it the bread will not rise. Your bread maker maintains the optimum temperature for the yeast to take effect, during the bread making process. Only use dried yeast that is suitable for bread making machines. Some yeast may require the use of a bread improver.
- Page 21 recipes Important note If your bread isn’t coming out the way you like, try changing the recipe slightly. Don’t be afraid to experiment and before long you’ll be baking perfect loaves each and every time. Always place the ingredients into the bread pan in the order listed in the recipe. Keep the yeast away from the liquid and salt.
- Page 22 recipes Sundried Tomato and Parmesan bread - Program 1 Water (tepid) 310ml Oil (from the sun dried tomatoes) 1½ tsp Salt 1 tsp Sugar 1 tbsp Parmesan cheese (finely grated) Strong white bread flour 525g Wholemeal bread flour Dried yeast 1 tsp Sun dried tomatoes, drained and roughly chopped...
- Page 23 Whole-wheat Bread - Program 3 MEDIUM LARGE X LARGE Water (tepid) 380ml 410ml 530ml 2 tbsp 2 tbsp 3 tbsp Salt 1 tsp 1½ tsp 2 tsp Sugar 2 tbsp 2½ tbsp 3 tbsp Dried milk powder 1½ tbsp 2 tbsp 2½...
- Page 24 recipes Crusty White Bread - Program 5 MEDIUM LARGE X LARGE Water (tepid) 300ml 375ml 410ml Olive oil 1 tbsp 1½ tbsp 2 tbsp Salt 1½ tsp 1½ tsp 2 tsp Sugar 2 tbsp 2¼ tbsp 2½ tbsp Strong white bread flour 400g 500g 600g...
- Page 25 Fruit Loaf - Program 6 Water (tepid) 375ml Margarine 2 tbsp Strong white bread flour 440g Dried milk powder 2 tbsp Sugar 2½ tbsp Salt 1½ tsp Mixed spice 1½ tsp Dried yeast 2 tsp Dried fruit 110g Add the mixed fruit when your bread maker beeps (2:45) Gluten Free - Program 7 Milk 310ml...
- Page 26 recipes Citrus Sponge Cake - Program 8 Butter, softened 200g Caster sugar 200g Eggs (medium, beaten) Self raising flour 200g Baking powder 1 tsp Orange 1 (zest only) Lemon 1 (zest only) Sticky Gingerbread Cake - Program 8 Demerara sugar Butter Melt together and add to the pan...
- Page 27 Rich Fruit Cake - Program 8 In this recipe, the dry ingredients are mixed together in a bowl before adding to the bread pan, then the wet ingredients are added. Eggs (medium, beaten) Melted butter 100g Vanilla/almond extract A few drops Mixed fruit 275g Chopped dates...
- Page 28 recipes Garlic and Coriander Naan Bread - Program 9 Milk, warm 130ml Olive oil 2 tbsp Salt 1 tsp Ground cumin 2 tsp Ground coriander 2 tsp Garlic 2 cloves, crushed Strong plain white flour 300g Dried yeast 1 tsp Pre-heat the oven to 210ºC.
- Page 29 Strawberry Jam - Program 11 Strawberries, washed hulled and halved 300g Jam sugar 260g Lemon juice 2 tbsp Our jam recipe uses jam sugar which is readily available in most good supermarkets. Jam sugar contains pectin which allows jams and jellies made using soft fruits to set successfully.
- Page 30 recipes Chunky Tomato and Apple Chutney - Program 13 (Home Made) Tomatoes, skinned and coarsely chopped Apples, finely grated Onion, finely chopped Cider vinegar 150ml Jam sugar 350g Mixed raisins and sultanas Salt 1½ tsp Ground black pepper ½ tsp Mustard powder ½...
- Page 31 Step Function Value Preheat time 15 mins 1st kneading cycle time 10 mins Rest period time 5 mins 2nd kneading cycle time 5 mins 1st rise cycle time 0 mins 3rd kneading cycle time 0 mins 2nd rise cycle time 0 mins 4th kneading cycle time 0 mins...
-
Page 32: Troubleshooting
troubleshooting Dough does not rise enough • Liquids are too hot (above 105°F/40°C). • Inactive yeast or not enough yeast. • Ingredients are too cold. • Too much salt. Salt can be used to control the effect of the yeast within the dough. Too much salt may make the yeast inactive. - Page 33 troubleshooting Sticky bread which slices unevenly • Always use a serrated bread knife. • Allow bread to cool longer before slicing. Bread shape and height varies with each use • Ensure accurate measurement of ingredients. • Room temperature and length of the timer cycle not constant. The bread has a floured corner •...
- Page 34 cleaning Always ensure the bread maker is switched off, has cooled down and is unplugged from the mains supply before cleaning. Do not immerse the bread maker or power cord and plug in water or any other liquid. Do not use abrasive cleaning materials (e.g. steel wool) or cleaning agents, to clean any part of this bread maker.
- Page 35 connection to the mains supply This appliance must be earthed. This appliance is fitted with either a moulded or rewirable BS1363, 13 amp plug. The fuse should be rated at 13 amps and be ASTA approved to BS1362. If the fuse in a moulded plug needs to be changed, the fuse cover must be refitted. The appliance must not be used without the fuse cover fitted.
- Page 36 after sales service These appliances are built to the very highest of standards. There are no user serviceable parts. Follow these steps if the unit fails to operate: 1. Check the instructions have been followed correctly. 2. Check that the fuse has not blown. 3.
- Page 37 guarantee Please keep your receipt as this will be required for any claims under this guarantee. This appliance is guaranteed for 1 year after your purchase as described in this document. During this guaranteed period, if in the unlikely event the appliance no longer functions due to a design or manufacturing fault, please take it back to the place of purchase, with your till receipt and a copy of this guarantee.
- Page 40 VBM015_Iss_6 10/13 93461-5...