Biasi RIVA COMPACT M90E.24S User Manual And Installation Instructions
Hide thumbs
Also See for RIVA COMPACT M90E.24S:
- Service manual (44 pages) ,
- Service manual (44 pages) ,
- Servise manual (44 pages)

Related Manuals for Biasi RIVA COMPACT M90E.24S


Summary of Contents for Biasi RIVA COMPACT M90E.24S
-
Page 1: Installation Instructions
User manual and Installation instructions RIVA COMPACT Models: M90E.24S M90E.28S M90E.32S... -
Page 3: Using The Boiler
Congratulations on your choice. Your boiler is electronically controlled and has electronic ignition. The materials it is made of and the control systems it is equipped with give you safety, a high level of comfort and energy savings to allow you to get the greatest benefit out of independent heating. - Page 4 Biasi products are manufactured in accordance with ISO 9000 and do not, and will not, contain any First aid --- Medical attention must be sought fol-...
-
Page 5: Installing The Boiler
You are strongly advised to flush out the instruction manuals thoroughly and then if system both cold and hot in order to remove necessary contact Biasi UK for advice and system and installation debris. assistance. Please remember that if you are in any doubt about the installation of this product you can contact our... -
Page 6: Table Of Contents
....6.7 Fitting the flue system ... 4.5 Technical data mod. M90E.24S . . . 6.8 Flue restrictors . -
Page 7: Appliance Description
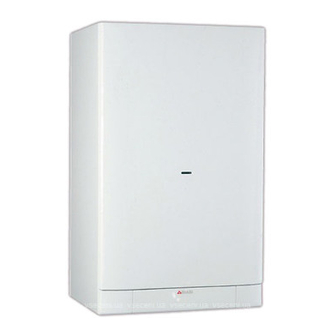
APPLIANCE DESCRIPTION Overview 8 Function selector and c.h. temperature control knob 9 D.h.w. temperature control knob 10 Appliance operation light Isolation valves Fig. 1.1 Fig. 1.2 (bottom view of the boiler) 1 Case front panel 11 C.h. return valve 2 Control panel 12 D.c.w. -
Page 8: Instructions For Use
INSTRUCTIONS FOR USE Warnings Refilling procedure 1 Isolate the boiler from the electrical supply at Biasi UK Ltd support the Benchmark initiat- the fused spur. Reconnect the filling loop as ive. The Benchmark Log Book is located at demonstrated in Fig. 2.1. -
Page 9: Ignition
Instructions for use Ignition C.h. circuit temperature 1 Check that the valves located in the lower part The output temperature of c.h. water is adjustable of the boiler are open (Fig. 2.3). from a minimum of about 38°C to a maximum of about 85°C (Fig. -
Page 10: Temperature
Instructions for use Your qualified installer will be able to recommend (Fig. 2.9), minimises annoying incidences of scale the most suitable adjustment for your system. deposits and clogging. The temperature and pressure gauge (4, Fig. 1.3 on page 1) will allow you to check that the set tem- perature is obtained. -
Page 11: Built In Time Switch
Instructions for use 3 Empty the water circuits, if necessary, as Setting the current time shown in the installation instructions in the sec- Note: with a new unit or when the reset button B tion maintenance. has been pressed and the selector switch A is to position, the time display G is flashing. - Page 12 Instructions for use To force constantly on or off the timer operation set the mode selector switch A to the TIMER posi- tion. The symbols shown in Fig. 2.17 appears on the display. Fig. 2.15 Activating the timed settings Set the mode selector switch A to the AUTO posi- tion shown in Fig.
-
Page 13: Useful Advice
USEFUL ADVICE Central heating --- general check of the appliance’s operation. For reasonably economical service install a room External cleaning thermostat. Before carrying out any cleaning, disconnect the Never shut off the radiator in the area where the appliance from the electrical mains, using the room thermostat is installed. - Page 14 Useful advice If water comes out of the pressure relief valve If water should occasionally leak from the boiler... Check on the temperature and pressure gauge (4 on page 1) that the pressure in the central heating shut off the valves positioned under the boiler circuit is not close to 3 bars.
-
Page 15: Technical Information
TECHNICAL INFORMATION Overview 13 Gas inlet valve 14 D.h.w. outlet pipe 15 C.h. flow valve 16 D.h.w. temperature probe NTC 17 Main circuit drain valve 18 C.h. pressure relief valve 19 Pump 20 Pump vent plug 21 Automatic air purger valve 22 D.h.w. -
Page 16: Main Diagram
Technical information Main diagram Fig. 4.2... -
Page 17: Hydraulic Specifications
Technical information Hydraulic specifications tem component cocks, the by --- pass valve ensur- es a minimum flow of water through the primary heat exchanger. kPa bar Expansion vessel Note: this boiler is designed for operation only in a sealed central heating system The height difference between the pressure relief valve and the highest point in the system may be 7m at most. -
Page 18: Technical Data Mod. M90E.24S
Technical information Technical data Injectors mod. M90E.24S Natural G20 Butane G30 Nominal heat input 26,6 Propane G31 BTU/h 90 754 Minimum heat input 11,0 BTU/h 37 530 Gas supply pressures Maximum useful output 24,3 norm. BTU/h 82 906 Natural 2 000... - Page 19 Technical information Electrical Data Voltage Frequency Power consumption Protection degree IPX4D External fuse rating Internal fuse rating 1,6 T Flue design Flue pipe diameter Coaxial 60/100 Twin split pipes Roof 80/125 Nominal heat flow rate** 26,6 Exhaust temperature** ° C Smoke production** kg/h 55,1...
-
Page 20: Technical Data Mod. M90E.28S
Technical information Technical data Injectors mod. M90E.28S Natural G20 Butane G30 Nominal heat input 31,1 Propane G31 BTU/h 106 107 Minimum heat input 13,0 BTU/h 44 353 Gas supply pressures Maximum useful output 28,4 norm. BTU/h 96 895 Natural 2 000 1 700 2 500 Minimum useful output... - Page 21 Technical information Electrical Data Voltage Frequency Power consumption Protection degree IPX4D External fuse rating Internal fuse rating 1,6 T Flue design Flue pipe diameter Coaxial 60/100 Twin split pipes Roof 80/125 Nominal heat flow rate** 31,1 Exhaust temperature** ° C Smoke production** kg/h 70,6...
-
Page 22: Technical Data M90E.32S
Technical information Technical data M90E.32S Gas supply pressures norm. Nominal heat input 35,2 Natural 2 000 1 700 2 500 BTU/h 120 102 mbar Minimum heat input 15,5 Butane 2 900 2 000 3 500 BTU/h 52 886 mbar Maximum useful output 32,0 Propane 3 700... - Page 23 Technical information Flue design Flue pipe diameter Coaxial 60/100 Twin split pipes Roof 80/125 Nominal heat flow rate** 35,2 Exhaust temperature** ° C Smoke production** kg/h Flue gas figures Nominal heat input** 35,2 content content CO content Exhaust temperature** ° C Other specifications Height Width...
-
Page 24: General Requirements
GENERAL REQUIREMENTS Biasi UK Ltd support the Benchmark initiative. This appliance is not suitable for external installa- The Benchmark Log Book is located at the back tion. of this manual and should be completed by the Installing/Commisssioning Engineer Flue system handed over to the User for future reference by other visiting Engineers. -
Page 25: Gas Supply
General requirements The appliance has a built--- in automatic air release Horizontally from a terminal in the same wall 300 Table follows in next page valve, it should be ensured as far as possible that the appliance heat exchanger is not a natural col- Above the roof pitch with roof slope less lecting point for air. -
Page 26: Domestic Water
General requirements Water treatment pressure within the domestic system can increase to a level in excess of the 10 bar limit. Central heating circuit In these circumstances it is therefore recom- mended that a 3 bar pressure reducing valve be Where a new boiler is fitted to a new system with fitted to the incoming mains water supply and a either plastic or copper pipes, it is important the... -
Page 27: Installation
INSTALLATION Warnings The use of gas appliances is subject to statutory control; it is essential to observe the current regulations and laws in force (see also chapter 5). The appliance must discharge combustion products directly outside or into a suitable ex- haust duct designed for this purpose. -
Page 28: Overall Dimensions
Installation Mounting the boiler Utilise the paper template supplied with the boiler to determine the fixing position for the bracket and 1 Take the protective caps off the boiler pipe- boiler. Securely mount the bracket to the wall work. using appropriate fixings suitable for the type of wall construction and capable of supporting the 2 Thoroughly clean the connections. -
Page 29: Fitting The Flue System
Tab. 6.4 for models M90E.24S, M90E.28S Tab. 6.5 for the model M90E.32S For the correct use of the restrictors with twin pipes refer to Fig. 6.8 for the models M90E.24S; and M90E.28S, refer to Fig. 6.9 for the model M90E.32S. - Page 30 0.90 m or 2,75 m In all circumstances the flue terminal must dis- respectively. charge horizontally and the equivalent flue length must not exceed 3 metres for models M90E.24S, M90E.28S and 2,7 metres for the model M90E.32S. Elbows 45° & 90° (Fig. 6.6C) Co--- axial 60/100mm.
-
Page 31: Electrical Connections
Please, see the boiler accessory leaflet available Optional 45° and 90° elbows can be used to offset from your Supplier for details or contact Biasi UK the flue route. Technical Helpline. 6.10 Electrical connections... - Page 32 Installation Fig. 6.11 Fig. 6.13 4 Remove the side panels or move the lower part For the electrical connection to the boiler use elec- of the side panels as indicated in Fig. 6.12 and tric wires which conform to the current regulations, pull the control panel.
-
Page 33: External Frost Protection
Installation To fused spur isolation switch Power supply terminal block To the external control device To the fused spur isolation switch External controls terminal block Fig. 6.14 8 Connect the room thermostat between ter- Fig. 6.16 minals 1 and 3 as shown in Fig. 6.15. Do not connect live wires to terminals to which the room thermostat must be con- 6.11... -
Page 34: Commissioning
COMMISSIONING Ensure that the Benchmark Log Book is satis- 2 Remove the front panel of the case (see the factorily commpleted during the commssion- section 9.2 in this manual. ing process. The Log Book is located at the end 3 Unscrew the cap on the automatic air purger- of this manual. -
Page 35: Lighting The Boiler
Commissioning Checking the gas pressure at This procedure must be repeated twice more. the burner During this operation we highly recommend the use of a c.h. flushing detergent in the quan- This boiler has been tested to the highest qual- tities as specified by the appropriate manufac- ity control standards. -
Page 36: Adjusting The Burner Ignition
Commissioning 10 Check the minimum gas pressure and com- pare the value on the gauge with the value indi- cated in the sections 4.5, 4.6 or 4.7 (gas pressures at the burner), accordingly with the model of boiler installed. 11 Switch off the boiler and re--- connect the elec- trical connector A to the modulator coil. -
Page 37: Checking The Ignition Device
Commissioning Natural (G20) RISC 9 10 11 12 Fig. 7.7 M90E.24S Refer to the table gas pressures at the burner in the mbar M90E.28S sections 4.5, 4.6 or 4.7 for appropriate value. M90E.32S 7 Having finished this procedure, reset dip --- Fig. -
Page 38: Checking The Flue System
8 11 14 17 20 23 26 29 32 35 Show the User how to switch off the appliance quickly and indicate the position of the electric M90E.24S mbar supply isolator. M90E.28S Explain the proper use and adjustment of all sys- M90E.32S... -
Page 39: Gas Conversion
GAS CONVERSION Warnings 9 set correctly the dip --- switch ”2” to the correct position (Fig. 8.2) in accordance with the follo- Procedures to adapt the boiler to the type of wing table. gas available must be carried out by a com- petent and responsible person. -
Page 40: Maintenance
MAINTENANCE Warnings Side panels 3 Loosen the screws B. Bring the bottom of the The procedures detailed in this chapter must panels away from the boiler and lift them, free- be carried out only by a professionally ing them from the top hooks (Fig. 9.2). qualified person. -
Page 41: Combustion Analysis Check
Maintenance 2 Open the central heating drain cock (17 in Fig. 9.4). Air--- Flue exhaust Sampling points Fig. 9.4 3 A small quantity of water will remain in the d.h.w. heat exchanger after draining. If the boiler is being drained to prevent freezing, the d.h.w. -
Page 42: Checking The Pressurisation In The Expansion Vessel
Maintenance Checking the pressurisation Checking the flue in the expansion vessel Have the integrity of the flue outlet pipe (45 on page 10) air intake pipe (46 on page 10), checked Empty the central heating system as described in periodically, the venturi device* (42 on page 10) section 9.4 of this chapter and check that the pres- cleaned and the efficiency of the flue safety circuit sure in the expansion vessel is not less than 1 bar. - Page 43 Maintenance...
- Page 48 *1796209156* 17962.0915.6 0605 48A5 UK Biasi U.K. Ltd Unit 31/33, Planetary Road Industrial Estate, Neachells Lane Willenhall, Wolverhampton WV 13 3XB Technical helpline: 01902 304 400 Web site: www.biasi.co.uk...