
Related Manuals for Kodak EasyShare G600


Summary of Contents for Kodak EasyShare G600
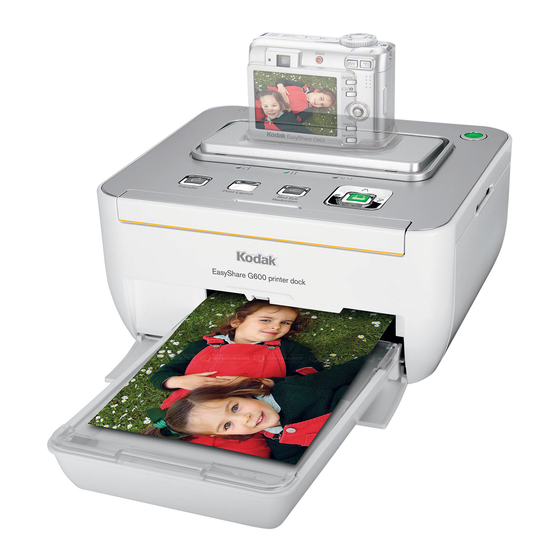
- Page 1 Kodak EasyShare G600 printer dock User’s guide www.kodak.com For interactive tutorials, www.kodak.com/go/howto...
- Page 2 Eastman Kodak Company Rochester, New York 14650 © Eastman Kodak Company, 2006 All screen images are simulated. Kodak, EasyShare, ImageLink, and XtraLife are trademarks of Eastman Kodak Company. P/N 4J4599_en...
- Page 3 12 USB device connector (for compatible USB light devices) 5 Print Layout button 13 Paper status indicator light 6 Transfer button/light 14 Camera connector 7 Paper tray 15 Camera battery status light 8 Paper-tray cover 16 Cartridge status indicator light www.kodak.com/go/support...
- Page 4 Product features Back/top/side view USB connector (to computer) Connector cover release tab Power connector (DC-in) Color cartridge (shown installed) Cooling vent Cartridge-release tab Paper path slot Cartridge door Connector cover for optional battery www.kodak.com/go/support...
-
Page 5: Table Of Contents
Reducing red eye in your prints..............18 Canceling printing..................19 4 Installing software ................20 Installing the software................. 20 5 Using the printer dock with a computer ..........22 Connecting to a computer ................22 Transferring pictures from your digital camera..........23 www.kodak.com/go/support... - Page 6 Telephone customer support ............... 56 11 Appendix ...................57 Printer dock specifications ................57 Important safety instructions ............... 58 Extending battery life .................. 60 Upgrading your software and firmware............61 Additional care and maintenance ..............61 Warranty..................... 62 Regulatory information................64 www.kodak.com/go/support...
-
Page 7: Getting Started
85 F (30 To avoid getting fingerprints on the ribbon, handle the cartridge by the spool ends. Keep the cartridge away from direct sunlight and out of high-temperature environments (such as a vehicle parked in the sun). www.kodak.com/go/support... -
Page 8: Attaching The Custom Camera Insert
Attaching the custom camera insert IMPORTANT: Use the custom insert that came with your digital camera to dock the camera. Depending on your camera connector, you may need the Kodak dock adapter kit D-26. See the instructions included with the dock adapter. -
Page 9: Connecting The Power
3 Connect the AC power adapter into a power outlet. Purchase an AC power adapter and other accessories at www.kodak.com/go/accessories. 4 Press the Power button, , to turn on/off the printer dock. -
Page 10: Loading The Paper And Cartridge
IMPORTANT: Use only Kodak cartridges and photo paper kits with the symbol. Do not use inkjet paper. (Kodak photo paper kits sold separately at a retailer of Kodak products, or visit www.kodak.com/go/accessories). Paper: IMPORTANT: Do not load more than 30 sheets of paper (see upper limit line, , inside tray). - Page 11 IMPORTANT: Remove the cartridge when the cartridge light glows red (see page 49). The cartridge may lock if there is a paper error. Clear the paper error (see page 41) and make sure the paper light is off before you remove the cartridge. www.kodak.com/go/support...
-
Page 12: Inserting And Removing The Paper Tray
When storing or traveling with your printer dock, close the paper-tray cover and paper-tray door to keep out dust and debris. IMPORTANT: Make sure you store the paper-tray in the space provided on the bottom of the printer dock (see page 33). www.kodak.com/go/support... -
Page 13: Setting Up Your Digital Camera
This printer dock is ImageLink print-system compatible. You can dock not only Kodak EasyShare digital cameras, but other brands of ImageLink system-compatible digital devices. NOTE: Not all cameras are compatible for charging on the G600 printer dock. See your camera user’s guide for dock compatibility. Docking the camera... - Page 14 For charging, use the AC adapter to power the printer dock. The printer dock will not charge camera batteries when it is powered by its printer battery. The Kodak Ni-MH rechargeable digital camera battery pack and Kodak Li-Ion rechargeable digital camera battery charge up to 3 hours.
- Page 15 Setting up your digital camera Refreshing the Kodak Ni-MH rechargeable camera battery IMPORTANT: The battery refresh feature is intended for use with the Kodak Ni-MH rechargeable digital camera battery KAA2HR only. Li-Ion batteries do not require refreshing. Battery status light...
-
Page 16: Best Camera Setting For 4 X 6 Inch (10 X 15 Cm) Prints
(3:2). This ensures that the pictures you take are proportional to the printer-dock paper, preventing unwanted cropping of your pictures. See your Kodak EasyShare digital camera user’s guide for more information. www.kodak.com/go/support... -
Page 17: Printing Without A Computer
The first three passes apply layers of yellow, magenta, and cyan colors to the print, and the fourth pass applies the Kodak XtraLife coating that protects and preserves the image. IMPORTANT: Do not pull out the print. The printer dock automatically ejects the finished print after the fourth pass. -
Page 18: Selecting Pictures On Your Camera For Printing
Printing without a computer Selecting pictures on your camera for printing NOTE: The following procedure pertains to Kodak EasyShare digital cameras. For information on tagging pictures on other brands of ImageLink system-compatible cameras, see the camera user’s guide. 1 Press the Share button on your camera. -
Page 19: Printing From A Pictbridge Compatible Device
NOTE: If the PictBridge device is already plugged in, but the connection is no longer available, disconnect the USB cable then reconnect it to re-establish the connection. 2 Use the PictBridge compatible device to review pictures, choose printing options, and print. See your device user’s guide for details. www.kodak.com/go/support... -
Page 20: Changing The Printed Picture Layout
Select a picture-layout, then press and hold the Print Layout button, , for 4–5 seconds. The cartridge and paper status lights blink red for 2 seconds then turn off. The selected picture layout appears on the docked camera screen. www.kodak.com/go/support... - Page 21 Change these settings on your device before printing. If the picture layout selected on your device does not match any of the sizes on the printer dock, then the closest picture layout on the printer dock is automatically selected. www.kodak.com/go/support...
-
Page 22: Printing Pictures On The Same Sheet
2 Press the printer dock Print Layout button repeatedly to scroll through and select either 2-up , 4-up , or 9-up , depending on the picture layout you wish to print (see page 14). 3 Press to begin printing. www.kodak.com/go/support... - Page 23 4. 4 Press the Print Layout button repeatedly to select either 2-up , 4-up , or 9-up , depending on the picture size you wish to print (see page 14). 5 Press to begin printing. The print screen appears. www.kodak.com/go/support...
-
Page 24: Reducing Red Eye In Your Prints
The Red-eye reduction button is disabled when printing from a computer. If printing from a computer (see page 24), make sure Kodak EasyShare software is installed on the computer. Printing may slightly increase when using red-eye reduction. Your printer dock may apply red-eye reduction to an area such as a sunburn, which darkens the area in your print. -
Page 25: Canceling Printing
Press and hold for 2 seconds. Printing is cancelled automatically. NOTE: When printing is cancelled, the paper is ejected from the printer dock. If you cancel a print during the fourth pass (clear coat), the print is ejected upon completion. www.kodak.com/go/support... -
Page 26: Installing Software
1 Close all software applications that are open on your computer (including anti-virus software). 2 Place the Kodak EasyShare software CD into the CD-ROM drive. 3 Load the software: Windows OS—if the install window does not appear, choose Run from the Start menu and type d:\setup.exe where d is the drive letter that contains the CD. - Page 27 5 Restart the computer if prompted. If you turned off anti-virus software, turn it back on. See the anti-virus software manual for details. For more information on installing the software, see the ReadMe file on the Kodak EasyShare software CD. For information on the software applications included on the Kodak EasyShare software CD, click the Help button in the EasyShare software.
-
Page 28: Using The Printer Dock With A Computer
Connecting to a computer IMPORTANT: Make sure your camera is NOT docked when you connect the printer dock to the computer. 1 Make sure Kodak EasyShare software is installed on the computer (page 20). 2 Plug the labeled end of the USB cable (included) into the labeled USB port on your computer. -
Page 29: Transferring Pictures From Your Digital Camera
(page 3 Press the Transfer button, , on the printer dock. Kodak EasyShare software opens on your computer and the printer dock Transfer light blinks green. 4 Use Kodak EasyShare software to transfer pictures from the camera to your computer. See the Kodak EasyShare software Help for details. -
Page 30: Printing From A Computer
Using the printer dock with a computer Printing from a computer We recommend using Kodak EasyShare software (included) for printing. This software lets you take advantage of a wide range of features, including full-color enhancement, red-eye reduction, picture organization, and much more. To install your Kodak... - Page 31 Print from the File menu.) NOTE: The Print Layout button on the printer dock is disabled when printing from a computer. Set printing options in the application from which you are printing. www.kodak.com/go/support...
- Page 32 1 From the Start menu, select Settings, then select Printers. NOTE: Depending on your Start menu configuration, you may need to select Printers and Faxes from the Control Panel. 2 Right-click the Kodak EasyShare G600 printer dock icon, then select Printing Preferences. 3 Click the Color-Correction tab.
-
Page 33: Canceling Printing
1 Make sure the printer dock is selected as the current printer. 2 From an application File menu, select Print. 3 Select Color Control from the Copies & Pages pop-up menu. 4 Select Kodak color. 5 Select a color mode option. Canceling printing Windows 2000/XP OS: 1 Double-click the printer icon in the system tray. -
Page 34: Using The Printer Dock With A Usb Flash Drive
3 Follow the steps for printing from your digital camera (page 11) and changing your picture layout (page 14). IMPORTANT: You can only print pictures from a USB flash drive if your camera is docked. www.kodak.com/go/support... -
Page 35: Canceling Printing
Press and hold for 2 seconds. Printing is cancelled automatically. NOTE: When printing is cancelled, the paper is ejected from the printer dock. If you cancel a print during the fourth pass (clear coat), the print is ejected upon completion. www.kodak.com/go/support... -
Page 36: Copying Pictures To A Usb Flash Drive
(see page 28). 2 Press the Transfer button, , on the printer dock. The Transfer screen appears on your camera’s screen. 3 Use the buttons on your camera to select your transfer option. 4 Follow your camera’s on-screen instructions. www.kodak.com/go/support... -
Page 37: Using The Printer Dock With A Usb Flash Drive
, on a printer dock that is connected to a computer, you have the option to transfer your pictures from your camera to your computer or USB flash drive. NOTE: With the Kodak EasyShare software installed (see page 20), pressing the Transfer button establishes drive connections for the docked camera. -
Page 38: Canceling Copying To A Usb Flash Drive
Canceling copying to a USB flash drive To cancel copying, do one of the following: Press the Transfer button, NOTE: A cancel confirmation screen appears when you press the Transfer or Print button. Use the buttons on your camera to make your selection. www.kodak.com/go/support... -
Page 39: Printer Dock Portability
(such as a vehicle parked in the sun). Consider purchasing a printer dock travel bag and other accessories at a retailer of Kodak products or visit www.kodak.com/go/accessories. Before you pack your printer dock, remove the paper tray, printer IMPORTANT: battery, cables, and any device connected to the printer dock www.kodak.com/go/support... - Page 40 Printer dock portability Close the paper tray door on the Slide the paper tray into the bottom of the printer dock. printer dock until it clicks into place. Close the paper tray cover. Pull out the handle to transport. www.kodak.com/go/support...
-
Page 41: Powering Your Printer Dock With A Battery
Charge the printer battery before taking it with you. You must connect the AC power adapter to your printer dock to charge the attached printer battery (sold separately). Purchase the Kodak Li-Ion rechargeable printer battery KPB-100 at www.kodak.com/go/accessories. Attaching the printer battery (optional) Push down on the Snap the battery into place. - Page 42 Printer dock portability Printer battery information Battery charging The Kodak Li-Ion rechargeable printer battery KPB-100 begins to charge when you attach it to the printer dock and connect the AC power adapter. Your printer dock uses the Power button, , light to show the printer battery charging status.
- Page 43 Failure to observe this precaution may cause leakage. Remove batteries when the product is stored for an extended period of time. In the unlikely event that battery fluid leaks inside the product, contact your local Kodak Customer Service representative.
-
Page 44: Maintenance And Firmware Upgrade
Keep the printer dock, accessories, and supplies away from direct sunlight and out of high-temperature environments (such as a vehicle parked in the sun). When storing, remove the paper tray, then close the paper-tray cover (see page and paper-tray door to keep out dust and debris. Store paper flat. www.kodak.com/go/support... - Page 45 4 Use the moistened cloth to gently wipe clean the surface of the paper-feed rollers. Advance the feed rollers with your thumb, as necessary, and continue cleaning. 5 Allow the paper-feed rollers to fully dry before reconnecting the power. Paper-feed rollers www.kodak.com/go/support...
-
Page 46: Upgrading Your Printer Dock Firmware
22). Download the latest version of the printer dock firmware (the software that runs on the printer dock) to your computer. Visit www.kodak.com/go/printerdockdownloads. From your USB flash drive 1 Transfer the latest version of the printer dock firmware file from your computer to your USB flash drive System or Service folder. -
Page 47: Troubleshooting
Interactive Troubleshooting and Repairs. Select FAQs to learn how to perform a Diagnostic test (identifies common problems). Printing problems If... Try the following IMPORTANT: Use only Kodak color cartridge & paper kits (with Paper does not symbol) for your printer dock. Do not use inkjet paper. feed (Paper light may The paper-tray may be empty. - Page 48 Troubleshooting If... Try the following IMPORTANT: Use only Kodak color cartridge & paper kits (with Printer is symbol) for your printer dock. Do not use inkjet paper. jammed (Paper or Color- If the Paper light blinks quickly: cartridge light Remove the paper-tray...
- Page 49 Troubleshooting If... Try the following IMPORTANT: Use only Kodak color cartridge & paper kits (with Printing stops symbol) for your printer dock. Do not use inkjet paper. during mid-print (paper stops Check the paper: feeding and Remove the paper-tray (page Paper light Check the paper slot on the back of the printer dock.
- Page 50 Do not use inkjet paper. light or under- exposed Load the paper with the Kodak logo facing down. Reload the paper, if necessary (page Turn the flash off, then take the picture. See your camera user’s guide for details.
- Page 51 Change the picture size or resolution on your digital camera to 3:2. See your camera user’s guide for details. cropped Adjust cropped pictures using Kodak EasyShare software on your computer. Select the proper paper size in print options if you are printing from an application on your computer.
- Page 52 Install Kodak EasyShare software (page 20). If you choose Custom installation, make sure to install the printer driver. Uninstall, then reinstall Kodak EasyShare software (page 20). NOTE: When printing a large number of prints, printing may slow down to prevent the Printing is slow print head from overheating.
- Page 53 Supply mismatch is likely to occur as you continue to use your printer dock. If you wish to keep your cartridge and paper supply synchronized, discard unused cartridge or paper when one or the other is fully depleted. www.kodak.com/go/support...
-
Page 54: Transfer/Communication Problems
Make sure your computer meets the minimum system requirements. Upgrade your system if necessary (see Helpful links, page 55). Install Kodak EasyShare software (page 20). If you choose Custom installation, make sure to install the printer driver. Uninstall, then reinstall Kodak EasyShare software (page 20). www.kodak.com/go/support... -
Page 55: Printer-Dock-Status Lights
Cartridge properly installed and None required. working normally. Light glows Cartridge nearly depleted. None required. amber Light glows red Cartridge depleted or uninstalled. Install a new cartridge (page then press Cartridge incorrectly seated. Remove and re-install the cartridge (page 4), then press www.kodak.com/go/support... - Page 56 Paper did not feed; sheets stuck together Check the paper supply. Reload (page 41). with new paper, if necessary, then press NOTE: Do not load more than 30 sheets of paper. Paper-feed rollers are dirty. Clean the paper-feed rollers (page 39). www.kodak.com/go/support...
- Page 57 Camera not properly seated on Reseat the camera on the printer connector. dock (page Unrecognized battery type Install a Kodak Ni-MH installed, or camera does not rechargeable digital camera support charging. battery or Kodak Li-Ion rechargeable digital camera battery. See your camera user’s guide for battery compatibility and other charging options.
- Page 58 The Print button is disabled; print command is controlled from the PictBridge compatible device. To print from another source, unplug the PictBridge compatible device. Transfer button/light Light status Cause Action/solution Light glows green Printer dock ready for None required. transferring pictures. www.kodak.com/go/support...
- Page 59 Turn on the computer. Red-eye-reduction button/light Light status Cause Action/solution Light glows green Red-eye reduction applied to None required. pictures for current print job. To turn red-eye reduction on or off, press the Light is off Red-eye reduction not selected. Red-Eye-Reduction button. www.kodak.com/go/support...
- Page 60 Light blinks red Battery error. Attach a new printer battery (see page 35). Light glows red Battery needs charging. Charge the printer battery (page 36). Still having problems? Visit www.kodak.com/go/support, or see Chapter 10, Getting help, or contact your camera manufacturer. www.kodak.com/go/support...
-
Page 61: Getting Help
(or click the Help button in the EasyShare software) Get help with the Windows operating www.kodak.com/go/pcbasics system and working with digital pictures Other Get support for Kodak docks, cameras, www.kodak.com/go/support software, accessories, more Get information on Kodak EasyShare www.kodak.com/go/printerdocks printer docks Get information on Kodak inkjet www.kodak.com/go/inkjet... -
Page 62: Telephone Customer Support
Computer model, Operating system Printer dock serial number Processor type and speed (MHz) Version of Kodak EasyShare software Amount of memory (MB) and free hard Exact error message you received disk space... -
Page 63: Appendix
Appendix Printer dock specifications For more specifications, visit www.kodak.com/go/printerdocks. Printer dock specifications Printing process Continuous tone, thermal dye transfer, full-bleed Temperature: 50 to 95 °F (10 to 35 °C) Operating environment (for Humidity: 10% to 86% RH optimum picture quality) -
Page 64: Important Safety Instructions
Using this product Read and follow these instructions before using Kodak products. Always follow basic safety procedures. The use of an accessory attachment that is not recommended by Kodak, such as an AC adapter, may cause fire, electric shock, or injury. CAUTION: Do not disassemble this product;... - Page 65 Failure to observe this precaution may cause leakage. Remove batteries when the product is stored for an extended period of time. In the unlikely event that battery fluid leaks inside the product, contact your local Kodak Customer Service representative.
-
Page 66: Extending Battery Life
If you are getting fewer than 20 pictures per charge with your Kodak Ni-MH rechargeable digital camera battery, (and if none of the tips above seem to help),... -
Page 67: Upgrading Your Software And Firmware
Appendix Upgrading your software and firmware Download the latest versions of the software included on the Kodak EasyShare software CD and the printer dock firmware (the software that runs on the printer dock). Visit www.kodak.com/go/printerdockdownloads. Additional care and maintenance Do not allow chemicals, such as suntan lotion, to come into contact with the painted surface of the printer dock. -
Page 68: Warranty
Limitations Request for Warranty service will not be accepted without proof of date of purchase, such as a copy of the original dated Kodak digital camera or accessory sales receipt. (Always keep the original for your records.) This warranty does not apply to the battery(s) used in digital cameras or accessories. - Page 69 Kodak (such as adapters and cables), or claims made after the duration of this warranty. Kodak makes no other express or implied warranty for this product. In the event that the exclusion of any implied warranty is ineffective under the law, the duration of the implied warranty will be one year from the purchase date.
-
Page 70: Regulatory Information
Appendix Regulatory information FCC compliance and advisory G600 Kodak EasyShare printer dock This equipment has been tested and found to comply with the limits for a Class B digital device, pursuant to Part 15 of the FCC Rules. These limits are designed to provide reasonable protection against harmful interference in a residential installation. - Page 71 N137 Waste Electrical and Electronic Equipment labeling In the European Union, do not discard the product as unsorted municipal waste. Contact your local authorities or go to www.kodak.com/go/recycle for recycling program information. Korea Class B ITE English translation: As this equipment has obtained EMC registration for household use, it can be used in any area including residential areas.
- Page 72 This is a Class B product based on the standard of the Voluntary Control Council for Interference from Information Technology Equipment (VCCI). If this is used near a radio or television receiver in a domestic environment, it may cause radio interference. Install and use the equipment according to the instruction manual. www.kodak.com/go/support...
- Page 73 AC power adapter & cord, 3 connector USB, 13, 22 camera, i camera power (DC-in), ii, 3 connector, i USB (from device), i, 13 preparing for use with printer USB (to computer), ii, 22 dock, 7 cooling vents, ii printing from, 11 www.kodak.com/go/support...
- Page 74 30 Kodak EasyShare software customer support, 56 help, 55 installing, 20 printing with, 24 DC-in, power connector, ii, 3 Kodak web sites, 55 disposal and recycling of batteries, 37, 59 door layout. See picture size cartridge, ii, 4 light...
- Page 75 18 AC adapter & cord, 3 tagged pictures from computer, 24 connecting, 3 tagging pictures for, 12 connector (DC-in), ii, 3 with Kodak EasyShare software, 24 print button/light, i, 52 print order quality bypassing, 12 reducing red eye, 18...
- Page 76 3 safety, 58 service and support, 56 upgrading software & firmware, 55, 61 setup URLs, Kodak web sites, 55 color cartridge, 4 custom camera insert, 2 cable, 13, 22 loading paper, 4 connector (from device), i, 13...