Table of Contents
Advertisement
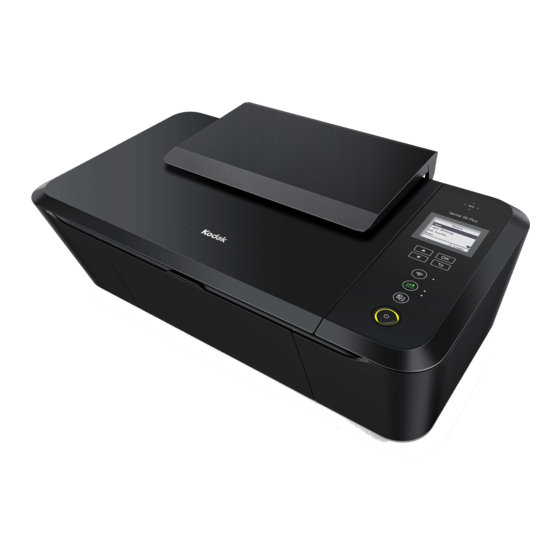
55 Plus
Wireless All-In-One Inkjet Printer
Extended User Guide
We're glad you chose this KODAK VERITÉ Wireless All-In-One Inkjet Printer.
?
Need help fast?
Read your Setup Manual and/or Extended User Guide first for quick tips that make using your KODAK VERITÉ Wireless All-In-
One Inkjet Printer more enjoyable. If you have read your instructions and still need assistance, you may access our online help at
www.kodakverite.com/support
or call 1-844-995-6325 (1-844-99KODAK)
Details, explanations, and expressions in the display panel of the actual product may differ from those shown in this
Extended User Guide. The displayed items and specifications are subject to change without notice.
Advertisement
Table of Contents

Related Manuals for Kodak verite 55 plus


Summary of Contents for Kodak verite 55 plus
- Page 1 Need help fast? Read your Setup Manual and/or Extended User Guide first for quick tips that make using your KODAK VERITÉ Wireless All-In- One Inkjet Printer more enjoyable. If you have read your instructions and still need assistance, you may access our online help at www.kodakverite.com/support...
-
Page 2: Table Of Contents
Contents Introduction ............... 3 Making copies ............31 Notice and Safety ..................3 Copy Setting ....................32 Dear Customer ..................... 3 Check ink levels ..................34 About this Extended User Guide .............. 3 Scanner ..............35 General safety information ........4 Scan in [Scanning] application by Windows® ........35 Scan in Mac ....................36 Overview .............. -
Page 3: Introduction
• Symbols used in this Extended User Guide operation of your device. Your KODAK Product and supplies have been designed and tested to Symbols Description meet strict safety requirements, including safety agency evaluation... -
Page 4: General Safety Information
• Never use a gas duster on this device. This gas trapped inside of this General safety information device may cause ignition and explosion. Funai reserves the right to change products at any time without being • In the event that the device becomes too hot, or if you see smoke obliged to adjust earlier supplies accordingly. - Page 5 Android™ are trademarks of Google Inc. Regulatory Model : JM502-10UA • Mac OS®, OS X®, iPhone®, iPod touch®, iPad®, Safari® and Mac (VERITE 55 PLUS/37, VERITE 55 PLUS/07) logo® are trademarks of Apple Inc., registered in the U.S. and other Address: 19900 Van Ness Avenue, Torrance, CA countries.
- Page 6 Throw the paper away carefully. Do not make any repairs to the device yourself. Improper The Kodak trademark and trade dress are used under license from maintenance can result in injuries or damage to the device. Only have Eastman Kodak Company.
-
Page 7: Overview
• Overview When opening the lid/door Scanner glass • Ink door Front view Paper support Ink cartridge holder Paper guide Scanner lid Paper exit tray Exit tray extender Menu display Control panel and LEDs • Rear view AC power cord and AC plug USB port —... -
Page 8: Control Panel & Menu Display
• Control panel & Menu display Buttons (up) — Use to select an item, set number of Menu display copies, or to select a letter on the Menu (up) button display. (down) button — Use to confirm the current selection. (back) button (down) button —... -
Page 9: Meaning Of Led Behavior And Lights
Even in sleep mode, the unit is able to receive a print job from USB / network equipment. Lights up Unit is Starting. All LEDs When you turn On, KODAK Logo with "Starting Up" and the progress bar ( ) will be displayed on the Menu display. Blinking 9 Indicates that the unit is Ready. - Page 10 ECO mode status LED(s) Behavior Meaning / Possible cause(s) No light Indicates that ECO mode0 (ECO Off). Lights up Indicates that ECO mode1 is ON (Save 20% ink). Lights up Indicates that ECO mode2 is ON (Save 30% ink, page Reduce 12%). Network status LED(s) Behavior...
-
Page 11: Initial Operation
• Initial operation Removing packaging material from the unit Remove the tapes and the plastic bag for transportation from the Packing contents unit and then take the binding wire out for the AC power cord. Lift the paper support up, get the Setup Manual off the unit and Unit then remove the tape including the white paper. -
Page 12: Install Ink Cartridges
Install ink cartridges Set the color ink cartridge all the way into the cartridge slot on the right side. • Install ink cartridges to ink cartridge holder 1 Color (Right) Remove the black and color ink cartridges from packaging. Black Color Remove the plastic tapes on the black and color ink cartridges Black... -
Page 13: Load Paper
Load paper Turn On the unit • Connect the AC plug to the AC outlet. Set paper into the paper support Slide the paper guide to the left first. Press and then (Power) LED will light up, when the unit is turned On. Fan the plain paper to be printed and then tap the paper sheets so the ends are the same. -
Page 14: Initial Setup
Open the scanner lid and place the alignment pattern paper facing Initial setup down on the scanner glass, then press after closing the scanner lid. Select language Cartridge Setup Step 3 of 5 : Press to select the desired language, then press Place test print on •... -
Page 15: Wi-Fi Setup
Wi-Fi Setup [Enter Password] will appear on the Menu display, then enter Password. Press to select a letter, then press Select Wi-Fi Setup type and follow the Menu display instructions. After entering the Password, press to select [Done], then press Wi-Fi Setup •... -
Page 16: Wi-Fi Protected Setup
Wi-Fi Protected Setup Press to select [Wi-Fi Protected Setup] then press Press the WPS button on router. Wi-Fi Setup Wi-Fi Protected Setup Network and Password Wi-Fi Protected Setup on Wi-Fi router. Skip Router1 Cancel Router1 Wi-Fi Protected Setup Connected to Router1 Next How long the WPS button must be pressed and other specifics vary... -
Page 17: Before You Download The Printer Driver To Your Pc
• Before you download the printer driver to your PC How to download the printer driver From your computer go to www.kodakverite.com/support • Requirements select the "DOWNLOADS" tab. Your PC must have one of the following operating systems. Select "Drivers and Software" then follow Instruction on your Microsoft®... -
Page 18: Install The Printer Driver To Your Pc
The unit's serial number is located on the sticker on the back side of the unit. ❏ Note(s) • If the installer does not start when you double-click [KODAK- VERITE 55 PLUS Installer.mpkg], please try the following steps: Select [System Preferences] in the Apple Menu. The Apple Menu is located on the top left of the screen. -
Page 19: Changing Connection Type To Wi-Fi From Usb Connection
Click the printer, select the driver from pull-down menu of [Use], then click [Add]. USB connection has always priority. • Make sure to choose FUNAI KODAK VERITE 55 PLUS of If you would like to change the connection type to Wi-Fi from USB [Bonjour Multifunction] in [kind]. -
Page 20: Eco Mode
Click the printer, select the driver from pull-down menu of [Use], then click [Add]. • Make sure to choose FUNAI KODAK VERITE 55 PLUS of e. g. 3) Resizing (Paper : A4 Fit to paper size : A5) [USB Multifunction] in [kind]. -
Page 21: Print Using Your Smartphone/Tablet
Use the mobile App Print using your smartphone/tablet Printing using the print application is available. 'Easy Simple Print' can print the data in your smartphone/tablet directly to the unit. • How to download the mobile App Printing is also available by using the mobile App for Android™ or iOS. -
Page 22: Mobile Connection By Nfc For Android
Mobile connection by NFC for Android™ Mobile connection by (Wireless) ❏ ❏ Note(s) Note(s) • Check whether your Android™ smartphone/tablet supports NFC • Check whether your smartphone/tablet supports QR code first. reading first. Scan the QR code below (or on the Setup Manual) with your Place your Android™... -
Page 23: Print Via Cloud Services
AirPrint Print via cloud services With iOS / OS X AirPrint, you can print photos, emails, web pages, This unit supports Google Cloud Print™ and iOS / OS X AirPrint. and documents wirelessly from your Apple devices (iPhone, iPod touch, iPad). iOS / OS X AirPrint does not require a driver to be installed. -
Page 24: Check Print Status From Your Pc
• Check print status from your PC Status Messenger Settings To configure the Status Messenger, right click on the icon in the taskbar and select [Settings]. Status Messenger for Windows® The Status Messenger application automatically displays an error when a unit error has occurred. It is installed together with the printer Right click driver, and is added to the Start-up program by default, so it will automatically launch at startup. -
Page 25: Print Media
Insert paper into the paper support Print media Slide the paper guide to left side. Specifications for print media You can setup normal printer paper, envelopes or printed documents (forms) into the paper support. Paper support Paper Sizes Letter · Legal · Executive · Statement · A4 · JIS B5 · A5 · A6 ·... - Page 26 Open the paper exit tray and exit tray extender. Loading Pre-printed Material • If you would like to print on an input sheet (for example, forms or stationery), place the input sheet with the Pre-printed side facing forward in the paper support. CAUTION Forms from a Laser Printer! •...
-
Page 27: Print Settings
When you print a document, the [Print] dialog box appears. order], if you would like to change the print order to print the last Select [KODAK VERITE 55 PLUS] (this unit) and click on [Properties] or page of your document first. - Page 28 Reverse page order: Watermark: You can choose a watermark from three modes. (Same watermark on [On] Print from the last page. all pages, a different watermark on first page, or a different watermark [Off] Print from the first page. on odd/even pages.) Select a watermark that you would like to add to your print job.
-
Page 29: Confirming Print Settings For Mac
• Confirming Print Settings for Mac Save changes Click on [Presets] list box, and select [Save Current Settings as ❏ Note(s) Preset...]. The saved configuration information will be managed by names. Macintosh Screenshots Input name in [Preset Name:] textbox, then select [Preset Available •... - Page 30 • • Layout Cover Page If necessary, you can print the cover page. Print Cover Page: If you would like to print the cover page, select [Before document] or [After document]. Pages per Sheet: Cover Page Type: Print multiple pages on one sheet. If you would like to print the cover page, select the cover page type.
-
Page 31: Using Menu Display
Using Menu display Making copies The copy function is available using on the unit. From the Control panel, use Home Lift the scanner lid on the unit. to navigate the desired settings, and press Home Load the original print side down on the scanner glass. Copy Copy Setting Ink Levels... -
Page 32: Copy Setting
• Resize Copy Setting Copy Setting Set the resize for enlarging or compressing • Copies Copies the copy document. Color Color Copy Setting Quality Text Set the number of copies. Resize 100% From the Control panel, navigate to Copies Color Color Back Copy... - Page 33 • Remove the first page from the scanner Paper Type Copy Setting glass and place the next page. Copy Pages per Side Set the paper type. Quality Text Place next page on Press to continue to scan the next Resize 100% Flatbed Scanner and From the Control panel, navigate to...
-
Page 34: Check Ink Levels
Load the back side of the ID card facedown on the scanner glass in the left rear ID Card Copy placement corner with arrows and then Copy the back side of press the ID Card? Skip Copy Copying process will start. ❏... -
Page 35: Scanner
Scanner Paper Size: Select the paper size from below: You can use a variety of scanner functions from your smartphone/tablet • Letter • 3 x 5 in. (Index Card) or PC. The "Scanning" application is available if your PC has a Windows® •... -
Page 36: Scan In Mac
Scan in Mac Run the Image Capture application. (Scanning with other applications such as “Preview” is a very similar process.) • Simplified scan mode In the “simplified” scanner interface, follow these Steps: Place the document you would like to scan on the scanner glass. Open Image Capture located in the Applications folder. - Page 37 When choosing [Text] in [Kind:] – [Threshold] to adjust the transition point between dark and light. ❏ Note(s) • Those images are created based on the screen of OS X 10.11. If the version of the OS is different or the OS is updated, it is possible that the display on the screen changes.
-
Page 38: Settings
The unit will start printing the alignment Settings pattern. Cartridge Setup Step 2 of 5 : You can setup the unit as you like depending on your needs. Test Print • The (Power) LED will light up then blink rapidly. LED lighting pattern is Maintenance “Blinking 5”. -
Page 39: Paper Setup
Paper Setup Network Status Sets the paper type and paper size. You can check the following settings for the network/router connection status. ❏ Note(s) • Connection • If you change the following Paper Settings, the default paper Network Status setting values in the Copy Menu will also be changed. From the Control panel, navigate to [Home Connection Signal Quality... -
Page 40: Wi-Fi Setup
The wireless security type is displayed. Wi-Fi Setup Security [Open], [WEP-64], [WEP-128], [WPA/ You can set the following Wi-Fi settings. WPA2-PSK] or [WPA2-PSK] will be shown WPA2-PSK • on the Menu display. Network and Password Wi-Fi Setup If you would like to connect to a router Back Network and Password manually, follow the Steps below. - Page 41 • IP Address Manual SSID Setting Wi-Fi Setup Enter SSID name of your router. From the Control panel, navigate to [Home Network and Password Wi-Fi Protected Setup Network and Password Press to select letters, > Setup > Wi-Fi Setup > IP Address], then IP Address Enter SSID numbers and symbols, then press...
- Page 42 • • Proxy Host Name Wi-Fi Setup Wi-Fi Setup From the Control panel, navigate to [Home From the Control panel, navigate to [Home Network and Password Wi-Fi Protected Setup Wi-Fi Protected Setup IP Address > Setup > Wi-Fi Setup > Proxy], then press >...
-
Page 43: Enable Wi-Fi
• Sleep Enable Wi-Fi Device Setup Enable or disable the wireless network for this unit. From the Control panel, navigate to [Home Language English Sleep 10min Menu > Setup > Device Setup > Sleep], Usage Tracking then press Software Version Back Select From the Control panel, navigate to... -
Page 44: Direct Connect Time
Direct Connect Time Google Cloud Print™ The setting of the Disconnect time when no Direct Mode operation is You can set the Google Cloud Print™ settings. detected. • Status From the Control panel, navigate to Google Cloud Print Display the connection status or registration [Home >... -
Page 45: Print Reports
• • Register to Google Cloud Print™ Enable/Disable to Google Cloud Print™ Google Cloud Print Google Cloud Print From the Control panel, navigate to [Home From the Control panel, navigate to [Home Status Status Register Register > Setup > Google Cloud Print > Register], >... -
Page 46: Restore Factory Default
Restore Factory Default All of the unit settings will be reset to the factory default. From the Control panel, navigate to [Home > Setup > Restore Factory Default], Setup then press AirPrint Google Cloud Print Print Reports Restore Factory Defau Back Select Press... -
Page 47: Web Interface
» The following screen will be displayed. Refer to “Print Reports” on page 45. Configuration Report [2016-07-04 07:42:39(UTC)] Device Information Model Name KODAK VERITE 55 PLUS Serial Number XXXXXXXXXXXXXXXX Software Version X.XX.XXX (XXXXXXXX) Device Statistics Information Printed Page Scanned Page... -
Page 48: Device Status
• Device Status Enable Wi-Fi You can check the status of the unit, such as remaining ink level. Device Configuration • General Settings You can change the following items. • Default paper size/type If you change this setting, the default paper size/type in Copy Menu setting are also changed. -
Page 49: Mobile
• • Wireless LAN Settings Google Cloud Print™ You can set the Google Cloud Print™ settings. • You can change connection settings by setting the SSID / Security / Password for Wireless Connection. • Registration and connection status of Google Cloud Print™ will be shown. -
Page 50: Software Update
Software Update • If the firmware update for this unit is available, the Update button is displayed. Press it and start to update the firmware. • When the firmware is the latest version, the Update button is not displayed. Login Password •... -
Page 51: Service
Remove the cartridges. Service ❏ Note(s) Black Color • If any problems occur, please see the notifications on the Status Messenger (Windows®). » Refer to “Status Messenger for Windows®” on page 24. Checking ink levels Using the Control panel Remove the black and color ink cartridges from the packaging. •... -
Page 52: Ordering Supplies
Ink Cartridge Not Inserted Correctly! printing photos. • If the ink door does not close properly, the ink cartridges are • For best results, use only genuine KODAK VERITÉ Ink Cartridges. not inserted correctly. Remove the ink cartridges and then insert them again correctly. -
Page 53: Restoring The Factory Settings
Restoring the factory settings Cleaning the ink cartridge nozzles and contacts You can restore the default settings on the unit using the web Remove the ink cartridge(s). interface or Control panel. » Dampen a clean, lint-free soft cloth with water, and then place the Refer to “Restore Factory Default”... -
Page 54: Preserving The Ink Cartridges
Remove paper from the paper support and paper exit tray. • KODAK does not recommend use of a refilled ink cartridge. Dampen a clean, lint-free soft cloth with water. • Refilling an ink cartridge can affect print quality and may cause damage to the unit. -
Page 55: Troubleshooting
Troubleshooting You can correct most problems by yourself. If you need additional help, the KODAK Solutions Center offers the most up-to-date driver, manuals, the latest FAQs and troubleshooting tips. Visit our website at www.kodakverite.com/support Setup troubleshooting Incorrect language appears on the display Change the language selection during initial setup –... - Page 56 • Temporarily disable security programs in Windows® Software did not install (continued) Close all open programs. Disable any security programs. Double-click the downloaded installer file to extract it. Follow the instructions on the computer screen to install the software. When the installation is completed, enable the security software again. •...
- Page 57 Display [Start] screen, right-click for [All Apps] icon to fade into the bottom right, click [All Apps], select the printer software folder “KODAK VERITE” from the list (Windows® 8). Click [Start] button, Click [All Programs], and then select the printer software folder “KODAK VERITE”...
- Page 58 • Status Messenger Error Message appears » Refer to “Check print status from your PC” on page 24 and “Status messages, LCD message and LED behaviors” on page 59. • Paper handling » Refer to “Print media” on page 25 and “Status messages, LCD messages and LED behaviors”...
-
Page 59: Status Messages, Lcd Messages And Led Behaviors
Status messages, LCD messages and LED behaviors The Status information will report problems with the unit. Take the proper action by referring to the following table. » Refer to “Check print status from your PC” on page 24. Wireless LED —... - Page 60 Status messages LCD messages LED behaviors Unit status or possible causes Refer to A paper jam has occurred inside of the unit. – Firmly grasp the paper, and then gently pull it out. Pull out the AC plug. Wait at least 30 “Clearing paper jam in seconds, then connect the AC plug back into the Paper Jam...
- Page 61 Status messages LCD messages LED behaviors Unit status or possible causes Refer to No ink detected. – Remove and reinstall the Ink cartridges. “Changing the ink cartridge” No Ink detected on page 51. – Make sure the Ink cartridges are inserted Please insert No Ink detected blinks as pattern 1...
- Page 62 Status messages LCD messages LED behaviors Unit status or possible causes Refer to Color ink is not inserted. – You get good printed results with Mono mode Color Ink Missing when you make prints in this condition, and the Printing in Color ink cartridge is warning indication continues until you press mono-only mode.
- Page 63 Status messages LCD messages LED behaviors Unit status or possible causes Refer to Pull out the AC plug. – Wait at least 30 seconds, then connect the AC plug back into the socket. Scanner Error Scanner Error: Please check • If this error occurs occasionally, refer the “Power cycling”...
-
Page 64: Improving The Print Quality
Improving the print quality If printout is like below, please try the suggestions in order. Examples of poor image quality Suggestions Using genuine ink cartridges » Refer to “Ordering ink cartridges” on page 52. Checking ink levels » Refer to “Checking ink levels” on page 51. Cleaning the ink cartridge nozzles »... -
Page 65: Appendix
Appendix Specifications For more product specifications, see the Product Data Sheet at www.kodakverite.com/support Technical Data Dimensions (width x depth x height) 17.7 x 10.7 x 6.0 inches (450.4 x 272.5 x 153 mm) Maximum dimensions (width x depth x height) 17.7 x 18.5 x 10.3 inches (450.4 x 470.6 x 262 mm) Weight 8.0 lb. -
Page 66: Limited Warranty
To locate your nearest AUTHORIZED SERVICE CENTER or for general service inquiries, please contact us at: FUNAI SERVICE CORPORATION www.kodakverite.com/support 2425 Spiegel Drive, Groveport, OH 43125 © 2016 Funai Electric Co., Ltd. All rights reserved. The Kodak trademark and trade dress are used under license from Eastman Kodak Company. English... - Page 67 The Kodak trademark and trade dress are used under license from Eastman Kodak Company. www.kodakverite.com © 2016 Funai Electric Co., Ltd. All rights reserved.