Table of Contents
Advertisement
Quick Links
• Built-In Direct Vent Fireplace
• Natural Gas or Propane
• Residential or Mobile Home
WARNING: Improper installation, adjustment, alteration, service or maintenance can cause
injury or property damage. Refer to this manual. For assistance or additional
information consult a qualified installer, service agency, or the gas supplier.
- Do not store or use gasoline or other flammable vapors and liquids in the vicinity of this or
any other appliance.
- Installation must be performed by a qualified installer, service agency or the gas supplier
IF YOU SMELL GAS
• Do not try to light any appliance.
• Do not touch any electrical switch; do not use any phone in your building.
• Immediately call gas supplier from a neighbor's phone. Follow the gas supplier's instructions.
• If you cannot reach your gas supplier, call the fire department.
36DV
Installer: After installation give this manual
to the homeowner and explain
operation of this fireplace.
O
WNER
- November, 1995 -
'
M
S
ANUAL
10850 117th Place N.E. Kirkland, WA 98033
Listed
(ANSI Z21.44)
Advertisement
Table of Contents
Troubleshooting

Related Manuals for FireplaceXtrordinair 36DV


Summary of Contents for FireplaceXtrordinair 36DV
-
Page 1: Introduction & Important Information
• Do not touch any electrical switch; do not use any phone in your building. • Immediately call gas supplier from a neighbor's phone. Follow the gas supplier's instructions. • If you cannot reach your gas supplier, call the fire department. 36DV WNER ANUAL... -
Page 2: Safety Precautions
AFETY RECAUTIONS • IF YOU SMELL GAS: * Do not light any appliance * Extinguish any open flame * Do not touch any electrical switch or plug or unplug anything * Open windows and vacate building * Call gas supplier from neighbor's house, if not reached, call fire department •... - Page 3 Always follow • If the log set becomes the instructions in this damaged, replace with manual. Travis Industries log set. • Do not touch the hot • Instruct everyone in the surfaces of the fireplace. house how to shut gas off...
-
Page 4: Table Of Contents
ABLE OF ONTENTS Introduction & Important Information Installation (continued) Introduction & Important Information ......1 Finalizing the Installation ......... 21 Glass Installation & Removal ....... 22 Safety Precautions Log Set & Coals Installation & Removal....22 Safety Precautions ...........2 Faceplate Installation & Removal......22 Air Shutter Adjustment ......... -
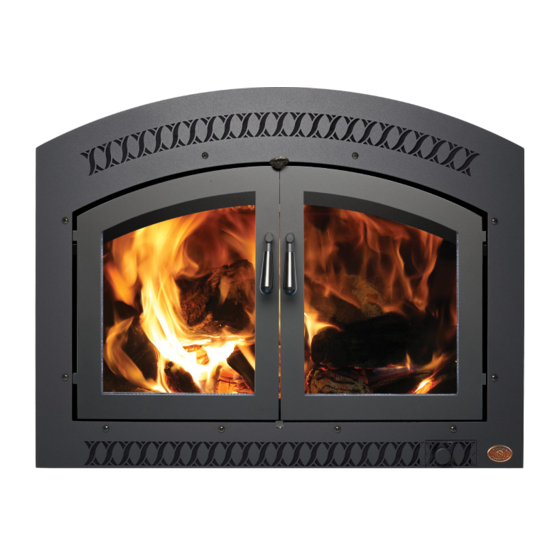
Page 5: Features
EATURES AND PECIFICATIONS Features: Installation Options: Works During Power Outages (utilizes millivolt system) Residential or Mobile Home High Efficiency Straight or Corner Placement Optional Thermostat or Remote Control Flush or Recessed Face Realistic "Wood Fire" Look Raised or Floor Hearth Quiet Blower for Effective Heat Distribution Convenient Operating Controls Internal or External Chase... -
Page 6: Installation
NSTALLATION Installation Preparation This appliance must be installed in accordance with all local codes, if any; if not, follow ANSI Z223.1 and the requirements listed in this manual. Failure to follow all of the requirements may result in property damage, bodily injury, or even death. When installed in a mobile home, this appliance must be installed in accordance with the Manufactured Home Construction and Safety Standard, Title 24 CFR, Part 3280, or if not applicable, the Standard for Manufactured Home Installations (ANSI A225.1--1984). -
Page 7: Fireplace Placement Requirements
NSTALLATION Fireplace Placement Requirements • Fireplace must be installed on a level surface capable of supporting the fireplace and vent • Fireplace must be placed directly on wood or non-combustible surface (not on linoleum or carpet) • Due to the high temperature of the fireplace, it should be located out of traffic and away from furniture and draperies. -
Page 8: Corner Installations
NSTALLATION Corner Installations 13-1/4" 10-1/2" Fireplace • 45° installations require the (includes following minimum framing 1/2" dimensions: standoffs) 19-5/8" 46-1/4" 43" 65-1/4" 11-1/8" Raised Fireplaces + The fireplace (and hearth if desired) may be placed on a platform designed to support the fireplace (250 Lbs.) and vent. -
Page 9: Mantel Requirements
NSTALLATION + Facing may be installed so it inserts behind the faceplate but not below it (see illustration below). + To achieve a facing that is flush with the drywall to the side of the fireplace, recess the framing directly next to the fireplace. See the illustration below. Nail Down Nail Down This 2x4 is recessed 3/8"... -
Page 10: Facing And Hearth Examples
NSTALLATION Facing and Hearth Examples... - Page 11 NSTALLATION Facing and Hearth Examples (continued)
-
Page 12: Vent Requirements
NSTALLATION Vent Requirements Always maintain the required 1" clearance (air space) to combustible materials to prevent a fire hazard. Do not fill air spaces with insulation. The gas appliance and vent system must be vented directly to the outside of the building, and never be attached to a chimney serving a separate solid fuel or gas-burning appliance. -
Page 13: Acceptable Vent Configurations
NSTALLATION • Use Model GS Direct Vent manufactured by Simpson Dura-Vent only. Follow the installation instructions included with the vent. For the nearest Simpson Dura-Vent supplier, call (800) 835-4429. Vent part numbers and descriptions are listed below. Straight Lengths Vent Terminations Elbows 908B 6"... -
Page 14: Elbows
NSTALLATION Elbows • Do not use 45° elbows. • Elbows are considered either horizontal or vertical (see the illustration below). Only one horizontal elbow may be used on the vent system. Horizontal elbows do not add to the vent length when determining the acceptable vent configuration. -
Page 15: Using No Elbows (Max. 21' Height)
NSTALLATION Approved Configurations with: Vertical Termination (No Elbows) - or - Vertical Terminations with two 45° Elbows • 10' Minimum Height (with or without offsets) • 34' Maximum Height • 6' Maximum Offset • Use restrictor position indicated by the area that your termination falls in Offset Length Horizontal OffsetVertical... -
Page 16: Using One Vertical Elbow
NSTALLATION Acceptable Vent Configurations When Using One Vertical Elbow Horizontal Run : Vent Height May Be: Use The Following: 9" to 3' No restrictor 9" to 7' 1' to 2' No restrictor 9" to 8' 2'-1" to 3' No restrictor 9"... -
Page 17: Using Two Vertical Elbows
NSTALLATION Acceptable Vent Configurations When Using Two Vertical Elbows • The vertical height directly off of the starter section (V in the illustration below) must be a minimum 3' tall. Horizontal Run: Vent Height May Be: Use The Following: 9" to 8' 3' to 5' Restrictor #1 9"... -
Page 18: Horizontal Vent Termination Requirements
NSTALLATION Horizontal Vent Termination Requirements (see the illustration below) • The horizontal vent termination (standard or snorkel) must meet the following requirements: A Minimum 12" clearance to any door or window (9" in the U.S. if the window may not be opened) B Minimum 12"... -
Page 19: Gas Line Install
NSTALLATION Gas Line Install The gas line must be installed in accordance with all local codes, if any; if not, follow ANSI 223.1 and the requirements listed below. The fireplace and gas control valve must be disconnected from the gas supply piping during any pressure testing of that system at test pressures in excess of 1/2 psig. -
Page 20: Gas Inlet Pressure
NSTALLATION Manifold Pressure: • Check the pressure of the gas downstream of the valve by removing the manifold pressure tap with a 3/16" allen wrench (1/8" N.P.T. plug). If the manifold pressure does not match the pressure listed in the table below on HI, check the inlet gas pressure and correct the problem. Manifold Pressure with Regulator on HI Natural Gas 3.5"... -
Page 21: Electrical Connection
NSTALLATION Electrical Connection Make sure the household breaker is shut off prior to working on any electrical lines. The fireplace must be properly grounded in accordance with local codes (or ANSI/NFPA 70-1987) • The electrical line must be 14 gauge, and supply 115 Volts at 60 Hz (2 Amps) 1 Remove the junction box cover at the right rear corner of the fireplace near the base. -
Page 22: Glass Installation And Removal
NSTALLATION 2 Remove the glass. Glass Installation and Removal... -
Page 23: Log Set Installation And Removal
NSTALLATION 3 Install the log set and coals (if using the decorative fireback, install it prior to the log set - page 39). Log Set Installation and Removal... -
Page 24: Faceplate Installation And Removal
NSTALLATION We recommend you purge the gas line at this time (with the glass removed). This allows gas to be detected once it enters the firebox, ensuring gas does not build up. 4 Replace the glass (follow the directions under "Glass Installation and Removal" on page 22) 5 Install the faceplate onto the fireplace by following the directions below (on black faceplates, check the gold trim to make sure it is in place properly - check the upper corners to make sure they abut - slide the side trim upwards if necessary). - Page 25 (if they vent configuration is correct, vent configuration is correct, are too blue, adjust the air control). contact Travis Industries. contact Travis Industries. 9 Give this manual to the home owner and fully explain the operation of the fireplace.
-
Page 26: Operation
PERATION Before You Begin Read this entire manual before you use your new fireplace (especially the section "Safety Precautions" on pages 2 & 3). Failure to follow the instructions may result in property damage, bodily injury, or even death. Location of Controls - See explanation below Blower Knob This knob controls the speed of the internal convection blower that pushes the heated air into the room. -
Page 27: Starting The Pilot
PERATION ONTINUED Starting The Pilot The pilot flame is required to ignite the main burners (it also plays a safety role). It should be left on once lit. It will stay lit unless the gas control valve is turned to "OFF". However, the pilot will go out if the gas is shut off or if the fireplace malfunctions. -
Page 28: Starting The Fireplace For The First Time
PERATION ONTINUED Starting the Fireplace for the First Time + Fumes from the paint curing and oil burning off the steel may occur the first time you start your fireplace. This is normal. We recommend you open the window to vent the room. + Condensation may appear on the glass each time you start the fireplace - this is normal. -
Page 29: Adjusting The Blower Speed
PERATION ONTINUED Adjusting the Blower Speed + The blower helps transfer the heat from the fireplace into the room. It will not turn on until the fireplace is up to temperature (approximately 10 minutes after starting). See the illustration below for instructions on adjusting the blower speed. -
Page 30: Maintenance
AINTENANCE Yearly Service Procedure Failure to inspect and maintain the fireplace may lead to improper combustion and a potentially dangerous situation. We recommend the following procedures be done by a qualified technician. Check the pilot flame. It should engulf approximately 3/8" of the top of the thermopile and engulf the top of the thermocouple (see illustration below). -
Page 31: Troubleshooting Table
ROUBLESHOOTING Problem: Possible Cause: Don't Call for Service Until You: Pilot Will Not Light A gas shut off valve is turned off Check all gas shut off valves See "Starting the Pilot Light" Step C The gas control knob isn't turned to "PILOT" See "Starting the Pilot Light"... -
Page 32: Troubleshooting
ROUBLESHOOTING ONTINUED How this Fireplace Works This fireplace was designed with safety as the primary concern. Many of the components inside this fireplace are for safety purposes. Therefore, only certified gas service technicians should service this fireplace. What Turns the Main Burners On and Off This fireplace uses a millivolt system to control its operation (a millivolt is a very small amount of electricity). -
Page 33: Wiring Diagram
Rheostat Replacement Parts List Replacement parts are available at your dealer. Contact Travis Industries for information on the closest dealer. The parts listed below are the only parts that the consumer may replace. All other parts must be replaced by a qualified gas service person. -
Page 34: Warranty
5-year period from the date of purchase contact your local authorized FIREPLACE XTRORDINAIR 36DV dealer. If your dealer is unable to repair your unit’s defect, he may process a warranty claim through TRAVIS INDUSTRIES, INC., including the name of the dealership where you purchased the unit, a copy of your receipt showing the date of the unit’s purchase, and the... -
Page 35: Listing Information
The listing label is shown below. It can be found on the baseplate of the fireplace behind the access door. Warnock Hersey Fireplace Xtrordinair 36DV Listed Gas-Fired Direct Vent Wall Furnace ® Tested to ANSI Z21.44-1992 "Gas-Fired Direct Vent Wall Furnace", CGA IR #41, and CAN/CGA-2.17-M91 "Gas-Fired Appliances for use at High Altitudes"... -
Page 36: Optional Equipment
PTIONAL QUIPMENT Remote Control (Part # 99300651) The remote control allows remote operation of the fireplace. Do not connect 110-120 VAC to the gas control valve or control wiring system of this unit. 1 Open the access door. Remove and discard the green jumper wire (see the illustration below). Attach the remote control wire to the top two posts of the on/off switch. -
Page 37: Thermostat (Part # 99300650)
PTIONAL QUIPMENT ONTINUED 4 The remote control receiver is mounted to the wall and requires a hole 1-3/4" wide by 2-1/2" high. Choose a location near the fireplace that may be reached with the 50' length of remote control wire. Cut the hole and route the remote control wire through this hole. -
Page 38: Decorative Refractories (Classic & Brick)
PTIONAL QUIPMENT ONTINUED 2 Route the thermostat wire through either of the gas inlet holes (you may wish to wrap the wire in electrical tape where it passes through the fireplace to prevent damage to the wire). 3 Route the thermostat wire to the thermostat location. It is best to choose a location away from the fireplace and centralized the room, yet within the 50' length of thermostat wire. -
Page 39: Altitude Considerations
PTIONAL QUIPMENT ONTINUED Decorative Firebacks (Classic Fireback - Part # 98500735 Brick Fireback - Part # 98500736) The decorative cast firebacks come in two different styles and attach to the walls of the firebox to enhance the aesthetic quality of the fireplace. The directions below detail their installation. Turn the gas control valve to "OFF"... -
Page 40: Index
NDEX Acceptable Vent Configurations........13 Location of Controls.............26 Adjusting the Blower Speed.........29 Log Set Installation and Removal ........22 Adjusting the Flame Height..........28 Maintenance Schedule ..........26 Air Shutter Adjustment..........22 Manifold Pressure ............20 Altitude Considerations (See Addendum #1)....39 Mantel Requirements...........9 Blower Control .............29 Measuring Vent Lengths ..........14 BTU Input..............5 Noise (see Normal Operating Sounds) ......29...