Table of Contents
Advertisement
Quick Links
WARNING:
If the information in these instructions is not followed exactly, a fire or explosion may result
causing property damage, personal injury, or loss of life.
- Do not store or use gasoline or other flammable vapors and liquids in the vicinity of this or any
other appliance.
- WHAT TO DO IF YOU SMELL GAS
• Do not try to light any appliance.
• Do not touch any electrical switch; do not use any phone in your building.
• Immediately call your gas supplier from a neighbor's phone. Follow the gas supplier's
instructions.
• If you cannot reach your gas supplier, call the fire department.
- Installation and service must be performed by a qualified installer, service agency, or the gas supplier.
A barrier designed to reduce the risk of burns from
the hot viewing glass is provided with this appliance
and shall be installed for the protection of children
and other at-risk individuals.
This appliance may be installed in an aftermarket, permanently located, manufactured home
(USA only), or mobile home, where not prohibited by local codes.
This appliance is only for use with the type of gas indicated on the rating plate. A conversion
kit is supplied with the appliance.
INSTALLER: Leave this manual with the appliance.
CONSUMER: Retain this manual for future reference.
Travis Industries, Inc.
Copyright 2020, T.I.
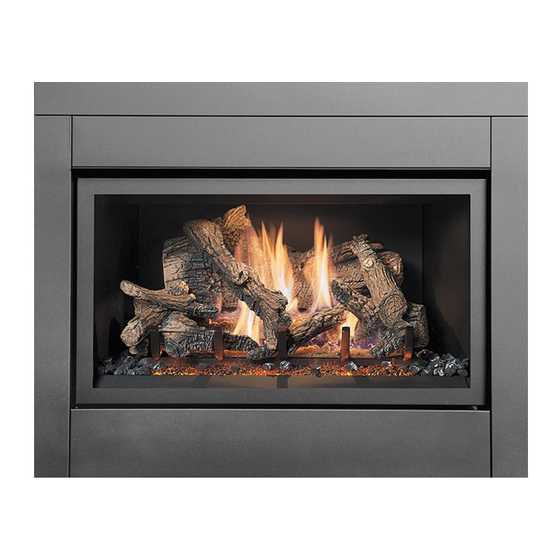
564 GSR2
Deluxe Fireplaces
Owner's Manual
564 25K, 35K
564 25K CF, 35K CF
HOT GLASS WILL CAUSE
BURNS
DO NOT TOUCH GLASS
UNTIL COOLED
NEVER ALLOW CHILDREN
TO TOUCH GLASS
12521 Harbour Reach Dr., Mukilteo, WA 98275
$10.00
Built-In Direct Vent
Natural Gas or Propane
Residential or Mobile
French language manuals at fireplacex.com
Manuels de langue Française à fireplacex.com
4/23/2021
Listed by
Omni-Test Laboratories, Inc.
Report # 0028GF080S
ANSI Z21.88-2017
CSA 2.33-2017
CSA 2.17-2017
Fireplace
Home
www.travisproducts.com
100-01553
Advertisement
Table of Contents

Related Manuals for FireplaceXtrordinair 564 GSR2


Summary of Contents for FireplaceXtrordinair 564 GSR2
- Page 1 564 GSR2 Deluxe Fireplaces Owner’s Manual 564 25K, 35K 564 25K CF, 35K CF WARNING: If the information in these instructions is not followed exactly, a fire or explosion may result causing property damage, personal injury, or loss of life.
-
Page 2: Introduction
Introduction Introduction We welcome you as a new owner of a 564 GSR2 gas fireplace. This manual details operation and maintenance of this fireplace. Please familiarize yourself with the Owner's Manual before operating your heater and save the manual for future reference. -
Page 3: Table Of Contents
Introduction Table of Contents Introduction ........... 2 Normal Operating Odors ......18 Important Information ........2 Maintaining Your Fireplace's Appearance . 19 Installation Warnings ........2 Yearly Service Procedure ......19 Table of Contents .......... 3 Grill Installation and Removal ....20 Features ............ -
Page 4: Features
Introduction Features Works During Power Outages (battery backup) EmberBed Light GreenSmart™ 2 Thermostat / Remote Control Standing or Intermittent (GreenSmart) Pilot Realistic "Wood Fire" Look Convenient Operating Controls Included Blower for Effective Heat Distribution Variable-Rate Heat Output ... - Page 5 Safety Precautions IF YOU SMELL GAS: * Do not light any appliance * Extinguish any open flame * Do not touch any electrical switch or plug or unplug anything * Open windows and vacate building * Call gas supplier from neighbor's house, if not reached, call the fire department This unit must be installed by a qualified installer to prevent the possibility of an explosion.
- Page 6 Safety Precautions Do not place clothing or other Light the heater using the built-in flammable items on or near the igniter. Do not use matches or heater. Because this heater can any other external device to light be controlled by a thermostat your heater.
-
Page 7: Before You Begin
Operation Before You Begin Read this entire manual before you use your new heater (especially the section "Safety Precautions" on pages 4 & 5). Failure to follow the instructions may result in property damage, bodily injury, or even death. Remote Control Warnings KEEP BATTERIES INSTALLED AT ALL TIMES The remote control system requires the batteries to remain in place at all... -
Page 8: Remote Set-Up
Operation Remote Set-Up Verify the Switch is on “REMOTE” The battery holder has a switch built into it (see Figure 1). This switch must remain in the REMOTE position for the remote to operate. Figure 1 Synchronize the Transmitter to the IFC The transmitter will need to be synchronized to the IFC (Integrated Fireplace Control) before the remote will work correctly. -
Page 9: Location Of Controls
Operation Location of Controls Direct Operation The fireplace may be directly operated from the battery holder. The three positions are shown below: ON (all the way left) – Burner turns on (regardless of transmitter settings). OFF (all the way right) – Burner turns off (regardless of transmitter settings). REMOTE (middle position) –... -
Page 10: Starting The Fireplace For The First Time
Operation Starting the Fireplace for the First Time Burn the heater at a high setting with the blower off for an extended period (up to 48 hours). This will cure the painted surfaces. Fumes from the paint curing and oil burning off the steel will occur. This is normal. -
Page 11: Pilot Fuel Conservation Timer
Operation Pilot Fuel Conservation Timer 7 Day Pilot Shutoff Timer (applies to units in CPI mode only) This appliance may be equipped with a 7 day pilot shutoff timer. This timer helps conserve fuel and save money by turning the pilot off when the appliance is not used for 7 days (this timer is mandated in certain areas for conservation purposes). -
Page 12: Remote Operation
Operation Remote Operation When the switch on the battery holder is set to “REMOTE” the transmitter operates the fireplace. Once you understand how the transmitter works, you will be able to operate your fireplace quickly and easily. Display Overview The transmitter display has four main sections (see Figure 4). Figure 4 Listen for the “Beep”... -
Page 13: Manual On-Off / Smart Thermostat / Standard Thermostat
Operation Manual On-Off / Smart Thermostat / Standard Thermostat Use the thermostat button to cycle through the three thermostat settings (see Figure 5). Figure 5 MANUAL ON/OFF – The burner will turn on and off using the remote (see Figure 6). Press the On/Off button to control the burner. -
Page 14: Mode Controls (Flame, Blower, Light, Comfort Control, Emberbed Light)
Operation Mode Controls (Flame, Blower, Light, Comfort Control, EmberBed Light) Use the mode button to cycle through the rive mode controls (see Figure 9 below). Figure 9 Flame Height Flame height may be controlled using the UP and DOWN buttons when in Flame Height Mode (see Figure 10 below). -
Page 15: Mode Controls - Continued
Operation Mode Controls - continued Accent Light The Accent Light (night light) inside the heater may be turned on and off using the up and down buttons when in Accent Light Mode (see illustration below). The center display will display the 7 settings, from “OFF”... -
Page 16: Low Battery Indicator
Operation Low Battery Indicator Transmitter Batteries The transmitter has a battery-level indicator. When it indicates low battery voltage (see Figure 12 below), Transmitter Battery Installation install three new AAA alkaline batteries into the transmitter (see “ ” on page 17). Figure 12 IFC Batteries The IFC (Integrated Fireplace Control) will “beep”... -
Page 17: Battery Replacement
Operation Battery Replacement Opening the Battery Box There are (2) locking tabs in the upper corners of face of the battery box. Slide the tabs to the side and the battery tray will pop outward enough to allow you to grab it. Pull the battery tray forward and remove it from the battery box. -
Page 18: Child-Proof Feature
Operation Child-Proof Feature The childproof feature disables the control buttons, preventing un-wanted use of the remote. Press both the MODE and UP buttons simultaneously to turn this feature on and off (see Figure 14 below). HINT: This feature is especially useful while using the thermostat setting. Figure 14 Normal Operating Sounds Normal Operating Odors... -
Page 19: Maintaining Your Fireplace's Appearance
Operation DANGER HIGH VOLTAGE: Disconnect power before attempting maintenance or repair. Maintaining Your Fireplace's Appearance Fingerprints or other marks left on the optional plated surface may become etched in place if they are not wiped clean prior to turning the fireplace on. Clean the plated surface with denatured alcohol and a soft cloth (with the fireplace cool). -
Page 20: Grill Installation And Removal
Operation Grill Installation and Removal Some fireplaces may use grills above and below the glass. See the instructions below to remove. Note: Install the barrier screen before attaching the grills. © Travis Industries 4/23/2021 - 1553 564 25k/35k GSR2 Owner’s... -
Page 21: Face Installation And Removal
Operation Face Installation and Removal Some fireplaces have a face that fits over the glass frame. The face can be removed following the directions below. © Travis Industries 4/23/2021 - 1553 564 25k/35k GSR2 Owner’s... -
Page 22: Barrier Removal
Operation Barrier Removal A barrier designed to reduce the risk of burns from the hot viewing glass is provided with this appliance and shall be installed for the protection of children and other at-risk individuals. If the barrier becomes damaged, the barrier shall be replaced with the manufacturer’s barrier for this appliance. -
Page 23: Glass Frame Removal And Installation
Operation Glass Frame Removal and Installation Warning: The appliance must be completely cool before removing the glass. Warning: Do not strike or slam the glass. Note: Remove the barrier before removing the glass (see previous page). Replace barrier after replacing the glass. Based upon the face being used, either: (a) swing the access door down and remove the top grill, (b) remove the face (unscrew or lift off - see the instructions incl u ded with the face for details). -
Page 24: Glass Frame Removal And Installation (Continued)
Operation Glass Frame Removal and Installation (continued) The latch can come loose from the latch assembly. This occurs only when it is rotated. Follow the directions below to re-install the latch if it comes loose. © Travis Industries 4/23/2021 - 1553 564 25k/35k GSR2 Owner’s... -
Page 25: Glass Cleaning
Operation Glass Cleaning The glass may be cleaned with a non- abrasive cleaner. To clean the inside of the glass, simply remove the glass frame, place it on a non-scratching surface, and clean the inside surface. WARNING: do not operate the fireplace without the glass frame in place. Accent Light Bulb Replacement 35 Watt 120 Volt T4 Halogen Bulb (GY6.35 Base) Warning:... -
Page 26: Ember Light Bulb Replacement
Operation Ember Light Bulb Replacement The accent lights in your fireplace provide additional lighting. The bulbs will burn out over time. Replace the halogen bulbs with the following bulbs: 35 Watt 120 Volt T4 Halogen Bulb (GY6.35 Base) To replace, follow the directions below: ... -
Page 27: Ember Bed Glass And Ember Material Installation
Operation Ember bed Glass and Ember Material Installation Ember bed Glass Installation Make sure the ember skirt is in place. The skirt hooks over the front of the ember platform and slopes outward toward the glass. The skirt helps keep the glass and ember material from falling off the platform when the glass is removed. -
Page 28: Ember Material Installation
Operation Ember Material Installation Once the ember glass installation is complete, place a generous amount of ember material on the firebox floor on either side of the firebox. Completely cover any visible metal on the firebox floor. NOTE: Make sure no ember material is placed directly on the burner. HINT: Add a few randomly placed ember chunks over the ember bed glass to produce a more realistic appearance. -
Page 29: Log Set Installation
Operation Log Set Installation Installation Warnings NOTE: If using propane (LP), convert the appliance before installing the log set. If using firebacks, install them prior to installing the log set. The logs are fragile, especially after being exposed to heat. ... -
Page 30: Log Set Overview - Birch 94500642
Operation Log Set Overview – Birch 94500642 When installed, the ten (10) logs should appear as shown below. Center Log 250-04934 Rear Log 250-04925 Left Log Right Twig 250-04928 250-04930 Center Left Twig Right Log 250-04932 250-04929 Left Twig Center Twig 250-04931 Front Left Log 250-04933... -
Page 31: Installation
Operation Installation Rear Log The rear log has two pockets that insert over two tabs on the back burner (see photos below). Place the log in place and push it back. The log straddles the burner and does not cover any burner holes. ©... -
Page 32: Left Log
Operation Left Log The left log has two flat surfaces on the bottom. Place the log so the flat surfaces rest against the burner as shown below. Make sure the log does not block any burner holes. Right Log The right log has a channel on the bottom that fits over the ridge on the burner. Place the log in place and slide it to the rear. -
Page 33: Front Left Log
Operation Front Left Log The front left log has a channel that fits over the grate. When in place, the knob on the front of the log fits over the grate as well. Front Ember Chunk The front ember chunk has a groove on the bottom that fits over the grate. Place it as shown below. ©... -
Page 34: Center Twig
Operation Center Twig The center twig is shown below. It has a pin on the bottom side. When in place, the fork on the front straddles the grate and the pin rests on the rear burner (make sure it is not over any burner holes). Center Log The center log has a hole on the back and a fork on the front. -
Page 35: Left Twig
Operation Left Twig The left twig has a hole on the bottom that fits over the locating pin on the front left log. Place the twig as shown below. The front left log has a groove that will point the twig upwards and to the right. Center Left Twig The center-left twig is flat on the bottom with one hole. -
Page 36: Right Twig
Operation Right Twig The right twig has a hole and a slot on the bottom that fit over the pins on the right log. When properly positioned, the log will be placed as shown below, and to the right. Ember Installation NOTE: The embers are included with the fireplace. -
Page 37: Rock Wool Placement
Operation Rock Wool Placement NOTE: The rock wool is included with the fireplace. Consult the installation manual for details on installing the rock wool. The included rock wool is placed on top of the burner to enhance the glow from the burner. The rock wool works best when it is applied in a very thin layer. -
Page 38: Troubleshooting Table
Operation Troubleshooting Table Problem: Possible Cause: Don't Call for Service Until You: The battery box switch is turned to "OFF" Turn the battery box switch to "ON" Main Burners Will The remote control is not working correctly See the remote control instructions Not Start The thermostat is disconnected or set too low See "Thermostat Operation"... -
Page 39: Replacement Parts List
Operation Replacement Parts List Caution: Use only Travis Industries replacement parts. Do not use substitute materials. Warning: Do not operate appliance with the glass front removed, cracked, or broken. Replacement of the glass should be done by a licensed or qualified service person. GLASS w/FRAME 564 25k/25k CF 250-05062 GLASS w/FRAME 564 35k/35k CF... -
Page 40: Wiring Diagram
Operation Wiring Diagram Caution: Label all wires prior to disconnection when servicing controls. Wiring errors can cause improper and dangerous operation. © Travis Industries 4/23/2021 - 1553 564 25k/35k GSR2 Owner’s... -
Page 41: 564 25K/Cf Safety Label
Operation 564 25K/CF Safety Label The safety (listing) label is attached to the operating tag (chained to the heater near the gas control valve). A copy is shown below © Travis Industries 4/23/2021 - 1553 564 25k/35k GSR2 Owner’s... -
Page 42: 564 35K/Cf Safety Label
Operation 564 35K/CF Safety Label The safety (listing) label is attached to the operating tag (chained to the heater near the gas control valve). A copy is shown below © Travis Industries 4/23/2021 - 1553 564 25k/35k GSR2 Owner’s... -
Page 43: Conditions & Exclusions
Limited 7 Year Warranty Register your TRAVIS INDUSTRIES, INC. Limited 7 Year Warranty online at traviswarranty.com. TRAVIS INDUSTRIES, INC. warrants this gas appliance (appliance is defined as the equipment manufactured by Travis Industries, Inc.) to be defect-free in material and workmanship to the original purchaser from the date of purchase as follows: Check with your dealer in advance for any costs to you when arranging a warranty call. - Page 44 Index Accent Light Bulb Replacement ....... 24 Location of Controls ........... 9 Barrier Removal ..........21 Log Set Installation .......... 28 Battery Replacement ........16 Low Battery Indicator ........16 Before You Begin ..........7 Normal Operating Odors ........17 Child-Proof Feature ..........