Table of Contents
Advertisement
Quick Links
Advertisement
Table of Contents

Related Manuals for BenQ MX768


Summary of Contents for BenQ MX768
- Page 1 MX768/MW769 Digital Projector User Manual...
-
Page 2: Table Of Contents
Table of contents Important safety Use Teaching Template......47 Controlling the projector through a LAN instructions ....3 environment..........48 Introduction....7 Using the Web Control Lock....57 Displaying image through Q Presenter .. Projector features........7 ..............58 Shipping contents ........8 Using the Projection Login Code .. -
Page 3: Important Safety Instructions
Important safety instructions Your projector is designed and tested to meet the latest standards for safety of information technology equipment. However, to ensure safe use of this product, it is important that you follow the instructions mentioned in this manual and marked on the product. Safety Instructions Please read this manual before Always open the lens shutter or... - Page 4 Safety Instructions (Continued) The lamp becomes extremely hot Do not place this product on an during operation. Allow the unstable cart, stand, or table. The projector to cool for approximately product may fall, sustaining serious 45 minutes prior to removing the damage.
- Page 5 Safety Instructions (Continued) Do not place this projector in any of Do not block the ventilation holes. the following environments. - Do not place this projector on a blanket, bedding or any other soft surface. - Space that is poorly ventilated or - Do not cover this projector with a cloth confined.
- Page 6 BenQ to have the projector serviced. Do not step on the projector or place any objects upon it. Besides probable...
-
Page 7: Introduction
Introduction Projector features This model is one of the best projectors available in the world. You can enjoy the best video quality across various devices such as PC, laptop, DVD and VCR even document camera to bring all possibility to life. The projector offers the following features. -
Page 8: Shipping Contents
Shipping contents Carefully unpack and verify that you have all of the items shown below. If any of these items are missing, please contact your place of purchase. Standard accessories The supplied accessories will be suitable for your region, and may differ from those illustrated. *The warranty card is only supplied in some specific regions. -
Page 9: Optional Accessories
Optional accessories Spare lamp kit carry bag Ceiling mount kit 3D glasses BenQ wireless dongle Introduction... -
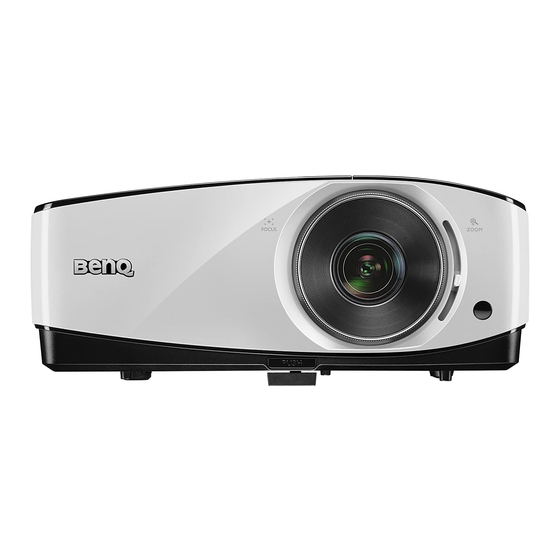
Page 10: Projector Exterior View
Projector exterior view External control panel Front/upper side (See "Projector" on page 11 details.) Lamp cover Focus ring Projection lens Lens cover Ventilation holes (intake) Zoom slide lever Front IR remote sensor Quick-release button Audio output jack Audio input jack Audio (L/R) input jack S-Video input jack RS-232 control port... -
Page 11: Controls And Functions
Controls and functions Projector ECO BLANK Press the ECO BLANK button to turn off the image for a period of time with 70% lamp power saving. See "Hiding the image" on page 44 for details. AUTO Automatically determines the best picture timings for the displayed image. -
Page 12: Mounting The Projector
If you intend to mount your projector on the ceiling or wall, we strongly recommend that you use a proper fitting BenQ projector ceiling mount kit or wall mount kit and that you ensure it is securely and safely installed. -
Page 13: Remote Control
Remote control Keystone/Arrow keys ( Left, Right) Displays 2D Keystone page and adjusts the horizontal keystone values. See "Using the menus" on page 33 details. When the On-Screen Display (OSD) menu is activated, the #5, and #6 keys are used as directional arrows to select the desired menu items and to make adjusents. -
Page 14: Network Setting
Operating the laser pointer 12. NETWORK SETTING Displays Network Settings menu. See for The Laser Pointer is a details. See "Network Settings" on page presentation aid for professionals. It emits red colored light when for details. you press it and the indicator 13. -
Page 15: Replacing The Remote Control Battery
Infra-Red (IR) remote control sensor is located on the front of the projector. The remote control must be held at an angle within 22.5 degrees perpendicular to the projector's IR remote control sensor to function correctly. The distance between the remote control and the sensor should not exceed 8 meters (~ 26 feet). -
Page 16: Positioning Your Projector
Rear Ceiling Select this location with the projector suspended upside- down from the ceiling behind the screen. Note that a special rear projection screen and the BenQ Projector Ceiling Mounting Kit are required for this installation location. Set Rear Ceiling in the SYSTEM SETUP: Basic >... -
Page 17: Obtaining A Preferred Projected Image Size
BenQ has provided a table of screen sizes to assist you in determining the ideal location for your projector. There are two dimensions to consider, the perpendicular horizontal distance from the center of the screen (projection distance), and the vertical offset height of the projector from the horizontal edge of the screen (offset). -
Page 18: Projection Dimensions
For example, If you are using the MX768 and a 200-inch screen, the projection distance is 7417 mm and with a vertical offset of 457 mm. If you are using the MX768 and your measured projection distance is 5.5 m (5500 mm), the closest match in the "Distance from screen (mm)"... - Page 19 150'' (about 3810 mm) screen is required. All measurements are approximate and may vary from the actual sizes. BenQ recommends that if you intend to permanently install the projector, you should physically test the projection size and distance using the actual projector in situ before you permanently install it, so as to make allowance for this projector's optical characteristics.
-
Page 20: Connection
Connection When connecting a signal source to the projector, be sure to: Turn all equipment off before making any connections. Use the correct signal cables for each source. Ensure the cables are firmly inserted. • In the connections shown below, some cables may not be included with the projector (see "Shipping contents"... - Page 21 1. Audio cable 7. USB cable (mini-B to type A) 2. Microphone 3.5 mini jack cable 8. Audio L/R cable 3. VGA cable 9. Video cable 4. VGA to DVI-A cable 10. S-Video cable 5. HDMI cable 11. Component Video to VGA (DSub) adapter cable 6.
-
Page 22: Connecting A Computer Or Monitor
It may take several seconds to successfully display the screen for the first time plug-in. • If computer's screen still can't be projected, please go to "My Computer", double-click “BenQ QPresenter” icon, then run the “Autorun.exe” file. • Projection speed will vary according to the computer capability. -
Page 23: Connecting A Monitor
To connect the projector to a notebook or desktop computer (using HDMI): Take a HDMI cable and connect one end to the HDMI jack of the computer. Connect the other end of the cable to the HDMI-1 or HDMI-2 jack on the projector. -
Page 24: Connecting Video Source Devices
Connecting Video source devices You need only connect the projector to a Video source device using just one of the above connecting methods, however each provides a different level of video quality. The method you choose will most likely depend upon the availability of matching terminals on both the projector and the Video source device as described below: Terminal Terminal appearance... -
Page 25: Connecting A Component Video Source Device
• In the unlikely event that you connect the projector to a DVD player via the projector's HDMI input and the projected picture displays wrong colors, please change the color space "Changing Color Space" on page 37 to YUV. See for details. -
Page 26: Connecting An S-Video/Composite Source Device
Connecting an S-Video/composite source device Examine your Video source device to determine if it has an unused S-Video/composite output jack available: • If it has both jacks, use the S-Video output jack for connection as the S-Video terminal provides better picture quality than the Video terminal. •... -
Page 27: Operation
Operation Starting up the projector Plug the power cord into the projector and into a power outlet. Check that the POWER indicator light on the projector lights orange after power has been applied. • Please use the original accessories (e.g. power cable) only with the device to avoid possible dangers such as electric shock and fire. -
Page 28: Adjusting The Projected Image
You can also press SOURCE on the projector or remote control to select your desired input signal. See "Switching input signal" on page 36 for details. • If no signal is detected for 3 minutes, the projector automatically enters ECO BLANK mode. - Page 29 • Using the projector or remote control Press / / / to display the 2D Keystone page. Press to adjust vertical values from -30 to 30. Press to adjust horizontal values from -25 to 25. • Using the OSD menu DISPLAY Press MENU/EXIT and select the menu.
- Page 30 Press / / / to select one of the four corners and press MODE/ENTER. Press to adjust vertical values from 0 to 60. Press to adjust horizontal values from 0 to 60. • Using the QUICK INSTALL key Press QUICK INSTALL on the remote control. Press to select Corner Fit and press MODE/ ENTER.
- Page 31 Press to select the direction and press MODE/ENTER. Only one Surface Fit setting will be stored so if you want to change from the previous direction to the other, the notice message will pop-up to remind you to reset the previous Surface Fit setting.
-
Page 32: Fine-Tuning The Image Size And Clarity
Press to adjust the top or/and bottom side convex or concave. Default is 0 and value is -40~0~40. Single side adjustment is only for distortion. For both sides of the vertical surface fit, use adjust the center of the curve because it is not always at the center. -
Page 33: Using The Menus
Using the menus The projector is equipped with On-Screen Display (OSD) menus for making various adjusents and settings. Below is the overview of the OSD menu. Main menu icon Main menu Highlight (selected) Status Sub-menu Press MENU/ EXIT to the previous page or to exit. -
Page 34: Securing The Projector
Securing the projector Using a security cable lock The projector has to be installed in a safe place to prevent theft. Otherwise, purchase a lock, such as the Kensington lock, to secure the projector. You can locate a Kensington lock slot on the rear side of the projector. See item 25 on page for details. -
Page 35: If You Forget The Password
Write down the number and turn off your projector. Seek help from the local BenQ service center to decode the number. You may be required to provide proof of purchase documentation to verify that you are an authorized user of the projector. -
Page 36: Switching Input Signal
• The native display resolution of MX768 is in a 4:3 aspect ratio while the native display resolution of MW769 is in a 16:10 aspect ratio. For best display picture results, you should select and use an input signal which outputs at this resolution. Any other resolutions will be... -
Page 37: Magnifying And Searching For Details
image distortion or loss of picture clarity. See "Selecting the aspect ratio" on page 37 details. Changing Color Space In the unlikely event that you connect the projector to a DVD player via the projector's HDMI input and the projected picture displays wrong colors, please change the color space to YUV. - Page 38 About the aspect ratio In the pictures below, the black portions are inactive areas and the white portions are active areas. OSD menus can be displayed on those unused black areas. Auto: Scales an image proportionally to fit the projector's native resolution in its horizontal or vertical width.
-
Page 39: Optimizing The Image
Optimizing the image Selecting a picture mode The projector is preset with several predefined picture modes so that you can choose one to suit your operating environment and input signal picture type. To select an operation mode that suits your need, you can follow one of the following steps. -
Page 40: Using Wall Color
Using Wall Color In the situation where you are projecting onto a colored surface such as a painted wall which may not be white, the Wall Color feature can help correct the projected picture’s color to prevent possible color difference between the source and projected pictures. To use this function, go to the DISPLAY >... -
Page 41: Selecting A Color Temperature
Selecting a Color Temperature The options available for color temperature* settings vary according to the signal type selected. Cool: Makes images appear bluish white. Normal: Maintains normal colorings for white. Warm: Makes images appear reddish white. *About color temperatures: There are many different shades that are considered to be "white" for various purposes. One of the common methods of representing white color is known as the “color temperature”. - Page 42 To adjust the settings: Go to the PICTURE menu and select 3D Color Management. Press MODE/ENTER and the 3D Color Management page displays. Select Primary Color and press to select a color from among Red, Yellow, Green, Cyan, Blue, or Magenta. Press to select Hue and press select its range.
-
Page 43: Setting The Presentation Timer
Setting the presentation timer The presentation timer can indicate the presentation time on the screen to help you achieve better time management when giving presentations. Follow these steps to utilize this function: Go to the SYSTEM SETUP: Basic > Presentation Timer menu and press MODE/ENTER to display the Presentation Timer page. -
Page 44: Hiding The Image
Hiding the image In order to draw the audience's full attention to the presenter, you can use ECO BLANK to hide the screen image. Press any key on the projector or remote control to restore the image. Eco Blank wording appears at the screen while the image is hidden. -
Page 45: Adjusting The Sound
Adjusting the sound The sound adjusents made as below will have an effect on the projector speaker(s). Be sure you have made a correct connection to the projector audio input. See "Connection" on page 20 for how the audio input is connected. Muting the sound To adjust the sound level, press MUTE on the remote control, or:... -
Page 46: Personalizing The Projector Menu Display
Personalizing the projector menu display The On-Screen Display (OSD) menus can be set according to your preferences. The following settings do not affect the projection settings, operation, or performance. • Language in the SYSTEM SETUP: Basic menu sets your familiar language for the OSD menus. -
Page 47: Use Teaching Template
Use Teaching Template Making writing on the board easier for teachers, you can use build-in template by OSD. Open the OSD menu and go to the DISPLAY > Teaching Template . Choose Blackboard/Whiteboard > Off/Letter Formation/Worksheet/Coordinate Chart. The Teaching Template displays. Teaching Whiteboard Blackboard... -
Page 48: Controlling The Projector Through A Lan Environment
Controlling the projector through a LAN environment Network Settings allow you to manage the projector from a computer using a web browser when the computer and the projector are properly connected to the same local area network. Configuring the Wired LAN Settings If you are in a DHCP environment: Take a RJ45 cable and connect one end to the LAN input jack of the projector and the other end to the RJ45 port. - Page 49 Configuring the Wireless LAN Settings Connect the BenQ wireless dongle (optional) to the USB TYPE-A input jack of the projector. Select Wireless LAN in SYSTEM SETUP: Advanced > Network Settings menu and press MODE/ENTER. For AP mode connection, you need to note SSID information, then search the projector with the same SSID in Q Presenter to start projection.
- Page 50 The BenQ remote network operation page opens. • The web page control supports IE version 7.0 or higher. • The illustrations in web page control, Q Presenter and USB Reader sections are for the purpose of explanation and may differ from the actual design of your projector.
- Page 51 i. These buttons function the same as the ones on the remote control. See "Remote control" on page 13 for details. The Display Setting page allows you to operate the projector as if you were using the OSD menus. These functions are some useful menu settings. The Picture Setting page allows you to manage the projector as if you were using the PICTURE menu.
- Page 52 The Information page displays the information and status of this projector. The Conference Control page allows you to control computer’s display status of all the computers linked to this projector. Operation...
- Page 53 The Crestron page is only available when you are on a Wired LAN network. It also allows you to control the projector remotely. The Crestron supports RoomView version 6.2.2.9. i. These buttons function the same as the ones on the OSD menus or remote control.
- Page 54 i. You can name the projector, keep track of its location and the person in charge of it. ii. You can adjust the Wired LAN settings. iii. Once set, access to the remote network operation on this projector has been password-protected.
- Page 55 The Admin page allows you to enter Basic, Wired LAN, Wireless LAN and Mail pages once the password is entered. The default password is “0000”. If you want to change the password, please enter Basic page. The Basic page allows you to change the password and select connected persons. The number of connected persons may affect the network display performance.
- Page 56 The Wired LAN page allows you to adjust the Wired LAN settings. The Wireless LAN page allows you to adjust the Wirless LAN settings. Max. length for SSID string is 16 bytes. Please use a different SSID when more than two projectors are connecting through wireless LAN.
-
Page 57: Using The Web Control Lock
The Mail page allows you to send alert e-mail to your ITS administrator. You can first try the Mail Test function to check if the Alert Mail works. Using the Web Control Lock This function is designed to prevent unauthorized people from maliciously changing the projector settings through the Projector Network Display System. -
Page 58: Displaying Image Through Q Presenter
Go to the SYSTEM SETUP: Advanced > Security Settings > Change Security Settings menu after opening the OSD menu system. Press MODE/ ENTER. The message “INPUT PASSWORD” appears. Enter the current password. If the password is correct, the OSD menu returns to the Security Settings page. Press to select Web Control Lock and press to select On or Off. - Page 59 ii. Projectors linked in the LAN will be found. Then select the projector you want to link. iii. Click “Connect”. Then you should be able to see the image on projector. iv. You can click to disconnect all connected projectors.. The Special Feature page allows you to have some advanced functions to manage the display image on your projector.
- Page 60 appers on th eprojector. You can change th elocation anytime you want, even back to full screen or blank out. The Basic and Advanced Settings pages allow you to configure the Q Presenter. i. You can select whether to activate Remote Desktop function. If the Remote Desktop function is activated, you can change the Name and Password.
-
Page 61: Using The Projection Login Code
Once set, press Apply to save the changes. x. You can link to the BenQ remote network operation page on page 49. Using the Projection Login Code This function is designed to ensure network display through the correct projector. To toggle this function: Go to the SYSTEM SETUP: Advanced >... -
Page 62: Using The Broadcassting Function
Using the broadcassting function When it comes to 1:N LAN Dispaly,there are two ways to do this function: By TCP/IP (support up to 8 porjectors, original design) By Multicast(support up to 255 projectors, this new design) You can select channel 1, 2, 3, 4, 5,6...25 with showing the corrspondent IP(gray out). There are 1~25 channels (25IPs) for you to select freely: 239.192.19.21~239.192.19.45 If the channel is fixed at emergency channel, when projector detects image coming in from... -
Page 63: Remote Desktop Control Through Q Presenter
Remote Desktop Control through Q Presenter The Q Presenter can proceed the Remote Desktop Control (RDC) the host PC from projector site. Setup the RDC login account (User name and Password ) in Q Presenter. • Name: must be 8 English capital letters A~Z and number 0 ~9. •... -
Page 64: Presenting From A Usb Reader
Activate Remote Desktop Control Function in Q Presenter > Settings > Basic Settings. Open the OSD menu and go to the SYSTEM SETUP: Advanced > Network Settings menu. Press MODE/ENTER. Select Remote Desktop and press MODE/ ENTER. Enter the Account and Password the same as step 1. - Page 65 To view your pictures as a slideshow, follow these steps: Connect a USB flash drive to your computer and copy files from your computer to the USB flash drive. Turn on your projector if needed. Remove the USB flash drive from your computer and plug it into the USB TYPE-A jack of the projector.
-
Page 66: Shutting Down The Projector
Shutting down the projector Press Power on the projector. A confirmation message displays prompting you. If you don't respond in a few seconds, the message will disappear. If you use the remote control, press OFF to shut down the projector. Press Power on the projector a second time. -
Page 67: Menu Operation
Menu operation Menu system Please note that the on-screen display (OSD) menus vary according to the signal type selected. Main menu Sub-menu Options Off/Light Yellow/Pink/Light Green/ Wall Color Blue/Blackboard Aspect Ratio Auto/Real/4:3/16:9/16:10 2D Keystone Corner Fit Horizontal Surface Fit Surface Fit Vertical Surface Position Phase... - Page 68 Dynamic/Presentation/sRGB/Cinema/(3D)/User 1/ Picture Mode User 2 Reference Mode Dynamic/Presentation/sRGB/Cinema/(3D) Brightness Contrast Color Tint Sharpness Brilliant Color On/Off Color Cool/Normal/Warm PICTURE Temperature Color R Gain/G Gain/B Gain/R Offset/G Temperature Offset/B Offset Fine Tuning Primary Color R/G/B/C/M/Y 3D Color Management Saturation Gain Reset Picture Current/All/Cancel Settings...
- Page 69 Settings Instant Restart On/Off Disable/5 min/10 min/15 min/20 Blank Timer min/25 min/30 min Disable/30 min/1 hr/2 hrs/3 hrs/4 Sleep Timer hrs/8 hrs/12 hrs Remote Front+Rear/Front/Rear Receiver Panel Key Lock On/Off Yes/No Background BenQ/Black/Blue/Purple Color BenQ/Black/Blue/MyScreen (by Splash Screen request) Operation...
- Page 70 High Altitude On/Off Yes/No Mode Mute On/Off Volume 0~10 Microphone Audio Settings 0~10 Volume Power On/Off On/Off Ring Tone Lamp Mode Normal/Economic/Smart Eco Reset Lamp Lamp Settings Yes/No Timer Equivalent Lamp Hour Change Password Change Security SYSTEM Security Power On Lock On/Off SETUP: Settings...
-
Page 71: System Setup
Status DHCP IP Address Wired LAN Subnet Mask Default Gateway DNS Server Apply Status SSID SSID Display Wireless LAN IP Address Network Connection Mode SYSTEM Settings Apply SETUP: Account Advanced Remote Desktop Password Connect Projection Login On/Off Code Broadcasting Broadcasting Channel IP Address AMX Device... -
Page 72: Description Of Each Menu
Description of each menu • The default values listed in this manual, especially on pages 72-82, are for reference only. They may vary between the projectors due to the continuous improvement to the products. FUNCTION DESCRIPTION Corrects the projected picture’s color when the projection surface is Wall Color not white. - Page 73 FUNCTION DESCRIPTION This projector features a 3D function which enables you to enjoy the 3D movies, videos, and sporting events in a more realistic way by presenting the depth of the images. You need to wear a pair of 3D glasses to view the 3D images.
- Page 74 FUNCTION DESCRIPTION Pre-defined picture modes are provided so you can optimize your Picture Mode projector image set-up to suit your program type. See "Selecting a picture mode" on page 39 for details. Selects a picture mode that best suits your need for the image quality and further fine-tune the image based on the selections listed on the Reference same page below.
-
Page 75: Color Space
FUNCTION DESCRIPTION Adjusts white peaking while maintaining correct color presentation. Brilliant "Adjusting Brilliant Color" on page 40 for details. Color This function is only available when User 1/2 is selected. "Selecting a Color Temperature" on page 41 for details. Color Temperature This function is only available when User 1/2 is selected. -
Page 76: Timer Display
FUNCTION DESCRIPTION Reminds the presenter to finish the presentation within a certain time frame. See "Setting the presentation timer" on page 43 details. Timer Period Sets a preferred length of time for presentation. Timer Display Presentation Sets whether to display the timer on screen. Timer Timer Position Sets the position where the timer displays on screen. -
Page 77: Direct Power On
FUNCTION DESCRIPTION Direct Power On Selecting On enables the function. See "Starting up the projector" on page 27 for details. Signal Power On the projector will turn on automatically when VGA Selecting On signal is detected. Off the projector has to be turnned Selecting on manually (by keypad or remote). - Page 78 Lock Allows you to select which background color will display when no Background signal is input into the projector. Four options are available: BenQ Color logo, Black, Blue, or Purple. Allows you to select which logo screen will display during projector start-up.
-
Page 79: Microphone Volume
FUNCTION DESCRIPTION A mode for operation in high altitude areas. See "Operating in a high High Altitude altitude environment" on page 44 for details. Mode Allows you to enter the audio setting menu. See "Adjusting the sound" on page 45 for details. - Page 80 FUNCTION DESCRIPTION Selecting On enables the function and the projector displays the grid Test Pattern test pattern. It helps you adjust the image size and focus and check that the projected image is free from distortion. Closed Caption Enable Activates the function by selecting On when the selected input signal carries closed captions.
-
Page 81: Monitor Out
FUNCTION DESCRIPTION Network Selecting On enables the function, and the projector can be monitored or controlled over a network when it is in standby mode. Microphone Selecting On enables the function, and the microphone can be used even in standby mode Monitor Out Selecting On enables the function. -
Page 82: Reset All
FUNCTION DESCRIPTION AMX Device Discovery Selecting the projector can be detected by AMX controller. Network Settings Mac Address Show Mac address. Returns all settings to the factory preset values. The following settings will still remain: User 1, User 2, Projector Position, Color Space Conversion, High Altitude Mode, Security Settings, Baud Rate and Network Settings Reset All... -
Page 83: Maintenance
Maintenance Care of the projector Your projector needs little maintenance. The only thing you need to do on a regular basis is to keep the lens and case clean. Never remove any parts of the projector except the lamp. Contact your dealer if other parts need replacing. -
Page 84: Lamp Information
Lamp information Getting to know the lamp hour When the projector is in operation, the duration (in hours) of lamp usage is automatically calculated by the built-in timer. The method of calculating the equivalent lamp hour is as follows: Total (equivalent) lamp hour = 1 (hours used in Economic mode) + 4/3 (hours used in normal mode) "Setting Lamp Mode eco function as Economic or SmartEco mode"... -
Page 85: Timing Of Replacing The Lamp
presentation, select Disable. The projector will not automatically shut down in a certain time period. Timing of replacing the lamp When the Lamp indicator lights up red or a message appears suggesting it is time to replace the lamp, please install a new lamp or consult your dealer. An old lamp may cause a malfunction in the projector and in some instances the lamp may explode. -
Page 86: Replacing The Lamp
• To assure optimal performance from the projector, it is recommended that you purchase a BenQ projector lamp for lamp replacement. • Ensure good ventilation when handling broken lamps. We recommend that you use respirators, safety glasses, goggles or face shield and wear protective clothing such as gloves. - Page 87 Remove the lamp cover by (a) sliding the cover toward the side of the projector and (b) lifting it off. • Do not turn the power on with the lamp cover removed. • Do not insert your fingers between the lamp and the projector.
-
Page 88: Resetting The Lamp Timer
Tighten the screws that secure the lamp. • Loose screw may cause a bad connection, which could result in malfunction. • Do not over tighten the screws. Ensure the handle is fully laid flat and locked in place. Replace the lamp cover by sliding it into place. - Page 89 Indicators Light Status & Description POWER TEMP LAMP1 LAMP2 Power events Stand-by Orange Green Powering up Flashing Normal operation Green Normal power-down cooling Orange Flashing Download CW start fail Green Scaler shutdown fail (data abord) Flashing Scaler reset fail (video projector only) LAN download fail LAN download processing Green...
- Page 90 Green Temperature 2 error (over limited temperature) Flashing Green Thermal Sensor 2 open error Flashing Flashing Thermal Sensor 2 short error Green Green Flashing Thermal IC #2 I2C Connection error Green Green Flashing Flashing Maintenance...
-
Page 91: Troubleshooting
Troubleshooting The projector does not turn on. Cause Remedy Plug the power cord into the AC inlet on the projector, and plug the power cord into the There is no power from the power cable. power outlet. If the power outlet has a switch, make sure that it is switched on. -
Page 92: Specifications
F= 2.42~2.98 Video signal input f= 20.77mm~31.13mm S-VIDEO Offset Mini DIN 4-pin port x 1 VIDEO (MX768): 130% RCA jack x 1 (MW769): 125% SD/HDTV signal input Zoom ratio Analog - Component RCA jack x 3 (MX768)1.6X (through RGB input) (MW769)1.5X... -
Page 93: Dimensions
Dimensions 329 mm (W) x 137.2 mm (H) x 248.7 mm (D) 248.7 137.2 77.4 62.5 Ceiling mount installation 221.0 Ceiling mount screw: M4 (Max L = 25 mm; Min L = 20 mm) Unit: mm 146.0 72.87 62.5 62.5 163.7 163.7 329.0... -
Page 94: Timing Chart
94.500 XGA_120* 119.989 97.551 115.500 (Reduce Blanking) 1152 x 864 1152 x 864_75 75.00 67.500 108.000 1024 x 576 BenQ NB Timing 60.0 35.820 46.996 1024 x 600 BenQ NB Timing 64.995 41.467 51.419 1280 x 720 60.000 45.000 74.250... -
Page 95: Supported Timing For Hdmi Input
84.997 68.677 94.500 XGA_120* 119.989 97.551 115.500 (Reduce Blanking) 1152 x 864 1152 x 864_75 75.00 67.500 108.000 BenQ Notebook 1024 x 576 60.0 35.820 46.996 Timing BenQ Notebook 1024 x 600 64.995 41.467 51.419 Timing 1280 x 720 60.000 45.000... - Page 96 1680 x 1050 59.954 65.290 146.250 1680 x 1050_60* 640 x 480@67Hz MAC13 66.667 35.000 30.240 832 x 624@75Hz MAC16 74.546 49.722 57.280 1024 x 768@75Hz MAC19 75.020 60.241 80.000 1152 x 870@75Hz MAC21 75.060 68.680 100.000 Supported timing for 3D signal with Field Sequential, over-under and side-by-side format. Supported timing for 3D signal with Field Sequential format.
- Page 97 Supported timing for Component Video Input Dot Clock Horizontal Vertical Timing Resolution Frequency Frequency Frequency (kHz) (Hz) (MHz) 480i* 720 x 480 15.73 59.94 13.5 480p* 720 x 480 31.47 59.94 576i 720 x 576 15.63 13.5 576p 720 x 576 31.25 720/50p 1280 x 720...
- Page 98 1024 x 768 XGA_85 84.997 68.667 XGA_120 119.989 97.551 ◎ (Reduce Blanking) 1152 x 864 1152 x 864_75 67.5 BenQ Notebook 1024 x 576 35.82 Timing BenQ Notebook 1024 x 600 64.995 41.467 Timing 1280 x 720_60 ◎ ◎ ◎...
- Page 99 70.069 56.476 XGA_75 75.029 60.023 1024 x 768 XGA_85 84.997 68.667 XGA_120 119.989 97.551 ◎ (Reduce Blanking) 1152 x 864 1152 x 864_75 67.5 BenQ Notebook 1024 x 576 35.82 Timing BenQ Notebook 1024 x 600 64.995 41.467 Timing Specifications...
- Page 100 1280 x 720_60 ◎ ◎ ◎ 1280 x 720 1280 x 720_120 ◎ 1280 x 768_60 47.396 ◎ ◎ ◎ (Reduce Blanking) 1280 x 768 1280 x 768_60 59.87 47.776 ◎ ◎ ◎ WXGA_60 59.81 49.702 ◎ ◎ ◎ WXGA_75 74.934 62.795 1280 x 800...
-
Page 101: Warranty And Copyright Information
Proof of purchase date will be required with any warranty claim. In the event this product is found to be defective within the warranty period, BenQ's only obligation and your exclusive remedy shall be replacement of any defective parts (labor included). To obtain warranty service, immediately notify the dealer from which you purchased the product of any defects.