Table of Contents
Advertisement
Quick Links
Advertisement
Table of Contents

Related Manuals for Fortinet Fortinet Switch 800F


Summary of Contents for Fortinet Fortinet Switch 800F
-
Page 1: Installation Guide
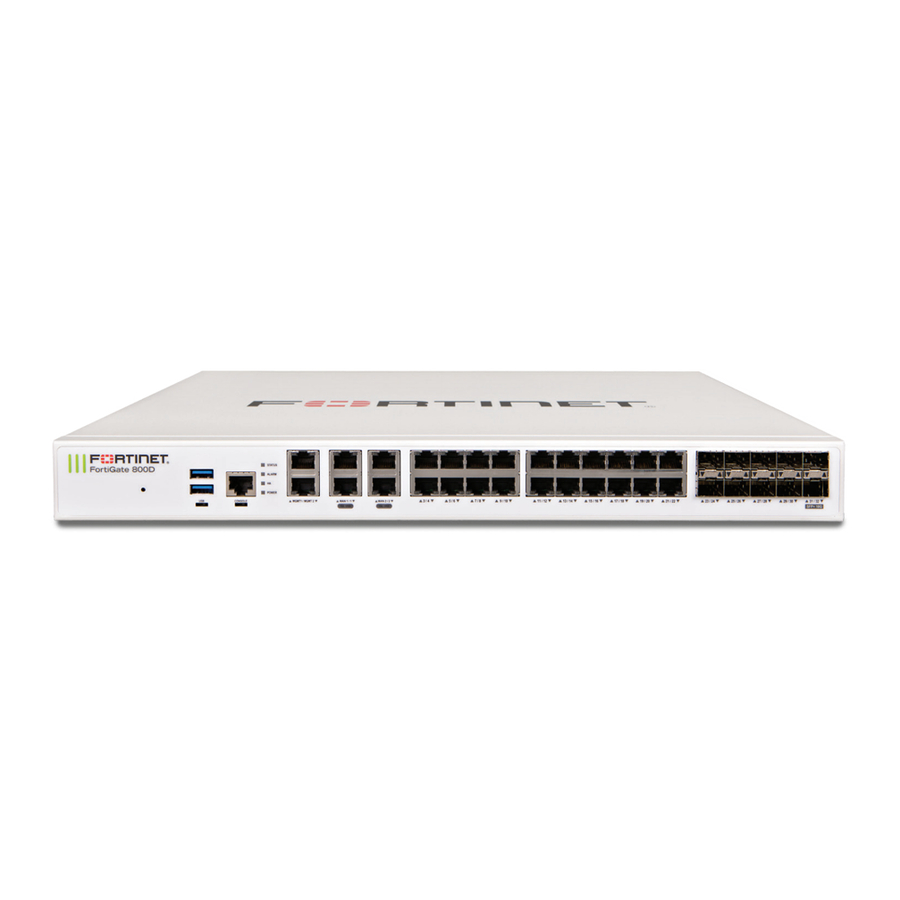
Installation Guide FortiGate 800/800F FortiGate-800 I N T E R N A L E X T E R N A L D M Z CONSOLE Enter P W R FortiGate-800F P W R I N T E R N A L E X T E R N A L D M Z CONSOLE... - Page 2 CAUTION: RISK OF EXPLOSION IF BATTERY IS REPLACED BY AN INCORRECT TYPE. DISPOSE OF USED BATTERIES ACCORDING TO THE INSTRUCTIONS. For technical support, please visit http://www.fortinet.com. Send information about errors or omissions in this document or any Fortinet technical documentation to techdoc@fortinet.com.
-
Page 3: Table Of Contents
Related documentation ....................... 9 FortiManager documentation ..................9 FortiClient documentation ....................9 FortiMail documentation....................9 FortiLog documentation ....................10 Comments on Fortinet technical documentation............10 Customer service and technical support................11 Getting started ..................... 13 Package contents ......................14 Mounting ........................... 15 Turning the FortiGate unit power on and off .............. - Page 4 High availability configuration settings ................51 Configuring FortiGate units for HA using the web-based manager ......53 Configuring FortiGate units for HA using the CLI............54 Connecting the cluster to your networks................55 Installing and configuring the cluster................. 57 Index ........................59 01-28006-0024-20041026 Fortinet Inc.
-
Page 5: Introduction
• network-level services such as firewall, intrusion detection, VPN, and traffic shaping. The FortiGate Antivirus Firewall uses Fortinet’s Accelerated Behavior and Content Analysis System (ABACAS™) technology, which leverages breakthroughs in chip design, networking, security, and content analysis. The unique ASIC-based... -
Page 6: Web-Based Manager
This Installation Guide contains information about basic and advanced CLI commands. For a more complete description about connecting to and using the FortiGate CLI, see the FortiGate CLI Reference Guide. 01-28006-0024-20041026 Fortinet Inc. -
Page 7: Setup Wizard
Introduction Setup wizard Setup wizard The FortiGate setup wizard provides an easy way to configure the basic initial settings for the FortiGate unit. The wizard walks through the configuration of a new administrator password, FortiGate interfaces, DHCP server settings, internal servers (web, FTP, etc.), and basic antivirus settings. -
Page 8: Fortigate Documentation
Describes the structure of FortiGate log messages and provides information about the log messages that are generated by FortiGate units. • FortiGate High Availability Guide Contains in-depth information about the FortiGate high availability feature and the FortiGate clustering protocol. 01-28006-0024-20041026 Fortinet Inc. -
Page 9: Related Documentation
Introduction FortiManager documentation Related documentation Additional information about Fortinet products is available from the following related documentation. FortiManager documentation • FortiManager QuickStart Guide Explains how to install the FortiManager Console, set up the FortiManager Server, and configure basic settings. •... -
Page 10: Fortilog Documentation
FortiGate unit. For a complete list of FortiGate documentation visit Fortinet Technical Support at http://support.fortinet.com. Comments on Fortinet technical documentation You can send information about errors or omissions in this document, or any Fortinet technical documentation, to techdoc@fortinet.com. 01-28006-0024-20041026... -
Page 11: Customer Service And Technical Support
Fortinet technical support web site at http://support.fortinet.com. You can also register FortiGate Antivirus Firewalls from http://support.fortinet.com and change your registration information at any time. Fortinet email support is available from the following addresses: amer_support@fortinet.com For customers in the United States, Canada, Mexico, Latin... - Page 12 Comments on Fortinet technical documentation Introduction 01-28006-0024-20041026 Fortinet Inc.
-
Page 13: Getting Started
FortiGate-800/800F Installation Guide Version 2.80 MR6 Getting started This section describes unpacking, setting up, and powering on a FortiGate Antivirus Firewall unit. This section includes: • Package contents • Mounting • Turning the FortiGate unit power on and off • Connecting to the web-based manager •... -
Page 14: Package Contents
The FortiGate-800 and FortiGate-800F package contains the following items: • FortiGate-800 or FortiGate-800F Antivirus Firewall • one orange crossover ethernet cable (Fortinet part number CC300248) • one grey regular ethernet cable (Fortinet part number CC300249) • one RJ-45 to DB-9 serial cable •... -
Page 15: Mounting
The FortiGate-800/800F unit may overload your supply circuit and impact your overcurrent protection and supply wiring. Use appropriate equipment nameplate ratings to address this concern. • Make sure that the FortiGate-800/800F unit has reliable grounding. Fortinet recommends direct connections to the branch circuit. Environmental specifications •... -
Page 16: Turning The Fortigate Unit Power On And Off
Disconnect the power cable from the power supply. Connecting to the web-based manager Use the following procedure to connect to the web-based manager for the first time. Configuration changes made with the web-based manager are effective immediately without resetting the firewall or interrupting service. 01-28006-0024-20041026 Fortinet Inc. -
Page 17: Connecting To The Command Line Interface (Cli)
Getting started To connect to the web-based manager, you need: • a computer with an ethernet connection, • Internet Explorer version 6.0 or higher, • a crossover cable or an ethernet hub and two ethernet cables. Note: You can use the web-based manager with recent versions of most popular web browsers. The web-based manager is fully supported for Internet Explorer version 6.0 or higher. - Page 18 FortiGate-800 login: FortiGate-800F login: Type admin and press Enter twice. The following prompt is displayed: Welcome ! Type ? to list available commands. For information about how to use the CLI, see the FortiGate CLI Reference Guide. 01-28006-0024-20041026 Fortinet Inc.
-
Page 19: Factory Default Fortigate Configuration Settings
Getting started Factory default NAT/Route mode network configuration Factory default FortiGate configuration settings The FortiGate unit is shipped with a factory default configuration. The default configuration allows you to connect to and use the FortiGate web-based manager to configure the FortiGate unit onto the network. To configure the FortiGate unit onto the network you add an administrator password, change network interface IP addresses, add DNS server IP addresses, and configure basic routing, if required. -
Page 20: Factory Default Transparent Mode Network Configuration
In Transparent mode, the FortiGate unit has the default network configuration listed in Table Table 4: Factory default Transparent mode network configuration Administrator User name: admin account Password: (none) 10.10.10.1 Management IP Netmask: 255.255.255.0 Primary DNS Server: 207.194.200.1 Secondary DNS Server: 207.194.200.129 01-28006-0024-20041026 Fortinet Inc. -
Page 21: Factory Default Firewall Configuration
Getting started Factory default firewall configuration Table 4: Factory default Transparent mode network configuration (Continued) Internal HTTPS, Ping External Ping HTTPS, Ping Administrative access Port 1 Ping Port 2 Ping Port 3 Ping Port 4 Ping Factory default firewall configuration FortiGate firewall policies control how all traffic is processed by the FortiGate unit. - Page 22 You can add this protection profile to firewall policies for connections between highly trusted or highly secure networks where content does not need to be protected. Figure 5: Web protection profile settings 01-28006-0024-20041026 Fortinet Inc.
-
Page 23: Planning The Fortigate Configuration
Getting started NAT/Route mode Planning the FortiGate configuration Before you configure the FortiGate unit, you need to plan how to integrate the unit into the network. Among other things, you must decide whether you want the unit to be visible to the network, which firewall functions you want it to provide, and how you want it to control the traffic flowing between its interfaces. -
Page 24: Nat/Route Mode With Multiple External Network Connections
You typically use the FortiGate unit in Transparent mode on a private network behind an existing firewall or behind a router. The FortiGate unit performs firewall functions, IPSec VPN, virus scanning, IPS, web content filtering, and Spam filtering. 01-28006-0024-20041026 Fortinet Inc. -
Page 25: Configuration Options
Getting started Configuration options Figure 8: Example Transparent mode network configuration FortiGate-800 Unit Gateway to in Transparent mode public network Internal network 204.23.1.5 10.10.10.2 Internet I N T E R N A L E X T E R N A L D M Z CONSOLE Enter... -
Page 26: Next Steps
If you are going to operate the FortiGate unit in Transparent mode, go to “Transparent mode installation” on page • If you are going to operate two or more FortiGate units in HA mode, go to “High availability installation” on page 01-28006-0024-20041026 Fortinet Inc. -
Page 27: Nat/Route Mode Installation
FortiGate-800/800F Installation Guide Version 2.80 MR6 NAT/Route mode installation This chapter describes how to install the FortiGate unit in NAT/Route mode. For information about installing a FortiGate unit in Transparent mode, see “Transparent mode installation” on page 41. For information about installing two or more FortiGate units in HA mode, see “High availability installation”... -
Page 28: Dhcp Or Pppoe Configuration
PPPoE server. Your ISP may provide IP addresses using one of these protocols. To use the FortiGate DHCP server, you need to configure an IP address range and default route for the server. No configuration information is required for interfaces that are configured to use DHCP. 01-28006-0024-20041026 Fortinet Inc. -
Page 29: Using The Web-Based Manager
NAT/Route mode installation Configuring basic settings PPPoE requires you to supply a user name and password. In addition, PPPoE unnumbered configurations require you to supply an IP address. Use Table 7 record the information you require for your PPPoE configuration. Table 7: PPPoE settings User name: Password:... -
Page 30: Using The Front Control Buttons And Lcd
Note: You cannot configure DHCP or PPPoE from the control buttons and LCD. Instead you can use the web-based manager, the CLI, or the setup wizard. To change the IP address and netmask of an interface Press Enter to display the interface list. 01-28006-0024-20041026 Fortinet Inc. -
Page 31: Using The Command Line Interface
NAT/Route mode installation Configuring the FortiGate unit to operate in NAT/Route mode Use the up and down arrows to highlight the name of the interface to change and press Enter. Press Enter for IP address. Use the up and down arrow keys to increase or decrease the value of each IP address digit. - Page 32 <192.168.120.99> <255.255.255.0> Set the IP address and netmask of the external interface to the external IP address and netmask that you recorded in Table 6 on page 01-28006-0024-20041026 Fortinet Inc.
- Page 33 NAT/Route mode installation Configuring the FortiGate unit to operate in NAT/Route mode config system external edit external set mode static set ip <address_ip> <netmask> Example config system external edit external set mode static set ip <204.23.1.5> <255.255.255.0> To set the external interface to use DHCP, enter: config system interface edit external set mode dhcp...
-
Page 34: Using The Setup Wizard
Table 8 lists the additional settings that you can configure with the setup wizard. See Table 6 on page 28 Table 7 on page 29 for other settings. 01-28006-0024-20041026 Fortinet Inc. -
Page 35: Starting The Setup Wizard
NAT/Route mode installation Starting the setup wizard Table 8: Setup wizard settings Password Prepare an administrator password. Internal Interface Use the information you gathered in Table 6 on page External Interface Use the information you gathered in Table 6 on page Starting IP: _____._____._____._____ Ending IP:... -
Page 36: Connecting The Fortigate Unit To The Network(S)
Note: You can also create redundant connections to the Internet by connecting two interfaces to separate Internet connections. For example, you could connect the external interface and the DMZ interface or any available user-defined interface to different Internet connections, each provided by a different service provider. 01-28006-0024-20041026 Fortinet Inc. - Page 37 NAT/Route mode installation Starting the setup wizard To connect the FortiGate unit running in NAT/Route mode Connect the Internal interface to the hub or switch connected to the internal network. Connect the External interface to your public switch or router. Optionally, connect the DMZ interface to the DMZ network.
-
Page 38: Configuring The Networks
In NAT/Route mode, you use the modem interface as either a backup interface or standalone interface to the Internet. In backup mode, the modem interface automatically takes over from a selected ethernet interface when that ethernet interface is unavailable. 01-28006-0024-20041026 Fortinet Inc. -
Page 39: Next Steps
To register the FortiGate unit After purchasing and installing a new FortiGate unit, you can register the unit by going to the System Update Support page, or using a web browser to connect to http://support.fortinet.com and selecting Product Registration. FortiGate-800/800F Installation Guide 01-28006-0024-20041026... - Page 40 Select Scheduled Update and configure a schedule for receiving antivirus and attack definition updates. Select Apply. You can also select Update Now to receive the latest virus and attack definition updates. For more information about FortiGate settings see the FortiGate Online Help or the FortiGate Administration Guide. 01-28006-0024-20041026 Fortinet Inc.
-
Page 41: Transparent Mode Installation
FortiGate-800/800F Installation Guide Version 2.80 MR6 Transparent mode installation This chapter describes how to install a FortiGate unit in Transparent mode. If you want to install the FortiGate unit in NAT/Route mode, see “NAT/Route mode installation” on page 27. If you want to install two or more FortiGate units in HA mode, see “High availability installation”... -
Page 42: Using The Web-Based Manager
Enter the management IP address and netmask that you recorded in Table 9 on page Select access methods and logging for any interfaces as required. Select Apply. To configure DNS server settings Go to System > Network > DNS. 01-28006-0024-20041026 Fortinet Inc. -
Page 43: Reconnecting To The Web-Based Manager
Transparent mode installation Reconnecting to the web-based manager Enter the IP address of the primary DNS server. Enter the IP address of the secondary DNS server. Select OK. To configure the default gateway Go to System > Network > Management. Set Default Gateway to the default gateway IP address that you recorded in Table 9 on page... -
Page 44: Using The Command Line Interface
Make sure that you are logged into the CLI. Set the management IP address and netmask to the IP address and netmask that you recorded in Table 9 on page 42. Enter: config system manageip set ip <address_ip> <netmask> Example 01-28006-0024-20041026 Fortinet Inc. -
Page 45: Using The Setup Wizard
Transparent mode installation Reconnecting to the web-based manager config system manageip set ip 10.10.10.2 255.255.255.0 Confirm that the address is correct. Enter: get system manageip The CLI lists the management IP address and netmask. To configure DNS server settings Set the primary and secondary DNS server IP addresses. Enter config system dns set primary <address_ip>... -
Page 46: Reconnecting To The Web-Based Manager
External for connecting to your public switch or router and the Internet, • DMZ for connecting to a DMZ network, • HA for connecting to another FortiGate-800 for high availability (see “High availability installation” on page 51), 01-28006-0024-20041026 Fortinet Inc. - Page 47 Transparent mode installation Reconnecting to the web-based manager There are 4 10/100 Base-TX connectors on the FortiGate-800: • user-defined interfaces 1 to 4 for connecting up to four additional networks to the FortiGate unit. FortiGate-800F There are 4 LC-SFP 1000Base-SX fiber transceivers on the FortiGate-800F: •...
-
Page 48: Next Steps
Time Protocol (NTP) server. Go to System > Config > Time. Select Refresh to display the current FortiGate system date and time. Select your Time Zone from the list. Optionally, select Automatically adjust clock for daylight saving changes check box. 01-28006-0024-20041026 Fortinet Inc. - Page 49 After purchasing and installing a new FortiGate unit, you can register the unit by going to the System Update Support page, or using a web browser to connect to http://support.fortinet.com and selecting Product Registration. To register, enter your contact information and the serial numbers of the FortiGate units that you or your organization have purchased.
- Page 50 Reconnecting to the web-based manager Transparent mode installation 01-28006-0024-20041026 Fortinet Inc.
-
Page 51: High Availability Installation
FortiGate-800/800F Installation Guide Version 2.80 MR6 High availability installation This chapter describes how to install two or more FortiGate units in an HA cluster. HA installation involves three basic steps: • Configuring FortiGate units for HA operation • Connecting the cluster to your networks •... - Page 52 FortiGate unit with the highest serial number becomes the primary cluster unit. Override You can configure a FortiGate unit to always become the primary unit in the cluster by giving it a high priority and by selecting Override master. Master 01-28006-0024-20041026 Fortinet Inc.
-
Page 53: Configuring Fortigate Units For Ha Using The Web-Based Manager
High availability installation Configuring FortiGate units for HA using the web-based manager Table 10: High availability settings (Continued) The schedule controls load balancing among the FortiGate units in the active-active HA cluster. The schedule must be the same for all FortiGate units in the HA cluster. -
Page 54: Configuring Fortigate Units For Ha Using The Cli
To change the FortiGate unit host name Power on the FortiGate unit to be configured. Connect to the CLI. “Connecting to the command line interface (CLI)” on page Change the host name. config system global set hostname <name_str> 01-28006-0024-20041026 Fortinet Inc. -
Page 55: Connecting The Cluster To Your Networks
You must connect all matching interfaces in the cluster to the same hub or switch. Then you must connect these interfaces to their networks using the same hub or switch. Fortinet recommends using switches for all cluster connections for the best performance. FortiGate-800/800F Installation Guide... - Page 56 • Connect the HA interfaces of the FortiGate units to another switch or hub. By default the HA interfaces are used for HA heartbeat communication. These interfaces should be connected together for the HA cluster to function. 01-28006-0024-20041026 Fortinet Inc.
-
Page 57: Installing And Configuring The Cluster
High availability installation Configuring FortiGate units for HA using the CLI Figure 13: HA network configuration Internal Network Port 1 Port 2 CONSOLE 10/100 10/100/1000 Enter Port 4 Hub or Hub or Switch Switch Port 4 Router CONSOLE 10/100 10/100/1000 Enter Port 1 Port 2... - Page 58 The only configuration settings that are not synchronized are the HA configuration (except for the interface heartbeat device and monitoring configuration) and the FortiGate host name. For more information about configuring a cluster, see the FortiGate Administration Guide. 01-28006-0024-20041026 Fortinet Inc.
-
Page 59: Index
6, 29, 34, 42, 45 starting 29, 35, 42, 46 starting 29, 35, 42, 46 synchronize with NTP server 39, 49 Fortinet customer service 11 front keypad and LCD configuring IP address 43 technical support 11 time zone 39, 48... - Page 60 Index 01-28006-0024-20041026 Fortinet Inc.