Kodak Scan Station 500 User Manual
Hide thumbs
Also See for Scan Station 500:
- User manual (112 pages) ,
- Specifications (2 pages) ,
- Reference manual (2 pages)
Table of Contents
Advertisement
A-61627
8F8038A
Scan Station 500
& Scan Station 520EX
User's Guide on Installation CD
Guides de l'utilisateur sur le CD d'installation
Benutzerhandbücher auf der Installations-CD
Guida dell'utente sul CD di installazione
Guías de usuario incluidas en el CD de instalación
Guias do usuário no CD de instalação
Gebruikershandleidingen op installatie-cd
Kurulum CD'sindeki Kullanım Kılavuzları
Uživatelská pøíruèka na instalaèním disku CD
User's Guide
Advertisement
Chapters
Table of Contents

Related Manuals for Kodak Scan Station 500


Summary of Contents for Kodak Scan Station 500
- Page 1 Scan Station 500 & Scan Station 520EX User’s Guide User’s Guide on Installation CD Guides de l'utilisateur sur le CD d'installation Benutzerhandbücher auf der Installations-CD Guida dell’utente sul CD di installazione Guías de usuario incluidas en el CD de instalación Guias do usuário no CD de instalação...
-
Page 2: Environmental Information
Safety • Place the Kodak Scan Station 500 on a level work surface capable of supporting 13.6 kgs (30 lbs). • When placing the Scan Station, make sure that the electrical power outlet is located within 1.52 metres (5 feet) of the Scan Station and is easily accessible. - Page 3 EMC statements United States: This equipment has been tested and found to comply with the limits for a Class A digital device pursuant to Part 15 of the FCC rules. These limits are designed to provide reasonable protection against harmful interference when the equipment is operated in a commercial environment.
- Page 4 INTRODUCTION USING THE SCAN STATION: WALK-UP USER INSTALLING AND USING THE CONFIGURATION ORGANIZER: ADVANCED USER TROUBLESHOOTING...
-
Page 5: Table Of Contents
USB flash drives with a simple touch. For the purpose of this manual the Kodak Scan Station 500 and the Kodak Scan Station 520EX will be referred to as Kodak Scan Station 500. -
Page 6: Scan Station Components
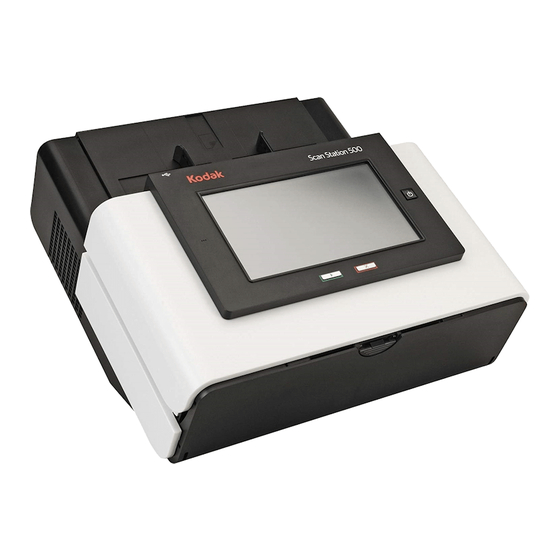
Scan Station Front view components Input tray extender Cover release Input tray button Side guides Power button USB port Scan Station cover Stop button Touch screen Output tray panel Go button Output tray extender Input tray extender (not shown) — pull this extender out to accommodate document sizes over 8 1/2 x 11 inches (A4). -
Page 7: Inside View
Inside view Separation module Separation module Imaging guides release lever Paper Present Sensor Gap release lever Feed module cover Scan Station cover release lever Rollers Feed module Separation module release lever — push the release lever down to remove the separation module for cleaning or replacement. Gap release lever —... -
Page 8: Rear View
Rear view Flatbed connector Modem port Security lock USB ports Ethernet port port Power port Flatbed connector — connects the optional A3/A4 Flatbed to the Scan Station. Modem port — connects the fax modem to a phone line. Power port — connects the power cord to the Scan Station. Ethernet port —... - Page 9 Advanced user does. • An advanced user is someone who wants to create custom scan settings using the Kodak Configuration Organizer software, save these settings to a USB flash drive and take them to the Scan Station for one touch operation.
-
Page 10: Getting Your Scan Station Ready
Getting your Scan 1. Be sure the Scan Station is on and ready to use (blue indicator light is on and constant and the application is displayed on the touch Station ready screen). 2. Adjust the side guides (by sliding them in and out) to accommodate the document size. -
Page 11: Getting Your Documents Ready
Getting your 1. Standard paper size documents feed easily through the Scan Station. When organizing your documents for scanning, stack the documents ready documents so the lead edges are aligned and centered in the input tray. This allows the feeder to introduce documents into the Scan Station one at a time. - Page 12 2. Do one of the following: • If you have a USB flash drive with your personal settings, insert the flash drive in the USB port. Your settings will be displayed on the touch screen and override the default settings. Proceed with Step 5.
- Page 13 • Otherwise, select Scan. Depending on how your Scan Station is configured none, one or all of the following options may be displayed: Custom E-mail Subject: select this option to display the keyboard and enter a customized E-mail subject line. Secure PDF Password: allows you to enter a password that will be used to encrypt and secure PDF files.
- Page 14 As the Scan Station begins to feed and process the documents, a Status screen will be displayed. The page number and a preview image will be displayed as each page is being scanned. NOTE: Depending on how your Scan Station is configured, the message, Do you have more pages to scan? may be displayed.
-
Page 15: Getting Familiar With The Touch Screen
Getting familiar with The Kodak Scan Station 500 provides a touch screen for easy access and operation. the touch screen When you use the Scan Station, default settings are displayed that have been configured by your administrator. These settings can be changed by touching the Settings button on the bottom of the screen. -
Page 16: Icon Descriptions: Destination Screen
Icon descriptions: Following is a description of the icons displayed on the Destination Destination screen screen. Destination screen icons Icon Description Left arrow — touch to scroll the list to the next destination group to the left of the current destination. Task —... -
Page 17: Settings Screen
Settings screen The Settings screen displays the icons for the scan settings. When you select an icon, the values associated with that scan setting will be displayed in the list. These settings do not need to be changed unless the document that you are scanning requires something different than the default. -
Page 18: Description Of Scan Settings
Description of Scan Following is detailed information about the Scan settings. settings Use the Right and Left arrows to scroll through the list of scan settings. Settings Shortcuts option Settings Shortcuts — six Settings Shortcuts are provided at installation. These can be used to quickly select a group of commonly used settings to make scanning faster and easier. - Page 19 File Name Settings option File Name Settings — allows you to name a folder name where scanned documents will be placed when scanning to a network folder, FTP location or USB flash drive destination. You can also define the file name prefix that will be applied to every scanned document created.
- Page 20 3. Select Advanced if you want to select one or both of the following options: • Interactively Name Scanned Files — if checked, you may be required to enter a file name for each page scanned. If JPEG or Single Page TIFF is selected as the File Type, you will be prompted for each page and each side scanned.
- Page 21 Scan As option Scan As — available selections: Color, Grayscale, and Black and White. If you select Black and White, the Black and White screen will be displayed. Select either Best (iThresholding) or Normal (ATP). • Best (iThresholding) — the Scan Station dynamically evaluates each document to determine the optimal threshold value to produce the highest quality image.
- Page 22 File Type option File Type — these file types are available: PDF - Searchable (Image + Text), PDF - Image Only, JPEG, TIFF - Multi Page or TIFF - Single Page. NOTE: Large files take a long time to download and may not be deliverable to the recipient (i.e., TIFF - Uncompressed will be a large file).
- Page 23 This screen allows you to select different options for creating PDF files. - Quality, displays the Quality screen. You can select Good, Better, or Best. The higher the quality, the larger the file size. - Language, this option is only available when you select PDF - Searchable (Image + Text).
- Page 24 Input Document Is option Input Document Is — the Scan Station scans both sides of a document in one pass. Depending on the type of documents you are scanning, select One Sided - Face Down or Two Sided. If you are scanning one sided documents, be sure to place the document with the side you want to scan facing the input tray.
- Page 25 Document Type option Document Type — allows you to select the type of content on your documents. • Text with Graphics: the documents contain a mix of text, business graphics (bar graphs, pie charts, etc.) and line art. • Text: the documents contain mostly text. •...
- Page 26 Black and White Black and White Adjustment — allows you to change the Contrast Adjustment option and Threshold values. This option is only available if your Scan As selection is Black and White. • If you select Best (iThresholding) on the Scan As screen, only the Contrast value can be changed.
- Page 27 Copies for Printing option Copies for Printing — allows you to select the number of copies (1-99) to print. • Use the Up and Down arrows to adjust the number of copies, then click the button to the left of the number to save the new value. Advanced option Advanced —...
-
Page 28: Resend Without Scanning Documents Again
Resend without At the end of a scan session you have the option to Resend your destination and scan settings without scanning the documents again. scanning documents again If you select Resend, the main screen will be displayed with your original destination and scan settings. -
Page 29: Using The Search Function
Settings Shortcuts. • For more information about using Settings Shortcuts, see the section entitled, “Creating Settings Shortcuts” in Chapter 3. • For information about creating Settings Shortcuts, see the Administrator’s Guide for the Kodak Scan Station 500. A-61627 November 2008 2-21... -
Page 30: Installing And Using The Configuration
3 Installing and Using the Configuration Organizer: Advanced User Contents Installing the Configuration Organizer..........3-2 Configuration files ................3-3 Configuration Organizer window............. 3-3 Menus..................3-4 Toolbar..................3-6 Status bar ................... 3-6 Creating and modifying configuration files ........3-7 Setting up destination groups ............3-8 Adding an email group and addresses ........ - Page 31 The Kodak Scan Station 500 Configuration Organizer allows you to create configuration files which contain your destination and scan setting preferences. After you create your personal configuration file and save it to a USB flash drive, you can carry your preferred settings to a Scan Station, and use these settings for your scan session.
-
Page 32: Configuration Files
Configuration files Configuration files are created using the Kodak Scan Station 500 Configuration Organizer. The System Administrator creates an encrypted configuration file that is loaded onto the Scan Station for general walk-up use. As an advanced user, you have the option of creating a customized configuration file that fits your unique scanning and destination needs. -
Page 33: Menus
Administrator — accesses the Configuration Organizer Administrator mode. For more information about the Administrator mode, refer to the Kodak Scan Station 500, Administrator’s Guide, A-61628. Exit — closes the Configuration Organizer. Edit menu — the Edit menu provides these options: Add Group —... - Page 34 Layout menu — the Layout menu provides these options: Moves Group Left — moves the selected group left one position. Moves Group Right — moves the selected group right one position. Moves Item Up — moves the selected item up one position in the list.
-
Page 35: Toolbar
Toolbar The Toolbar provides quick access to commonly used features. The toolbar is always displayed. You cannot add, delete or move toolbar buttons. Icon Description Saves the configuration file to the USB flash drive or hard drive. Adds a new item to the current group. Searches for an item. -
Page 36: Creating And Modifying Configuration Files
Creating and You can create a new configuration file from system defaults or modify one that already exists on the inserted flash drive, a locally stored modifying backup or a folder on the PC or network. configuration files 1. Select File>Open. The Open Configuration From dialog box will be displayed. -
Page 37: Setting Up Destination Groups
Setting up This section provides procedures for setting up your destination groups (i.e, email, flash drive folder, FTP, network folder, fax). destination groups Adding an email group and If you want to add an address to an email group that already exists, skip addresses to step 2. -
Page 38: Renaming And Email Group
Renaming an email group By default, when you add an email group, the group is named E-mail. 1. Access the Destination screen and select the email group that you want to rename. 2. Select Edit>Rename Group. The Rename Group dialog box will be displayed. - Page 39 Importing an email address CSV files are data files that represent database information. Each row book contains data values that are separated by a comma. Each comma found on a line of text represents a column of data from the original database.
- Page 40 4. Many email client applications automatically export the column headings as the first row of data. If you do not want to export the column headings as the first row, check Skip first row of data. NOTE: Some email applications also export the data with additional quote characters surrounding the data.
- Page 41 Adding a USB flash drive If you want to add a folder to a USB flash drive group that already folder group exists, skip to step 2: 1. In the Configuration Organizer window, access the Destination screen and select Edit>Add Group>Flash Drive Folder. A Flash Drive icon is added to the toolbar on the Configuration Organizer window.
-
Page 42: Renaming A Flash Drive Folder Group
Renaming a flash drive By default, when you add a flash drive group, the group is named Flash group Drive. 1. Access the Destination screen and select the flash drive group that you want to rename. 2. Select the flash drive group that you want to rename and select Edit>Rename Group. -
Page 43: Adding A Network Folder
Adding a network folder If you want to add an item to a network folder that already exists, skip to step 2. 1. In the Configuration Organizer window, access the Destination screen and select Edit>Add Group>Network Folder. A Network folder icon is added to the toolbar on the Configuration Organizer window. -
Page 44: Renaming A Network Group
Renaming a network group By default, when you add a network group, the group is named Network. 1. Access the Destination screen and select the network group that you want to rename. 2. Select Edit>Rename Group. The Rename Group dialog box will be displayed. -
Page 45: Adding An Ftp Group
Adding an FTP group To add an FTP group to your configuration: 1. In the Configuration Organizer window, access the Destination screen and select Edit>Add Group>FTP. An FTP icon is added to the toolbar on the Configuration Organizer window. 2. Select the FTP group you want to add to and select Edit>Add Item. The Add: Ftp Folder dialog box will be displayed. -
Page 46: Specifying Proxy Settings
5. You may optionally select Passive if required by the FTP server. Passive is most commonly used if the FTP site is outside the firewall. NOTES: • If you do not want the FTP site placed in alphabetical order, uncheck Add to list alphabetically. •... - Page 47 Adding a fax group and fax If you want to add a fax number to a fax group that already exists, skip numbers to step 2. 1. In the Configuration Organizer window, access the Destination screen and select Edit>Add Group>Fax. A Fax icon is added to the toolbar on the Configuration Organizer window.
- Page 48 The fax number will be added to the selected fax group and the number will be listed on the Configuration Organizer window. 4. Repeat steps 2 and 3 for each fax number you want to add to a fax group. A-61627 November 2008 3-19...
-
Page 49: Renaming A Fax Group
Renaming a fax group By default, when you add a fax group, the group is named Fax. 1. Access the Destination screen and select the fax group you want to rename. 2. Select Edit>Rename Group. The Rename Group dialog box will be displayed. -
Page 50: Setting Up A Flash Drive Password
Setting up a flash You may want to set up a password that will prevent unauthorized access to your configuration file. When a password is assigned, the drive password Scan Station or Configuration Organizer will display the keyboard prompting for the password before accessing the information. 1. -
Page 51: Testing Your Configuration File
Testing your Once you have created the configuration file, added any destinations you want, selected your preferred device settings and set up an configuration file optional password, save and test the file. 1. Insert a USB flash drive into the USB port on your PC. 2. -
Page 52: Advanced Features
Advanced features The Configuration Organizer provides some additional features that can help you streamline your scanning activities. • Tasks allow you to group together scan settings (i.e., resolution, file type, one-sided/two-sided, etc.) with one or more destinations. • Setting shortcuts allow you to create personalized groups of scan settings to make scanning easier. - Page 53 The Choose Destinations screen will be displayed listing the destinations that have been setup in your configuration file. 3. Select the destination(s) that you want to add to your task. For example, you may want to send invoices to personnel in the Billing department, then save a copy of what you send to your personal file on the network.
- Page 54 The Choose Settings screen will be displayed with the default settings. 5. Click on any of the settings in the list you want to change. For example if the invoices you want to send to the Billing Department should be one-sided, black and white, PDF files, you would make those selections.
-
Page 55: Renaming Tasks
Renaming tasks By default, when you add a task, the group is named Task. To change the name of the task: 1. Access the Destination screen and select the task that you want to rename. 2. Select Edit>Rename Item. The keyboard will be displayed allowing you to rename your task. -
Page 56: Creating Settings Shortcuts
Creating Settings Settings Shortcuts are a way for you to create personalized groups of scan settings to make scanning easier. If you have scan settings that Shortcuts you will use frequently (i.e., your Scan As setting will always be Black and White), you can create a shortcut for these settings and save them to your configuration file. -
Page 57: Creating A New Settings Shortcut
Creating a new Settings 1. In the Configuration Organizer window, access the Settings screen Shortcut and select the Settings Shortcut icon. 2. Select Edit>Add Item. The Add New Settings Shortcut dialog box will be displayed. 3. Enter the name of the new shortcut in the Description field. 4. - Page 58 Renaming Settings 1. Access the Settings screen and select the Settings Shortcut that Shortcut you want to rename. 2. Select Edit>Rename Item. The Rename Settings Shortcut dialog box will be displayed. 3. Enter a new name in the Description field and click OK. A-61627 November 2008 3-29...
-
Page 59: Troubleshooting
4 Troubleshooting Contents Problem solving ................6-1 Power button indicators ..............6-2 Problem solving Occasionally you may encounter a situation with your Scan Station where it may not function properly. Use the chart below as a guide to check possible solutions to help you resolve the situation before calling Technical Support. - Page 60 Problem Possible Solution Make sure that: Scan Station will not scan/feed documents • the power cord is plugged securely into the back of Scan Station and the wall outlet. • the power switch is on. • the wall outlet is not defective (call a licensed electrician). •...
- Page 61 Eastman Kodak Company 343 State Street Rochester, NY 14650 U.S.A. © Kodak, 2008. All rights reserved. TM: Kodak...