Table of Contents
Advertisement
Quick Links
Advertisement
Table of Contents
Troubleshooting

Related Manuals for DeLonghi ECAM23.450


Summary of Contents for DeLonghi ECAM23.450
- Page 1 5713215111/09.10...
- Page 2 BEAN TO CUP ESPRESSO AND CAPPUCCINO MACHINE Instruction for use ECAM23.450...
- Page 6 CLEAN...
-
Page 7: Table Of Contents
CONTENTS MAkING DRINkS WITH MIlk ....14 Filling and attaching the milk container .... 14 INTRODUCTION ........7 Making cappuccino or macchiato ....14 Symbols used in these instructions ....7 Making frothed milk (without coffee) ....15 Letters in brackets ..........7 Preparing milk (unfrothed and without coffee) 15 Troubleshooting and repairs ...... -
Page 8: Introduction
INTRODUCTION SAFETY Thank you for choosing the ECAM 23.450 auto- Fundamental safety warnings matic coffee and cappuccino maker. Danger! We hope you enjoy using your new appliance. This is an electrical appliance and may cause Take a few minutes to read these instructions. electric shock. -
Page 9: Designated Use
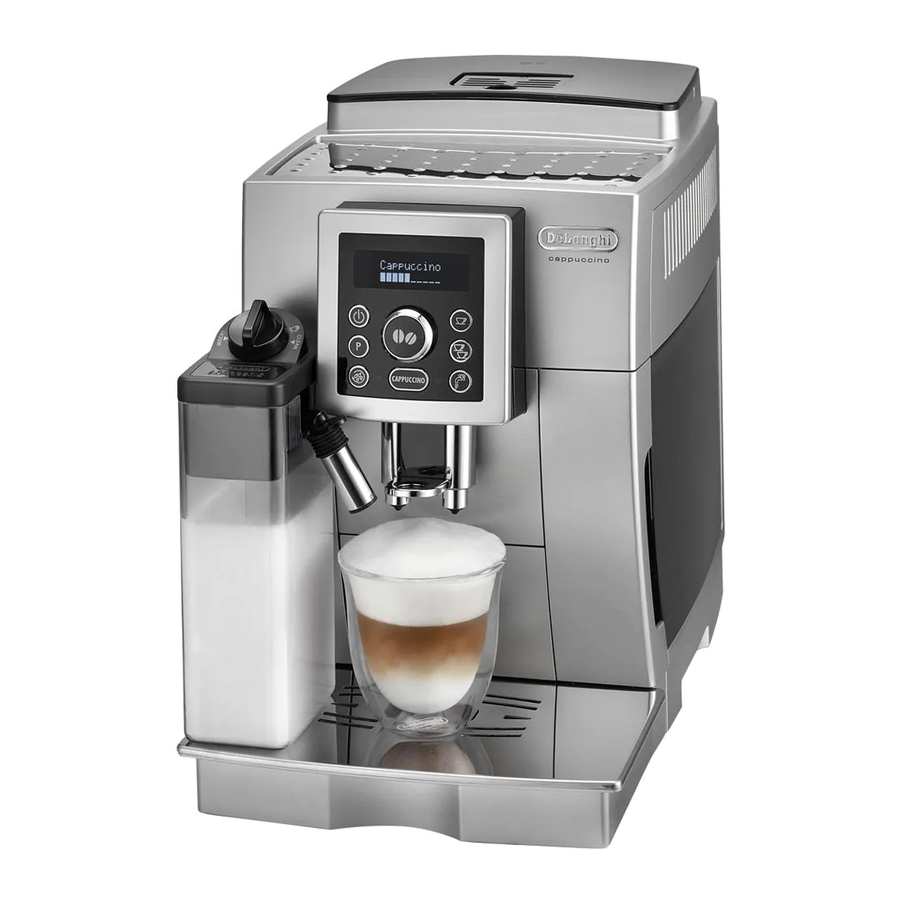
DESIGNATED USE DESCRIPTION This appliance is designed and made to prepare Description of the appliance coffee and heat drinks. (page 3 - A ) All other use is considered improper. A1. Control panel This appliance is not suitable for commercial A2. -
Page 10: Description Of The Accessories
Description of the accessories and correctly installed socket with a minimum (page 2 - C ) current rating of 10A only. C1. Measure If the power socket does not match the plug on C2. Cleaning brush the appliance, have the socket replaced with a C3. -
Page 11: Turning The Appliance On
• To enjoy your coffee even more and improve Please note! the performance of your appliance, we re- If the appliance is not used for an extended pe- commend installing a water softener filter as riod, also place the main switch in the 0 position described in the section “WATER SOFTENER (fig. -
Page 12: Auto-Start
Auto-start Energy Saving You can set the auto-start time in order to have Use this function to activate or deactivate energy the appliance ready at a certain time (for example saving mode. in the morning) so you can make coffee imme- This mode is active by default, reducing energy diately. -
Page 13: Activate/Deactivate The Beep
Activate/deactivate the beep Statistics function This activates or deactivates the beep emitted by This displays statistics relating to the machine. the machine each time the buttons are pressed To display, proceed as follows: or an accessory is inserted/removed. The beep is 1. -
Page 14: Customising The "My Coffee" Quantity
Customising the “my coffee” quantity spouts and heats the internal circuit of the The appliance is set by default to automatically machine so that the coffee delivered will be deliver 30 ml of “my coffee”. hotter. To modify this quantity, proceed as follows: • warm the cups with hot water (using the hot 1. -
Page 15: Making Coffee Using Pre-Ground Coffee
MAkING DRINkS WITH MIlk the machine. Their meaning is explained in the section “Displayed messages” (page Please note! 22). To avoid milk with poor froth or large bubbles, Please note! always clean the milk lid and hot water nozzle If “Energy Saving” mode is active, you may have as described in the section “Cleaning the milk to wait a few seconds before the first coffee is container”... -
Page 16: Making Frothed Milk (Without Coffee)
with a progress bar which fills gradually one after the other, you do not need to clean as preparation proceeds. If the froth is not by pressing the CLEAN button each time you satisfactory, turn the froth adjustment knob make a cappuccino. Just press it once after making the last cappuccino (the appliance towards (= less froth) or towards 3... -
Page 17: Change The Quantity Of Water Delivered Automatically
eds. Wait for it to cool down before touching it and 4. The machine delivers 250 ml of hot water, handle it from the front only. then delivery stops automatically. To inter- rupt delivery of hot water manually, press To clean (with the machine on): button again. -
Page 18: Cleaning The Water Tank
removing the drip tray) is not dirty. If neces- 5. Soak the infuser in water for about 5 minu- sary, remove coffee deposits with the brush tes, then rinse under the tap. provided or a sponge. 6. Use the brush (C2) to remove any coffee 2. -
Page 19: Cleaning The Hot Water/Steam Nozzle
the “INSERT” position Please note! (see figure) and pull it Use De’Longhi descaler only. off upwards. Under no circumstances should you use sulpha- 4. Wash all the compo- mic or acetic based descalers. Their use invalida- nents thoroughly with tes the guarantee. Failure to descale the applian- hot water and mild ce as described also invalidates the guarantee. -
Page 20: Setting Water Hardness
gh with clean water. Remove the water tank, 2. Turn the selection knob to select “ Water empty, rinse under running water, fill with hardness “. clean water and replace. “Rinsing” is displa- 3. Confirm the selection by pressing the yed. -
Page 21: Replacing The Filter
ty of 100 ml under the hot water spout. thout a filter, you must remove it and notify the 13. Press the button to confirm the selec- appliance of its removal as follows: tion. The appliance begins delivering hot 1. Extract the tank and exhausted filter; water and the message “... -
Page 22: Electrical Requirements
ElECTRICAl REqUIREMENTS Before using this appliance ensure that the voltage indicated on the product corresponds with the main voltage in your home, if you are in any doubt about your supply contact your local electricity company. The flexible mains lead is supplied connected to a B.S. 1363 fused plug having a fuse of 13 amp capacity. -
Page 23: Displayed Messages
DISPlAYED MESSAGES DISPlAYED MESSAGE POSSIBlE CAUSE REMEDY FILL TANK ! • Insufficient water in the tank. • Fill the tank with water and/or insert it correctly, pushing it as far as it will go until it clicks into place (fig. 3). EMPTY GROUNDS • The grounds container (A13) is full. • Empty the grounds container and drip tray, clean and replace (fig. 23). CONTAINER! Important: When removing the drip tray, the grounds container must be emptied,... -
Page 24: Troubleshooting
DISPlAYED MESSAGE POSSIBlE CAUSE REMEDY Press CLEAN button • Milk has been delivered recently and the • Press the CLEAN button and keep it tubes inside the milk container must be pressed until the progress bar which cleaned. appears on the display together with the message “Cleaning...” is complete. INSERT WATER SPOUT •... - Page 25 PROBlEM POSSIBlE CAUSE REMEDY The milk is not frothed, • The milk container lid or froth • Clean the milk container lid and knob as adjustment knob is dirty described in the section “Cleaning the or contains large milk container”. bubbles and squirts out • The milk is not cold enough or is not • Use skimmed or semi-skimmed milk at of the milk spout. semi-skimmed.