Table of Contents
Advertisement
Advertisement
Table of Contents
Troubleshooting

Related Manuals for DeLonghi ECAM23.450 SL


Summary of Contents for DeLonghi ECAM23.450 SL
- Page 4 CLEAN...
-
Page 5: Table Of Contents
contents makinG Drinks With milk ....14 Filling and attaching the milk container .....14 important safeGuarDs ......7 Making cappuccino or macchiato ....14 SAVE THESE INSTRUCTIONS ......7 Making frothed milk (without coffee) ....15 Preparing milk (unfrothed and without coffee) .15 short corD instructions ....7 Cleaning the milk frother with the CLEAN button .............15 introDuction ........8... -
Page 6: Important Safeguards
i m p o r t a n t s a f e G u a r D s When using electrical appliances, basic safety precautions should always be followed, inclu- ding the following. • Read all instructions carefully. • Make sure the voltage of your electrical system corresponds to the voltage shown on the bottom of the machine. • Do not touch hot surfaces. Use handles or knobs. -
Page 7: Introduction
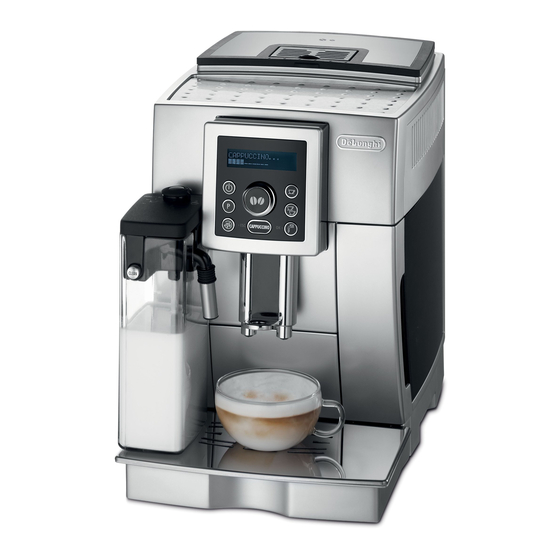
Description Thank you for choosing the ECAM23.450 SL Description of the appliance automatic coffee and cappuccino maker. (page 3 - A ) We hope you enjoy using your new appliance. A1. Control panel Take a few minutes to read these instructions. -
Page 8: Description Of The Accessories
Description of the accessories Connect the appliance to an efficiently earthed (page 2 - C ) and correctly installed socket with a minimum C1. Measuring scoop for pre-ground coffee current rating of 10A only. C2. Cleaning brush If the power socket does not match the plug on C3. -
Page 9: Turning The Appliance On
is normal to hear the noise of boiling water. displayed and the appliance goes off. After this, the noise diminishes. Please note! • To enjoy your coffee even more and improve If the appliance is not used for an extended the performance of your appliance, we period, also release the main switch (fig. 1). recommend installing a water softener filter as described in the section “WATER Important! -
Page 10: Auto-Start
auto-start When energy saving mode is active, an asterisk You can set the auto-start time in order to appears below “Energy Saving” in the menu. have the appliance ready at a certain time (for To deactivate or activate “Energy Saving” mode, example in the morning) so you can make coffee proceed as follows: immediately. -
Page 11: Cup Lighting
The beep is active by default. “Statistics” is displayed; To deactivate or reactivate the beep, proceed as 3. Press the button; follows: 4. Turn the selection knob (fig. 7) to verify: 1. Press the p button to enter the menu; how many coffees have been made;... -
Page 12: Adjusting The Coffee Mill
To modify this quantity, proceed as follows: • warm the cups with hot water (using the hot 1. Place a cup under the coffee spouts (fig. water function); 11). • select the “high” coffee temperature in the 2. Turn the selection knob until “MY COFFEE” is menu. displayed. making coffee using coffee beans 3. -
Page 13: Making Coffee Using Pre-Ground Coffee
making coffee using pre-ground coffee lid and hot water nozzle as described in the sections “Cleaning the milk frother Important! with the CLEAN button” on page 15 and • Never add pre-ground coffee when the “Cleaning the milk container” on page machine is off or it could spread through the inside of the machine and dirty it. -
Page 14: Making Frothed Milk (Without Coffee)
(Making cappuccino or macchiato), pressing the been delivered into the cup, press the CAPPUCCINO button twice instead of once. CAPPUCCINO button again. 5. The appliance stops delivering milk and after Please note! a few seconds the coffee is delivered into the If during delivery you want to stop making milk cup. -
Page 15: Cleaning
cleaninG showing the level of water it contains (fig. 23). Before the indicator protrudes from the cup Important! tray, the drip tray must be emptied and cleaned, • Do not use solvents, abrasive detergents otherwise the water may overflow the edge and or alcohol to clean the coffee maker. -
Page 16: Cleaning The Coffee Spouts
pre-ground coffee funnel (A6) is not blocked. If necessary, remove coffee deposits with the brush (C2) supplied. cleaning the infuser The infuser (A11) must be cleaned at least once a month. 7. Once inserted, make sure the two red buttons Important! have snapped out. -
Page 17: Cleaning The Hot Water/Steam Nozzle
5. Rinse the inside of the alternating “EMPTY GROUNDS froth adjustment knob CONTAINER” under running water 6. Completely empty the water tank (A9) and (see figure alongside). remove the water softener filter (if present); 6. Check that the intake then empty the drip tray and the empty tube and spout are grounds container and re-insert them. -
Page 18: Setting Water Hardness
fill the water tank again and the appliance is you are recommended to purchase one from ready for use. De’Longhi Customer Services. To use the filter correctly, follow the instructions below. settinG Water harDness installing the filter The DESCALE! message is displayed after a 1. -
Page 19: Removing The Filter
technical specification 2. Remove the new filter from the packaging; 3. Turn the date indicator disk (see fig. 29) until Voltage: 120V~ 60Hz the next 2 months of use are displayed (the Absorbed power: 1250W filter lasts about two months); Pressure: 15 bars 4. -
Page 20: Displayed Messages
DisplayeD messaGes DisplayeD messaGe possiBle cause remeDy FILL TANK ! • Insufficient water in the tank. • Fill the tank with water and/or insert it correctly, pushing it as far as it will go until it clicks into place (fig. 3B). EMPTY GROUNDS • The grounds container (A14) is full. • Empty the grounds container and drip tray, clean and replace (fig. 22). CONTAINER! Important: When removing the drip tray, the grounds container must be emptied,... -
Page 21: Troubleshooting
DisplayeD messaGe possiBle cause remeDy Press CLEAN button • Milk has been delivered recently and the • Press the CLEAN button and keep it tubes inside the milk container must be pressed until the progress bar which cleaned. appears on the display together with the message “Cleaning...” is complete. INSERT WATER SPOUT •... - Page 22 proBlem possiBle cause remeDy The milk is not frothed, • The milk container lid or froth • Clean the milk container lid and knob as adjustment knob is dirty described in the section “Cleaning the or contains large milk container” (page 17). bubbles and squirts out • The milk is not cold enough or is not • We recommend using skim or 2% of the milk spout. semi-skimmed.
-
Page 23: Limited Warranty
If repairs become necessary, see contact information below: u.s. residents: Please contact our toll free hotline at 1-866-528-8323 (1-866-Latte-Best) or log onto our website at www.delonghi.com residents of canada: Please contact our toll free hotline at 1-888-335-6644 or log onto our website at www.delonghi.com...