Table of Contents
Advertisement
Advertisement
Table of Contents
Troubleshooting

Related Manuals for DeLonghi ECAM23.46X


Summary of Contents for DeLonghi ECAM23.46X
- Page 1 De’Longhi Appliances via Seitz, 47 31100 Treviso Italy www.delonghi.com...
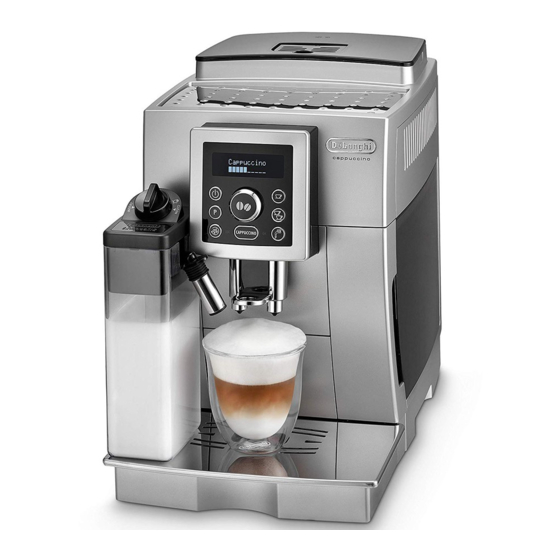
- Page 2 ECAM23.46X - 24.46X BEAN TO CUP ESPRESSO AND CAPPUCCINO MACHINE Instruction for Use Instructions videos available at: http://ecam23460.delonghi.com...
-
Page 7: Table Of Contents
CONTENTS 11. MAKING CAPPUCCINOS AND MILK-BASED COFFEES ..........14 1. FUNDAMENTAL SAFETY WARNINGS .....7 11.1 Filling and attaching the milk container ..14 2. SAFETY WARNINGS ........8 11.2 Adjusting the amount of froth .....15 2.1 Symbols used in these instructions ....8 11.3 Making cappuccino or latte macchiato ..15 2.2 Designated use ..........8 11.4 Making frothed milk (without coffee) ..15... -
Page 8: Fundamental Safety Warnings
1. FUNDAMENTAL SAFETY WARNINGS • The appliance is not intended for use by persons (including children) with reduced phys- ical, sensory or mental capabilities, or lack of experience and knowledge, unless they have been given supervision or instruction concerning use of the appliance by a person responsible for their safety. -
Page 9: Safety Warnings
• Children shall not play with the appliance. • Always unplug the appliance when left unattended and before assembly, taking apart or cleaning. Surfaces marked with this symbol become hot during use (the symbol is present in certain models only). 2. -
Page 10: Description
If your country is not among those listed on the sheet, call the button to deliver hot water ( When in the MENU, it number given in the guarantee. If repairs are required, contact acts as the "OK" button to confirm the selection made) De’Longhi Customer Services only. -
Page 11: Connecting The Appliance
5.3 Connecting the appliance • When making the first 5-6 cappuccinos, it is normal to hear the noise of boiling water. After this, the noise becomes Important! less. Check that the mains power supply voltage corresponds to that • To enjoy your coffee even more and improve the perfor- indicated on the rating plate on the bottom of the appliance. -
Page 12: Menu Settings
• press the main switch (A8) (fig. 2). 9. Press the button (B5) to exit the menu. Once the time has been confirmed, activation of auto-start is Important! indicated by the symbol displayed alongside the time and Never press the main switch while the appliance is on. under "Auto-start"... -
Page 13: Setting The Temperature
• If the milk container (D) is inserted, "Energy Saving" can- The lights come on each time coffee and cappuccino is made and not be activated. during each rinsing cycle. To disable or enable this function, proceed as follows: 1. Press the P button (B4) to enter the menu; 8.8 Setting the temperature 2. -
Page 14: Making Coffee
10.3 Customising the "my coffee" quantity Important! Danger of burns. The appliance is set by default to automatically deliver 30ml of Do not leave the appliance unattended while hot water is being "my coffee". To modify this quantity, proceed as follows: delivered. -
Page 15: Making Coffee Using Coffee Beans
10.6 Making coffee using coffee beans 2. Make sure the funnel is not blocked, then add one level measure of pre-ground coffee (fig. 15). Important! 3. Place a cup under the coffee spouts (A14) (fig. 9). Do not use caramelised or candied coffee beans as they could 4. -
Page 16: Adjusting The Amount Of Froth
11.2 Adjusting the amount of froth 11.5 Preparing milk (unfrothed and without Turn the froth adjustment dial (D1) to adjust the amount of froth coffee) on the milk delivered while making cappuccinos and milk-based Proceed as described in the previous section (“11.4 Making coffees. -
Page 17: Hot Water
6. Once the required quantity of coffee has been delivered hot water/steam connection nozzle (A13); into the cup, press the CAPPUCCINO button again. Coffee Important! delivery stops. • Do not use solvents, abrasive detergents or alcohol to clean The machine is now reprogrammed with the new milk and cof- the coffee machine. -
Page 18: Cleaning The Drip Tray And Condensate Tray
13.4 Cleaning the drip tray and condensate tray 13.8 Cleaning the pre-ground coffee funnel Check regularly (about once a month ) that the pre-ground cof- Important! fee funnel (A6) is not blocked. The drip tray (A19) is fitted with a level indicator (A18) (red) If necessary, remove coffee deposits with the brush (C5) showing the level of water it contains (fig. -
Page 19: Cleaning The Hot Water/Steam Connection Nozzle
Turn the froth adjust- • You should use De’Longhi descaler only. Using unsuitable ment dial (D1) anti- descaler and/or performing descaling incorrectly may re- clockwise to the "IN- sult in faults not covered by the manufacturer's guarantee. SERT" position (fig. 33) and pull off upwards;... -
Page 20: Setting Water Hardness
10. The appliance is now ready for rinsing through with clean 2. Immerse the paper completely in a glass of water for one water. Empty the container used to collect the descal- second; er solution. Extract the water tank, empty, rinse under 3. -
Page 21: Replacing The Filter
15. After the flow of hot water stops, the appliance automati- Please note cally resets to "Ready for coffee" status. The filter lasts about two months if the appliance is used nor- The new filter is active and indicated by an asterisk displayed mally. -
Page 22: Disposing Of The Appliance
18. DISPOSING OF THE APPLIANCE This product complies with European regulation no. The appliance must not be disposed of with house- 1935/2004 on materials and articles intended to come hold waste, but taken to an authorised waste separa- into contact with food. tion and recycling centre. - Page 23 FILL BEANS CONTAINER The coffee beans have run out. Fill the beans container (A7) (fig. 12). The pre-ground coffee funnel (A6) is clogged. Empty the funnel with the help of the brush (C5) as described in section “13.8 Cleaning the pre-ground coffee funnel”.
-
Page 24: Troubleshooting
20. TROUBLESHOOTING Below is a list of some of the possible malfunctions. If the problem cannot be resolved as described, contact Customer Services. PROBLEM POSSIBLE CAUSE remedy The coffee is not hot. The cups were not preheated. Warm the cups by rinsing them with hot water (Please note: you can use the hot water function). -
Page 25: Electrical Requirements (Uk Only)
The milk contains large The milk is not cold enough or is not Use skimmed or semi-skimmed milk at refrig- bubbles and squirts out of semi-skimmed. erator temperature (about 5° C). If the result is the milk spout (D5) or there is not as you wished, try changing brand of milk.