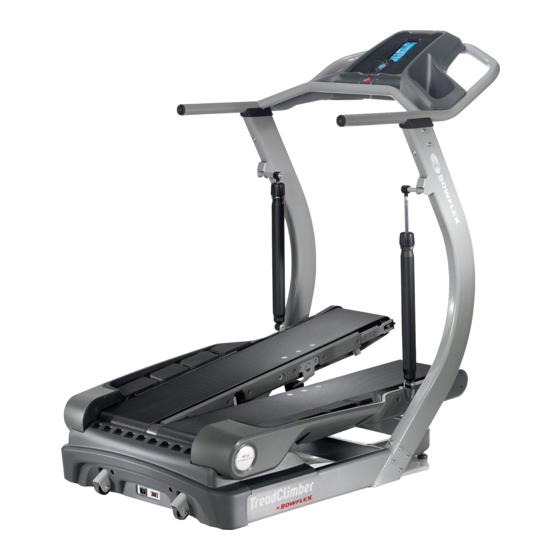
Bowflex TreadClimber TC20 Owner's Manual
Treadclimber
Hide thumbs
Also See for TreadClimber TC20:
- Service manual (95 pages) ,
- Assembly & owners manual (60 pages) ,
- Owner's manual (44 pages)
Table of Contents
Advertisement
Advertisement
Table of Contents

Related Manuals for Bowflex TreadClimber TC20


Summary of Contents for Bowflex TreadClimber TC20
- Page 1 Owner’s Manual Manual en Español Latino Americano: www.bowfl ex.com/manuals...
-
Page 2: Table Of Contents
Welcome to TreadClimber by Bowflex ® ® You are about to experience a transformation that will not only shape your body but will also change your outlook on life. We thank you for investing your time and money in your TreadClimber fi... -
Page 3: Important Safety Instructions
Important Safety Instructions This icon means a potentially hazardous situation which, if not avoided, could result in death or serious injury. Before using this equipment, obey the following warnings: Read and understand the complete Owner's Manual. Keep the Owner’s Manual for future reference. Read and understand all Warnings on this machine. - Page 4 Important Safety Instructions • The electrical wiring for the residence in which the machine will be used must obey the applicable local and provincial requirements. • Maximum user weight limit: 300 lbs. (136 kg). Do not use if you are over this weight. •...
-
Page 5: Safety Warning Labels And Serial Number
Safety Warning Labels and Serial Number Safety Key under Motor Cover • • on inside of Treadles CALIFORNIA 93120 PHASE 2 COMPLIANT FOR FORMALDEHYDE AAAAAAVVVYYWW9999 under Motor Cover -Moving parts can crush and cut. -Keep guards in place. -Lock out power before servicing. -
Page 6: Grounding Instructions
Safety Warning Labels and Serial Number Grounding Instructions This product must be electrically grounded. If a malfunction occurs, correct grounding decreases the risk of electric shock. The power cord is equipped with an equipment-grounding conductor, and must be connected to an outlet that is properly installed and grounded. - Page 7 Safety Warning Labels and Serial Number Emergency Stop Procedure ( Safety Key Port ) The TreadClimber machine is equipped with a Safety Key that can prevent serious injury, as well as prevent ® children from playing with and/or being injured on the machine. If the Safety Key is not correctly inserted into the Safety Key Port, the belts will not operate.
- Page 8 Specifications and Features Maximum User Weight: 300 lbs (136 kgs) Power Requirements: Operational Voltage: 120VAC 60 Hz Operating Current: 10A max Regulatory Approvals: c-ETL-us mark. 55.2” Evaluated per UL 1647 Fourth Edition, January (140.3 cm) 2008 and CAN/CSA-C22.2. 68-92. This product, its packaging, and components contain chemicals known to the State of California to cause cancer, birth defects, or reproductive harm.
- Page 9 Specifications and Features Console Console LCD Display Increase button STOP button START button G.O. Coach™ button Decrease button Decrease button Push to lower the speed of the belts, decrease a value, select a User, or scroll through a list of options G.O.
- Page 10 Specifications and Features START button Push to wake up the machine, begin a Quick Start workout, to select an option, to resume a paused workout, or to enter information. Push and hold for 2 seconds to set up a Custom Quick Start workout. STOP button Push to pause a workout, to exit an option, or push again while paused to end a workout.
- Page 11 Specifications and Features Time display Counts in minutes and seconds the total time of your workout (e.g. 24:22 minutes). During a Quick Start workout, the Time display will count up from “00:00”. For a Custom Quick Start or G.O. Coach workout, the Time display ™...
- Page 12 Specifications and Features Hydraulic Workout Cylinder Your TreadClimber machine uses Hydraulic Cylinders to absorb your steps and cushion your joints, decreasing ® your overall fatigue and reducing muscle strain. The displacement of the Treadles is adjusted by the dials on the Hydraulic Cylinders.
- Page 13 Specifications and Features Remote Heart Rate Monitor Monitoring your Heart Rate is one of the best procedures to control the intensity of your exercise. The Console reads the telemetry HR signals from the Heart Rate Chest Strap Transmitter that operates in the 4.5kHz - 5.5kHz range.
- Page 14 Specifications and Features If the Console does not display a heart rate value, the transmitter may be at fault. Check that the textured contact areas on the chest strap are making contact with your skin. You may need to lightly wet the contact areas. If no signal appears or you need further assistance, call your Nautilus Representative.
- Page 15 Specifications and Features The most effi cient procedure to burn fat during exercise is to start at a slow pace and gradually increase your intensity until your heart rate reaches between 60 – 85% of your maximum heart rate. Continue at that pace, keeping your heart rate in that target zone for over 20 minutes.
-
Page 16: Operations
For example, 15 minutes in the morning and 15 minutes in the evening. For best results, combine your TreadClimber fitness machine workouts with a strength training program using a Bowflex home ®... - Page 17 Operations Dynamic Knee Hug Stand with the feet together. Bring one knee forward and up toward the chest. Place the hands around the shin and pull the knee into the chest. Release the stretch by putting the foot on the fl oor. Each repetition of the sequence should take 1 to 3 seconds.
- Page 18 Operations Dynamic Twist Stand with the feet shoulder-width apart. Bend the elbows; hold the arms out to the sides. Twist the upper body to one side and then the other side as far as comfortably possible. Each repetition of the sequence should take 1 to 3 seconds. Repeat as a continuous, controlled, fl...
- Page 19 Operations Workouts Follow these guidelines to ease yourself into a weekly exercise regimen. Use your judgment and/or the advice of your physician or health care professional to fi nd the intensity and level of your workouts. Consult a physician before you start an exercise program. Stop exercising if you feel pain or tightness in your chest, become short of breath, or feel faint.
- Page 20 Operations Workout Schedule Here is a beginner, intermediate and advanced sample workout schedule. With each of these sample workout schedules, do not move on to the next week until the current week feels easier and comfortable. Week 1 Week 2 Week 3 Week 4 Week 5...
- Page 21 Operations Workout Log Use this log to track your workouts and progress. Tracking your workouts helps you stay motivated and achieve your goals. Date Cylinder Distance Time Calories Average Setting Speed REVISION Workout Cylinder (for reference only) Cylinder Reference Setting: 147.5mm...
- Page 22 Operations Cool-Down * When you are done using your TreadClimber fi tness machine, consider doing these relaxing stretches, which will ® help your body recover from the workout and make you more fl exible: Lying Leg Raise Lie on the fl oor face up with the legs slightly bent. Lift one leg up toward the ceiling, keeping the knee straight.
- Page 23 Operations Seated Twist Sit on the fl oor and extend the legs straight out in front of the body with the knees slightly bent. Place one hand on the fl oor behind the body and the other hand across the thigh. Twist the upper body as far as comfortably possible to one side.
-
Page 24: Before You Start
Operations Before You Start 1. Place the TreadClimber fi tness machine in your workout area. ® Place the machine on a clean, hard, level surface, free from unwanted material or other objects that may hamper your ability to move freely. A rubber mat can be used below the machine to prevent the release of static electricity and protect your fl... - Page 25 Operations 8. Select your workout, push START, and begin your workout when the belts are up to speed. The belts will only move after a 3 second, audible beep countdown. Keep your hands on the support Handlebars and stay as near the front of the machine as is comfortable in order to stay in balance on the Treadles.
- Page 26 Operations Quick Start Workout With the Quick Start Workout, you have 30 minutes to work your way to the top of a landmark structure. During the workout, your progress is updated on a landmark structure display. If you workout past the 30 minutes, the landmark structure will clear and allow you to climb it again.
- Page 27 Operations G.O. Coach™ User Profiles The G.O. Coach™ Console allows you to create two personal, user profiles to record and display your progress toward your G.O. Coach™ weekly goals. With a user profile created, the Console will track all your G.O. Coach™ Workouts for the week. To create a G.O.
-
Page 28: Pausing Or Stopping
Operations To start a G.O. Coach™ Workout, you must have a G.O. Coach™ User Profile. 1. Push the G.O. Coach™ button. 2. Use the Increase and Decrease buttons to select your User Profile (one circle= User 1, two circles= User 2) and push START. - Page 29 Operations Results When a workout ends, the Console will show your workout results. They are shown in sequence (time, distance, calories, average heart rate, and average speed) three times. Console Service / Setup Mode The Console has a Service / Setup Mode. Some options in the Service / Setup Mode can be adjusted to your preferences, but most are helpful for service of the machine.
-
Page 30: Moving Your Machine
Operations Moving Your Machine The TreadClimber fi tness machine weighs approximately 200 lbs (91 kg) when fully assembled and requires ® caution when being moved. Use the Transport Handle found under the front of the machine to move it. To get access to the Transport Handle, turn the Levelers until you have suffi... -
Page 31: Leveling Your Machine
Operations Machine Mat The Bowfl ex TreadClimber Machine Mat is an optional accessory that helps keep your workout area clear ® ® and adds a layer of protection to your fl oor. The rubber machine mat provides a non-slip, rubber surface which limits static discharge and reduces the possibility of display or running errors. -
Page 32: Maintenance
Maintenance Read all maintenance instructions fully before you start any repair work. In some conditions, an assistant is required to do the necessary tasks. Equipment must be regularly examined for damage and repairs. The owner is responsible to make sure that regular maintenance is done. - Page 33 We recommend that you use one of the following: • Lube-N-Walk Treadmill Lubrication Kit (available from www.bowflex.com or your local specialty fitness dealer) ® • 100% pure silicone, available at most hardware and auto parts stores. As you use your fi tness machine, the Console will show “LUbE” at set times. This is only a reminder and should be added to your inspection schedule.
-
Page 34: Walking Belt Alignment
Maintenance 6. Switch off your machine. 7. Take care to clean up any excess lubricant from the Treadles. We also recommend a periodic inspection of the Treadle surfaces below the belts. If the decks appear worn, contact a TreadClimber Representative (refer to ®... - Page 35 Maintenance Adjusting the Walking Belts – While operating the machine, notice where the belts run on each Treadle. The Walking Belt Adjustment Bolts are on the front end of each Roller. If the belt is tracking too far to the right, use a properly sized Hex Key to turn the right adjustment bolt clockwise on that belt in full turn increments.
-
Page 36: Walking Belt Electrostatic Reduction
Maintenance Walking Belt Electrostatic Reduction Your TreadClimber machine may develop a static charge caused by the movement of the walking belts. Follow ® this procedure to apply an anti-static spray to them to reduce the static electric charges. Wait a minimum of 60 minutes after the last workout before you apply the anti-static spray, to let hot electrical components cool to room temperature. - Page 37 Maintenance 5. Do steps 3 and 4 again until all sections of the belts are lightly coated with anti-static spray. 6. Wait until the belts dry fully (approximately 2-4 hours). 7. Using a 5 mm hex wrench, tighten the tension adjustment bolts for the walking belts. Turn the bolts clockwise to increase the tension.
- Page 38 Maintenance Maintenance Parts Console / Handlebar Assembly Right Junction Cover Cylinder Power Cord Safety Key Heart Rate Strap Right Side Rear Cover Cover Right Upright Left Junction Cover Left Upright Treadle Assembly Cylinder Pivot Cover Motor Cover Base Left Side Cover Handle...
- Page 39 Maintenance Maintenance Parts (Treadle Assembly) Drive Belt Treadle Stop Drive Motor Front Roller Lower Walking Belt Guide Motor Fan Walking Belt Adjustment Walking Screw Belt Adjustment Bracket Walking Belt Guide IGUS Bushing Right Side Foot Platform A/C Inlet Motor Control Board Motor Fan Rear Roller...
-
Page 40: Troubleshooting
Troubleshooting Condition/Problem Things to Check Solution Unit will not turn on, power switch Outlet Make sure outlet is functioning correctly. Verify does NOT light up this by plugging another device (ex: lamp) into the outlet. If outlet is connected to a light switch, check to make sure it is on. - Page 41 Troubleshooting Condition/Problem Things to Check Solution Heart rate not displayed while Transmitter not making Moisten skin contact area on the chest strap. using chest strap good contact with skin Electromagnetic interfer- Turn off any television, AM radio, microwave, or ence computer within 6 feet (2 meters) of the fi...
- Page 42 Troubleshooting Condition/Problem Things to Check Solution Knocking noises when unit is IGUS bushing If knocking sound seems to be coming directly operating from the rear roller, check IGUS (yellow “hat” shaped) bushings and replace if cracked. Hydraulic cylinder bolts Check and tighten both upper and lower bolts that connect the hydraulic cylinders to the unit.
-
Page 43: Body Weight Loss Guide
Bowflex Body Weight Loss Guide ® Introduction and Overview Welcome to the Bowfl ex Body Weight Loss Guide. This guide is designed to be used with your Bowfl ex equip- ® ® ment and will help you: • Lose weight and get lean •... - Page 44 Bowflex Body Weight Loss Guide ® How to Use this Guide • Eat breakfast within 90 minutes of waking up and balance your meals and snacks throughout the – Don’t go longer than 5-6 hours without eating – If you’re not used to eating breakfast, start out small with a piece of fruit and have something else 1-2 hours later.
- Page 45 Bowflex Body Weight Loss Guide ® Meal Plan Overview The female meal plan provides about 1400 calories, and the male plan provides about 1600 calories, of high quality nutrition to not only help you lose weight and feel great but get the most out of your calories. The vitamins, minerals, and antioxidants from eating mostly whole foods help support optimal health.
- Page 46 Bowflex Body Weight Loss Guide ® Here’s an overview of what an ideal day looks like: (See Portion Size Guide for proper serving sizes) Breakfast Snack #1 smart rich fruit protein carb carbs smart protein carb veggies protein/fat Lunch Snack #2...
- Page 47 Bowflex Body Weight Loss Guide ® Breakfast Options Fruit Smart Carb Protein/Fat Fruit and Nut Oatmeal Cook plain Berries or banana Plain oats Nuts and milk oats in water. Top with fruit, nuts, (Regular or quick- milk, cinnamon, and honey.
- Page 48 Bowflex Body Weight Loss Guide ® Snack Options Smart Carb Protein 1 medium apple 10-15 almonds Baby carrots 2 tbsp hummus 1 serving of crackers* 1 string cheese Energy or protein bar with <200 calories* *See www.Bowfl ex.com/Resources for brand recommendations Optional Treats You have the choice of replacing Snack #2 with a 100-150 calorie treat.
- Page 49 Bowflex Body Weight Loss Guide ® Portion Size Guide Each of the items listed are for one serving MALE FEMALE PROTEIN 2 eggs 1 egg 5oz chicken, fi sh, lean meat, or tofu 3oz chicken, fi sh, or lean meat...
- Page 50 Bowflex Body Weight Loss Guide ® OPTIONAL TREATS 1 medium potato 1/2 cup lowfat ice cream 1 small bag of baked potato chips = computer mouse 1oz dark chocolate 4oz of wine or 12oz light beer 3 cups air-popped or light popcorn...
- Page 51 Bowflex Body Weight Loss Guide ® DAIRY & DAIRY ALTERNATIVES CRACKERS, SNACKS & ENERGY BARS Plain non-fat greek yogurt Any unsalted nuts or seeds Energy bars Kefi r (yogurt like drink) Air-popped or light popcorn Crackers Organic low-fat milk Edamame in the pod...
- Page 52 Bowflex Body Weight Loss Guide ® Keep It Going Tips for continued weight loss and maintaining changes • Keep weighing yourself weekly, even after you’ve reached your goal weight • Continue keeping a food log. If you have your meal plan well-established, log your food every other week to keep yourself on track.
-
Page 55: Satisfaction Guarantee
100% Satisfaction Guarantee We want you to know that your TreadClimber machine is a superior product. Your satisfaction is guaranteed. If, ® for any reason, you are not 100% satisfi ed with your TreadClimber machine, please follow the instructions below ®... - Page 56 Nautilus Bowflex Schwinn Universal ® ® ® ® 8001852.010114.B...