Table of Contents
Advertisement
FOR CAR USE ONLY/NUR FÜR AUTOMOBIL GEBRAUCH/POUR APPLICATION AUTOMOBILE UNIQUEMENT/PARA USO EN
AUTOMÓVILES/SOLO PER L'UTILIZZO IN AUTOMOBILE/ENDAST FÖR BILBRUK/ALLEEN VOOR GEBRUIK IN DE AUTO/
ТОЛЬКО ДЛЯ ИСПОЛЬЗОВАНИЯ В АВТОМОБИЛЯХ/DO UŻYCIA TYLKO W SAMOCHODZIE/ΓΙΑ ΧΡΗΣΗ ΜΟΝΟ ΣΕ ΑΥTΟΚΙΝΗΤΟ
•
•
•
•
•
ALPINE ELECTRONICS MARKETING, INC.
1-1-8 Nishi Gotanda,
Shinagawa-ku,
Tokyo 141-0031, Japan
Phone 03-5496-8231
ALPINE ELECTRONICS OF AMERICA, INC.
19145 Gramercy Place, Torrance,
California 90501, U.S.A.
Phone 1-800-ALPINE-1 (1-800-257-4631)
ALPINE ELECTRONICS OF CANADA, INC.
777 Supertest Road, Toronto,
Ontario M3J 2M9, Canada
Phone 1-800-ALPINE-1 (1-800-257-4631)
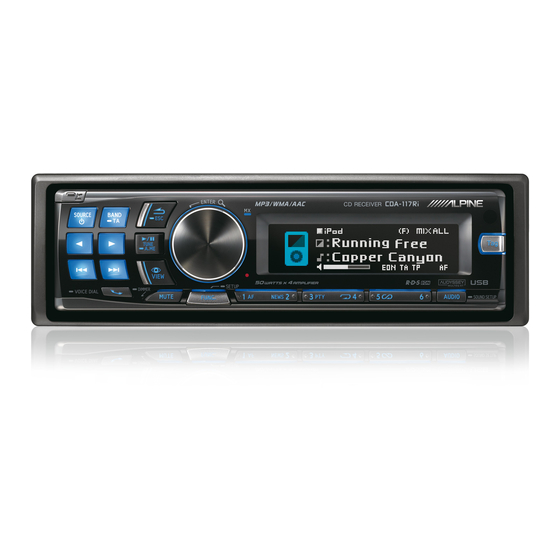
MP3/WMA/AAC CD Receiver
CDA-117Ri
ALPINE ELECTRONICS OF AUSTRALIA PTY. LTD.
161-165 Princes Highway, Hallam
Victoria 3803, Australia
Phone 03-8787-1200
ALPINE ELECTRONICS GmbH
Wilhelm-Wagenfeld-Str. 1-3, 80807 München, Germany
Phone 089-32 42 640
ALPINE ELECTRONICS OF U.K. LTD.
Alpine House
Fletchamstead Highway, Coventry CV4 9TW, U.K.
Phone 0870-33 33 763
ALPINE ELECTRONICS FRANCE S.A.R.L.
(RCS PONTOISE B 338 101 280)
98, Rue de la Belle Etoile, Z.I. Paris Nord Il,
B.P. 50016, 95945 Roissy Charles de Gaulle
Cedex, France
Phone 01-48638989
•
•
•
•
•
Viale C. Colombo 8, 20090 Trezzano
ALPINE ELECTRONICS DE ESPAÑA, S.A.
Portal de Gamarra 36, Pabellón, 32
01013 Vitoria (Alava)-APDO 133, Spain
ALPINE ELECTRONICS (BENELUX) GmbH
R R
ALPINE ITALIA S.p.A.
Sul Naviglio (MI), Italy
Phone 02-484781
Phone 945-283588
Leuvensesteenweg 510-B6,
1930 Zaventem, Belgium
Phone 02-725-13 15
Designed by ALPINE Japan
68-14470Z52-A
EN
DE
FR
ES
IT
SE
NL
RU
PL
GR
Advertisement
Table of Contents

Related Manuals for Alpine CDA-117Ri


Summary of Contents for Alpine CDA-117Ri
- Page 1 • • • • • • ALPINE ELECTRONICS MARKETING, INC. ALPINE ELECTRONICS OF AUSTRALIA PTY. LTD. ALPINE ITALIA S.p.A. 1-1-8 Nishi Gotanda, 161-165 Princes Highway, Hallam Viale C. Colombo 8, 20090 Trezzano Shinagawa-ku, Victoria 3803, Australia Sul Naviglio (MI), Italy...
-
Page 3: Table Of Contents
Contents ENGLISH CD/MP3/WMA/AAC Operating Instructions Playback ...............13 Repeat Play ..............13 WARNING M.I.X. (Random Play) ..........13 WARNING ............4 Searching for CD Text..........14 CAUTION ............4 Folder/File Name Search PRECAUTIONS ..........4 (Concerning MP3/WMA/AAC)......14 Folder Name Search mode........14 Getting Started File Name Search mode ........14 Accessory List ...............7 Quick Search...............14 Turning Power On and Off........7... - Page 4 Contents ENGLISH SETUP iPhone/iPod (optional) Setting................20 Connecting an iPhone/iPod........27 BLUETOOTH Setting..........21 Playback ...............28 Setting the BLUETOOTH Connection....21 Searching for a desired Song .......28 General Setting............. 21 Searching by artist name........28 Birthday Opening Message Setting Quick Search...............28 (Birthday Set) ...............21 Direct Search Function ...........28 Setting the Clock Display (Clock Mode).....21 Setting of Calendar Display Pattern Switching...
- Page 5 Contents ENGLISH Changer (optional) Controlling CD Changer (optional)....37 Playing MP3 Files with the CD Changer (optional)..............38 Multi-Changer Selection (optional)....38 Remote Control Controls on Remote Control ........ 38 Operating the Audio Processor......39 Battery Replacement ..........39 Controllable With Remote Control ....39 Connectable to Remote Control Interface Box.................
-
Page 6: Operating Instructions
Operating Instructions HALT USE IMMEDIATELY IF A PROBLEM APPEARS. WARNING WARNING DO NOT MIX NEW BATTERIES WITH OLD BATTERIES. INSERT WITH THE CORRECT BATTERY POLARITY. This symbol means important instructions. Failure to heed them can result in serious injury or death. DO NOT OPERATE ANY FUNCTION THAT TAKES YOUR ATTENTION AWAY FROM SAFELY DRIVING YOUR VEHICLE. - Page 7 New Discs Disc Accessories Centre Hole Centre Hole New Disc Outside Bumps (Bumps) Irregular Shaped Discs Transparent Sheet Disc Stabilizer On handling Compact Discs (CD/CD-R/CD-RW) Do not leave the disc in the car or the unit for a long time. Never Installation Location expose the disc to direct sunlight.
- Page 8 • The BLUETOOTH word mark and logos are owned by the Bluetooth SIG, Inc. and any use of such marks by Alpine Electronics, Inc. is under license. • “MPEG Layer-3 audio coding technology licensed from Fraunhofer IIS and Thomson.
-
Page 9: Getting Started
Detaching and Attaching the Front Panel Getting Started Detaching Rotary encoder/ENTER/ Turn off the unit power. (OPEN) /ESC Press (OPEN) to open the front panel (figure 1). To close the front panel, press the left side until it locks as shown in the figure 2. -
Page 10: Initial System Start-Up
• If no operation is performed for 60 seconds, SETUP is cancelled. Initial System Start-Up • To synchronise the clock to another clock/watch or radio time announcement, press and hold ENTER for at least 2 seconds after setting the “hour”. Minutes will reset to 00. If the display shows over “30”... -
Page 11: Radio
Presetting Stations Automatically Radio Press BANDTA repeatedly until the desired radio band is displayed. Rotary encoder/ENTER/ BAND/TA Press and hold TUNEA.ME for at least 2 seconds. /ESC SOURCE/ The frequency on the display continues to change while the automatic memory is in progress. The tuner will automatically seek and store 6 strong stations in the selected band. -
Page 12: Rds
Displayed only when INT Mute is OFF, and the mode is set to other than Bluetooth Audio. Turn the Rotary encoder to select RDS Regional, and then press ENTER. Rotary encoder/ENTER/ Turn the Rotary encoder to select ON or OFF. /ESC BAND/TA In the OFF mode, the unit automatically keeps receiving the... -
Page 13: Setting The Time To Automatically Adjust
Press and hold SETUP for at least 2 seconds to return to received next time, the volume level will be automatically adjusted to the level memorized. normal mode. • In the TA mode, the SEEK tuning selects only the TP stations. When an emergency broadcast is received, the volume level will be automatically changed to the memorized level in the traffic information mode. -
Page 14: Priority News
the AF list. The “EON” indicator lights up while an RDS EON station is • During tagging, changing the source or RDS station or traffic being received. If the station being received does not broadcast the information, etc., is received, the tagging will be cancelled; however, traffic information, the receiver automatically tunes in the related “Cannot Tag”... -
Page 15: Cd/Mp3/Wma/Aac
• The playback time may not be correctly displayed when a VBR CD/MP3/WMA/AAC (Variable Bit Rate) recorded file is played back. • Press VIEW to switch the display. For details, refer to “Displaying the Text” on page 19. SOURCE/ Rotary encoder/ENTER/ Repeat Play /ESC (OPEN) -
Page 16: Searching For Cd Text
Notes Searching for CD Text • Press and hold ESC for at least 2 seconds in the search mode to cancel. Or, the search mode is cancelled if no operation is performed for 60 seconds. • Press ESC in the search mode to return to the previous mode. •... -
Page 17: Terminology
played back (WMA ver. 7 , 8 and 9 are supported). Protected files are not Verify the writing order in the software’s documentation. The playback supported, neither are raw AAC files (using the “.aac” extension). order of the folders and files is as follows. There are many different versions of the AAC format. -
Page 18: Sound Setting
Sound Setting Sound Setting Rotary encoder/ENTER/ SOURCE/ /ESC Use steps 1 to 4 to select one of the setting modes to modify. See the applicable section below for details about the BAND/TA selected setting item. Press and hold SOUND SETUP for at least 2 seconds to activate the Sound Setting mode. -
Page 19: Setting The Subwoofer System
(DVD MUSIC): Setting the Subwoofer System A DVD or Video CD contains a large quantity of data such as music clip. MX uses this data to reproduce the sound accurately. AUX (MX level 1): Choose the MX mode (CMPM, MOVIE, or MUSIC) that corresponds to the media connected. -
Page 20: Adjusting The Graphic Equalizer Curve
Storing the Sound Field Adjustment Settings Band-4 1.6 kHz~10 kHz Band-5 10 kHz~17.5 kHz Turn the Rotary encoder to adjust the level. When the settings of Sound Field have been completed, Adjustable level: −6 to +6 dB select any one of the preset buttons (1 through 6) in any Press SOURCE... -
Page 21: Other Functions
The display in CD mode: Other Functions (Blank) Track No. (Blank) Elapsed Time Text (Disc Name) Calendar Text (Track Name) Clock Track No. Elapsed Time VIEW The display in MP3/WMA/AAC mode: Displaying the Text Folder No./File No. (Blank) Elapsed Time (Blank) Artist Name Calendar... -
Page 22: About The Indication Display
About the indication display SETUP BAND/TA Indicator/ MP3/WMA/AAC CD Mode iPod Mode Mode Mode Rotary encoder/ENTER/ SOURCE/ /ESC Folder Name — — being displayed Artist Name Artist Name — being displayed being displayed Album Name Album Name — ... -
Page 23: Bluetooth Setting
Refer to “Setting the Time to automatically Adjust” on page 11. Setting of Calendar Display Pattern Switching (Calendar) Turn the Rotary encoder to change the setting, and then press ENTER. (e.g. Select Power IC ON or Power IC OFF) Setting item: Calendar Press and hold SETUP for at least 2 seconds to return to normal mode. -
Page 24: Setting The Aux+ Level (Aux In Gain)
Rotary encoder Setting item: AUX IN Setting item: AUX+ Setup Setting contents: Setting contents: ON / OFF (Initial setting) ON / OFF (Initial setting) Note ON : • Via KCA-410C, up to 2 external devices with RCA output can be Set to ON when a portable device is connected. -
Page 25: Setting The Language Font
Setting the Language Font Press ENTER to execute the setting value. The confirmed signal value of steering remote control appears in the right of the display. With doing so, the function of the unit is assigned to the steering remote control button. ... -
Page 26: Scroll Setting (Text Scroll)
displayed the same way until all words of the title have been Adjusting Source Signal Levels (FM Level) shown. Scroll Setting (Text Scroll) Setting item: FM Level Setting contents: High (Initial setting) / Low Setting item: Text Scroll Setting the TUNER (FM) tone quality Setting contents: Auto / Manual (Initial setting) -
Page 27: Usb Memory/Portable Audio Player (Optional)
USB Memory/Portable audio player (optional) Rotary encoder/ENTER/ SOURCE/ /ESC Bank No. Song number Bank1 1~1,000 Bank2 1,001~2,000 Bank20 19,001~20,000 Playback VIEW 4 5 Press SOURCE to select the USB mode. Press or to select the desired track (file). Connecting the USB Memory (optional) Pressing and holding ... -
Page 28: Random Play)
To cancel repeat play, select (off) with the above Searching by artist name procedure. Note Press ENTER to activate the search selection mode. • During repeat play, setting M.I.X. to ON will cancel the repeat play. Turn the Rotary encoder to select a desired Bank, and then press ENTER. -
Page 29: Alphabet Skip Function
Alphabet Skip Function iPhone/iPod (optional) SOURCE/ Rotary encoder/ENTER/ /ESC 4 5 During search mode, press or to perform the Alphabet Skip Function. A list is skipped to the next number, symbol or letter. Notes •... -
Page 30: Playback
Turn the Rotary encoder to select the desired Song, and Playback then press ENTER. The selected song is played back. Notes Press SOURCE to switch to the USB iPod mode. • After pressing and holding ENTER for at least 2 seconds while in Press ... -
Page 31: Select Playlist/Artist/Album/Genre/Composer/Episode
In the search mode, press any one of the preset buttons (1 Press ESC. through 6) to quickly skip over a designated percent of The hierarchy you selected last in the search mode is displayed. your song content. Song search example: Random Play Shuffle (M.I.X.) If there are 100 songs in your iPhone/iPod, they are divided into 6 groups using percentages (shown below). -
Page 32: Displaying The Text
Displaying the Text IMPRINT Operation (optional) Press VIEW. Each press changes the display. BAND/TA Rotary encoder/ENTER/ Note SOURCE/ • When the Text Scroll is set to Manual, press and hold VIEW for at least /ESC 2 seconds, the current text will be scrolled one time. Track No./All Songs No. -
Page 33: Adjusting Subwoofer Level/Bass Level/Treble Level/Fader (Between Front And Rear)/ Balance (Between Left And Right)/Black Out In Multeq Mode
Press and hold SOUND SETUP for at Least 2 seconds to Adjusting Subwoofer Level/Bass Level/ activate the Sound menu selection mode. Treble Level/Fader (Between Front and Turn the Rotary encoder to select the desired item, and then press ENTER. Rear)/Balance (Between Left and Right)/ MultEQ Mode ... -
Page 34: Setting The Subwoofer Phase
Setting the Subwoofer Phase Turning Media Xpander ON/OFF Rotary encoder Setting item: Media Xpander Setting item: SUBW. Phase Setting contents: Setting contents: OFF (Initial setting) / ON PHASE 0° (Initial setting) / PHASE 180° Setting the MX Level Setting the Subwoofer Channel (SUBW. -
Page 35: Setting The Time Correction Unit (Tcr Parameter)
Band-3 400 Hz Setting the Time Correction Unit (TCR Band-4 1 kHz Parameter) Band-5 2.5 kHz Band-6 6.3 kHz Band-7 17.5 kHz Setting item: TCR Parameter Setting contents: Turn the Rotary encoder to adjust the level. cm (Initial setting) / inch Adjustable output level: −6 to +6 dB Sound Field Adjustment To adjust another band, repeat steps 1 and 2, and then... -
Page 36: Storing The Sound Field Adjustment Settings
through 6) in any item of the Sound Field Adjustment MID-H 20 Hz~20 kHz mode (e.g. X-Over), press and hold the desired preset HIGH (1 kHz~20 kHz) /(20 Hz~20 kHz) buttons for at least 2 seconds. When FACTORY’S is selected, refer to “Setting the Response Slope for the High Range Speaker (TW Setup)”... -
Page 37: Example 1: Front Left Seat
Delay Time Differ- Distance Example 1: Front Left Seat Distance (cm) Number ence (ms) (inch) 10.2 13.6 17.0 20.4 23.8 27.2 10.7 30.6 12.1 34.0 13.4 5.1ms 37.4 14.7 0.5m 40.8 16.1 2.25m 44.2 17.4 47.6 18.8 51.0 20.1 54.4 21.4 57.8 22.8... -
Page 38: About The Crossover
207.4 81.7 characteristics of the speakers. Depending on the speakers, a passive network may not be necessary. If you are unsure about this point, 210.8 83.1 consult your authorized Alpine dealer. 214.2 84.4 4.2ch (FRONT/REAR/SUBW.) mode 217.6 85.8 Cut-off frequency 221.0... -
Page 39: Changer (Optional)
• Depending on the connected DVD Changer, some functions may not be outside that recommended may cause damage to the speakers. available. For the recommended crossover frequencies of Alpine speakers, refer to Press SOURCE to activate the CHANGER mode. the respective Owner’s Manual. -
Page 40: Playing Mp3 Files With The Cd Changer (Optional)
Note Remote Control • After selecting the desired disc, you can operate in the same way as for the CD player of this unit. For details, see the CD/MP3/WMA/AAC section. Playing MP3 Files with the CD Changer (optional) Press SOURCE to switch to the MP3 Changer mode. Press any one of the disc select buttons (1 through 6) corresponding to one of the discs loaded in the CD Changer. -
Page 41: Operating The Audio Processor
IMPRINT audio processor (PXA-H100) (sold separately) is Opening the battery cover connected, refer to “IMPRINT Operation (optional)” on page 30. Slide out the battery cover while firmly pressing in the direction Power Button of the arrow. Press this button to turn the power on/off. ... -
Page 42: In Case Of Difficulty
Information Unable to fast forward or backward the CD. In Case of Difficulty CD playback sound skips due to vibration. Basic No function or display. CD playback sound skips without vibration. Error displays (built-in CD player only). CD-R/CD-RW playback not possible. Radio MP3/WMA/AAC Unable to receive stations. -
Page 43: Indication For Cd Changer
2 When the error indication remains after ejecting, press the button again. If the error indication still does not turn off after pressing the button for a few times, consult your Alpine dealer. Indication for CD Changer... -
Page 44: Indication For Iphone/Ipod Mode
Indication for iPhone/iPod Mode Specifications FM TUNER SECTION MW TUNER SECTION LW TUNER SECTION CD PLAYER SECTION PICKUP USB SECTION Frequency response may differ depending on the encoder software/bit rate. GENERAL CHASSIS SIZE NOSEPIECE SIZE... - Page 45 Note • Due to continuous product improvement, specifications and design are subject to change without notice. CAUTION (Bottom side of player)
-
Page 46: Installation And Connections
Installation and Connections Before installing or connecting the unit, please read the following and refer to “Operating Instructions” on page 4 for proper use. Warning ARRANGE THE WIRING SO IT IS NOT CRIMPED OR PINCHED BY A SHARP METAL EDGE. MAKE THE CORRECT CONNECTIONS. -
Page 47: Installation
When your vehicle has the Bracket, mount the long hex Mounting Bracket bolt onto the rear panel of the CDA-117Ri and put the Rubber Cap on the hex bolt. If your vehicle does not have the Mounting Support, reinforce the head unit with the iPhone/iPod Connection (sold separately) metal mounting strap (not supplied). -
Page 48: Remove The Iphone/Ipod
Remove the iPhone/iPod Notes • After changing the unit to a source other than the USB iPod, remove the iPhone/iPod. If the iPhone/iPod is removed in the USB iPod mode, data may cause damage. • If sound is not output or the iPhone/iPod is not recognised even when the iPhone/iPod is connected, remove the iPhone/iPod once, then connect it again, or reset the iPod. -
Page 49: Connections
Connections ADAPTIVE STEERING REMOTE G.GND (Black) To adaptive steering remote control interface box ADAPTIVE STEERING REMOTE CONTROL IN1 (Brown/Yellow) To adaptive steering remote control interface box ADAPTIVE STEERING REMOTE CONTROL IN2 (Brown/Orange) To adaptive steering remote control interface box (Blue) To BLUETOOTH INTERFACE (KCE-400BT) (sold separately) (Black) - Page 50 If you add an optional noise suppressor, connect it as far away “CD CHG”, when the DHA-S690 is connected. from the unit as possible. Your Alpine dealer carries various Steering Remote Control Interface Connector noise suppressors, contact them for further information.