
Related Manuals for THOMSON SpeedTouch 545


Summary of Contents for THOMSON SpeedTouch 545
- Page 1 SpeedTouch™ 545/570 Multi-User ADSL Gateways Setup and User’s Guide Release R4.2.1 SERIES...
- Page 3 SpeedTouch™ 545/570 Setup and User’s Guide Release R4.2.1...
- Page 4 Status v1.0 Change Note PeckelbeenS Short Title Setup and User's Guide ST545/570 R4.2.1 (en) Copyright © 2003 THOMSON. All rights reserved. Passing on, and copying of this document, use and communication of its contents is not permitted without written authorization from THOMSON.
-
Page 5: Table Of Contents
Contents 1 SpeedTouch™ Installation ..........5 Getting Acquainted with the SpeedTouch™............ 6 Setting Up the SpeedTouch™................9 SpeedTouch™ Configuration Setup ..............11 1.3.1 Microsoft Windows SpeedTouch™ Configuration Setup ............ 12 1.3.2 Operating System Independent SpeedTouch™ Configuration Setup........ 19 2 SpeedTouch™ Internet Connectivity ......23 Internet Connections via SpeedTouch™’s Embedded PPP Dial-in Client. - Page 6 5 SpeedTouch™ Web Interface........47 Basic Topics Menu Links ................... 50 Advanced Topics Menu Links ................56 6 SpeedTouch™ NAPT Manager ........67 7 Support ................73 Upgrading a SpeedTouch™545 for Wireless Networking ......74 Using the Wall Mounting Assembly..............76 SpeedTouch™...
-
Page 7: Speedtouch™ Installation
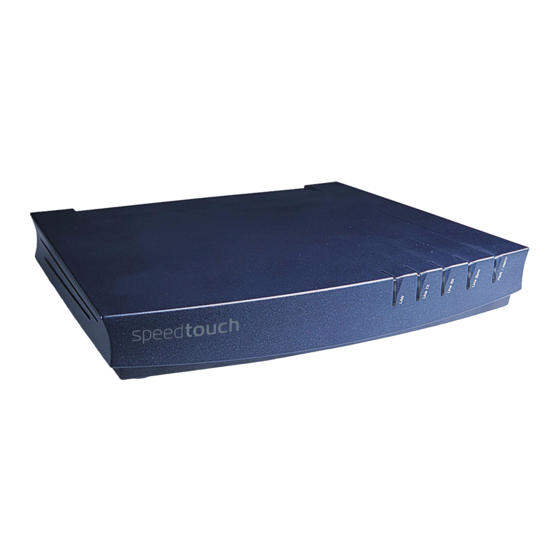
1 SpeedTouch™ Installation 1 SpeedTouch™ Installation Introduction Thank you for purchasing a SpeedTouch™ Multi-User ADSL Gateway! With the SpeedTouch™545 Wireless Upgradeable and SpeedTouch™570 Wireless Multi-User ADSL Gateways two cutting-edge technologies are combined: ADSL and Wireless LAN (WLAN). With this answer to the increasing popularity of both technologies, users can build a home or small office (Wireless) LAN without any need for network wiring and surf the Internet at high speed;... -
Page 8: Getting Acquainted With The Speedtouch
1 SpeedTouch™ Installation 1.1 Getting Acquainted with the SpeedTouch™ Introducing the Prior to proceeding, please make sure to read first the SpeedTouch™ Quick Installation SpeedTouch™ Guide. It provides important package content and safety information. Check whether all items are present in your package. In the event of damaged or missing items, please contact your local product dealer for further information. - Page 9 1 SpeedTouch™ Installation SpeedTouch™545 The slot on the SpeedTouch™545 side panel allows you to upgrade your SpeedTouch™ side panel for wireless connectivity by installing a SpeedTouch™010 wireless upgrade card: For more information on how to install the SpeedTouch™010 wireless upgrade card, “7.1 Upgrading a SpeedTouch™545 for Wireless Networking”...
- Page 10 1 SpeedTouch™ Installation Ethernet port LEDs Each Ethernet Port on the rear panel has one LED to indicate the link integrity/activity. A second LED may be provided to indicate the 10/100Base-T selection: 10/100 Base-T Link Integrity/Activity Indicator Description Name LED Status 10/100Base-T 10Base-T Ethernet connection.
-
Page 11: Setting Up The Speedtouch
1 SpeedTouch™ Installation 1.2 Setting Up the SpeedTouch™ Wall mounting Part of the package is a wall mounting assembly which allows you to conveniently mount assembly the SpeedTouch™ on a wall. See “7.2 Using the Wall Mounting Assembly” on page 76 for more information. - Page 12 1 SpeedTouch™ Installation Turn on the Once all previous steps are completed, you can turn the SpeedTouch™ on (I) with the SpeedTouch™ power switch. The SpeedTouch™ is ready for service as soon as the start-up procedures are completed, the Power On Self Test (POST) is passed and both Power/Alarm and Line Sync LEDs on the front panel are constantly lit green.
-
Page 13: Speedtouch™ Configuration Setup
1 SpeedTouch™ Installation 1.3 SpeedTouch™ Configuration Setup Internet connectivity Some configuration may be required to prepare the SpeedTouch™ for Internet connec- tivity. Before setting up the SpeedTouch™ for Internet connectivity, make sure that the SpeedTouch™ is prepared as described in “1.2 Setting Up the SpeedTouch™”... -
Page 14: Microsoft Windows Speedtouch™ Configuration Setup
1 SpeedTouch™ Installation 1.3.1 Microsoft Windows SpeedTouch™ Configuration Setup Supported MS One of the following MS Windows OSs must be installed on your PC(s): Windows OSs • MS Windows 98 • MS Windows 98SE • MS Windows ME • MS Windows NT4.0 SP6 •... - Page 15 1 SpeedTouch™ Installation Detection of the Proceed as follows: SpeedTouch™ Insert the SpeedTouch™ Setup CD-ROM in your PC's CD-ROM drive. The SpeedTouch™ CD Browser will start automatically. If the SpeedTouch™ CD Browser window does not appear automati- Note cally, open a Run window via Start > Run from the Start menu and enter the following path: D:\Menu.exe, where D stands for the drive letter of your CD-ROM drive.
- Page 16 1 SpeedTouch™ Installation The Initial Setup window appears: Click Setup my SpeedTouch™ to start the SpeedTouch™ Setup wizard. The Welcome to the SpeedTouch™ Setup Wizard window appears: Click Next. The Software License Agreement window appears: You must accept before continuing. Click Yes to accept. If you accepted this License Agreement in a previous configuration Note setup, this window will not be shown anymore.
- Page 17 1 SpeedTouch™ Installation The Setup wizard will search for the SpeedTouch™ on the network. The following window shows the detection progress: The Setup wizard should find your SpeedTouch™ device on the local network. This is indicated by the following window: If more than one device is found, a list of available devices will be provided.
- Page 18 1 SpeedTouch™ Installation Configuration of the Proceed as follows: SpeedTouch™ (and PC) As soon as the SpeedTouch™ Setup wizard has detected your SpeedTouch™ device, you can proceed with the configuration procedure. If the SpeedTouch™ has been configured before: Note • It may be protected by a system password.
- Page 19 1 SpeedTouch™ Installation The SpeedTouch™ Setup wizard will update the SpeedTouch™ configuration and your PC’s configuration according to the Service profile. You can follow the config- uration progress in following window: As soon as the SpeedTouch™ Setup wizard completed the update of the Speed- Touch™...
- Page 20 1 SpeedTouch™ Installation Additional configuration Some additional configuration may be needed: • Wireless Settings When running the SpeedTouch™ Setup wizard, the SpeedTouch™ wireless Access Point settings will be set to their default values. You might need to re-asso- ciate your WLAN clients, using the factory defaults WLAN settings as specified in “4.1 First-time Wireless Client Association”...
-
Page 21: Operating System Independent Speedtouch™ Configuration Setup
1 SpeedTouch™ Installation 1.3.2 Operating System Independent SpeedTouch™ Configuration Setup Supported Systems As the SpeedTouch™ is OS-independent, this configuration setup can be used by any computer system. Prerequisites Make sure that: • The SpeedTouch™ device is correctly set up and turned on as described in “1.2 Setting Up the SpeedTouch™”... - Page 22 1 SpeedTouch™ Installation Configuration of the Proceed as follows: SpeedTouch™ Open a web browser and browse to the SpeedTouch™ web pages at http://10.0.0.138. See “5 SpeedTouch™ Web Interface” on page 47 for more information. If you can not access the SpeedTouch™ web pages, it is probably not in Note its default state.
- Page 23 1 SpeedTouch™ Installation Easy Setup will update the SpeedTouch™ configuration according to the Service profile. You can follow the configuration progress in following window: As soon as Easy Setup completed the update of the SpeedTouch™ configuration, following window will appear: Click Finish to close the wizard.
- Page 24 1 SpeedTouch™ Installation Additional configuration Some additional configuration may be needed: • Wireless Settings When running the SpeedTouch™ Setup wizard, the SpeedTouch™ wireless Access Point settings will be set to their default values. You might need to re-asso- ciate your WLAN clients, using the factory defaults WLAN settings as specified in “4.1 First-time Wireless Client Association”...
-
Page 25: Speedtouch™ Internet Connectivity
2 SpeedTouch™ Internet Connectivity 2 SpeedTouch™ Internet Connectivity Introduction This chapter provides information on how to configure your SpeedTouch™ according to your preferences and how to access the Internet. Access methods As soon as the SpeedTouch™ and your computers have been configured as outlined in “1.3 SpeedTouch™... -
Page 26: Internet Connections Via Speedtouch™'S Embedded Ppp Dial-In Client
2 SpeedTouch™ Internet Connectivity 2.1 Internet Connections via SpeedTouch™’s Embedded PPP Dial-in Client. Introduction The SpeedTouch™ supports both most popular connection methods: Routed PPP over ATM (PPPoA) and PPP over Ethernet (PPPoE). The connection method depends on the Service profile you selected to configure the SpeedTouch™... -
Page 27: Using The Ms Windows Xp Internet Gateway Device Control Client
2 SpeedTouch™ Internet Connectivity 2.1.1 Using the MS Windows XP Internet Gateway Device Control Client Introduction MS Windows XP users can easily establish PPP sessions, without the need of first browsing to the SpeedTouch™ web pages, due to MS Windows XP’s Internet Gateway Device Discovery and Control Client that allows you to control the SpeedTouch™... - Page 28 2 SpeedTouch™ Internet Connectivity The connected Internet As long as the SpeedTouch™’s embedded PPP dial-in client is connected, you are able to Gateway overview the connection status and some counters by double-clicking the Internet Connection icon in your PC’s Network Connections window: More detailed monitoring is provided via: •...
-
Page 29: Using The Speedtouch™ Web
2 SpeedTouch™ Internet Connectivity 2.1.2 Using the SpeedTouch™ Web Pages Introduction As the SpeedTouch™ web pages are controllable from any Operating System with installed web browser, the method to establish PPP sessions described below can be used by any computer system. Starting an Internet Proceed as follows: session... - Page 30 2 SpeedTouch™ Internet Connectivity During the Internet You are able to overview and monitor your Internet connectivity as long as the session session is running via: • Dr SpeedTouch™ “3 Dr SpeedTouch™” on page • The SpeedTouch™ System Information page “...
-
Page 31: Connect To The Internet Via A Host Pppoe Dial-In Client
2 SpeedTouch™ Internet Connectivity 2.2 Connect to the Internet via a Host PPPoE Dial- in Client Introduction This section explains how you can connect to the Internet using a Broadband PPPoE dial-in application. The PPP over Ethernet connection scenario provides PPP-like dial-in behavior over the virtual Ethernet segment. -
Page 32: Using An Ms Windows Xp Broadband Connection
2 SpeedTouch™ Internet Connectivity 2.2.1 Using an MS Windows XP BroadBand Connection. Configuring a Proceed as follows: broadband connection On the Start menu, click (Settings >) Control Panel. The Control Panel window appears. Go to (Network and Internet Connections >) Network Connections. - Page 33 2 SpeedTouch™ Internet Connectivity In the next window, select Connect using a broadband connection that requires a user name and password: Click Next to continue. In the next window, give a name to the connection you are creating, e.g. MyISP: In the next window, select whether the connection is available to any user or only to yourself: If you want to share this connection with other users you must select...
- Page 34 2 SpeedTouch™ Internet Connectivity In the next window, fill in the Internet account information. This information should be provided by your service provider: At the end of the configuration the following window appears: Click Finish to complete the configuration. The Connect MyISP window (see below) appears. Starting a broadband Proceed as follows: Internet session...
- Page 35 2 SpeedTouch™ Internet Connectivity As soon as the connection is established, the connection message box and dial-up window are minimized into a DUN icon in the system tray: You can open your web browser and surf the Internet. Terminating a Proceed as follows: broadband Internet On the Start menu, point Connect To and click the name of the connection you’ve...
-
Page 36: Using The Mac Os X Pppoe Dial-In Client
2 SpeedTouch™ Internet Connectivity 2.2.2 Using the Mac OS X PPPoE Dial-in Client Configuring a Proceed as follows: broadband connection On the Apple menu, click System Preferences. The System Preferences window appears. Click the Network icon. The Network window appears. Make sure Built-in Ethernet is selected in the Show list and click the PPPoE tab: Enter the Account Name and Password provided by your Service Provider. - Page 37 2 SpeedTouch™ Internet Connectivity Starting a broadband Proceed as follows: Internet session Click the Internet Connect dockling. If the Internet Connect dockling is not available, go to the Applications Note folder on the system startup disk and double-click Internet Connect. The following window appears: Make sure Built-in Ethernet is selected in the Configuration list.
- Page 38 2 SpeedTouch™ Internet Connectivity E-DOC-CTC-20030814-0001 v1.0...
-
Page 39: Dr Speedtouch
3 Dr SpeedTouch™ 3 Dr SpeedTouch™ Introduction The Dr SpeedTouch™ application allows you to monitor, diagnose and troubleshoot your SpeedTouch™ device. With Dr SpeedTouch™you can: • Monitor the status and performance of the SpeedTouch™ device. • Run a Diagnostics program to locate a connectivity problem. •... - Page 40 3 Dr SpeedTouch™ Using By default Dr SpeedTouch™ is started automatically at boot of your system and runs in Dr SpeedTouch™ the background, i.e. minimized in the status area. Proceed as follows: Double-click in the status area. Dr SpeedTouch™ searches your network for SpeedTouch™ devices. If more than one device is found, a list of available devices will be provided.
- Page 41 3 Dr SpeedTouch™ • Select the Performance tab to monitor the downstream and upstream performance of your DSL connection: For more information on Dr SpeedTouch™ please click Help in the applica- Note tion or press F1 for context sensitive help. E-DOC-CTC-20030814-0001 v1.0...
- Page 42 3 Dr SpeedTouch™ E-DOC-CTC-20030814-0001 v1.0...
-
Page 43: Wireless Connectivity
4 Wireless Connectivity 4 Wireless Connectivity Introduction The SpeedTouch™570 and SpeedTouch™545 (with wireless upgrade card installed) feature a Wireless LAN Access Point (AP) which behaves as a hub and allows wireless connectivity between several devices and the local (W)LAN and - via the SpeedTouch™ DSL router - to the public network, e.g. - Page 44 4 Wireless Connectivity Wireless client Only wireless client adapters compliant to IEEE802.11b DSSS, will be able to communi- requirements cate with the SpeedTouch™ and other members of the SpeedTouch™ (W)LAN envi- ronment. It is highly recommended that the wireless client adapter is Wi-Fi™ certified to ensure smooth interoperability.
-
Page 45: First-Time Wireless Client Association
4 Wireless Connectivity 4.1 First-time Wireless Client Association Initial SpeedTouch™ When the SpeedTouch™ leaves the factory and after every Reset-to-Defaults (See wireless configuration “7.4 SpeedTouch™ Default Configuration” on page 88 for more information), the SpeedTouch™ wireless configuration returns to its initial default settings. These settings are as follows: •... - Page 46 4 Wireless Connectivity First-time wireless For a successful association the wireless client must be correctly configured for: client configuration • the default WEP encryption • the default Network Name. As the SpeedTouch™ broadcasts its SSID to the wireless clients, you can select the SpeedTouch™...
-
Page 47: Connecting Wireless Clients
4 Wireless Connectivity 4.2 Connecting Wireless Clients Before you connect In case the SpeedTouch™ has not been configured before (the SpeedTouch™ is still in other wireless clients its default configuration), it is recommended to proceed first with the configuration setup procedures as described in “1.3 SpeedTouch™... - Page 48 4 Wireless Connectivity Registering wireless In case registration is enabled, you must register pending wireless network clients as clients follows: Make sure the wireless client is correctly associated to the SpeedTouch™ WLAN. Depending on your WLAN client adapter a wireless icon may become green or a message similar to the following may appear: “Successfully joined Wireless net- work SpeedTouch012345".
-
Page 49: Speedtouch™ Web Interface
5 SpeedTouch™ Web Interface 5 SpeedTouch™ Web Interface Introduction The SpeedTouch™ comes with integrated local configuration capabilities. The local configuration, via the SpeedTouch™ web interface, is based on the HTTP server/web browser concept. It allows you to configure your SpeedTouch™ via a web browser using HTML pages from any local computer attached to the SpeedTouch™... - Page 50 5 SpeedTouch™ Web Interface Result As a result the System Information page appears: If the SpeedTouch™ is still in its default configuration the embedded Easy Note Setup will appear automatically. Topic menu and links On the left of each of the SpeedTouch™ web pages a topics menu is provided. This menu navigates you via links through all configurational aspects of the SpeedTouch™.
- Page 51 5 SpeedTouch™ Web Interface The following table lists all advanced topic links: ADVANCED topic menu Click ... To ... Diagnostics View SpeedTouch™ diagnostics. Easy Setup Configure the SpeedTouch™ via the embedded wizard. IP Addresses View/configure the SpeedTouch™ IP interfaces. IP Routing View/configure the SpeedTouch™...
-
Page 52: Basic Topics Menu Links
5 SpeedTouch™ Web Interface 5.1 Basic Topics Menu Links System Information lick this link to display the System Information page. This page is also the Speed- Touch™ home page. The System Information page consists of four sections: • Click the Diagnostics tab to view the results of the System Self Test, LAN connec- tivity and DSL synchronization test: •... - Page 53 5 SpeedTouch™ Web Interface • Click the System tab to view some important system information of the Speed- Touch™: The System table lists: • The SpeedTouch™ product name. • The unique Medium Access Control (MAC) address of your SpeedTouch™. This MAC address can be used to identify your SpeedTouch™. •...
- Page 54 5 SpeedTouch™ Web Interface Wireless Click this link to display the SpeedTouch™ Wireless page. If you are using a SpeedTouch™545 without wireless upgrade card installed, Note this page will not be available. This allows you to: • Click the Access Point Settings tab to view the Access Point Settings pages: •...
- Page 55 5 SpeedTouch™ Web Interface • Click the Data Security tab to enable/disable the 64-bit/128-bit WEP encryp- tion: By default WEP encryption is enabled (at 128-bit encryption). To change the WEP encryption: Select the desired WEP encryption level (64-bit or 128-bit). Enter a WEP key of your choice.
- Page 56 5 SpeedTouch™ Web Interface • If registration is disabled, the following table is shown: If New Station Allowed is selected, any client with the correct wireless settings (Network Name and, if required, Network key) will be automatically added to the Access Control List and will be allowed to send/receive data via the SpeedTouch™...
- Page 57 5 SpeedTouch™ Web Interface System Log Click this link to view the System Log page. This page allows you to view the activity on the SpeedTouch™ since power on: E-DOC-CTC-20030814-0001 v1.0...
-
Page 58: Advanced Topics Menu Links
5 SpeedTouch™ Web Interface 5.2 Advanced Topics Menu Links Diagnostics Click this link to display the Diagnostics page. This page consists of three expandable sections: • Expand the System section to view some important system information: • Expand the Lan section to view the LAN configuration: Expand subsequently the Wireless and the Site Monitor section to allow the SpeedTouch™... - Page 59 5 SpeedTouch™ Web Interface • Expand subsequently the Wan, DSL and Connections sections to view the current DSL state and connection information: Click to instantly check all SpeedTouch™ connections on IP connectivity. Easy Setup Click this link to start the SpeedTouch™ Easy Setup wizard. “1.3.2 Operating System Independent SpeedTouch™...
- Page 60 5 SpeedTouch™ Web Interface IP Addresses lick this link to display the IP Addresses page. This page allows you to view or add/delete specific IP address entries for Speed- Touch™'s interfaces: When adding an IP address, all essential IP routes will be automatically be added to the SpeedTouch™...
- Page 61 5 SpeedTouch™ Web Interface NAPT lick this link to display the Network Address and Port Translation (NAPT) page. This page allows you to: • View or add/delete specific static NAPT entries: To add static NAPT entries proceed as follows: Click New. Specify the outside address and inside address for the entry as well as the protocol and port to which the entry applies.
- Page 62 5 SpeedTouch™ Web Interface • Define a default server: By specifying a default server IP address (e.g. 10.0.0.154 as shown above), all incoming connections that don’t match a specifically configured static NAPT entry will be forwarded to the device with this IP address. This setting should be adequate for most server applications and eliminates the need for specific static NAPT entries.
- Page 63 5 SpeedTouch™ Web Interface DHCP lick this link to display the Dynamic Host Configuration Protocol (DHCP) page. This page allows you to: • Click The DHCP Server tab to access the DHCP server pages. • Click the Server Config tab to enable/disable the SpeedTouch™ (Auto)DHCP server: Depending on the DHCP server status, following Status message can be displayed:...
- Page 64 5 SpeedTouch™ Web Interface Under Properties, you are able to select: • DHCP server Enables the SpeedTouch™ DHCP server. If it was not running, it will be enabled immediately. • Auto DHCP The SpeedTouch™ will not start its DHCP server immediately, but will first probe the network for a possible concurrent DHCP server for some period of time (set by Client timeout in seconds).
- Page 65 5 SpeedTouch™ Web Interface • Click the DHCP Relay tab to view the DHCP relay pages. The DHCP relay agent allows you to use DHCP clients and DHCP servers available on different networks. • Click the Relay Config tab to view the current SpeedTouch™ DHCP relay status: Via this table you can also manually add static SpeedTouch™...
- Page 66 5 SpeedTouch™ Web Interface lick this link to display the Dynamic Name System (DNS) page. This page allows you to: • View the current SpeedTouch™ DNS server hostname leases: Via this table you can also add static DNS hostname entries. This may be useful for devices which do not support DNS, e.g.
- Page 67 5 SpeedTouch™ Web Interface • Back up the current SpeedTouch™ configuration, restore the SpeedTouch™ default configuration, or upload a backup configuration file: • To backup the current configuration click Backup and follow the instructions. • To restore the SpeedTouch™ defaults: Click Restore default to load the default configuration.
- Page 68 5 SpeedTouch™ Web Interface Templates Click this link to display the Templates page. This page allows you to: • View the templates currently stored in the SpeedTouch™ memory. The listed service templates are available for the embedded Easy Setup wizard: Each template file requires a certain amount of memory.
-
Page 69: Speedtouch™ Napt Manager
6 SpeedTouch™ NAPT Manager 6 SpeedTouch™ NAPT Manager Introduction The SpeedTouch™ Network Address Port Translation (NAPT) Manager is designed to simplify the configuration of the SpeedTouch™ NAPT engine. Rather than defining the required NAPT entries for a certain application and adding them via the SpeedTouch™ web pages, the NAPT Manager offers you a selection of most popular host applications for which the configuration of NAPT entries can be done automatically. - Page 70 6 SpeedTouch™ NAPT Manager The SpeedTouch™ CD Browser menu appears: Click Configuration. The following window appears: Click Configure NAPT Settings. The NAPT Manager window appears: Click Next. E-DOC-CTC-20030814-0001 v1.0...
- Page 71 6 SpeedTouch™ NAPT Manager The Software License Agreement appears: You must accept before continuing. Click Yes to accept. If you accepted this Software License Agreement in a previous session Note of NAPT Manager, this window will not be shown anymore. NAPT Manager will search for the SpeedTouch™...
- Page 72 6 SpeedTouch™ NAPT Manager If the Setup wizard does not find any SpeedTouch™ on the network an Note error window appears. In this case check that: • The SpeedTouch™ is turned on and fully initialized. • Your PC is correctly connected to the SpeedTouch™ or the WLAN client is correctly associated with the SpeedTouch™...
- Page 73 6 SpeedTouch™ NAPT Manager The Add Port Mapping window appears. If you want to: • Enter a port mapping for a specific application: Click the Basic tab. Select an application in the Application list and enter a host IP address. By default, the IP address of the PC from which you are running the NAPT Manager will be taken as host IP address.
- Page 74 6 SpeedTouch™ NAPT Manager The NAPT Manager will update the SpeedTouch™ NAPT configuration. You can follow the progress in following window: As soon as the NAPT Manager completed the update of the SpeedTouch™ NAPT configuration, following window will appear: Click Finish to close the NAPT Manager. The NAPT manager allows you to delete or modify configured NAPT Note mappings via the same procedure.
-
Page 75: Support
7 Support 7 Support In this chapter This chapter contains the following topics: Topic Page Upgrading a SpeedTouch™545 for Wireless Networking Using the Wall Mounting Assembly SpeedTouch™ System Software Upgrade SpeedTouch™ Default Configuration UPnP™ on Windows XP Systems Troubleshooting E-DOC-CTC-20030814-0001 v1.0... -
Page 76: Upgrading A Speedtouch™545 For Wireless Networking
7 Support 7.1 Upgrading a SpeedTouch™545 for Wireless Networking Introduction If you purchased a SpeedTouch™545, you can upgrade your device for providing wire- less networking by installing the SpeedTouch™010 wireless upgrade card. Installing the wireless Proceed as follows: upgrade card Make sure the SpeedTouch™... - Page 77 7 Support Put the cover cap over the back plastic part of the SpeedTouch™010 wireless upgrade card as indicated below: Holding the wireless upgrade card with the label facing up, insert the Speed- Touch™010 wireless upgrade card completely into the slot: The card should slide in easily with little resistance.
-
Page 78: Using The Wall Mounting Assembly
7 Support 7.2 Using the Wall Mounting Assembly Wall mounting Part of the package is a wall mounting assembly which allows you to conveniently mount assembly the SpeedTouch™ on a wall. Before you start, check for the following items: • The wall mounting assembly (with Velcro sticker and counterpart sticker in place) •... -
Page 79: Speedtouch™ System Software Upgrade
7 Support 7.3 SpeedTouch™ System Software Upgrade Introduction This chapter describes how to upgrade the SpeedTouch™ system software. System software For new system software packages, you can: updates (all OSs) • Click the link, available on the SpeedTouch™ CD Browser. “7.3.1 Checking for new System Software via the SpeedTouch™... -
Page 80: Checking For New System Software Via The Speedtouch™ Cd Browser
7 Support 7.3.1 Checking for new System Software via the SpeedTouch™ CD Browser Introduction If your computers runs a Microsoft Windows operating system you can use the Speed- Touch™ CD Browser to check for new system software. Checking for new Proceed as follows: system software Insert the SpeedTouch™... - Page 81 7 Support The following window appears: Click Check for new System Software. Your web browser appears and opens the SpeedTouch™ System Software Upgrade Internet website. Follow the instructions to download the latest system software for your SpeedTouch™. You may require a user name and password, prior to be able to access Note the SpeedTouch™...
-
Page 82: Checking For System Software Via The Speedtouch™ Web Pages (All Oss)
7 Support 7.3.2 Checking for System Software via the SpeedTouch™ Web Pages (all OSs) Checking for new Proceed as follows: System Software Open a web browser and go to the SpeedTouch™ web pages. Open the Upgrade page via Advanced > System: The System Software box shows some information on the currently running sys- tem software;... -
Page 83: Upgrade Via The Speedtouch™ Upgrade Wizard
7 Support 7.3.3 Upgrade via the SpeedTouch™ Upgrade Wizard Introduction The procedure described in this section are valid only in case: • You run an MS Windows Operating System. • Your SpeedTouch™ and computer are connected through a wired network. •... - Page 84 7 Support The following window appears: Click Upgrade My SpeedTouch™. The Welcome to the SpeedTouch™ Upgrade Wizard window appears: Click Next. The SpeedTouch™ Software License Agreement window appears: You must accept before continuing. Click Yes to accept. If you accepted this License Agreement in a previous upgrade, this Note window will not be shown anymore.
- Page 85 7 Support The Setup wizard will continue to search for the SpeedTouch™ on the network. The following window shows the detection progress: The Setup wizard should find your SpeedTouch™ device on the local network. This is indicated by the following window: If more than one device is found, a list of available devices will be provided.
- Page 86 7 Support The following window shows the system software version currently active on the SpeedTouch™ as well as one or more system software versions available on the CD-ROM: Select the appropriate system software version and click Next to continue. If the Service Provider has included a separate disk with dedicated Note upgrade system software, click Have Disk to navigate to the location of the appropriate file.
- Page 87 7 Support After upgrading the SpeedTouch™, a final window appears to announce that the upgrade has been successful Click Finish to close the wizard. E-DOC-CTC-20030814-0001 v1.0...
-
Page 88: Upgrade Via The Speedtouch™ Web
7 Support 7.3.4 Upgrade via the SpeedTouch™ Web Pages Upgrade Procedure Proceed as follows: Open a web browser and go the SpeedTouch™ web pages. If needed, click Save All to save the current configuration. Open the Upgrade page via Advanced > System: On this page you can find the Software Upgrade box: Two fields are shown: •... - Page 89 7 Support Check whether the Passive software version filename field is empty. If not, click Remove passive to remove the dormant system software from the SpeedTouch™ permanent storage. Removing the passive system software may take up to 2 minutes to Note complete.
-
Page 90: Speedtouch™ Default Configuration
7 Support 7.4 SpeedTouch™ Default Configuration Reset to default Proceed as follows: configuration Make sure the SpeedTouch™ is powered on. Use a pencil to press the Default button at the SpeedTouch™ until all the LEDs on the front panel start flashing. Default button Release the button. -
Page 91: Upnp™ On Windows Xp Systems
7 Support 7.5 UPnP™ on Windows XP Systems Adding UPnP™ If you are running Microsoft Windows XP, it is recommended to add the UPnP™ component to your system. Proceed as follows: On the Start menu, click Control Panel. The Control Panel window appears. Click Add or Remove Programs. The Add or Remove Programs window appears. - Page 92 7 Support Adding Internet Your MS Windows XP system is able to discover and control Internet Gateway Devices Gateway Device (IGD), like the SpeedTouch™545 and SpeedTouch™570 on your local network. There- Discovery and Control fore it is recommended to add the IGD Discovery and Control client to your system. Proceed as follows: On the Start menu, click Control Panel.
-
Page 93: Troubleshooting
7 Support 7.6 Troubleshooting Configuration problems In case your SpeedTouch™ is unreachable due to misconfiguration, you might consider a hardware reset to factory defaults as described in “7.4 SpeedTouch™ Default Config- uration” on page However, note that resetting the SpeedTouch™ to its factory settings will revoke all the changes you made to the configuration. - Page 94 7 Support Problem Solution No wireless connectivity. Make sure both wireless client adapter and SpeedTouch™ are allowed to connect through wireless channels as defined for local regulatory domain. Make sure that the WLAN client is config- ured for the correct wireless settings (SSID, WEP).
- Page 95 7 Support Problem Solution No Line synchronization achieved. Check whether the central splitter or dedi- DSL/WAN LED off or flashing. cated filters are installed correctly and that the correct line is patched to your Speed- Touch™ line port. Make sure that ADSL service is enabled on the telephone line the SpeedTouch™...
- Page 96 7 Support E-DOC-CTC-20030814-0001 v1.0...
- Page 98 www.speedtouch.com SERIES Built for excellence...