Table of Contents
Advertisement
Quick Links
Advertisement
Table of Contents
Troubleshooting

Related Manuals for Gateway 9415


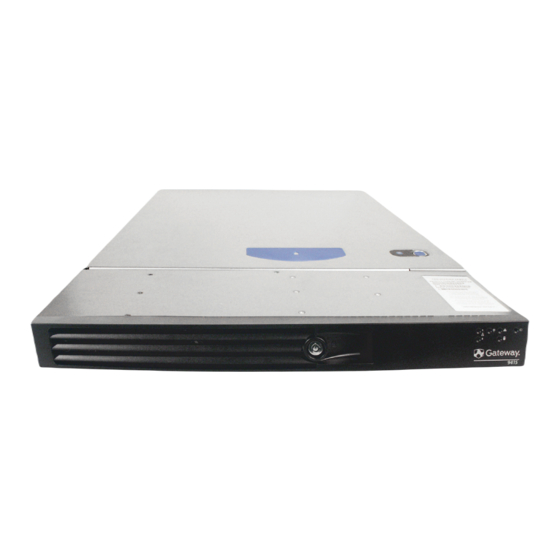
Summary of Contents for Gateway 9415
-
Page 1: User Guide
User Guide Gateway 9415 Server... -
Page 2: Table Of Contents
Removing the server from a cabinet ........ - Page 3 Opening the server case ........
- Page 4 Before calling Gateway Customer Care ........
- Page 5 www.gateway.com...
-
Page 6: Checking Out Your Gateway Server
Chapter 1 Checking Out Your Gateway Locating drives, ports, jacks, and ■ controls Locating system board components ■ Available help resources ■ Server... -
Page 7: Front
Slim-line CD or DVD drive Hard drive bay LAN 2 activity indicator LAN 1 activity indicator Reset button (recessed) www.gateway.com Control panel Hard drive bay Power button Power/ sleep LED System System ID button status System ID LED... - Page 8 USB port Menu scroll up Menu scroll down Menu scroll left Menu scroll right USB port System ID LED Reset button Power/sleep LED Hard drive activity LED LAN 1 activity LED Power button LAN 2 activity LED System status LED www.gateway.com...
-
Page 9: Back
Low-profile PCI expansion bays I/O panel I/O panel PS/2 mouse Keyboard Serial port (RJ-45) Full-height, full-length PCI expansion bays Diagnostic LAN 1 Video and 2 port ports jacks www.gateway.com Power Redundant connectors power supply (optional) External ID LED LEDs SCSI connector... -
Page 10: Interior
Interior DIMM sockets PCI riser Redundant assembly power supply (optional) Processor Processor sockets fan module air duct Power distribution Power supply air duct board (also partially under air duct) www.gateway.com Hot-swap Drive bay backplane area Primary power supply (standard) -
Page 11: System Board
2 socket 1 CPU 2 fan header CPU 1 fan header SATA IPMB SCSI ports channel A header header DIMM sockets www.gateway.com Intel Management Module (IMM) connector ICMB Serial A header SCSI channel B Battery PCI riser slot (full-height) -
Page 12: Hot-Swap Backplanes
Hot-swap backplanes SCSI backplane SCSI connector from system board SCSI drive connector Mounting Power thumbscrew connector Drive LED SCSI drive Drive LED connector www.gateway.com Front control panel connector SCSI drive Drive LED connector... -
Page 13: Getting Help
For instructions, see Using Your System Companion CD. Gateway Web site Gateway provides a variety of information on its Web site to help you use your server. Visit the Gateway Web site at ■... -
Page 14: Setting Up Your Server
Chapter 2 Setting Up Your Server Using your server safely ■ Installing your server into a cabinet ■ Starting and turning off your server ■ Setting up your operating system ■... -
Page 15: Setting Up The Hardware
Setting up the hardware To make sure that your working environment is safe: ■ Use a clean, dry, flat, stable surface for your server. Allow at least 6 inches at the back of the server for cabling and air circulation. ■... -
Page 16: Protecting From Power Source Problems
However, some electrical sources include more line noise than normal. Line noise can also be a problem if your server is located near, or shares a circuit with, a device that causes electromagnetic interference, such as a television or a motor. -
Page 17: Mounting Your Server Into A Cabinet
Mounting your server into a cabinet The cabinet mounting hardware included with your server should be used with standard 4-post cabinets that have front and back vertical posts. If your cabinet is a different type, obtain mounting hardware from the cabinet manufacturer. - Page 18 Remove the two screws from each handle, then set the handles and screws aside. Align the slots in a server rail with the studs on the side of the server, then engage the slots with the studs and slide the rail back until it stops. (Your server may be different than the server shown in the example.)
- Page 19 Place a disk guide over the disk guide screw hole towards the back of the server. Insert a small screw through the disk guide, then tighten the screw. Attach the remaining disk guide on the other side of the server.
- Page 20 (leave them loose enough to allow insertion of the cabinet rail in the next step). Insert the slotted foot at the back of each cabinet rail between the nut bar and the post, then tighten the screws. www.gateway.com...
- Page 21 With the front of the server facing you, lift the server and insert it into the cabinet from the front, then position the disk guides so they fit in the cabinet rails. (Your server may be different than the server shown in the example.) Install a nut bar or mounting nuts on the front cabinet posts.
-
Page 22: Installing The Bezel
To install the bezel: With the server pulled out from the cabinet, align the holes in the handle with the holes in the front side of the server. Attach the handles to the sides of the server with two mounting screws on each side. - Page 23 Use a screw through each handle to secure the server to the cabinet posts. Remove the bezel lock keys from the inside of the bezel, then snap on the bezel with the control panel area at the right. To lock the bezel, insert the key into the lock and rotate it ¼ turn clockwise. To unlock it, rotate the key ¼...
-
Page 24: Removing The Server From A Cabinet
Screws are required to support the front of the server. You must support the server while removing the front screws and while sliding the server off the cabinet rails. If the server is not supported, damage to the server or injury may result. -
Page 25: Starting Your Server
Before you start your server for the first time: ■ Make sure that the server and monitor are plugged into a power outlet or surge protector and that the surge protector (if you are using one) is turned on. ■... -
Page 26: Understanding The Power-On Self-Test
■ outlet or surge protector, and turned on. You may also need to adjust the monitor’s brightness and contrast controls. If you cannot find the cause of the power loss, contact Gateway Customer Care. ■ For more information, see The first time you turn on the server, any pre-installed operating system may begin asking you for configuration settings. -
Page 27: Turning Off Your Server
Turning off your server Every time you turn off your server, first shut down the operating system. You may lose data if you do not follow the correct procedure. To turn off the server: See the operating system’s documentation or online help for instructions on shutting down the operating system. -
Page 28: Configuring The Rj-45 Serial Port
The RJ-45 serial port connector can be configured to support either a Data Set Ready (DSR), or a Data Carrier Detect (DCD) signal. The default configuration for your server supports DSR signals. To change the configuration from DSR to DCD signal support, a jumper (J7A1) must be changed on the system board. -
Page 29: Setting Up The Operating System
Setting up the operating system If you ordered your server with the operating system already installed by Gateway, in most cases it is completely installed and the basic settings are already configured. The Windows Small Business Server operating system may require additional installation, depending on the version you ordered. -
Page 30: Maintaining Your Server
Chapter 3 Maintaining Your Server Caring for your server ■ Recording the BIOS configuration ■ Managing your server and network ■... -
Page 31: Caring For Your Server
Avoid subjecting your server to extreme temperatures. Do not expose your server to heating ducts or other heat-generating objects. Damage caused by extreme temperatures is not covered by your warranty. As a general rule, your server is safest at temperatures that are comfortable for you. - Page 32 If you spill liquid on the keyboard, turn off your server and turn the keyboard upside down to let the liquid drain. Let the keyboard dry completely before trying to use it again. If the keyboard does not work after it dries, you may need to replace it.
-
Page 33: Preparing For System Recovery
Preparing for system recovery If your system files are corrupted, you may not be able to start the server from the hard drive. Startup diskettes are diskettes that let you start the server and attempt to fix the problem. See your operating system’s documentation or online help for instructions on creating startup diskettes. -
Page 34: System Administration
System administration Gateway Server Manager Gateway Server Manager lets you manage multiple computers on a Windows network from a single window, then implement commands and policies across the network with a single action. With Gateway Server Manager, you can run system management tasks which are triggered by certain events or conditions. -
Page 35: Local Control Panel
To remove a BIOS security password: Restart your server, then press F2 when the Gateway logo screen appears during startup. The BIOS Setup utility opens. Select the Security Enter the current password, then press E For the new password, leave the password field blank, then press E is removed. - Page 36 Navigation The following table shows the LCP menu options: Menu Options Configure the Network (LAN channel 1 to 3) server IP address (BMC) ■ Netmask ■ Gateway address ■ Enable LAN channel ■ Inventory CPUs ■ DIMMs ■ Drives ■...
- Page 37 BMC firmware revision Local Control Panel firmware revision HSC firmware revision HSC2 firmware revision Monitor the POST progress codes server Server health (drill down to subsystem(s) at fault) System event log CPU sensors (CPU 1 to n) Presence ■ Over temperature ■...
- Page 38 Power control IPMI control Send the chipset a power control command. The same functionality as if done over LAN or by GSM. Issue an IPMI command Select the LCP display language Set sensor refresh interval Password setup Remote access control www.gateway.com...
-
Page 39: Identifying Your Server
The System ID indicator is a blue LED that you can turn on to help you locate the correct server. For the System ID indicator to turn on, the server does not need to be turned on, but it does need to be plugged in. -
Page 40: Updating The Baseboard Management Controller Firmware
■ Fault resilient booting (the extent depends on the option selected) You should update the BMC firmware when Gateway Customer Care has instructed you to update it. The initial firmware update after installing the IMM Module also requires a boot block update, but subsequent firmware updates do not. - Page 41 Create a DOS-bootable USB Disk-on-key device or DOS-bootable CD. Download the BMC update file from support.gateway.com. Follow the instructions included with the update file. Turn off the server, then disconnect the power cord(s) and wait for the Standby power LED to turn off. Follow the instructions in “Closing the server case”...
-
Page 42: Updating The Fru/Sdr
SCCD in the following procedure. To update the FRU/SDR: Boot your server to DOS (using a DOS-bootable diskette, CD, or USB disk on key). Put the System Companion CD in the CD drive and change directories (to the CD drive) to access it. -
Page 43: Using Your System Companion Cd
Using your System Companion CD You can use your System Companion CD to: ■ Install hardware drivers ■ Install programs ■ View server documentation Instructions for using the CD are provided in Using Your System Companion CD. www.gateway.com... -
Page 44: Installing Components
Opening and closing the server case ■ Installing and replacing major ■ components You must open your server case to install components. If you are not comfortable with these procedures, get help from a computer service technician or contact Gateway Customer Care. -
Page 45: Preparing To Install Components
Is near a grounded outlet so you can test your server after installation. ■ Is near a telephone (in case you need help from Gateway Customer Care). The telephone must be directly connected to a telephone jack and cannot be connected to your server. -
Page 46: Preventing Static Electricity Discharge
■ Wear a grounding wrist strap (available at most electronics stores) and attach it to a bare metal part of the server. You can also touch a bare metal surface on the back of the server with your finger. Warning To prevent risk of electric shock, do not insert any object into the vent holes of the power supply. -
Page 47: Opening The Server Case
To open the server: Follow the instructions in sure that you turn off the server, then unplug the power cord(s) and all other cables connected to the server. Warning This server has two power cords. To disconnect internal AC power, you must unplug both power cords. - Page 48 Press and hold the panel release button, then slide the top panel toward the back of the server about ½ inch. Lift the top panel away from the server. Panel release button www.gateway.com...
-
Page 49: Closing The Server Case
Slide the top panel onto the server. Slide the top panel toward the front of the server until it clicks into place. Replace the shipping screw (if necessary). Reconnect the power cords and all other cables. -
Page 50: Removing And Installing Air Ducts And Air Dams
To remove the processor air duct: Follow the instructions in sure that you turn off the server, then unplug the power cord(s) and all other cables connected to the server. Follow the instructions in “Preventing static electricity discharge”... -
Page 51: Removing The Processor Air Dam
To remove the processor air dam: Follow the instructions in sure that you turn off the server, then unplug the power cord(s) and all other cables connected to the server. Follow the instructions in Follow the instructions in “Preventing static electricity discharge”... - Page 52 After this is done, the air duct is no longer suitable for use with only a single processor installed. Follow the instructions in Follow the instructions in “Installing the processor air duct” on page “Closing the server case” on page www.gateway.com...
-
Page 53: Installing The Processor Air Duct
Place the processor air duct over the processor sockets. The front edge of the air duct should contact the fan module, and the top of the installed air duct should be flush with the top of the fan module. Follow the instructions in “Closing the server case” on page www.gateway.com... -
Page 54: Removing The Power Supply Air Duct
Removing the power supply air duct Your server is equipped with a power supply fan module and a power supply air duct to direct the airflow and ensure proper cooling. Caution To ensure continued, reliable operation, always operate your server with the appropriate air ducts and air dams in place. -
Page 55: Installing The Power Supply Air Duct
Installing the power supply air duct Caution To ensure continued, reliable operation, always operate your server with the appropriate air ducts and air dams in place. Failure to do this could result in equipment damage. To install the power supply air duct:... -
Page 56: Installing And Removing Drives
Installing and removing drives Your server’s basic configuration includes one CD or DVD drive and as many as three SCSI hot-swap hard drives. An optional diskette drive can also be added in place of the center hard drive. As you prepare to install drives, remember: ■... -
Page 57: Installing A Diskette In A Converted Hard Drive Bay
Installing a diskette in a converted hard drive bay If you need to install a slim-line diskette drive into your server, you must install the diskette drive in the center hard drive bay. To install a diskette drive in a converted hard drive bay:... - Page 58 Align the holes in the sides of the diskette drive with the holes in the carrier and attach the drive to the carrier with the two screws that came with the diskette drive conversion kit. Reattach the rails to the sides of the carrier with the four screws you previously removed. www.gateway.com...
- Page 59 Install the interposer board on the diskette drive carrier with one screw on the right side. Connect the data and power cables to the interposer board. While guiding the cables, insert the new drive assembly into the center hard drive bay until it clicks into place. www.gateway.com...
-
Page 60: Removing A Diskette Drive From The Converted Hard Drive Bay
To remove a diskette drive from the converted drive bay: Follow the instructions in sure that you turn off the server, then unplug the power cord(s) and all other cables connected to the server. Caution The diskette drive is not hot-swappable. Before installing or removing the drive, make sure that power is turned off and the power cord is unplugged. -
Page 61: Removing A Cd Or Dvd Drive
Removing a CD or DVD drive To remove a CD or DVD drive: Follow the instructions in sure that you turn off the server, then unplug the power cord(s) and all other cables connected to the server. Caution The CD or DVD drive is not hot-swappable. Before installing or removing the drive, make sure that power is turned off and the power cord is unplugged. - Page 62 Push in on the blue lever at the back of the drive carrier to release the drive carrier from the drive bay, then slide the drive carrier out through the front of the server. Press down on the side of the drive carrier to release the drive from the carrier.
-
Page 63: Installing A Cd Or Dvd Drive
Installing a CD or DVD drive To install a CD or DVD drive: Follow the instructions in sure that you turn off the server, then unplug the power cord(s) and all other cables connected to the server. Caution The CD or DVD drive is not hot-swappable. Before installing or removing the drive, make sure that power is turned off and the power cord is unplugged. - Page 64 Place the CD or DVD drive in the drive carrier (included with your server) by aligning the two holes in the left side of the drive with the two alignment pins in the carrier, then lowering the right side of the drive into the carrier until it clicks into place.
-
Page 65: Installing A Hard Drive
Reconnect all power cords and peripheral device cables, then turn on the server. Installing a hard drive Use this procedure to add or replace a hard drive in a hot-swap bay. Your server supports as many as three 1-inch high, 3.5-inch hot-swap SCSI hard drives. You can purchase additional drives through your Gateway Sales or Customer Care representative. - Page 66 When the drive carrier lever begins to close by itself, push on the lever to lock the drive assembly into the drive bay. Reinstall the bezel, if required, by snapping it into place on the front of the chassis. www.gateway.com Step...
-
Page 67: Filling Empty Drive Bays
Configuring the onboard SCSI RAID solution To launch the SCSI RAID BIOS console: Restart your server. Press F2 when the Gateway logo screen appears during startup. The BIOS Setup utility opens. From the BIOS menu, select the Main... - Page 68 C key. The RAID BIOS console will open. , then press E RAID Properties column for this disk, then use the Array Disk as the value. Array Disk column. Array Disk www.gateway.com NTER . The RAID Properties NTER column changes to Primary...
- Page 69 Use the arrow keys to select screen opens. column. Hot Spare (If you do not want to create the IM volume, select , then press E RAID Properties www.gateway.com to confirm erasing Delete Step and select Save changes, Discard changes, NTER .
- Page 70 (If you do not want to create the volume, select then exit this menu.) The IS volume exists as soon as you save the changes. The RAID Properties screen now displays the IS volume properties and status. www.gateway.com and select Save changes Discard changes...
-
Page 71: Installing Memory
Installing memory Your server supports from 256 MB to 16 GB of total memory. Supported DIMM sizes include 256 MB, 512 MB, 1 GB, 2 GB, and 4 GB. Caution Modules must be installed in banks in identical pairs. Use only DDR2-400 compliant, 240-pin, SDRAM registered ECC, DIMM memory modules. -
Page 72: Memory Online Sparing
Double row Memory online sparing The chipset on the system board in your Gateway server supports memory online sparing, which can provide a way to prevent data loss in case of DIMM failure. Memory online sparing is configured in the BIOS. - Page 73 To install or replace memory: Follow the instructions in sure that you turn off the server, then unplug the power cord(s) and all other cables connected to the server. Follow the instructions in Pull the plastic tabs away from the sides of the memory module slot. If you are replacing a memory module, lift the old module out of the slot.
-
Page 74: Installing And Removing Pci Expansion Cards
Removing and installing the PCI riser assembly To remove and reinstall the PCI riser assembly: Follow the instructions in sure that you turn off the server, then unplug the power cord(s) and all other cables connected to the server. Follow the instructions in If you are replacing a card, disconnect any cables that are attached to the old card. - Page 75 Touching the contacts can cause electrostatic damage to the card. - OR - If you are installing or replacing the PCI riser connector, follow the instructions in “Removing and installing a PCI riser connector” on page www.gateway.com “Removing and installing...
-
Page 76: Removing And Installing A Pci Riser Connector
Position the PCI riser assembly over the PCI sockets on the server board, lining up the four hooks at the back of the riser assembly with the four slots in the back of the chassis. Press the PCI riser assembly into the PCI sockets. - Page 77 To remove and install a PCI riser connector: Follow the instructions in sure that you turn off the server, then unplug the power cord(s) and all other cables connected to the server. Follow the instructions in Remove the PCI riser assembly from the server by following the instructions in “Removing and installing the PCI riser assembly”...
-
Page 78: Removing And Installing A Pci Expansion Card
Removing and installing a PCI expansion card To remove and install a PCI expansion card: Follow the instructions in sure that you turn off the server, then unplug the power cord(s) and all other cables connected to the server. Follow the instructions in Disconnect any cables that are attached to the card you are removing. - Page 79 Remove the PCI riser assembly from the server by following the instructions in “Removing and installing the PCI riser assembly” on page Open the PCI retention clip on the PCI riser card assembly. Remove the PCI expansion card and place it in a static-free bag for storage. You can...
- Page 80 Install the PCI riser assembly by following the instructions in installing the PCI riser assembly” on page Follow the instructions in See the card’s documentation for software installation procedures. PCI card retention clip “Closing the server case” on page www.gateway.com “Removing and...
-
Page 81: Replacing Fans And Fan Modules
Individual system fan module fan numbers are indicated on the top of the processor air duct. The first number in the pair is for the fan closest to the front of the server. Processor fan... - Page 82 To replace a fan in the fan module: Follow the instructions in sure that you turn off the server, then unplug the power cord(s) and all other cables connected to the server. Follow the instructions in Follow the instructions in Trace the cable from the failed fan to the connector on the fan distribution board, then disconnect the cable.
- Page 83 To replace the system (PCI) fan: Follow the instructions in sure that you turn off the server, then unplug the power cord(s) and all other cables connected to the server. Follow the instructions in Disconnect the fan cable from the connector on the power distribution board.
- Page 84 Caution System fans are not hot-swappable. Before removing or replacing a fan, you must first turn off the server and all peripheral devices attached to the server, and remove the AC power cord(s) from the power supply or wall outlet.
-
Page 85: Power Supply Fans
Power supply fans are not monitored by the mini-BMC, therefore no SEL or GSM events will be reported with the mini-BMC configuration. When a predicted or current fan failure is reported, the server must be opened to determine which fan is having problems. LEDs on the power distribution board will indicate which fan requires attention. - Page 86 Connect the fan cable to the connector on the power distribution board. Follow the instructions in Follow the instructions in “Removing the power supply air duct” on page “Installing the power supply air duct” on page “Closing the server case” on page www.gateway.com 50..
-
Page 87: Installing A Processor
Install the most current BIOS version. For instructions, see page 109. Follow the instructions in sure that you turn off the server, then unplug the power cord(s) and all other cables connected to the server. Follow the instructions in Follow the instructions in ®... - Page 88 If removing the heat sink also pulls the processor out of the processor socket, the processor could be damaged. Rotate the processor release lever a full 135° to release the processor, then lift the processor out of the socket. www.gateway.com...
- Page 89 If you are installing a second processor in your server, follow the instructions in “Removing the processor air dam” on page 46 the processor air duct. Caution If you add a second processor to your server, you must remove the processor air dam or the processor may overheat, causing possible data loss and damage to the processor.
- Page 90 Do not fully tighten one screw before tightening another. Gradually and equally tighten each captive screw until each is firmly tightened. Do not over-tighten the screws. Follow the instructions in Follow the instructions in “Installing the processor air duct” on page “Closing the server case” on page www.gateway.com...
-
Page 91: Installing An Intel Management Module (Imm)
(LCP). To install an Intel Management Module (IMM): If Gateway Server Manager (GSM) software is installed in your server, uninstall it prior to installing the IMM module. Follow the instructions in sure that you turn off the server, then unplug the power cord(s) and all other cables connected to the server. - Page 92 Following the installation of a new IMM module, reinstall the GSM software (supplied on a CD with your server) and update the FRU/SDR (see page 37). When you subsequently reboot your server, the GSM software will take over management of the server. IMM connector “Closing the server case”...
-
Page 93: Replacing A Power Supply Module
If one of the two power supplies fails, the other power supply supports the server while you replace the failed power supply. You do not need to turn off the server or disconnect peripheral devices to replace a failed redundant power supply. - Page 94 Pull the power supply module straight out of the server with the handle. Insert the new power supply module into the server, with the green locking lever to the left, until it locks into place, then fold the handle flat.
-
Page 95: Replacing The Power Distribution Board
Replacing the power distribution board To replace the power distribution board: Follow the instructions in sure that you turn off the server, then unplug the power cord(s) and all other cables connected to the server. Follow the instructions in Follow the instructions in Remove the power supply modules by following the instructions in power supply module”... - Page 96 Reconnect the power cables to the power distribution board and the hot-swap backplane. Reconnect the drive cables and drive power cables to the hot-swap backplane. Reinstall the power supply modules by following the instructions in power supply module” on page “System board” on page 6 www.gateway.com for the location “Replacing a...
- Page 97 Reinstall the power supply air duct by following the instructions in power supply air duct” on page Follow the instructions in “Closing the server case” on page www.gateway.com “Installing the...
-
Page 98: Replacing The Hot-Swap Backplane
To replace the hot-swap backplane: Follow the instructions in sure that you turn off the server, then unplug the power cord(s) and all other cables connected to the server. Unlock the bezel (if necessary) and remove it by pulling it straight off the front of the server. - Page 99 Tighten the blue captive thumbscrew in the center of the backplane. Reconnect all cables to the backplane. Follow the instructions in Reinstall the hot-swap drives back into the server. Make sure that you install the drives into the same bays you removed them from in a hard drive” on page Replace the bezel by snapping it into place on the front of the server.
-
Page 100: Replacing The Cmos Battery
Replacing the CMOS battery If the server clock does not keep time or the settings in the BIOS Setup utility are not saved when you turn off the server, replace the CMOS battery with an equivalent battery. Warning Danger of explosion if battery is incorrectly replaced. Replace only with the same or equivalent type recommended by the manufacturer. - Page 101 PCI riser assembly” on page Follow the instructions in Turn on your server, then press F2 when the Gateway logo screen appears during startup. The BIOS Setup utility opens. Restore any BIOS settings that you wrote down in Save all your settings and close the BIOS Setup utility.
-
Page 102: Replacing The Control Panel Module
To remove the control panel module: Follow the instructions in sure that you turn off the server, then unplug the power cord(s) and all other cables connected to the server. Follow the instructions in Unlock the bezel (if necessary) and remove it by pulling it straight out from the front of the chassis. - Page 103 Press the blue latch at the back of the control panel module, then slide the module out of the chassis enough to reach the USB cable. Blue latch Blue latch Standard control panel module Optional LCP control panel module www.gateway.com...
- Page 104 Connect the front panel cable to the new control panel module. Guide the front panel cable into the control panel opening in the chassis, then slide the new control panel module into the chassis far enough to let you connect the USB cable. Optional LCP control panel module www.gateway.com...
-
Page 105: Reconfiguring The Lcp Control Panel Module Tray
Connect the front panel cable to the hot-swap backplane. Replace the bezel by snapping it into place on the front of the server. Important If you are replacing the standard control panel module with the... - Page 106 Use a flat-blade screwdriver to lift the metal retention tabs. Failure to do so could result in injury to fingers or fingernails. Align the new sub-bezel with the LCP control panel, then press it until it clicks into place. Metal retention tabs www.gateway.com...
-
Page 107: Replacing The System Board
Replacing the system board To replace the system board: Follow the instructions in sure that you turn off the server, then unplug the power cord(s) and all other cables connected to the server. Follow the instructions in Remove the processor air duct by following the instructions in processor air duct”... - Page 108 Remove the 7 screws that secure the system board to the server. Screw Screw Screw Screw Screw Screw Screw www.gateway.com...
- Page 109 Slide the system board toward the front of the server. If the board is difficult to move, push on the back I/O port panel for added leverage. Lift the board away from the case. www.gateway.com...
- Page 110 Reinstall the PCI riser assembly by following the instructions in installing the PCI riser assembly” on page Follow the instructions in Turn on your server, then press F2 when the Gateway logo screen appears during startup. The BIOS Setup utility opens. “Installing memory” on page “Installing a processor”...
- Page 111 Check BIOS settings to make sure that they detect the server’s new hardware, then save your changes (if any) and close the BIOS Setup utility. If your server does not start after installing the new system board, contact Gateway Customer Care. For more information, see “Getting Help”...
-
Page 112: Using The Bios Setup Utility
Chapter 5 Using the BIOS Setup Utility Opening the BIOS Setup utility ■ Updating the BIOS ■ Resetting the BIOS settings to their ■ factory defaults Resetting the BIOS passwords ■... -
Page 113: Opening The Bios Setup Utility
To open the BIOS Setup utility: Restart your server, then press F2 when the Gateway logo screen appears during startup. The BIOS Setup utility opens. When you select menu items, the Item Specific Help box on the right side of the screen displays specific information about the selection. -
Page 114: Updating The Bios
Updating the BIOS If you need a new version of the BIOS, you can download the BIOS update from Gateway, then install the new version from a diskette. To update the BIOS: Print the appendix for Restart your server, then press F2 when the Gateway logo screen appears during startup. -
Page 115: Recovering The Bios
2-3. Follow the instructions in Reconnect the power cords and turn on the server. The BIOS is forced to boot from the secondary partition. After you repair the primary BIOS partition, return the server to the default condition. - Page 116 To recover the old BIOS: Turn on or restart the server. Press and hold C To manually recover the BIOS: Turn off the server, then disconnect the power cords and all other cables connected to the server. Follow the instructions in Caution Moving the jumper while the power is on can damage your server.
- Page 117 Follow the instructions in Place the jumper back onto pins B1-B2. Follow the instructions in Plug in the AC power cords and turn on the server, then verify that the recovery was successful. “Opening the server case” on page “Closing the server case” on page...
-
Page 118: Resetting The Bios
To reset the BIOS using the power and reset buttons: Print the appendix for Restart your server, then press F2 when the Gateway logo screen appears during startup. The BIOS Setup utility opens. Record any custom BIOS settings on your printout. -
Page 119: Resetting Bios Passwords
Remove the jumper across pins C1-C2, then place the jumper across pins C2-C3. Follow the instructions in Reconnect the power cords and turn on the server. The BIOS password(s) is cleared. Turn off the server, then disconnect the power cords and all other cables connected to the server. - Page 120 To clear the BIOS password(s): Turn off the server, then disconnect the power cords and all other cables connected to the server. Follow the instructions in Caution Moving the jumper while the power is on can damage your server. Always turn off the server and unplug the power cords and all other cables before changing the jumper.
- Page 121 www.gateway.com...
-
Page 122: Troubleshooting
Chapter 6 Troubleshooting Getting telephone support and training ■ Interpreting error messages and codes ■ Troubleshooting ■ If the suggestions in this chapter do not correct the problem, see “Telephone support” on page 118 for more information about how to get help. -
Page 123: Telephone Support
■ Make sure that your server is nearby at the time of your call. The technician may have you follow appropriate troubleshooting steps. ■... -
Page 124: Telephone Support
Telephone support Gateway offers a wide range of customer service, technical support, and information services. Telephone numbers You can access the following services through your telephone to get answers to your questions: Resource Service description Gateway’s Get tutorial assistance for software issues. -
Page 125: Safety Guidelines
Safety guidelines While troubleshooting your server, follow these safety guidelines: ■ Never remove the top panel while your server is turned on and while the modem cable and the power cords are connected. ■ Do not attempt to open the monitor. To do so is extremely dangerous. Even if the power is disconnected, energy stored in the monitor components can be dangerous. -
Page 126: Error Messages
Hard disk controller failure - press F1 to try reboot ■ The drive controller may be defective. Press F1 to try to restart the server. For more information about running diagnostics on your hard drive, see your operating system’s documentation. - Page 127 System Event Log Full ■ Clear the event log. To clear or view the event log, restart your server, then open the BIOS Setup utility by pressing and holding F2 while your server restarts. Select the menu, then select the Server “Resetting BIOS passwords”...
-
Page 128: Troubleshooting
First steps Try these steps first before going to the following sections: ■ Make sure that the power cords are connected to your server and an AC outlet and that the AC outlet is supplying power. ■ If you use a surge protector or a UPS, make sure that it is turned on and is rated to handle the power required by your server. -
Page 129: Battery Replacement
If you have problems after installing a new CMOS battery, try each of the following items, closing the case and restarting the server after each try: ■ Restart your server, then open the BIOS Setup utility by pressing and holding F2 while your server restarts. Correct any discrepancies. ■... - Page 130 If the video adapter is integrated into the system board, the board may be faulty. Try using an add-in card. Same as for 4 beeps. Same as for 4 beeps. Same as for 4 beeps. www.gateway.com...
-
Page 131: Additional Beep Codes Provided By Optional Intel Management Modules
1-5-2-4 1-5-4-2 1-5-4-3 1-5-4-4 LED information The system board in this server includes LEDs that can assist you in troubleshooting your system. See the following table for a description of these LEDs and the information they provide: LED Name Function... -
Page 132: Diagnostic Leds
The BIOS sends a 1-byte hex code to port 80 prior to each POST task. These codes are displayed on four tri-colored LEDs, located on the system board and available at the back of the server chassis. They can provide troubleshooting information in the event of a system hang during POST. -
Page 133: Post Code Checkpoints
Set up boot strap processor for POST. Enumerate and set up application processors. Re-enable cache for boot strap processor. Early CPU Init Exit. Initialize the 8042 compatible keyboard controller. Detect the presence of PS/2 mouse. Detect the presence of keyboard in KBC port. www.gateway.com... - Page 134 CPU, and so on) successfully installed in the system and update the BDA, EBDA, and so on. Programming the memory hole or any kind of implementation that needs an adjustment in system RAM size, if needed. www.gateway.com for more information. See “DIM code for more information.
- Page 135 CPUs before boot, including the programming of the MTRRs. Prepare CPU for operating system boot, including final MTRR values. Wait for user input at config display, if needed. Uninstall POST INT1Ch vector and INT09h vector. De-initializes the ADM module. www.gateway.com IRQ Routing Table. Prepares the...
-
Page 136: Bootblock Initialization Code Checkpoints
Re-enable CACHE. Verify that flat mode is enabled. Test base 512 KB memory. Adjust policies and cache first 8 MB. Set stack. Bootblock code is copied from ROM to lower system memory and control is given to it. BIOS now executes out of RAM. www.gateway.com... - Page 137 L1 cache is enabled. Set up floppy controller and data. Attempt to read from floppy. Enable ATAPI hardware. Attempt to read from ARMD and ATAPI CDROM. Disable ATAPI hardware. Jump back to checkpoint E9. www.gateway.com “POST code checkpoints” on...
- Page 138 The recovery file size does not equal the found flash part size. Erase the flash part. Program the flash part. The flash has been updated successfully. Make flash write-disabled. Disable ATAPI hardware. Restore CPUID value back into register. Give control to F000 ROM at F000:FFF0h. www.gateway.com...
- Page 139 PCI devices. Description First ASL checkpoint. Indicates that the system is running in ACPI mode. System is running in APIC mode. Entering sleep state S1, S2, S3, S4, or S5. Waking from sleep state S1, S2, S3, S4, or S5. www.gateway.com...
-
Page 140: Bios
Make sure that the drive is configured correctly by following the instructions in the drive’s documentation. ■ Turn off your server, then remove the drive and push it in again to make sure the drive is seated correctly. For instructions, see page Your CD drive tray does not open ■... -
Page 141: Hard Drive
The hard drive cannot be accessed, or you receive a “General failure reading drive C” error message ■ If a diskette is in the diskette drive, eject it and restart your server by pressing the reset button. ■ Restart your server by pressing the reset button. -
Page 142: Internet
Liquid has been spilled into the keyboard ■ If you spilled liquid in the keyboard, turn off your server and unplug the keyboard. Clean the keyboard and turn it upside down to drain it. Let the keyboard dry before using it again. If the keyboard does not work after it dries, you may need to replace it. -
Page 143: Power
You press the power button, but the server does not turn on ■ If the power button LED is green, the server is turned on, but you may not be seeing an image on the monitor. For monitor troubleshooting, see ■... -
Page 144: Processor
Set the Retest Processor option in the BIOS Setup utility to ■ If you have upgraded your server from one processor to two, you may need to reconfigure your operating system so it recognizes the additional processor. For instructions, see your operating system’s documentation. - Page 145 www.gateway.com...
-
Page 146: A Server Specifications
Appendix A Server Specifications The following specifications are for the standard configuration. Your server may contain optional equipment. All specifications are subject to change. -
Page 147: System Specifications
Case size 27.48 × 16.93 × 1.70 inches (69.8 × 43.0 × 4.33 cm) (without handles) Weight Varies by configuration. A fully loaded server weighs about 35 lbs. (15.9 kg) Fans Four dual-rotor, 40 × 40 × 56 mm, multi-speed processor fans ■... -
Page 148: System Board Specifications
Dual onboard 10/100/1000 network interface ■ IEEE 850.3u auto-negotiation support ■ Full duplex support ■ SCSI LSI 53C1030 controller ■ Dual-channel Ultra320 SCSI channels with integrated RAID 0/1 ■ support Accessible at back panel ■ ACPI ACPI compliance Supports: ■ ■ ■ ■ www.gateway.com... -
Page 149: Environmental Specifications
Environmental specifications The following specifications identify maximum environmental conditions. At no time should the server run under conditions which violate these specifications. Variable Temperature Humidity Acoustic noise Shock Vibration Electrostatic discharge (ESD) System cooling requirement in BTU/Hr Requirements Nonoperating: -40° to 158°F (-40° to 70°C) Operating: 50°... -
Page 150: Electronic Specifications
PCI memory space Description Timer/counter, HPET #0 in legacy replacement Mode. In APIC mode, cascade from 8259 controller 1 Keyboard controller Slave controller INTR output. In APIC mode Timer/counter, HPET #0 Serial port A Serial port B Parallel port (not implemented) www.gateway.com... -
Page 151: Pci Interrupt Routing
USB 2.0 controller 2 Option for SCI, TCO, HPET #0,1,2 Option for SCI, TCO, HPET #0,1,2 Option for SCI, TCO, HPET #0,1,2 USB 2.0 EHCI controller 1, Option for SCI, TCO, HPET #0,1,2 SIO3 Interrupt B Interrupt C www.gateway.com Interrupt D... - Page 152 Interrupt A Legacy IDE ICH5R_IRQ15 Intel 82546GB 1 P64A_IRQ6 Intel 82546GB 2 P64A_IRQ7 SCSI Controller 1 P64B_IRQ2 SCSI Controller 2 P64B_IRQ1 FH Riser P64A_IRQ5 LP Riser P64B_IRQ4 Interrupt B Interrupt C P64A_IRQ4 P64A_IRQ2 P64B_IRQ3 P64B_IRQ2 www.gateway.com Interrupt D P64A_IRQ1 P64B_IRQ1...
-
Page 153: Additional Specifications
For more information about your server, such as memory size, hard drive size, and processor type, visit Gateway’s eSupport page at support.gateway.com. The eSupport page also has links to additional Gateway documentation and detailed specifications for your own server. www.gateway.com... -
Page 154: B Bios Settings
Appendix B BIOS Settings If you ever need to restore your BIOS settings, such as after a system board change, a record of the settings will make the process much easier. You can print this appendix, then record your custom BIOS settings on the printout. Only settings which can be changed are listed. - Page 155 To view all BIOS settings: Restart your server Press F2 when the Gateway logo screen appears during startup. The BIOS Setup utility opens. Select menus and submenus to display setting information. Caution Setting the wrong values in the Advanced Menu may cause the server to malfunction.
- Page 156 Max CPUID Value Limit Hyper-Threading Technology Intel Speed Step™ Tech Onboard P-ATA Channels Onboard S-ATA Channels Configure S-ATA as RAID S-ATA Ports Definition Mixed P-ATA/S-ATA Primary IDE Master Primary IDE Slave www.gateway.com Value Enabled Disabled Enabled Disabled Enabled Disabled Auto Disabled Disabled...
- Page 157 Secondary IDE Slave Third IDE Master Fourth IDE Master Hard Disk Write Protect IDE Detect Time Out (Sec) ATA(PI) 80-Pin Cable Detection Floppy A Onboard Floppy Controller www.gateway.com Value N/A (auto-detected) Selects IDE Device Configuration sub-menu. N/A (auto-detected) Selects IDE Device Configuration sub-menu.
- Page 158 USB Devices Enabled (List of USB devices detected by BIOS) USB Function Legacy USB Support Port 60/64 Emulation USB 2.0 Controller USB 2.0 Controller Mode USB Mass Storage Device Configuration Onboard Video www.gateway.com Value Disabled 3F8/IRQ4 2F8/IRQ3 3E8/IRQ4 2E8/IRQ3 Disabled 3F8/IRQ4 2F8/IRQ3 3E8/IRQ4...
- Page 159 Slot 3 Option ROM (Only visible when supported by riser) Slot 4 Option ROM (Only visible when supported by riser) Slot 5 Option ROM (Only visible when supported by riser) www.gateway.com Value Enabled Disabled Disabled Enabled Disabled Enabled Disabled Enabled...
- Page 160 (Only visible when supported by riser) DIMM 1A (Information) DIMM 1B (Information) DIMM 2A (Information) DIMM 2B (Information) DIMM 3A (Information) DIMM 3B (Information) Extended Memory Test Memory Retest www.gateway.com Value Disabled Enabled Installed Not Installed Disabled Spare Installed Not Installed...
- Page 161 Sparing reserves memory to replace failures. Quick Boot Quiet Boot Bootup Num-Lock PS/2 Mouse Support POST Error Pause Hit <F2> Message Display Scan User Flash Area 1st Boot Device www.gateway.com Value Enabled Disabled Sparing Disabled Disabled Enabled Disabled Enabled Disabled...
- Page 162 Boot Device 1st Drive nth Drive 1st Drive nth Drive 1st Drive nth Drive Administrator Password is (Installed/Not installed) www.gateway.com Value Varies (Specifies boot sequence from the available devices. A device enclosed in parenthesis has been disabled.) Varies (Specifies...
- Page 163 Password On Boot Secure Mode Timer Secure Mode Hot Key (Ctrl-Alt-) Secure Mode Boot Diskette Write Protect Video Blanking Power Switch Inhibit NMI Control www.gateway.com Value No Access View Only Limited Full Access Disabled Enabled Disabled Enabled 1 minute...
- Page 164 Chassis Part Number Chassis Serial Number BIOS Version BMC Device ID BMC Firmware Revision BMC Device Revision PIA Revision SDR Revision HSC FW Revision (HSBP) BIOS Redirection Port www.gateway.com Value Varies Varies Varies Varies Varies Varies Varies Varies BIOS ID string...
- Page 165 ACPI Redirection Port Serial Port Connector Clear All Event Logs BIOS Event Logging Critical Event Logging ECC Event Logging PCI Error Logging FSB Error Logging Hublink Error Logging www.gateway.com Value 9600 19.2K 38.4K 57.6K 115.2K No Flow Control CTS/RTS XON/XOFF...
- Page 166 Assert NMI or SERR Assert NMI or PERR Resume on AC Power Loss FRB-2 Policy Late POST Timeout Hard Disk OS Boot Timeout PXE OS Boot Timeout OS Watchdog Timer Policy www.gateway.com Value Disabled Enabled Disabled Enabled Stays Off Power On...
- Page 167 Save Changes and Exit Discard Changes and Exit key) Discard Changes ( Load Setup Defaults ( Load Custom Defaults Save Custom Defaults Onboard SCSI. Setting First ATA Channel Second ATA Channel www.gateway.com Value Enabled Disabled Value P-ATA M-S S-ATA M-S S-ATA M-S None...
- Page 168 Block Mode PIO Mode Async DMA Ultra DMA S.M.A.R.T. Type LBA/Large Mode Block (Multi-Sector Transfer) Mode PIO Mode www.gateway.com Value Device information Device vendor Device size Device LBA mode Device block mode Device PIO mode Device Async DMA mode Device Ultra DMA mode Device S.M.A.R.T.
- Page 169 USB Mass Storage Device Configuration Setting DMA Mode S.M.A.R.T. 32Bit Data Transfer Setting USB Mass Storage Reset Delay Device #1 Emulation Type Device #n www.gateway.com Value Auto SWDMA 0-2 MWDMA 0-2 UWDMA 0-5 Auto Disabled Enabled Disabled Enabled Value 10 Sec...
- Page 170 BIOS submenu BIOS 2nd level submenu Configuration (cont’d) Setting Emulation Type www.gateway.com Value Auto Floppy Forced FDD Hard Disk CDROM...
- Page 171 www.gateway.com...
-
Page 172: C Safety, Regulatory, And Legal Information
Appendix C Safety, Regulatory, and Legal Safety information ■ Legal and Regulatory Information ■ Information... -
Page 173: Important Safety Information
Important safety information Your Gateway system is designed and tested to meet the latest standards for safety of information technology equipment. However, to ensure safe use of this product, it is important that the safety instructions marked on the product and in the documentation are followed. - Page 174 To reduce the risk of fire, use only No. 26 AWG or larger telecommunications line cord. Important Do not use Gateway products in areas classified as hazardous locations. Such areas include patient care areas of medical and dental facilities, oxygen-laden environments, or industrial facilities.
-
Page 175: Regulatory Compliance Statements
FCC Part 15 Class A Statement The server is designated as complying with Class A requirements if it bares the following text on the rating label: This device complies with Part 15 of the FCC Rules. Operation is subject to the following two conditions: (1) This device may not cause harmful interference. - Page 176 (1) this device may not cause harmful interference, and (2) this device must accept any interference received, including interference that may cause undesired operation. Caution Changes or modifications not expressly approved by Gateway could void the FCC compliance and negate your authority to operate the product.
- Page 177 The termination on an interface may consist of any combination of devices subject only to the requirement that the sum of the Ringer Equivalence Numbers of all the devices does not exceed 5. www.gateway.com...
- Page 178 Laser safety statement All Gateway systems equipped with CD and DVD drives comply with the appropriate safety standards, including IEC 825. The laser devices in these components are classified as “Class 1 Laser Products” under a US Department of Health and Human Services (DHHS) Radiation Performance Standard. Should the unit ever need servicing, contact an authorized service location.
- Page 179 In the interest of continued product development, Gateway reserves the right to make improvements in this manual and the products it describes at any time, without notices or obligation.
-
Page 180: Index
System Companion CD drive installing location troubleshooting checkpoints ACPI runtime bootblock initialization code bootblock recovery code DIM code POST code cleaning case keyboard screen tape drive closing case CMOS battery see battery components installing www.gateway.com... - Page 181 DIM code checkpoints POST code checkpoints DIM code checkpoints DIMM see memory diskette drive connector installing location replacing display troubleshooting documentation Gateway Web site System Companion CD drive bays location drivers installing drives configuring diskette hard drive hot-swap installing RAID...
- Page 182 Gateway Customer Care Learning Libraries Web address Web site Gateway Server Manager hard drive indicator installing LED indicator troubleshooting heat sink installing help telephone support tutoring hot-swap backplane, SCSI...
- Page 183 Kensington location Main menu BIOS Setup utility maintenance cleaning cleaning case cleaning keyboard cleaning screen Gateway Server Manager general guidelines recording BIOS configuration master boot record memory installing location troubleshooting messages monitor cleaning port...
- Page 184 SCSI backplane connector drive location installing drives SDRAM see memory security locking server set passwords setting up in BIOS supervisor password system user passwords using password Security menu BIOS Setup utility security switch connector location serial number serial port www.gateway.com...
- Page 185 BIOS configuration tape drive cleaning location technical support Customer Care resources tips before contacting telephone support training Gateway Learning Libraries troubleshooting add-in card battery beep codes BIOS card CD drive diagnostic LEDs error messages expansion card general guidelines...
- Page 186 (UPS) updating the BIOS USB ports internal connector location user password utilities BIOS Setup VGA port Web site Gateway www.gateway.com...
- Page 187 www.gateway.com...
- Page 188 A MAN 9415 USR GDE R0 03/05...