Table of Contents
Advertisement
Quick Links
Download this manual
See also:
User Manual
Advertisement
Table of Contents

Related Manuals for Gateway 960


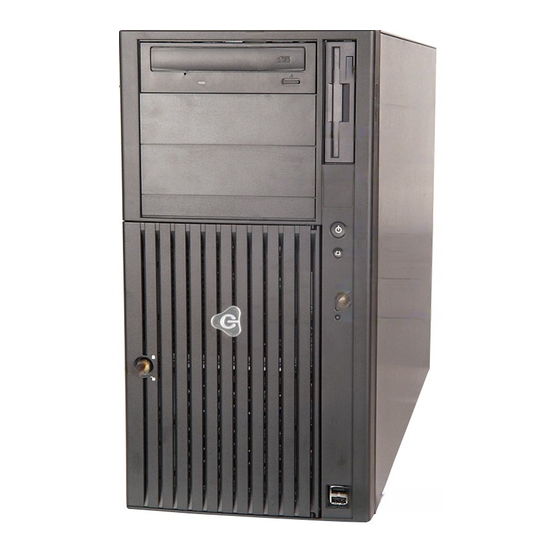
Summary of Contents for Gateway 960
- Page 2 www.gateway.com...
-
Page 3: Table Of Contents
Gateway Web site ........ - Page 5 Server into a Rackmount Cabinet This guide provides the information you need to install your Gateway 960 or Gateway 980 server into a rackmount cabinet. Read this guide to learn how to: Convert a Gateway server into a rackmount-configured server. See “Converting your server to a rackmount server”...
-
Page 6: Identifying Parts In The Accessory Kit
Installing Your Gateway Server into a Rackmount Cabinet Identifying parts in the accessory kit There are two accessory kits for the Gateway 960 or Gateway 980 servers: Rackmount handle kit. Install the rackmount handle kit if you are converting your server to a rackmount server. -
Page 7: Safety-Related Rackmount Installation Instructions
The user’s guide is on the Server Companion CD (SCCD) that shipped with your server. Stability Make sure that your Gateway server is stable in the rackmount cabinet and mounted according to the rackmount instructions in this installation guide. -
Page 8: Converting Your Server To A Rackmount Server
Converting your server to a rackmount server You can convert your Gateway 960 or Gateway 980 server to a rackmount server. Before converting your server, make sure that the server is on a stable work surface, such as a strong table or counter. -
Page 9: Removing The Front Cover, Top And Side Panels, And Feet
Turn off your server, then disconnect the power cord and all other cables connected to the server. Unlock the hot-swappable RAID bay cover door, press the cover release latch on each side of the front cover, then pull the cover away from the case. Cover Cover release release latch latch Lock www.gateway.com... - Page 10 Installing Your Gateway Server into a Rackmount Cabinet To remove the top panel: Remove the two top panel screws on the back of the case. panel panel screw screw Slide the top panel toward the back of the case, then lift the panel up and away from the case.
- Page 11 Lay the case on its side so the three captive thumbscrews are at the top. Captive thumbscrews Loosen the three captive thumbscrews that secure the side panel to the server case. These screws cannot be removed. Important Loosen only the captive thumbscrews that are surrounded by black metal. www.gateway.com...
- Page 12 Installing Your Gateway Server into a Rackmount Cabinet Slide the side panel toward the front of the case, then lift the panel away from the case. Store the side panel in case you need to reinstall it later. To remove the server feet: Use needle-nose pliers to grip the server foot anchor, pull the anchor straight out, then remove the server foot.
-
Page 13: Removing And Rotating The Drives, Drive Bay Adapters, And Emi Shield
www.gateway.com... - Page 14 Installing Your Gateway Server into a Rackmount Cabinet Repeat Step 2 and 3 for each drive. Press the release latch on each side of the empty drive bay adapter and pull the adapter out. Repeat Step 5 for each empty drive bay adapter.
- Page 15 Plug the power and data cables into the back of each drive. Rotate the empty drive bay adapters for the rackmount orientation and slide the adapters into the drive bays. Make sure that the adapters lock into the bays. Install the EMI shield. www.gateway.com...
-
Page 16: Rotating And Installing The Front Cover Drive Faceplate
Installing Your Gateway Server into a Rackmount Cabinet Rotating and installing the front cover drive faceplate To rotate and install the front cover drive faceplate: Press the faceplate release tabs inward to remove the drive bay faceplates from the front cover, then pull the faceplates away from the front cover. -
Page 17: Installing The Front Cover And Top Panel
Installing the front cover and top panel To install the front cover and top panel: After converting to the rackmount server configuration, reinstall the top panel. Reinstall the front cover. Go to “Installing your server into a rackmount cabinet” on page 14. www.gateway.com... -
Page 18: Installing Your Server Into A Rackmount Cabinet
Installing Your Gateway Server into a Rackmount Cabinet Installing your server into a rackmount cabinet Before adding the rails to your server, make sure that the server is on a stable work surface, such as a strong table or counter. -
Page 19: Installing The Inner Rails
#8-32 × 8.0mm To install the inner rails on the server: Slide the inner rail out, then slide the white release latch toward the end of the rail. Pull the inner rail out of the rail assembly. Inner rail Release latch www.gateway.com... -
Page 20: Attaching The Rail Assemblies To The Rackmount Cabinet Brackets
Installing Your Gateway Server into a Rackmount Cabinet Mount the inner rail on one side of the case using five Phillips head screws from the accessory kit. Make sure that the white release latch is positioned toward the front of the case with the latch facing out. - Page 21 10 M4 screws #8-32 × 8.0mm 10 M4 nuts To attach the rail assemblies to the rackmount cabinet brackets: Lay a front and back rackmount cabinet bracket on a flat work surface as shown. Place the rail assembly inside the brackets. www.gateway.com...
-
Page 22: Installing The Rackmount Cabinet Brackets And The Rail Assemblies
Installing Your Gateway Server into a Rackmount Cabinet Slide the middle rail out of the outer rail until it clicks into the fully extended position. Middle rail Outer rail Insert five screws into the holes on the rail assembly and loosely secure the rail assembly to the brackets with hex head nuts. - Page 23 Attach the rackmount cabinet bracket to the front vertical mounting rail with the appropriate nuts and screws provided by the rackmount cabinet manufacturer. Attach the back rackmount bracket to the back vertical mounting rail with the appropriate nuts and screws provided by the rackmount cabinet manufacturer. www.gateway.com...
- Page 24 Installing Your Gateway Server into a Rackmount Cabinet Slide the middle rail, if required, until the five screws that are loosely securing the rail assembly to the brackets are visible. Middle rail Tighten the five screws and hex head nuts that hold the rail assembly to the brackets.
-
Page 25: Mounting The Server Into The Rackmount Cabinet
Lift the server to the same height as the middle rails, then align the inner rails on the server with middle rails. Warning To avoid injury or damage to the server, we recommend that two people lift the server. www.gateway.com... - Page 26 Installing Your Gateway Server into a Rackmount Cabinet Push the server evenly into the cabinet until it is pushed completely into the cabinet. If the rails lock when you push the server in, slide the white release latches toward the front of the server and push again.
- Page 27 You will feel the latch lock into place. Slide the white release latches toward the front of the server, then push the server back into the cabinet until the inner rails lock into place. Connect the power cord and device cables as required. www.gateway.com...
-
Page 28: Securing The Server In The Cabinet
Installing Your Gateway Server into a Rackmount Cabinet Securing the server in the cabinet Tools you need to complete this task: Phillips screwdriver Parts you need to complete this task: 4 screws (provided by the rackmount cabinet manufacturer) To secure the server in the rackmount cabinet: Close the back door of the rackmount cabinet, then lock it if necessary. -
Page 29: Getting Help
Documentation on the Server Companion CD (SCCD) Gateway Web site Server Companion CD A comprehensive Gateway user’s guide is available on the Server Companion CD (SCCD) that shipped with your server. To view documents: Insert the Server Companion CD into the CD drive on a computer running a Windows operating system. -
Page 30: Gateway Web Site
Installing Your Gateway Server into a Rackmount Cabinet Gateway Web site Gateway provides a variety of information on its Web site to help you use your server. Gateway's online support is available 24 hours per day, 7 days per week and provides the most current drivers, product specifications, tutorials and personalized information about your system. - Page 31 For the latest product updates, consult the Gateway Web site at www.gateway.com. In no event will Gateway be liable for direct, indirect, special, exemplary, incidental, or consequential damages resulting from any defect or omission in this manual, even if advised of the possibility of such damages.
- Page 32 Installing Your Gateway Server into a Rackmount Cabinet Notes www.gateway.com...
- Page 33 Getting help Notes www.gateway.com...
- Page 34 Installing Your Gateway Server into a Rackmount Cabinet Notes www.gateway.com...
- Page 35 www.gateway.com...
- Page 36 A MAN 960/980 RACK GDE R1 12/02...