Advertisement
Table of Contents
- 1 Assemble Handle
- 2 Install Brushes and Nozzle
- 3 How to Empty
- 4 To Clean Filters
- 5 Solution Tank
- 6 Picking up Spills
- 7 Select Tool
- 8 Attach Hose and Tool
- 9 How to Connect
- 10 Using the Tool
- 11 Cleaning the Nozzle
- 12 Cleaning the Brushes
- 13 Warranty
- 14 Full One Year Warranty
- Download this manual
See also:
Owner's Manual
Advertisement
Table of Contents

Related Manuals for Hoover FloorMate SpinScrub 800


Summary of Contents for Hoover FloorMate SpinScrub 800
- Page 1 HOOVER ate TM SpinS Floor Cleaner www_h@overoco_...
- Page 2 Do not run apphance over water, take it to a Hoover Factory cord. Keep cord away from heated Service Center or Amhorized surfaces. Hoover Warranty Service Dealer. A temporary adapter...
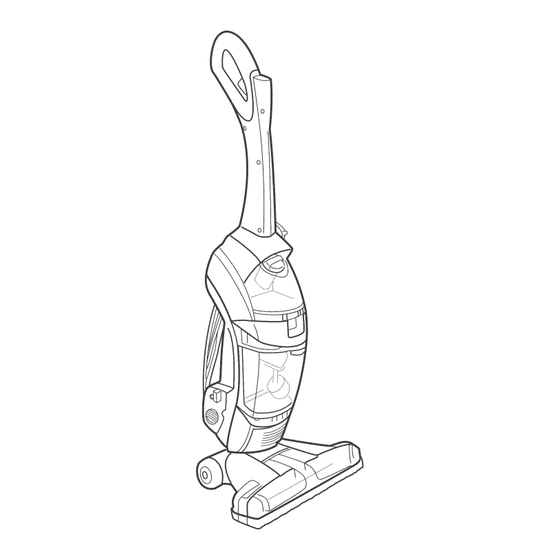
- Page 3 Warranty ....Hard floor cleaner B. Nozzle C. Upper handle D. Brush assemblies E. Tool caddy F. Floor swivel tool G. Grout tool H. Telescoping wand Hose Floor cleaning concentrates LISTED © 2004 The Hoover Company vw, w _.hoovef.oom ContJnuect...
- Page 4 This cleaner is intended household use. Operate cleaner only at voltage specified on data plate on back of cleaner, Plug cleaner into a properly grounded outlet, Soft hand grip ON/OFF switch Squeegee (underneath nozzle) Solution trigger: squeeze to release Bumper Soft-tread wheels cleaning solution...
-
Page 5: Assemble Handle
Assemble handle Rotate bottom handle support (A) up the upright position until a snap %lt. Align control (B) on upper handle (C) with slot in bottom aandle support (D). Push upper handle (C) down until is snapped in place. Install brushes and nozzle To install... - Page 6 Press brush assembly firmly to snap into place. % install nozzle, make sure latches (C) are Align middle section (D) of nozzle with opening (E) or] cleaner. Remove cardboard packing insert from squeegee area on underside of nozzle. While holding nozzle in place, slide...
- Page 7 Store hose;tools and accessories To store bose: Place the hose grip (D) into (E) on back of caddy. Pull hose up and press into cut-out area (F). Continue wrap- ping hose down, underneath tongue (G), and back tap, pressing into second cut-out area (H). Place hose end (I) into slot (J) on back of caddy.
- Page 8 The cleaner may also be lifted using the car- ying handle (A) on the ff'ont of the cleaner. Your HOOVER FloorMate SpinScrub 800 Cleaner be used to both vacuum debris clean non-carpeted floor...
- Page 9 (2 oz.) HOOVER') Floor to Flooff MCleaner. Check for worn spots or joint...
- Page 10 If rubber ring (D) on cap has become dislodged, reposi- it with uneven side against ledge (E) as shown. Replace cap. Rotate clockwise until it locks in place. must be locked in place for proper performance to prevent leaking. Slide tank straight into...
-
Page 11: How To Empty
How to empty "x Turn cleaner off and disconnect from electrical outlet. Although necessary for satisfacto_\y performance, is recommended that the recovery tank be emptied after dry vacuuming before operation. Check the solution tank also. It may need to be refilled at this time. - Page 12 (E) and push tank straight into cleaner body until it is locked in place. Recommended cleaning sequence Use your HOOVER') FloorMate SpinScrub 800 Cleaner o Dry Vacuum to remove loose dirt, hair debris. • Wet Clean floor surface. brushes will...
-
Page 13: Picking Up Spills
NOTE: Your HOOVER€) FloorMate SpinScrub T< 800 cleaner be used to clean wood floors that have been sealed with a polyurethane coating can be cleaned with water. CAUTION: To prevent damage to wood floors, follow the flooring manufacturer's cleaning rec-... -
Page 14: Select Tool
Select tool A. Floor swivel tool * Swivel head * 2 rows of brushes o Use to clean small, tight areas Grout tool * Stiff brushes to use for more, concentrated cleaning on stubborn grout stains Attach hose and tool Unplug cleaner from... -
Page 15: Using The Tool
• Do not store cleaner on a wood surface unless cleaner completely- dry. For your convenience, the HOOVER@ FloorMate SpinScrub 800 tool caddy (A) is provided for storing the hose, tools, telescoping wand, set of brushes detergent. -
Page 16: Cleaning The Nozzle
Cleaning the nozzle Turn cleaner OFF and disconnec{ from electrical outlet. The cleaner's nozzle can be removed for easy cleaning. Slide the two nozzle release latches (A) outward. Remove nozzle (B) by pulling straight out. Rinse nozzle under running water. Remove debris from... -
Page 17: Cleaning The Brushes
Cleaning the brushes The brush assembly can be removed for easy cleaning. Turn cleaner OFF and disconnect from electrical outlet. Place handle in the upright position. Remove tanks to pr>vent leaking. Set aside. Pull the two nozzle release buttons (A) out. Remove nozzle. Tilt cleaner"... - Page 18 Use the list below to help solve minor problems. ,/Make sure the cleaner C]eaner won't run plugged in firmly. / Check the fuse or breaker. Low suction V"Empty the recovery tank; it may be full andthe automatic shut-off engaged. ¢" Make sure filter and filter" lid are properly positioned.
-
Page 19: Warranty
The addition of lubricant could cause damage. Do not add lubricant to motor bearings. 1"oobtain approved HOOVER service and genuine HOOVER parts, locate the nearest Hoover Factory Service Center or Authorized Hoover Warranty Service Dealer (Depot) by: / Checking the Service Section oi The Hoover Company on-line at wxvw.hoover.com... -
Page 20: Full One Year Warranty
This warranty does not cover pick up deliver_ or house calls; however, if you mail your appliance to a Hoover Factory Service Center fin" warranty service, transportation will be paid one way. While this warranty gives you spe- cific legal rights, you may also have other rights which vary fl'om state to state.