
Related Manuals for Endress+Hauser SS2100 Series


Summary of Contents for Endress+Hauser SS2100 Series
- Page 1 BA02337C/66/EN/01.23 70214287 Products Solutions Services Operating Instructions SS2100-series TDLAS Gas Analyzer Sample Conditioning System...
-
Page 2: Table Of Contents
Incoming product acceptance and identification ........15 10.1 Packing, shipment, and storage ......53 10.2 Service ..............54 4.1 Scope of delivery ..........15 10.3 Disclaimers ............54 4.2 Checking the SCS installation ......15 10.4 Warranty ............54 Installation ........16 Endress+Hauser... -
Page 3: Introduction
It is important to closely review the sections of this manual to ensure the SCS performs as specified. Intended use Endress+Hauser’s SS2100-series products are high-speed, diode laser-based extractive analyzers designed for extremely reliable monitoring of very low (trace) to standard concentrations of specific components in a variety of background gases. - Page 4 (e.g., heat, arcing, sparking, etc.). Toxins. Endress+Hauser analyzers measure a variety of gases, including high-level H S. Follow all safety protocols governing toxic gases and potential leaks.
-
Page 5: Standard Documentation
• On the USB provided with the analyzer • Endress+Hauser’s website: www.endress.com Each analyzer shipped from the factory is packaged with documents specific to the model that was purchased. This document is an integral part of the complete document package, which also includes:... -
Page 6: Manufacturer Address
Operating Instructions SS2100-series Sample Conditioning System For additional instruction manuals, refer to the Endress+Hauser website, www.endress.com, to download the published documentation. To determine which Description of Device Parameters applies to your analyzer, refer to the following product- firmware matrix. TDLAS Analyzer Model... - Page 7 The spatial period of a periodic wave. The distance over which the wave's shape repeats. Wavelength derivative form of absorption spectroscopy that has been increasingly applied for measurements in modulation harsh environments due to its improved sensitivity and noise-rejection capabilities over direct absorption. spectroscopy (WMS) Used by TDLAS analyzers. Endress+Hauser...
-
Page 8: Safety
Purge the SCS enclosure to remove any potentially toxic gas. Test the H S levels of the SCS enclosure using the port from the safety purge kit to ensure the purge has cleared any toxic gas. If no gas leak is detected, open the SCS enclosure door. Endress+Hauser... -
Page 9: Product Safety
2.2.4 Laser safety The Endress+Hauser TDLAS Gas Analyzer is a Class 1 laser product, which poses no threat to equipment operators. The laser internal to the analyzer controller is classified Class 3B and could cause eye damage if the beam is viewed directly. -
Page 10: Workplace Safety
Operational safety Before commissioning the entire measuring point Verify that all connections are correct. Ensure that electrical cables and hose connections are undamaged. Do not operate damaged products. Protect them against unintentional operation. Label damaged products as defective. Endress+Hauser... -
Page 11: Lifting Provisions For The Analyzer
Always use a lifting truck or a forklift to transport the analyzer. Two people are needed for the installation. Ensure all equipment used for lifting and moving the analyzer is rated for the weight load. Lift the device by the recessed grips. Endress+Hauser... -
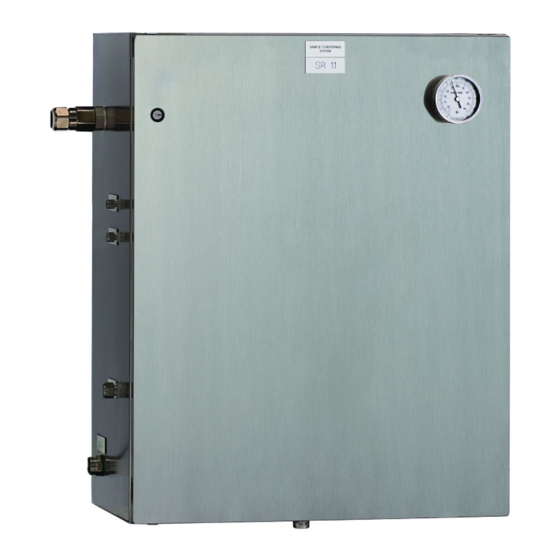
Page 12: Product Description
SCS, contact Service →. Endress+Hauser sample conditioning systems are designed to filter incoming gas, as well as control pressure and flow to the analyzer. The SCS uses a 7-micron particulate filter and a membrane separator that removes entrained liquids or particles from the natural gas stream before they enter the analyzer. -
Page 13: Regulators At The Probe
Refer to the following diagram showing the interface of the probe and the analyzer system. The analyzer system provided by Endress+Hauser is represented by the blue dashed outline. The probe and field pressure reducing station may also be supplied by Endress+Hauser but these are separate from the analyzer system. -
Page 14: Sample Transport Tubing
If liquid is found in the bypass or sample cell flow meter tubes, investigate and correct immediately. Pressure regulator All Endress+Hauser TDL cells are limited to a maximum 0.7 barg (10 psig) pressure. To ensure that this pressure is not exceeded, a pressure regulator is provided inside the sample system. Flow controller A sample flow controller is provided with the SCS in which a flow control needle valve and flow meter similar to the sample bypass are used. -
Page 15: Incoming Product Acceptance And Identification
The analyzer house atmospheric vent is properly installed. • An optional sample probe or field pressure reducing station may be provided by Endress+Hauser or through a third party. This is not included in a standard configuration. If a sample probe is used with the analyzer, the sample probe is correctly installed at the process supply tap and that the sample probe isolation valve is closed. -
Page 16: Installation
The installer is responsible for complying with all local installation codes. Certified glands and cables should be used where appropriate in compliance with local regulations. Endress+Hauser Class I Division 2 analyzers use a non-incendive protection method, and as such all portions of the local installation codes apply. - Page 17 Refer to Application of conduit lubricant →. Pull ground, neutral and line (hot) wire (#14 AWG minimum) into the power terminal box inside the heater controller enclosure. Strip back the jacket or insulation of the wires just enough to connect to the power terminal block. Endress+Hauser...
- Page 18 Class I, Division 2 hazardous locations as per the Canadian Electrical Code (CEC) Appendix J and the National Electric Code (NEC) Article 501, or methods described in the Standard IEC/EN 60079-0 and IEC/EN 60079-14. The installer is responsible for complying with all local installation codes. Endress+Hauser...
-
Page 19: Connecting The Gas Lines
SS2100-series Sample Conditioning System Operating Instructions The heat-shrinkable entry seal Model NUS-4X supplied by Endress+Hauser provides a waterproof fitting where the heat trace bundle enters the SCS enclosure. This seal consists of a three-part assembly; a rigid plastic nylon nut, an O-ring, and the heat-shrinkable molded area. - Page 20 Before connecting the sample supply line, do the following: Confirm that the low-pressure flare or atmospheric vent header shut-off valve is closed. Determine appropriate tubing route from the SCS to the low-pressure flare or atmospheric vent header. Endress+Hauser...
- Page 21 • For connections with previously swaged ferrules, thread the nut to the previously pulled up position, then tighten slightly with a wrench. • Secure tubing to appropriate structural supports as required. Check all connections for gas leaks using a liquid leak detector. Endress+Hauser...
- Page 22 • Ream all tubing ends. Blow out the lines for 10–15 seconds with clean, dry nitrogen or air prior to making the connection. Connect the validation source tube to the SCS using the ¼” stainless steel compression-type fittings provided. Secure and tighten fittings: Endress+Hauser...
- Page 23 12 hours (or until the reading stabilizes) after the system is powered up and before actual readings are taken. Progress of the system conditioning can be monitored from the gas concentration readings. Once the gas constituents have reached equilibrium within the system tubing, the readings stabilize. Endress+Hauser...
-
Page 24: Starting Up The Scs
Energize power to the analyzer controller and ignore any error messages that are seen on the display during the temperature stabilization period. Once the analyzer has thermally stabilized, enable Peak Tracking and any other software features as directed in the Description of Device Parameters →. Endress+Hauser... -
Page 25: Starting The Field Pressure Reducing Station
Starting the field pressure reducing station A field pressure reducing station or sample probe may be provided by Endress+Hauser or through a third party. This is not included in a standard configuration. Refer to manufacturer’s instructions for starting the field pressure reducing station. - Page 26 This is normal. If the alarms do not resolve themselves by the end of the warm-up period, contact Service →. After sufficient warm-up time, confirm that the sample system enclosure is heated to the specified temperature (see your as-built drawings) by observing the temperature reading on the analyzer display. Endress+Hauser...
-
Page 27: Validation For Trace Moisture (H O) Or Ammonia (Nh ) Systems
Permeation validation is available on all trace measurement systems, including trace moisture and ammonia. Validation methods Endress+Hauser’s TDLAS gas analyzers use one of two methods to validate low moisture or ammonia measurements: a permeation validation system, and a dynamic dilution. - Page 28 If you suspect the settings of the sample conditioning system have been altered, refer to Service →. Refer to your as-built drawings for the calibrated output of the validation flow. Endress+Hauser...
-
Page 29: Installing The Permeation Tube For Nh Systems
Remove the existing gasket from the permeation device and replace with the new VCR gasket. Place the permeation device and tighten fitting nuts. Confirm proper support for the VCR adapter on the ‘T’ during installation. Endress+Hauser recommends securing the VCR adapter fitting with a wrench while tightening the connection. -
Page 30: Permeation Tube Storage
The sample system requires 5 to 8 hours to stabilize the temperature of the new permeation device. Endress+Hauser does not recommend validating the analyzer during the temperature stabilization period. New permeation devices may take up to 21 days to fully stabilize the validation concentration. -
Page 31: Sample Conditioning System Maintenance
To perform a regular SCS status check The following steps should be performed only if there is a suspected problem with the SCS. Performing this check will cause reading errors for up to 4 hours while the enclosure temperature stabilizes. Endress+Hauser... - Page 32 NOTICE Opening the door may affect the temperature reading until the temperature is stabilized. Do not leave the SCS door open any longer than necessary. Endress+Hauser recommends no more than 60 seconds. For additional information, contact Service →.
-
Page 33: Shutting Down The Scs
Isolation of the SCS from the field pressure regulator will discontinue sample flow and may cause the pressure at the outlet of the field pressure regulator to slowly increase if the pressure regulator does not have “bubble-tight” shut off. The slow pressure Endress+Hauser... - Page 34 Although power can shut off to the SCS heat trace, it is advisable to allow this line to remain heated unless the SCS will be out of service for an extended period, or unless maintenance is required on the heat trace line. Endress+Hauser...
-
Page 35: Filter Maintenance
Restart the system following the procedure in Starting up the SCS →. 8.3.2 Cleaning the filter Use the following steps to clean the filter: Shut down the system following the procedure in Shutting down the SCS →. a. Power off the analyzer. b. Close the sample supply valve. Endress+Hauser... -
Page 36: Replacing A Fuse
All valves, regulators, switches, etc. should be operated in accordance with site lockout, tagout procedures. This procedure should be used ONLY when necessary and is not part of routine maintenance. To avoid compromising the system warranty, contact service before cleaning mirrors. Refer to Service →. Endress+Hauser... - Page 37 Do not attempt to replace a glass mirror with a stainless steel mirror. System calibration may be adversely affected. To clean the mirror, refer to the following instructions. To replace a stainless steel mirror, refer to Replacing a mirror →. Endress+Hauser...
- Page 38 • Flashlight NOTICE Endress+Hauser does not recommend cleaning the top mirror. If the top mirror is visibly contaminated, refer to Service →. Careful marking of the mirror orientation is critical to restoring system performance upon reassembly after cleaning.
- Page 39 NOTICE Always handle the optical assembly by the edge of the mount. Never touch the optical surfaces of the mirror. Endress+Hauser does not recommend cleaning the top mirror. If the top mirror is visibly contaminated, contact Service →.
-
Page 40: Replacing The Pressure Sensor
Power off the system. Refer to Powering down the analyzer in the Description of Device Parameters → for this analyzer. Open the door to the SCS enclosure. Refer your as-built drawings. To disconnect components Remove the optical cable harness using a flat-head screwdriver. Endress+Hauser... - Page 41 Tip the measurement cell forward so that any loose debris falls to the flat surface and not inside the cell. Threads showing signs of galling indicate a possible leak. Refer to Service → to arrange for repair. Endress+Hauser...
- Page 42 Wrap stainless steel PTFE tape around the threads at the top of the pressure sensor, beginning from the base of the threads to the top, approximately three times taking care to avoid covering the top opening. A0054941 Figure 13. Replacing the seal tape Holding the cell steady, insert the new pressure sensor into the threaded opening. Endress+Hauser...
- Page 43 Conduct a leak test to determine that the new pressure sensor is not leaking. CAUTION Do not allow cell to exceed 0.7 barg (10 psig) or damage could occur. For any questions related to leak testing the pressure sensor, refer to Service →. Endress+Hauser...
- Page 44 Remove the cell from the bracket by removing the four securing screws (two on top, two on the bottom) using a ” Allen wrench. Place the measurement cell on a clean, flat surface with the pressure sensor facing up. Endress+Hauser...
- Page 45 Turn the ⅞” wrench counterclockwise to loosen the pressure sensor until it is able to be removed. To replace the pressure sensor Remove excess seal tape from the flange opening and threads and check threads for galling. A0054945 Figure 18. Removing excess seal tape from flange Endress+Hauser...
- Page 46 NOTICE Make sure the black connector at the bottom of the pressure sensor is facing up from the measurement cell. A0054947 Figure 21. Newly installed pressure sensor positioning Endress+Hauser...
-
Page 47: Scrubber Maintenance For H S Systems
(gas composition) and how often (switching frequency). Thus, scrubber lifetime is application specific. The Endress+Hauser SS2100 analyzer systems predict the remaining scrubber capacity by using the actual H concentration measurements and dry cycle durations to calculate how much cumulative H S has been removed by the scrubber. - Page 48 All valves, regulators, switches, etc. should be operated in accordance with site lockout, tagout procedures. To replace the scrubber efficiency indicator Remove the old scrubber efficiency indicator: a. Close the sample supply shut-off valve. b. Allow all residual gas to dissipate as indicated by no flow on the sample bypass flow meter. Endress+Hauser...
- Page 49 These substances are odorless, dark powders that require few special precautions other than avoiding contact with the internal substances, keeping the scrubber tightly sealed, and protecting the contents against humidity. Discard used scrubber and scrubber indicator in an appropriate leak-proof receptacle. Endress+Hauser...
-
Page 50: Replacing The Dryer For H O And Nh Systems
Using a wrench, tighten the nuts ⅛ turn from finger tight. Heat trace sleeve bundle The heat trace bundle sleeve, manufactured by others, is an option for the Endress+Hauser sample conditioning system. Refer to the optional drawings for heat trace power in your as-built drawings. -
Page 51: Instrument Troubleshooting
(see specifications in the Operating Instructions →). Pressures and temperatures outside this range will trigger a Pressure Low Alarm, Pressure High Alarm, Temp Low Alarm, or Temp High Alarm fault. For information on systems alarms, refer to the Description of Device Parameters →. Endress+Hauser... -
Page 52: Troubleshooting Symptoms
Re-install the relief valve. Check all connections for gas leaks using a liquid leak detector. Troubleshooting symptoms Refer to Maintenance and troubleshooting in the Operating Instructions → for troubleshooting symptoms and diagnostics. Endress+Hauser... -
Page 53: Service
Service 10.1 Packing, shipment, and storage Endress+Hauser TDLAS gas analyzer systems and auxiliary equipment are shipped from the factory in appropriate packaging. Packaging for this type of analyzer typically consists of a wooden crate. When packaged, all inlets and vents are capped and protected prior to shipment. -
Page 54: 10.2 Service
Warranty For a period of 18 months from date of shipment or 12 months in operation, whichever comes first, Endress+Hauser warrants that all products sold by it shall be free from defects in material and workmanship under normal use and service when correctly installed and maintained. - Page 55 Products Solutions Services www.addresses.endress.com...